
1. Introduzione
This manual provides detailed instructions for the installation, operation, and maintenance of your Rosewill FBM-X2-400-HELIX Micro ATX Mini Tower PC Case. This versatile case is designed to accommodate Micro ATX and Mini ITX motherboards, offering a compact yet spacious solution for both office and gaming PC builds. It comes equipped with a pre-installed 400W power supply unit and features excellent airflow design.
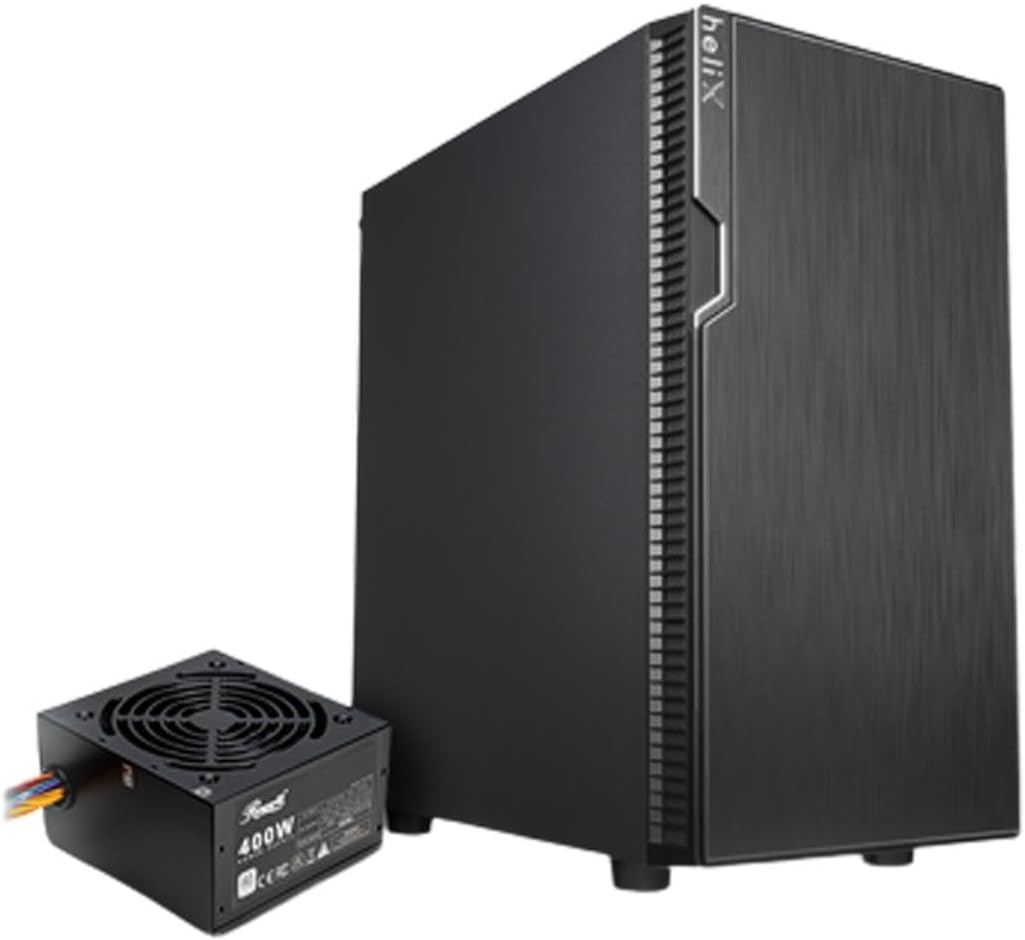
Figure 1: Rosewill FBM-X2-400-HELIX Micro ATX Mini Tower PC Case with included 400W Power Supply Unit.
2. Informazioni sulla sicurezza
- Scollegare sempre l'alimentatore dalla presa a muro prima di installare o effettuare la manutenzione di qualsiasi componente all'interno del case del PC.
- Handle all components with care to prevent damage from electrostatic discharge (ESD). Consider using an anti-static wrist strap.
- Tenere le parti di piccole dimensioni e le viti lontano dalla portata dei bambini.
- Assicurare una corretta ventilazione attorno al case del PC per evitare il surriscaldamento.
- Non tentare di modificare la custodia o i suoi componenti, poiché ciò potrebbe invalidare la garanzia e comportare rischi per la sicurezza.
3. Caratteristiche principali
- Design elegante: A versatile, compact, and sturdy steel/plastic mini case suitable for office or gaming PC systems.
- Interni spaziosi: Features four expansion slots, one internal 3.5" drive bay, and three internal 2.5" drive bays. Supports Micro ATX or Mini ITX motherboards.
- Pre-Installed 400W Power Supply Unit: Includes a CE and FCC certified non-modular 400W PSU for convenience.
- Great Cable Management: Designed for easy organization of internal cables and wires.
- Excellent Airflow: Comes with one pre-installed 120mm fan in the rear. Supports two additional 120mm fans in the front and two 120mm fans on top, or one 240mm radiator in the front.
4. Specifiche
| Caratteristica | Specificazione |
|---|---|
| Marca | Rosato |
| Nome del modello | FBM-X2-400-HELIX |
| Tipo di caso | Mini-torre |
| Compatibilità della scheda madre | Micro-ATX, Mini-ITX |
| Pre-Installed PSU | 400W (Non-Modular, CE/FCC Certified) |
| External Drive Bays | Nessuno |
| Alloggiamenti per unità interne da 3.5" | 1 |
| Alloggiamenti per unità interne da 2.5" | 3 |
| Slot di espansione | 4 |
| Porte I / O anteriori | 2x USB 2.0, 1x USB 3.0, ingresso/uscita audio |
| Ventole preinstallate | 1 ventola posteriore da 120 mm |
| Supporto ventola (anteriore) | 2x 120mm |
| Supporto per ventola (in alto) | 2x 120mm |
| Supporto radiatore (anteriore) | 1x 240mm |
| Materiale | Acciaio legato, plastica |
| Colore | Nero |
| Dimensioni (LxWxH) | 16.75 x 16.65 x 10 pollici |
| Peso dell'articolo | 11.82 libbre |
5. Contenuto della confezione
Si prega di controllare il contenuto della confezione una volta disimballata per assicurarsi che siano presenti tutti gli articoli:
- Rosewill FBM-X2-400-HELIX PC Case
- Pre-installed 400W Power Supply Unit
- Scatola degli accessori (contenente viti, distanziatori, fascette, ecc.)
- Manuale dell'utente (questo documento)
6. Configurazione e installazione
Follow these steps to assemble your PC within the Rosewill FBM-X2-400-HELIX case.
6.1. Preparazione
- Disimballare il case del PC e posizionarlo su una superficie stabile e piana.
- Rimuovere i pannelli laterali svitando le viti a testa zigrinata sul retro del case.
- Gather all necessary components: motherboard, CPU, RAM, storage drives, graphics card (if applicable), and any additional fans or radiators.

Figure 2: Internal layout of the PC case, highlighting the pre-installed power supply and available drive bays.
6.2. Installazione della scheda madre
- Install the CPU, CPU cooler, and RAM onto your Micro ATX or Mini ITX motherboard before placing it into the case.
- Align the motherboard with the standoffs inside the case. Ensure the I/O shield is properly seated in the rear opening.
- Fissare la scheda madre con le viti appropriate presenti nel kit di accessori.
6.3. Unità di alimentazione (PSU)
The 400W PSU is pre-installed in the bottom rear section of the case. Connect the necessary power cables to your motherboard (24-pin ATX, 4/8-pin CPU), graphics card (if required), and storage drives.

Figure 3: Included PSU connectors for various components.
6.4. Installazione dell'unità di archiviazione
The case supports one 3.5" HDD and three 2.5" SSDs/HDDs.
- For 3.5" HDD: Locate the 3.5" drive bay and secure the drive using the provided screws.
- For 2.5" SSD/HDD: Mount the 2.5" drives to the designated mounting points using the provided screws.
- Connect SATA data and power cables to each installed drive.
6.5. Installazione della scheda di espansione
The case provides four expansion slots for graphics cards or other PCI-E devices.
- Remove the necessary slot covers from the rear of the case.
- Insert your graphics card or other expansion card into the appropriate PCI-E slot on the motherboard.
- Fissare la scheda con una vite.
6.6. Gestione dei cavi
Utilize the cable routing cutouts and tie-down points behind the motherboard tray to organize cables. This improves airflow and gives your build a cleaner appearance.
6.7. Collegamenti del pannello frontale
Collega i cavi del pannello frontale (USB 2.0, USB 3.0, audio HD, interruttore di alimentazione, interruttore di reset, LED di alimentazione, LED HDD) ai connettori corrispondenti sulla scheda madre. Consulta il manuale della scheda madre per la posizione esatta dei connettori.

Figure 4: Front I/O panel with USB 3.0, USB 2.0, and audio ports.
6.8. Sistema di raffreddamento
The case includes one pre-installed 120mm rear fan. Additional fans or a 240mm AIO radiator can be installed for enhanced cooling.
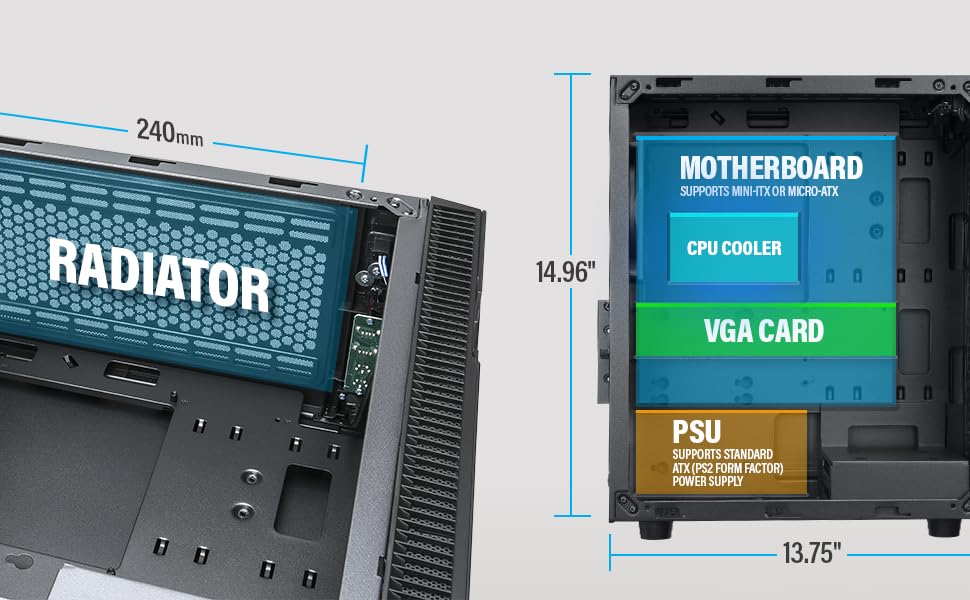
Figure 5: Diagram illustrating component clearance and radiator support.
6.9. Assemblaggio finale
- Una volta installati tutti i componenti e sistemati i cavi, riattaccare i pannelli laterali.
- Collegare il monitor, la tastiera, il mouse e il cavo di alimentazione al PC.
6.10. Official Product Video: Installation Overview
Video 1: Un overview of the Rosewill Micro ATX Mini Tower Case, including its pre-installed 400W PSU and internal features. This video provides a visual guide to the case's design and component layout.
7. Istruzioni per l'uso
After completing the setup, you can power on your PC.
- Assicurarsi che tutti i cavi esterni (alimentazione, monitor, periferiche) siano collegati saldamente.
- Press the power button located on the front I/O panel of the case.
- The power LED will illuminate, indicating the system is powered on.
- To shut down, use the operating system's shutdown function or press and hold the power button for a few seconds.
8. Manutenzione
Una manutenzione regolare aiuta a garantire prestazioni ottimali e longevità dei componenti del PC.
- Filtri antipolvere: Periodically check and clean any removable dust filters (e.g., front, top, bottom) to maintain good airflow and prevent dust buildup inside the case.
- Pulizia interna: Every few months, open the side panels and use compressed air to gently remove dust from fans, heatsinks, and other components.
- Controllo del cavo: Ensure all internal cables remain securely connected and are not obstructing airflow.
9. Risoluzione Dei Problemi
In caso di problemi, fare riferimento ai seguenti suggerimenti comuni per la risoluzione dei problemi:
- Nessun potere: Check if the power cable is securely connected to both the PSU and the wall outlet. Ensure the power switch on the PSU is in the 'ON' position. Verify front panel power switch connection to the motherboard.
- Nessuna visualizzazione: Ensure your monitor is connected to the graphics card (or motherboard if using integrated graphics) and is powered on. Reseat the graphics card and RAM modules.
- Surriscaldamento: Check if all case fans and CPU cooler fans are spinning. Ensure dust filters are clean and there is adequate airflow. Verify thermal paste application on the CPU.
- Porte USB non funzionanti: Check the front panel USB cable connections to the motherboard. Ensure drivers are installed for your operating system.
10. Garanzia e supporto
For warranty information, technical support, or service inquiries, please refer to the official Rosewill webo contattare il servizio clienti. Conservare la prova d'acquisto per eventuali reclami in garanzia.