1. Introduzione
Thank you for choosing the Promounts Modern All Seasons 52" Smart Ceiling Fan. This manual provides essential information for the safe installation, operation, and maintenance of your new ceiling fan. Please read it thoroughly before installation and keep it for future reference.
This Wi-Fi enabled ceiling fan features 3 aerodynamic blades, an integrated LED light with 3 color temperatures, 6 adjustable fan speeds, and voice/app control compatibility with Alexa and Google Assistant. It also includes a reversible motor for year-round comfort and a timer function for automated control.
2. Informazioni sulla sicurezza
Durante l'installazione e l'uso di apparecchi elettrici, seguire sempre le precauzioni di sicurezza di base per ridurre il rischio di incendi, scosse elettriche e lesioni personali.
- Leggere attentamente tutte le istruzioni prima di iniziare l'installazione.
- L'installazione deve essere eseguita da un elettricista qualificato.
- Prima dell'installazione o della manutenzione, assicurarsi che l'alimentazione sia disattivata tramite l'interruttore automatico.
- La struttura di montaggio deve essere in grado di sostenere il peso della ventola (circa 15 libbre).
- Non piegare i portalame durante l'installazione, il bilanciamento o la pulizia.
- Tenere le mani lontane dalle pale del ventilatore quando questo è in funzione.
- This fan is suitable for both indoor and outdoor use, but ensure proper weather protection for outdoor installations.
3. Contenuto della confezione
Unpack your fan and check the contents against the list below. You should have the following items:
- 1 x DC Motor
- 3 x Reversible Fan Blades
- 1 x telecomando
- 1 kit di luci a LED
- 1 x Pacchetto vite
Strumenti e materiali necessari: Philips Screw Driver, Blade Screw Driver, 11 mm Wrench, Step Ladder, Wire Cutters.

Image: All components of the Promounts 52" Smart Ceiling Fan laid out for assembly, including blades, motor, light kit, remote, and mounting hardware.
4. Configurazione e installazione
Follow these steps carefully for proper installation. Refer to the wiring diagram and installation video for visual guidance.
4.1. Gruppo ventola
- Prepare the Fan Motor: Remove the outer screws from the fan motor assembly.
- Fissare le pale del ventilatore: Securely attach the three fan blades to the motor housing using the provided screws. Ensure they are tightened evenly.
- Install Fan Housing: Place the fan housing over the motor assembly, aligning the screw holes. Secure it with screws.
- Assemble Canopy: Disassemble the downrod by removing the pin and screws. Feed the wires through the downrod. Reattach the pin and screws to secure the downrod to the motor.
- Installa il kit luci LED: Connect the LED light kit to the fan's wiring. Secure the light kit to the fan assembly.
- Attach Glass Diffuser: Carefully place the glass diffuser over the LED light kit and secure it.

Immagine: Primo piano view of the fan motor and one blade, illustrating the lightweight construction and how blades attach.
4.2. Cablaggio e montaggio
Before proceeding, ensure power is OFF at the circuit breaker.
- Staffa di fissaggio: Install the ceiling mounting bracket to your electrical junction box.
- Collegare il ricevitore: Connect the receiver unit to the fan's wiring and the household wiring according to the provided wiring diagram.
- Ventilatore sospeso: Sollevare con cautela la ventola assemblata e appenderla alla staffa di montaggio.
- Tettoia sicura: Slide the canopy up to cover the mounting bracket and secure it with screws.
Schema elettrico:

Image: A detailed wiring diagram illustrating how to connect the ceiling fan to the outlet box, including the receiver for smart control. It shows connections for neutral, hot, ground, light, and fan lines.
4.3. Video di installazione
Video: This video provides a comprehensive guide to the physical installation process of the Promounts Modern All Season Smart Ceiling Fan.
Video: This video demonstrates the wiring process for the Promounts Modern All Season Smart Ceiling Fan, ensuring correct electrical connections.
5. Istruzioni per l'uso
5.1. Basic Functions (Remote Control)
- Velocità della ventola: Use the remote to select one of 6 adjustable fan speeds.
- Luce LED: Turn the integrated LED light on/off and adjust its brightness.
- Temperatura del colore: Cycle through 3 light color temperatures: Warm (3000K), Natural (4500K), and Cool White (6000K).
- Flusso d'aria inverso: Activate the reversible motor for summer cooling (downward airflow) or winter warmth (upward airflow).
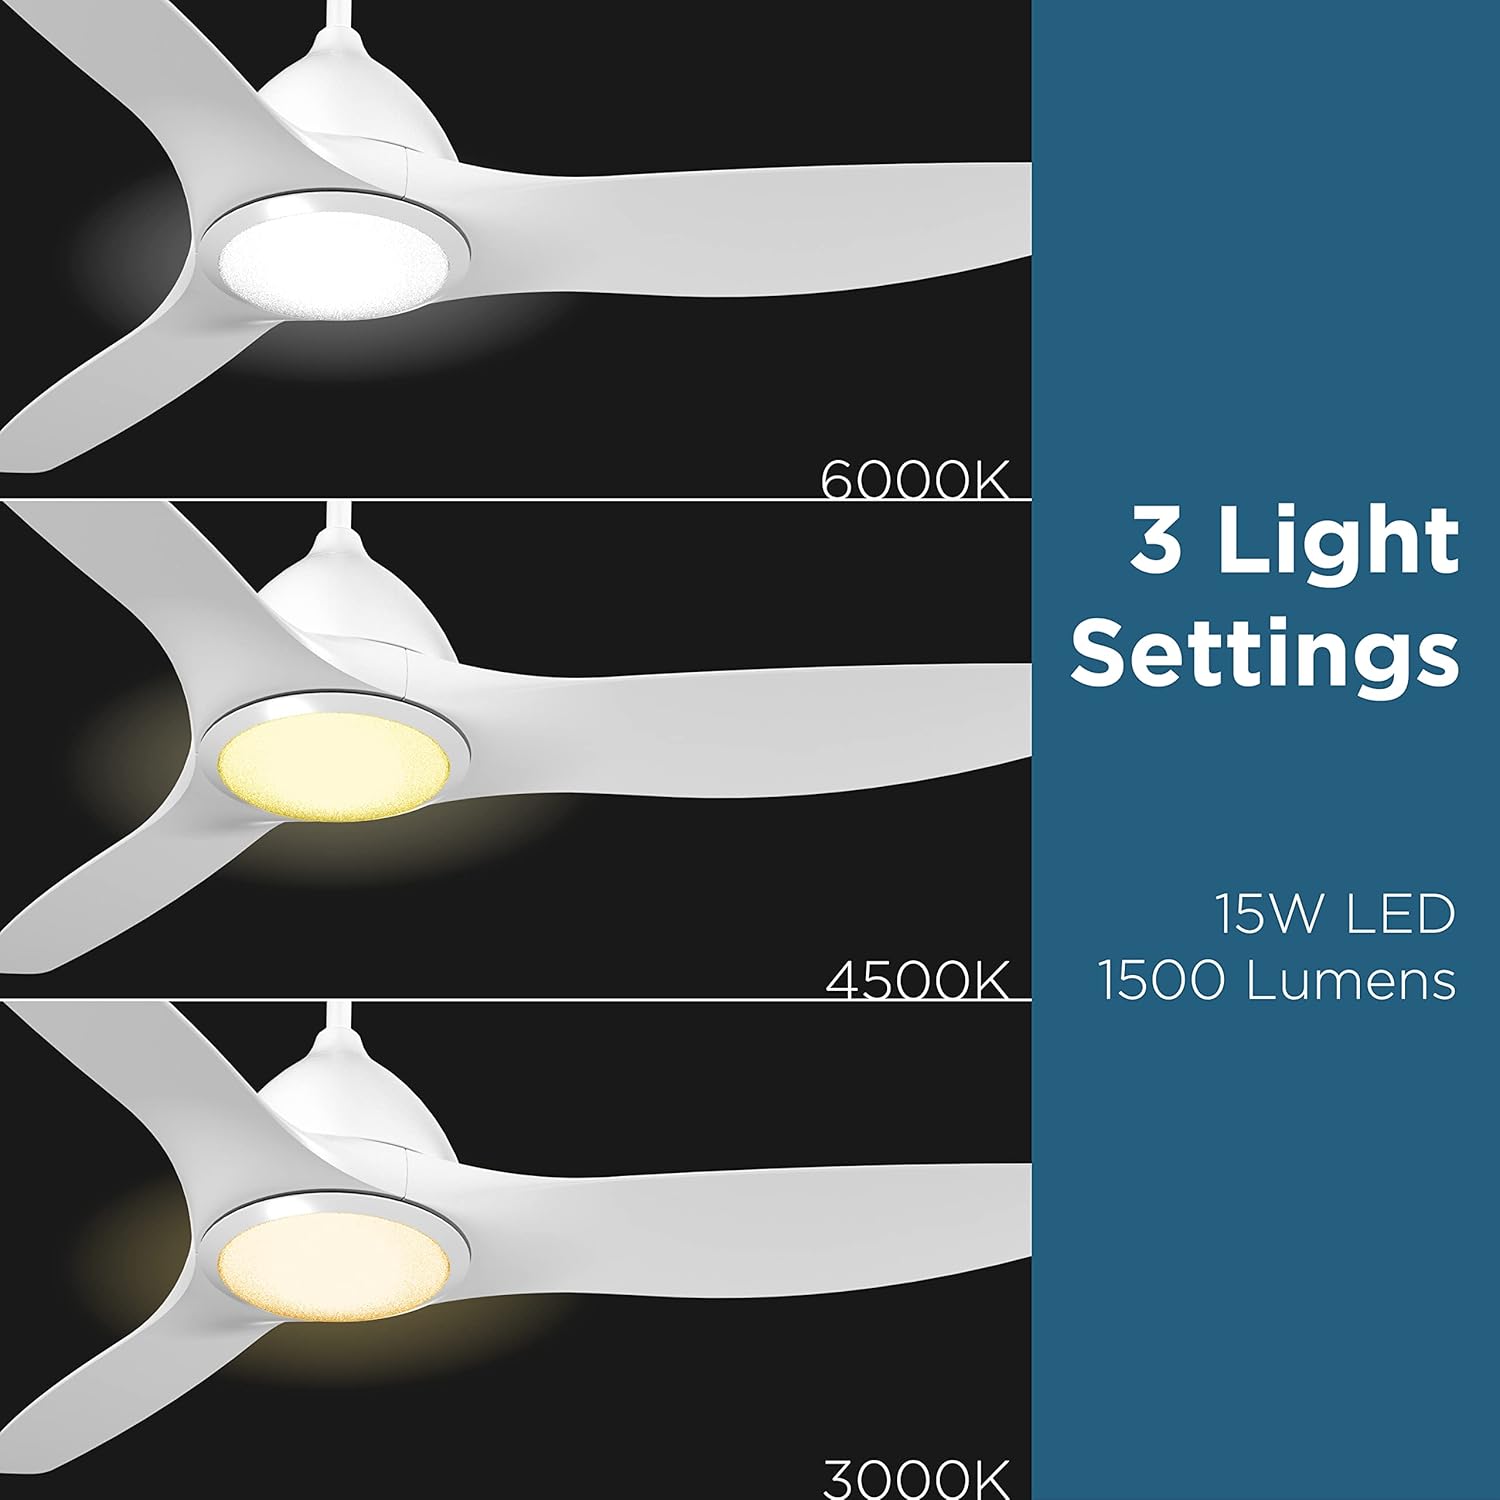
Image: Visual representation of the three adjustable LED light color temperatures: Warm (3000K), Natural (4500K), and Cool White (6000K).

Image: A diagram illustrating the reversible airflow function, showing how the fan circulates air downwards for cooling in summer and upwards to distribute warm air in winter.
5.2. Controllo intelligente e integrazione delle app
Control your fan and light settings through the mobile app or via voice commands with Alexa and Google Assistant. Ensure your fan is connected to your home’s 2.4GHz Wi-Fi network.
- Applicazione mobile: Download the dedicated app to control all fan functions, set timers, and create custom schedules.
- Controllo vocale: Integrazione con Alexa o Google Assistant per il funzionamento a mani libere. Examples: "Alexa, turn on Ceiling Fan," "Hey Google, set fan to speed 3."
- Funzione timer: Set specific times for the fan or light to automatically turn on/off.

Image: A smartphone displaying the fan control app interface alongside exampdi comandi vocali per Alexa e Google Assistant.
5.3. Pairing Video
Video: This video demonstrates the process of pairing the Promounts Modern All Season Smart Ceiling Fan with your smart device or home assistant.
6. Manutenzione
Una manutenzione regolare garantisce prestazioni ottimali e longevità del ventilatore da soffitto.
- Pulizia: Pulire periodicamente le pale della ventola e l'alloggiamento del motore con un panno morbido e asciutto.amp panno. Non usare detergenti abrasivi o solventi.
- Stringere le viti: Controllare annualmente tutte le viti e i collegamenti per accertarsi che siano ben saldi.
- Bilanciamento della lama: If the fan wobbles, use the included balancing kit to correct it.
- Luce LED: The LED light kit is designed for long-lasting performance and typically does not require replacement.
7. Risoluzione Dei Problemi
Se riscontri problemi con la ventola, fai riferimento ai seguenti problemi comuni e alle relative soluzioni:
| Problema | Possibile causa | Soluzione |
|---|---|---|
| La ventola non si avvia | Loose wiring, no power, remote battery dead | Check all wiring connections, ensure power is on, replace remote battery. |
| La ventola traballa | Loose blades, unbalanced blades, loose mounting bracket | Tighten blade screws, use balancing kit, ensure mounting bracket is secure. |
| La luce non funziona | Loose light kit wiring, faulty LED driver | Check light kit connections, contact customer support if LED driver is suspected. |
| Il telecomando non funziona | Battery dead, remote not paired | Replace remote battery, re-pair remote with fan (refer to pairing instructions). |
| Smart control issues | Wi-Fi connectivity issues, incorrect app setup | Ensure 2.4GHz Wi-Fi is active, re-pair fan with app, check router settings. |
8. Specifiche
| Caratteristica | Dettaglio |
|---|---|
| Marca | Promozioni |
| Numero di modello | OHCF02-W |
| Colore | Bianco |
| Dimensioni del prodotto | 52"P x 52"L x 9"A |
| Peso dell'articolo | 15 libbre |
| Numero di lame | 3 |
| Materiale della lama | Acrilonitrile Butadiene Stirene (ABS) |
| Numero di velocità | 6 |
| Tipo di luce | GUIDATO |
| Temperature di colore | 3 (3000K, 4500K, 6000K) |
| Cosatage | 45 watt |
| Voltage | 110 Volt |
| Fonte di alimentazione | AC |
| Metodo di controllo | App, Remote, Touch, Google Assistant |
| Uso interno/esterno | Interno, Esterno |
| Specifica Met | Energy Star, FCC, RoHS |
9. Garanzia e supporto
This Promounts ceiling fan comes with a Garanzia di 3 anno. For warranty claims, technical support, or any questions regarding your product, please contact Promounts AV Products USA directly.
Puoi visitare il Promounts Store on Amazon per maggiori informazioni o per contattare il venditore.