1. Introduzione
This manual provides detailed instructions for the setup, operation, and maintenance of your Abovsare Digital Wall Clock. Please read this manual thoroughly before using the product to ensure proper function and longevity.
2. Prodotto finitoview
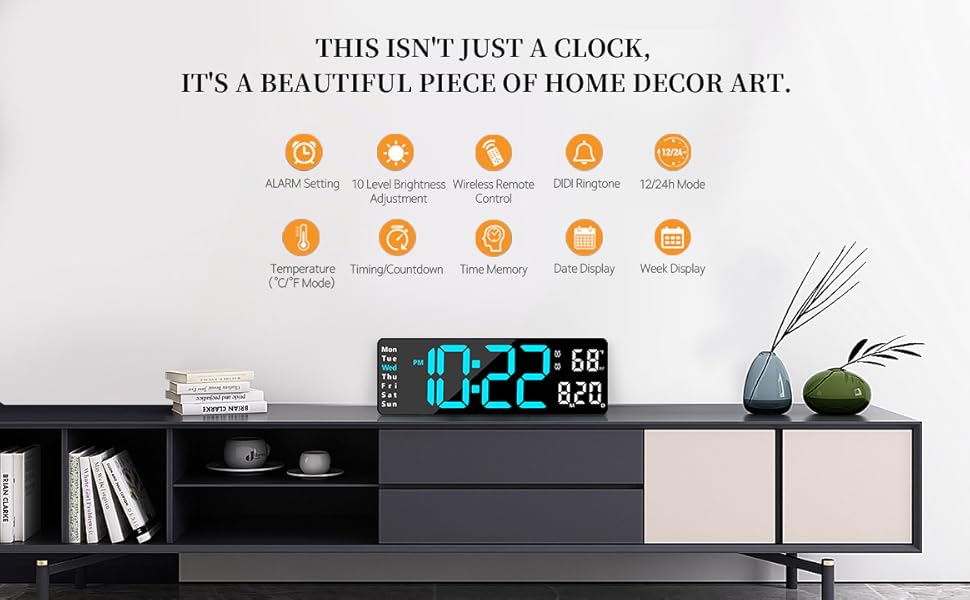
The Abovsare Digital Wall Clock features a 13-inch large LED display with high-contrast digits, making it easily readable from various distances and angles. It displays time, date, day of the week, and temperature. The clock includes a remote control for convenient adjustments and offers automatic brightness dimming. It is designed for both wall-mounted and desktop use.
Caratteristiche principali:
- Ampio display LED da 13 pollici: 3.5-inch high contrast jumbo digits for clear visibility.
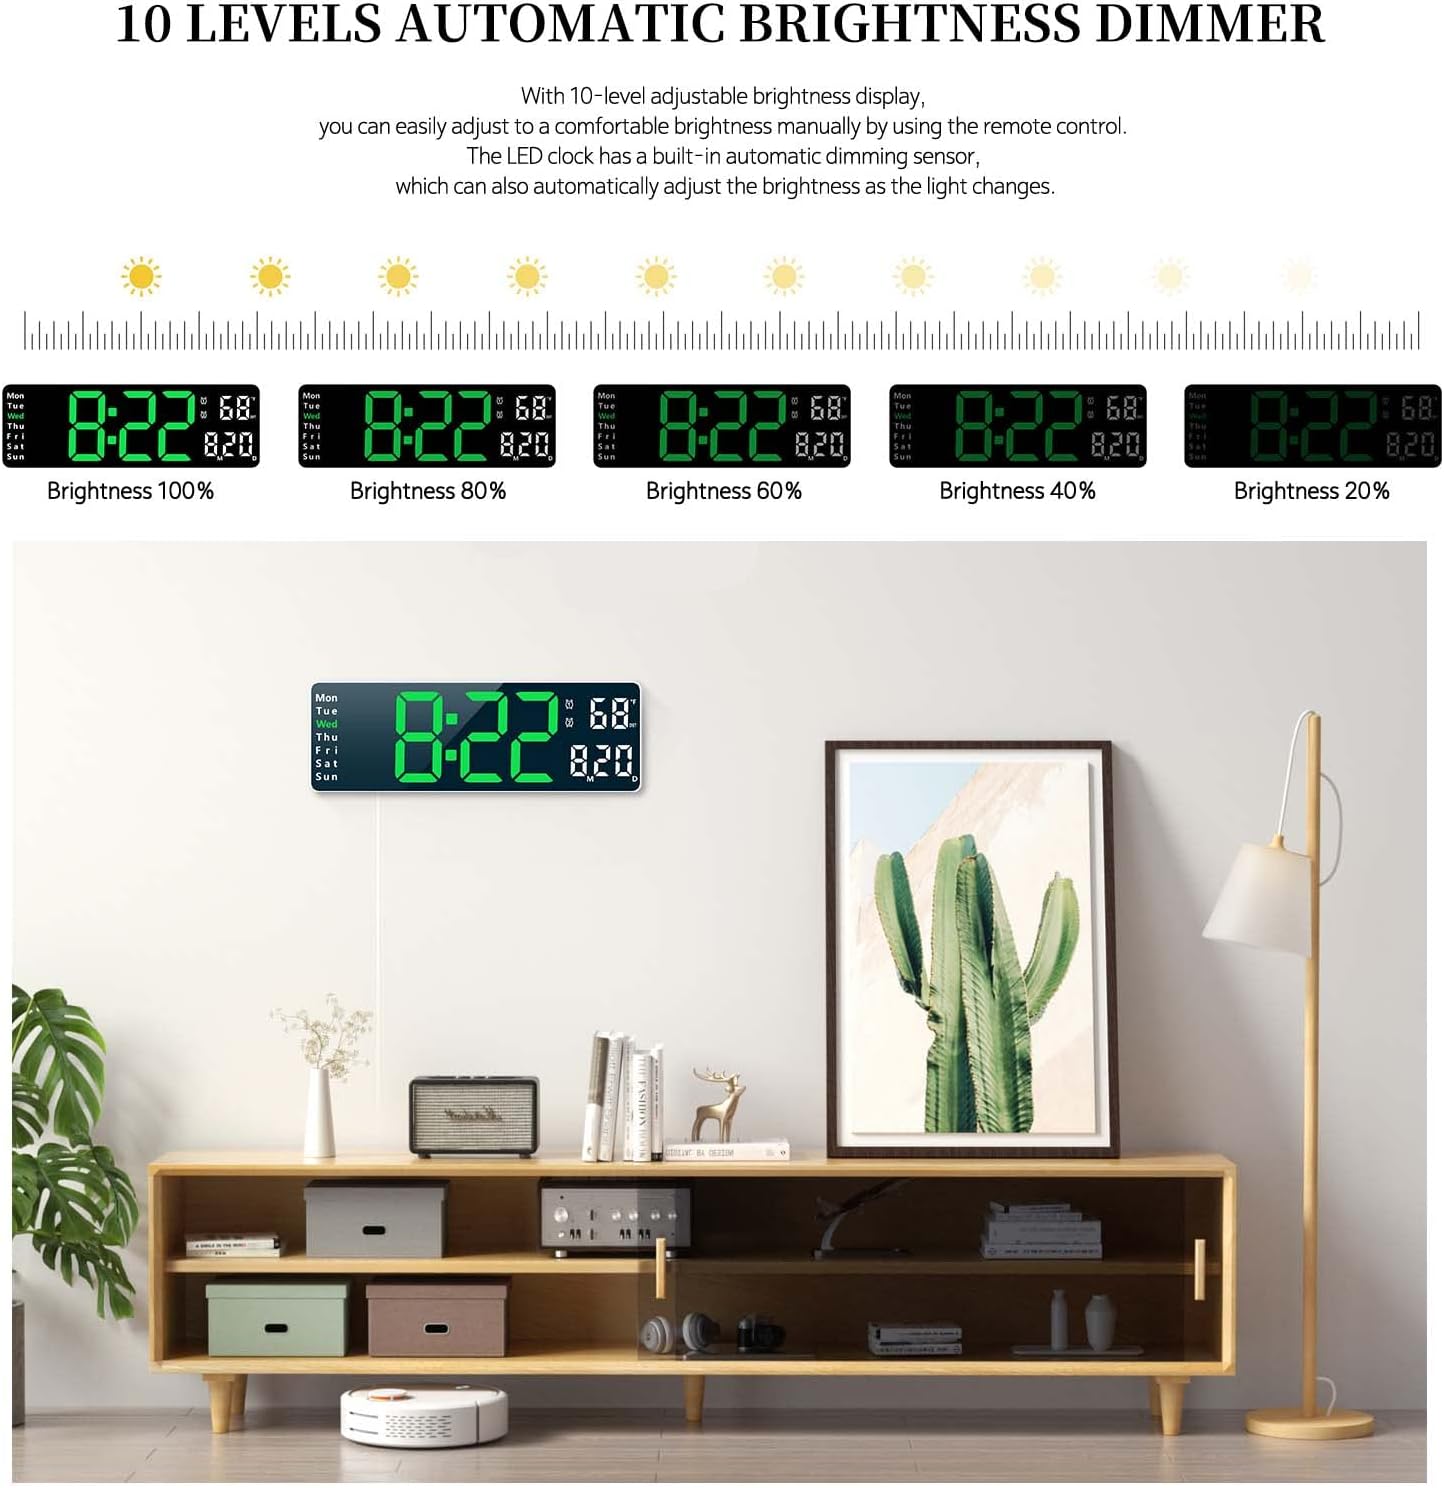
- Dimmer automatico della luminosità a 10 livelli: Adjustable brightness manually via remote or automatically based on ambient light.
- Posizionamento versatile: Suitable for wall mounting or desktop placement.
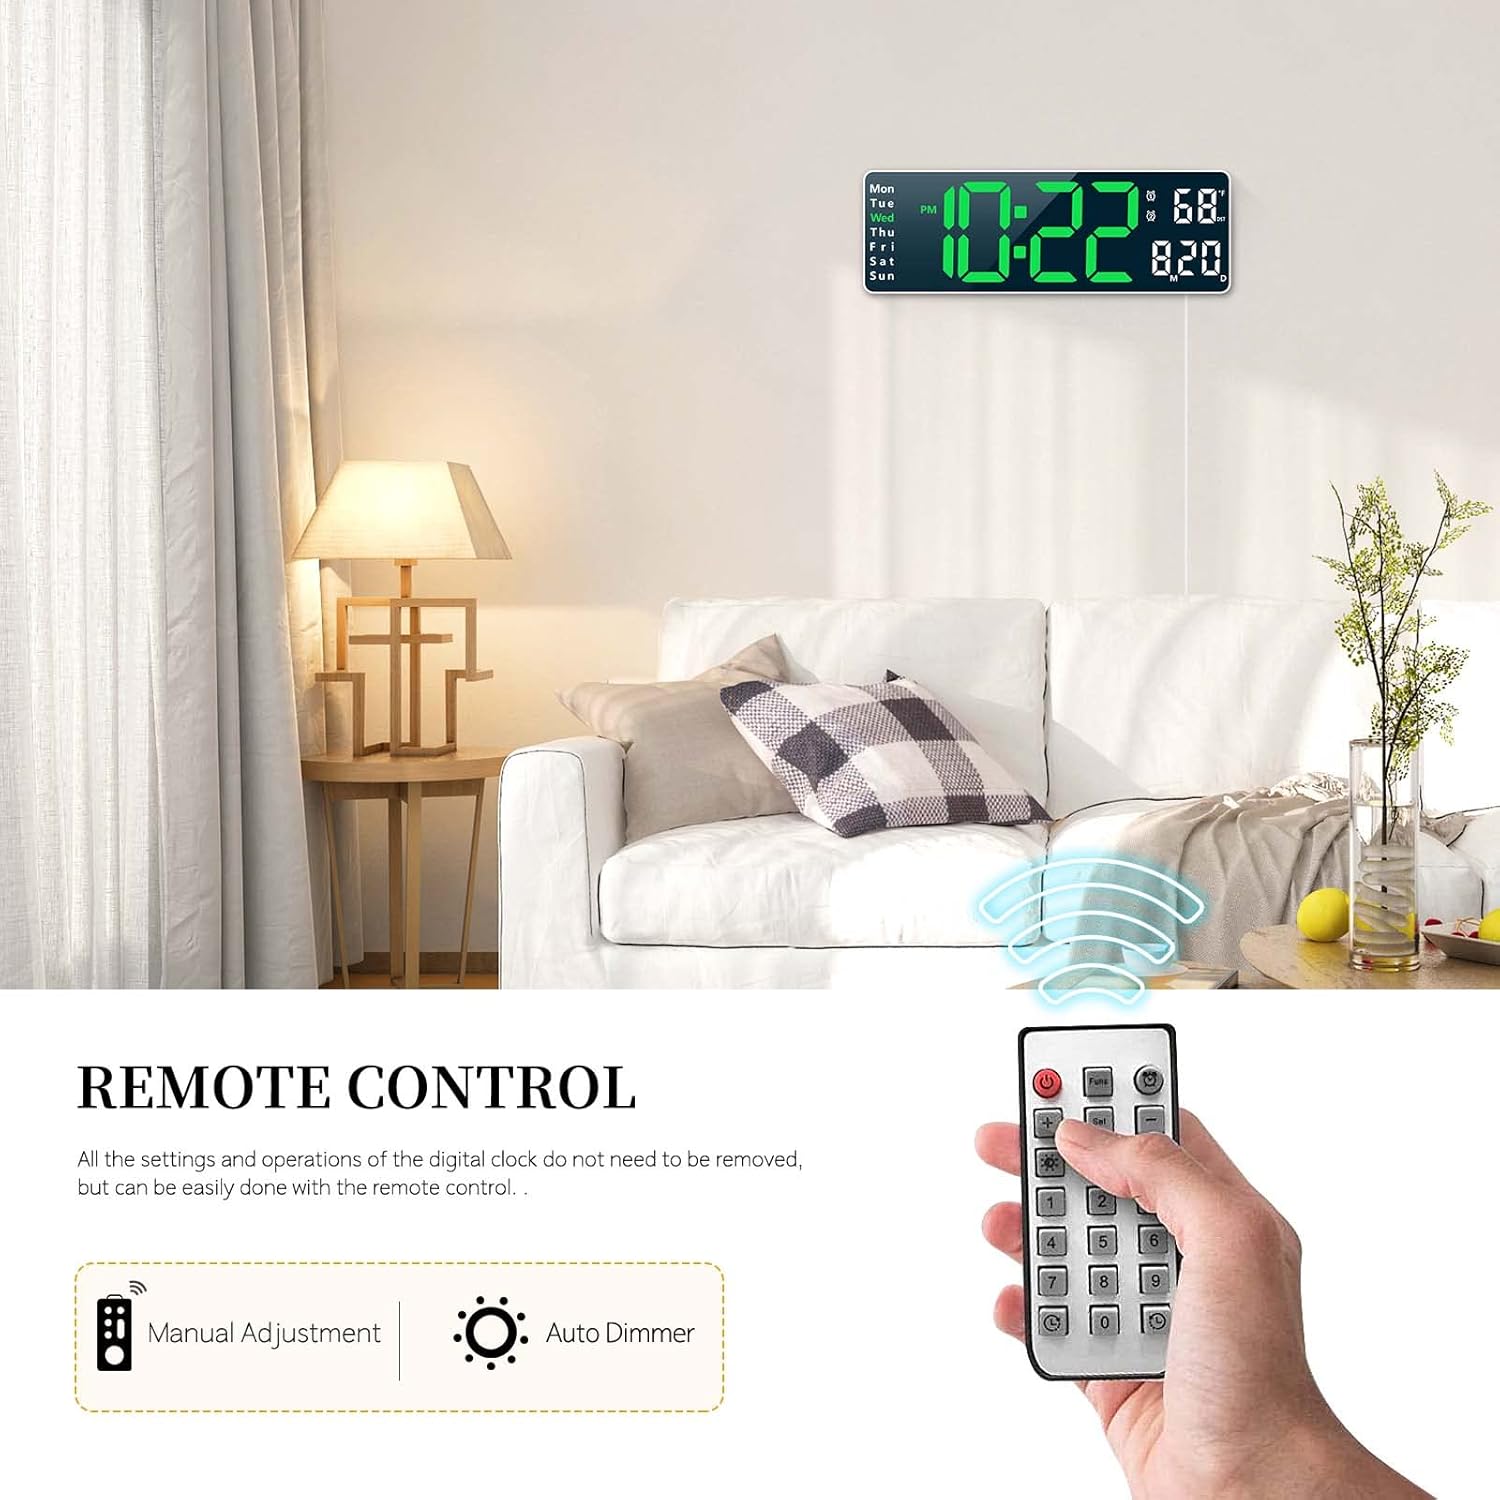
- Telecomando: Tutte le impostazioni e le operazioni possono essere gestite comodamente tramite il telecomando in dotazione.
- Funzione di memoria: Built-in memory retains time data even if power is disconnected.
- Funzione doppio allarme: Set two separate alarms for different schedules.
- Count-up/Count-down Timer: Supporta tempi fino a 99 minuti e 99 secondi.
- Visualizza: Time (12/24H), Date, Week, and Temperature (°C/°F).

3. Contenuto della confezione
Si prega di controllare la confezione per verificare la presenza dei seguenti elementi:
- Abovsare Digital Wall Clock Unit
- Telecomando
- USB Power Cable (Note: Power adapter not included, requires 5V/1A or 5V/2A adapter)
- Manuale d'uso
4. Impostazione
4.1 Collegamento di alimentazione
The clock requires continuous power to operate. Connect the provided USB cable to the clock and plug it into a 5V/1A or 5V/2A USB power adapter (not included) or a USB port. The clock is not battery operated for its main function.
4.2 Installazione della batteria di memoria
For the memory function to work during power outages, install 2 AAA batteries (not included) into the battery compartment located on the back of the clock. These batteries only store time data and do not power the main display.

5. Istruzioni per l'uso
All settings and operations can be performed using the included remote control.
5.1 Impostazione dell'ora e della data
- Press the 'SET' button on the remote control.
- Use the arrow keys (Up/Down) to adjust the hour, then press 'SET' to confirm.
- Ripetere per minuti, anno, mese e giorno.
- Premere nuovamente 'SET' per uscire dalla modalità di impostazione.
- To switch between 12-hour and 24-hour format, press the '12/24H' button on the remote.
5.2 Impostazione dell'allarme
L'orologio supporta due sveglie separate.
- Press the 'ALARM' button on the remote control.
- Select Alarm 1 or Alarm 2 using the arrow keys.
- Adjust the alarm hour and minutes using the arrow keys, pressing 'SET' after each adjustment.
- To activate/deactivate an alarm, press the 'ON/OFF' button when the alarm is selected. An alarm icon will appear/disappear on the display.
- To snooze, press any button on the remote when the alarm sounds.
5.3 Regolazione della luminosità
The clock offers 10 levels of brightness and an automatic dimming feature.
- Regolazione manuale: Press the 'BRIGHTNESS' button on the remote repeatedly to cycle through 10 brightness levels.
- Oscuramento automatico: The built-in sensor automatically adjusts display brightness according to ambient light conditions. This feature is enabled by default.
5.4 Timer Function (Count-up/Count-down)
The clock can function as a timer for up to 99 minutes and 99 seconds.
- Conto alla rovescia: Press the 'TIMER' button, then use the number keys on the remote to input the desired time. Press 'START' to begin.
- Conto alla rovescia: Press the 'TIMER' button, then press 'START' without inputting a time to begin counting up from zero.
- Press 'STOP' to pause and 'RESET' to clear the timer.

5.5 Utilizzo del telecomando
The remote control allows for easy adjustment of all clock functions from a distance. Ensure there is a clear line of sight between the remote and the clock's sensor.
6. Opzioni di montaggio
The Abovsare Digital Wall Clock can be placed on a desktop or mounted on a wall.
6.1 Posizionamento sul desktop
Simply place the clock on any flat surface such as a desk, shelf, or nightstand. Ensure it is stable and not prone to falling.
6.2 Montaggio a parete
The clock features integrated keyholes on the back for easy wall mounting.
- Measure the distance between the keyholes on the back of the clock.
- Mark two corresponding spots on the wall where you wish to mount the clock.
- Install two screws (not included) into the wall at the marked spots, leaving a small portion of the screw head protruding.
- Align the keyholes on the back of the clock with the screw heads and slide the clock down to secure it.


7. Manutenzione
To ensure the longevity and optimal performance of your digital clock, follow these maintenance guidelines:
- Pulizia: Use a soft, dry cloth to wipe the display and casing. Evitare detergenti abrasivi o solventi che potrebbero danneggiare la superficie.
- Energia: Always use a 5V/1A or 5V/2A USB power adapter. Incorrect power sources may damage the device.
- Ambiente: Tenere l'orologio lontano dalla luce solare diretta, da temperature estreme e da elevata umidità.
- Sostituzione della batteria: Replace the AAA memory batteries annually or when the memory function appears to fail during power outages.
8. Risoluzione Dei Problemi
If you encounter any issues with your Abovsare Digital Wall Clock, please refer to the following common problems and solutions:
| Problema | Possibile causa | Soluzione |
|---|---|---|
| Il display dell'orologio è spento. | Nessuna alimentazione o collegamento difettoso. | Ensure the USB cable is securely connected and the power adapter is working. Use a 5V/1A or 5V/2A adapter. |
| Telecomando non funzionante. | Batteries in remote are dead or incorrect orientation; obstacle between remote and clock. | Replace remote control batteries. Ensure clear line of sight to the clock's sensor. |
| Time/Date not saving after power off. | Memory batteries are dead or not installed. | Install 2 new AAA batteries in the memory battery compartment. |
| Schermo troppo scuro o troppo luminoso. | Brightness setting needs adjustment or automatic dimming sensor is obstructed. | Manually adjust brightness using the remote. Ensure the light sensor on the clock is not covered. |
9. Specifiche
| Caratteristica | Dettaglio |
|---|---|
| Marca | Sopravvalutare |
| Modello (Colore) | White Case+green Digit |
| Tipo di visualizzazione | LED digitale |
| Dimensioni del prodotto | 1.2"W x 4.1"H (Note: This seems to be a partial dimension, the display is 13-inch diagonal) |
| Fonte di alimentazione | Corded Electric (USB, 5V/1A or 5V/2A adapter required) |
| Batteria di memoria | 2 x AAA (non incluso) |
| Tipo di montaggio | Da tavolo o da parete |
| Materiale | Acrilonitrile Butadiene Stirene (ABS) |
| Caratteristiche speciali | Large LED display, automatic brightness dimmer, count-up or count-down function, memory function, remote control, dual alarm, date, week, temperature display. |
10. Garanzia e supporto
For warranty information and customer support, please refer to the product packaging or contact Abovsare customer service through the retailer where the product was purchased. Keep your purchase receipt as proof of purchase.