
1. Introduzione
This manual provides detailed instructions for the installation, operation, and maintenance of your Spedal MINIEYE AC1 Dash Cam. Please read this manual thoroughly before using the device to ensure proper functionality and safety. The MINIEYE AC1 is designed to record your driving journey in high definition and offers advanced features for enhanced road safety.
2. Prodotto finitoview
2.1 Caratteristiche principali
- 1944P Ultra Full HD Recording: Cattura video nitiditage with a 140° wide-angle field of view.
- AI ADAS (Advanced Driver-Assistance System): Provides real-time alerts for collision avoidance.
- Sensore G integrato: Automatically detects sudden movements or impacts and locks footage.
- Monitoraggio del parcheggio 24 ore su 24: Monitors your vehicle even when parked (requires hardwire kit, sold separately).
- Potente visione notturna: Garantisce registrazioni nitide anche in condizioni di scarsa illuminazione.
- Registrazione in loop: Sovrascrive il foo più vecchiotage quando la scheda di memoria è piena, garantendo una registrazione continua.
- Controllo APP: Gestisci le impostazioni, view pippotage, and download videos via a dedicated mobile application.
2.2 Contenuto della confezione
Verifica che tutti gli articoli elencati di seguito siano presenti nel tuo pacco:
- MINIEYE AC1 Dash Cam Unit
- Caricabatterie per auto
- Cavo di alimentazione
- Cavo monitor
- Host Base
- Modulo GPS
- Adesivo elettrostatico
- Piede di porco (per il passaggio dei cavi)
- Livella a bolla
- Free 32GB TF Card (MicroSD Card)
- Manuale dell'utente (questo documento)
2.3 Componenti del dispositivo
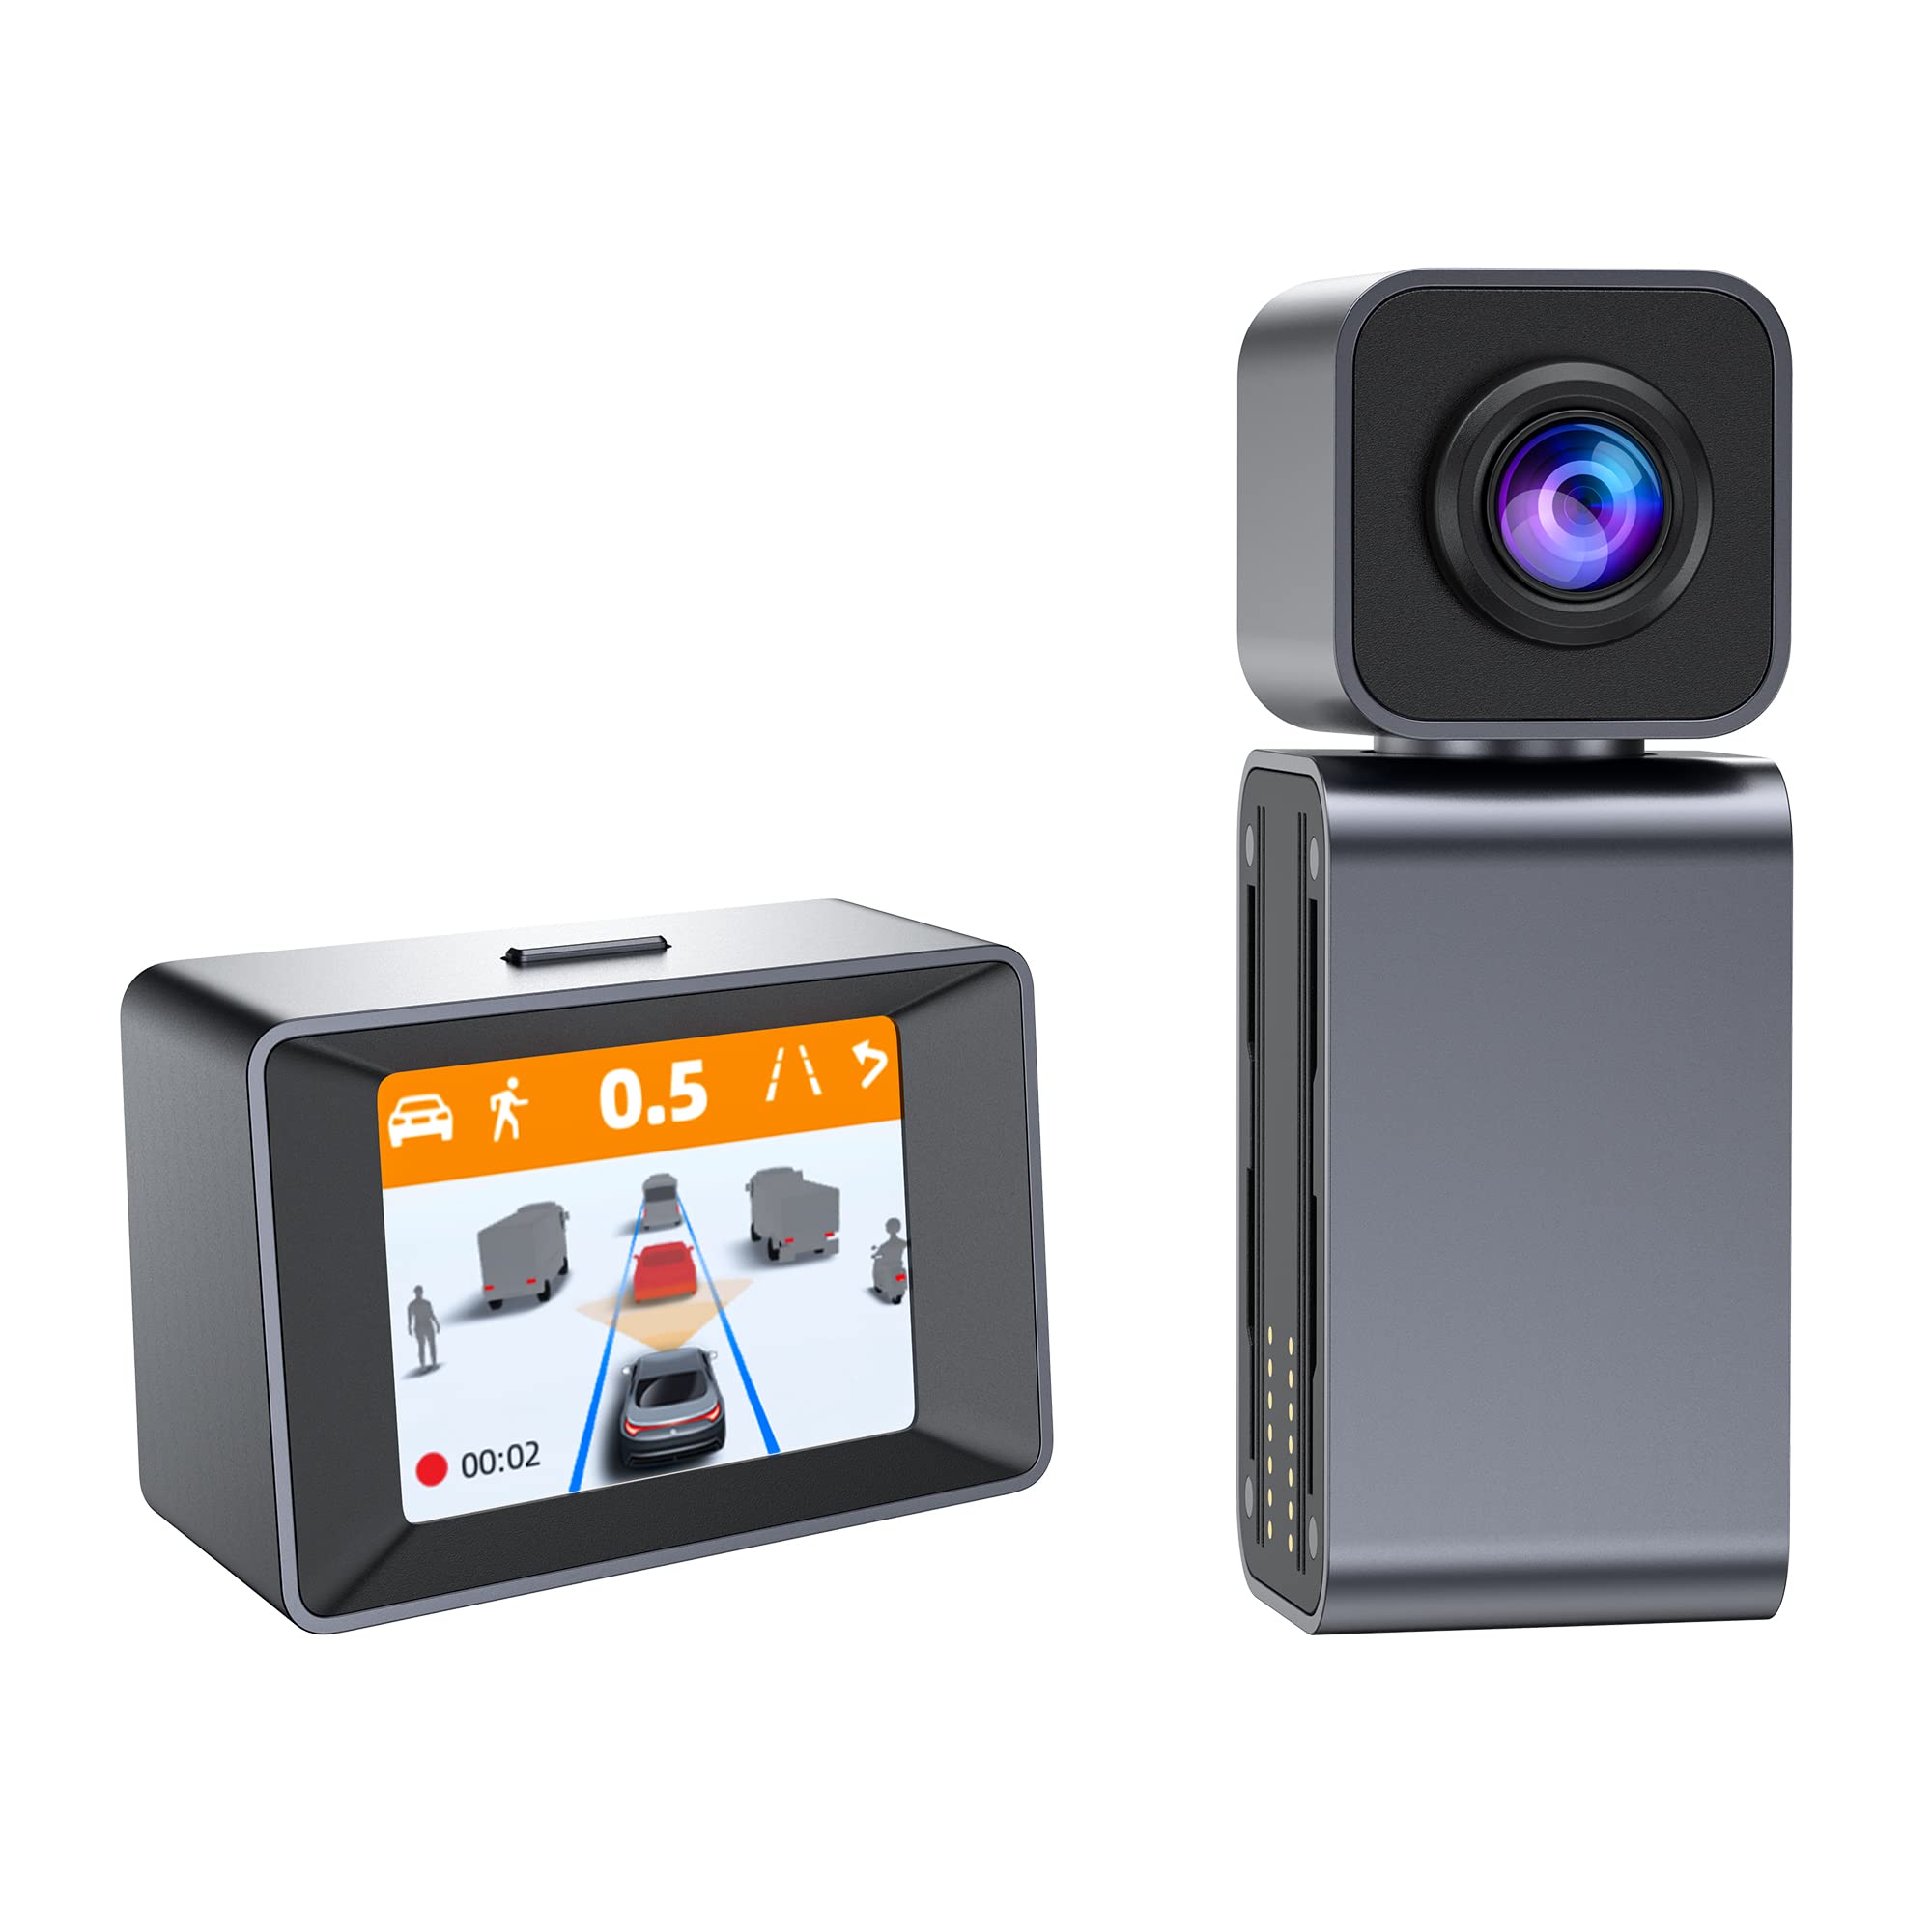
Image: The MINIEYE AC1 Dash Cam showing the main recording unit with its lens and the separate display unit. The display unit shows a simulated traffic scenario with distance warnings, illustrating the ADAS functionality.
3. Impostazione
3.1 Installazione
- Preparare il parabrezza: Pulisci l'area del parabrezza in cui verrà montata la dash cam. Assicurati che sia priva di polvere e grasso.
- Applicare l'adesivo elettrostatico: Apply the electrostatic sticker to the cleaned area. This helps in easy removal and prevents residue on the windshield.
- Attach Host Base: Secure the host base to the electrostatic sticker. Use the bubble level to ensure the base is level for optimal camera angle.
- Montaggio Dash Cam: Attach the MINIEYE AC1 Dash Cam unit to the host base.
- Inserisci la scheda TF: Insert the provided 32GB TF card into the designated slot on the dash cam. Ensure it is inserted correctly until it clicks into place.
- Connetti alimentazione: Connect the power cable to the dash cam and route it along the windshield edge and dashboard using the crowbar to tuck it neatly. Plug the car charger into your vehicle's cigarette lighter socket.
- Connect Monitor (if applicable): If using an external monitor, connect it using the monitor cable.
- Collegare il modulo GPS: Attach the GPS module to the dash cam for location and speed data recording.
3.2 Accensione iniziale e impostazioni
- Accensione: Avvia il veicolo. La dash cam si accenderà automaticamente e inizierà a registrare.
- Formato scheda TF: It is recommended to format the TF card upon first use and periodically thereafter to ensure optimal performance. This can usually be done through the device settings or the mobile app.
- Regola l'angolazione della telecamera: Adjust the camera lens to ensure it captures the road ahead clearly, covering the desired field of view.
3.3 Configurazione del controllo delle app
- Scarica l'app: Cercare the "MINIEYE" in your smartphone's app store (iOS or Android) and install it.
- Connettiti al Wi-Fi: Enable Wi-Fi on your smartphone and connect to the dash cam's Wi-Fi network. The network name and password can typically be found in the dash cam's settings or manual.
- Accoppia dispositivo: Open the MINIEYE app and follow the on-screen instructions to pair your dash cam.
- Configura impostazioni: Use the app to adjust recording resolution, G-sensor sensitivity, parking monitoring settings, and other preferences.
4. Istruzioni per l'uso
4.1 Registrazione di base
Once powered on, the MINIEYE AC1 automatically begins continuous loop recording. Video files are saved in segments (e.g., 1, 3, or 5 minutes) to the TF card. When the card is full, the oldest unprotected filevengono sovrascritti.
4.2 Sensore G e registrazione di emergenza
The built-in G-Sensor detects sudden impacts or rapid acceleration/deceleration. When triggered, the current video segment is automatically locked and saved to a protected folder, preventing it from being overwritten by loop recording. The sensitivity of the G-Sensor can be adjusted via the mobile app.
4.3 Monitoraggio del parcheggio
With the optional hardwire kit (not included), the dash cam can monitor your vehicle while parked. If an impact or motion is detected, the dash cam will automatically record a short video segment. Ensure this feature is enabled and configured in the app settings.
4.4 ADAS (Advanced Driver-Assistance System)
The AI ADAS features provide real-time alerts to enhance driving safety:
- Avviso di collisione frontale (FCW): Alerts you if you are approaching a vehicle ahead too quickly.
- Avviso di abbandono della corsia (LDW): Ti avvisa se il tuo veicolo esce dalla corsia senza aver attivato la freccia.
- Front Vehicle Start Alert: Informs you when the vehicle in front of you has started moving after a stop.
These alerts are typically visual on the display and/or audible. Calibration may be required for optimal ADAS performance.
4.5 Viewing e download di Footage
Pippotage può essere viewed directly on the dash cam's display (if available) or more conveniently through the MINIEYE mobile application. Use the app to browse recorded videos, download important clips to your smartphone, or share them.
5. Manutenzione
- Pulisci la lente: Per garantire una qualità video nitida, pulire regolarmente l'obiettivo della fotocamera con un panno morbido e privo di lanugine.
- Formato scheda TF: Format the TF card every 2-4 weeks to prevent data corruption and maintain optimal recording performance. Back up any important files prima della formattazione.
- Aggiornamenti del firmware: Check the MINIEYE app or official website periodically for firmware updates. Keeping your dash cam's firmware updated ensures access to new features and performance improvements.
- Magazzinaggio: Quando non viene utilizzata per lunghi periodi, conservare la dash cam in un luogo fresco e asciutto, lontano dalla luce solare diretta.
6. Risoluzione Dei Problemi
- La Dash Cam non si accende:
- Controllare il collegamento del caricabatteria per auto e assicurarsi che la presa accendisigari del veicolo funzioni.
- Ensure the power cable is securely connected to the dash cam.
- Problemi di registrazione (ad esempio, blocco, danneggiamento files):
- Formatta la scheda TF.
- Try a different high-speed (Class 10 or U1/U3) TF card.
- Ensure the TF card is not full of locked files.
- Problemi di connessione all'app:
- Assicurati che il Wi-Fi della dash cam sia abilitato.
- Riavvia sia la dash cam che lo smartphone.
- Verify you are connecting to the correct Wi-Fi network and using the correct password.
- Avvisi ADAS non funzionanti:
- Ensure ADAS features are enabled in the app settings.
- Perform ADAS calibration if available in the app.
- Assicurarsi che l'obiettivo della fotocamera sia pulito e libero da ostruzioni.
7. Specifiche
| Caratteristica | Dettaglio |
|---|---|
| Nome del modello | MINIEYE AC1 |
| Marca | Spedale |
| Risoluzione di acquisizione video | Formato: 1944p |
| Angolo reale di View | 140 gradi |
| Tecnologia di connettività | USB, Wireless (for App Control) |
| Metodo di controllo | Applicazione |
| Tipo di montaggio | Supporto di aspirazione |
| Tipo di servizio del veicolo | Auto |
| Produttore | Shenzhen Youjia Innov Tech Co., Ltd |
8. Garanzia e supporto
For warranty information, technical support, or service inquiries, please refer to the warranty card included with your product or visit the official Spedal website. You may also contact Spedal customer service directly through the contact information provided on their website or within the MINIEYE mobile application.
Conservare la prova d'acquisto per eventuali richieste di garanzia.