
1. Introduzione
This manual provides essential information for the safe and efficient operation of your Cuifati 30A MPPT Solar Controller. Please read these instructions carefully before installation and use to ensure optimal performance and longevity of the product.
The Cuifati 30A MPPT Solar Controller is designed to manage the power flow from your solar panels to your battery bank, ensuring efficient charging and protecting your batteries from overcharge and over-discharge. It features an intelligent regulator compatible with 12V, 24V, 36V, and 48V systems, a built-in USB port for device charging, and an LCD digital panel for easy monitoring and parameter configuration.
2. Prodotto finitoview
2.1 Caratteristiche principali
- Ampia compatibilità: Supporta sistemi di batterie da 12 V, 24 V, 36 V e 48 V.
- Integrated USB Output: Two 5V/2A USB ports for charging mobile devices.
- Protezione intelligente: Features protection against overcurrent, short-circuit, inverse polarity, low voltage, e sovrapprezzo.
- Schermo LCD: Provides real-time status and data, allowing for convenient mode switching and parameter configuration.
- Automatic System Management: Manages solar panel and battery operations automatically with a built-in industrial microcontroller.
2.2 Componenti
The solar controller unit includes the main control module with an LCD screen, USB ports, and terminal connections for solar panels, battery, and load. The device is housed in an engineering plastic casing progettato per durare nel tempo.

Figura 1: Fronte view of the Cuifati 30A MPPT Solar Controller, showing the LCD display, USB ports, and connection terminals.
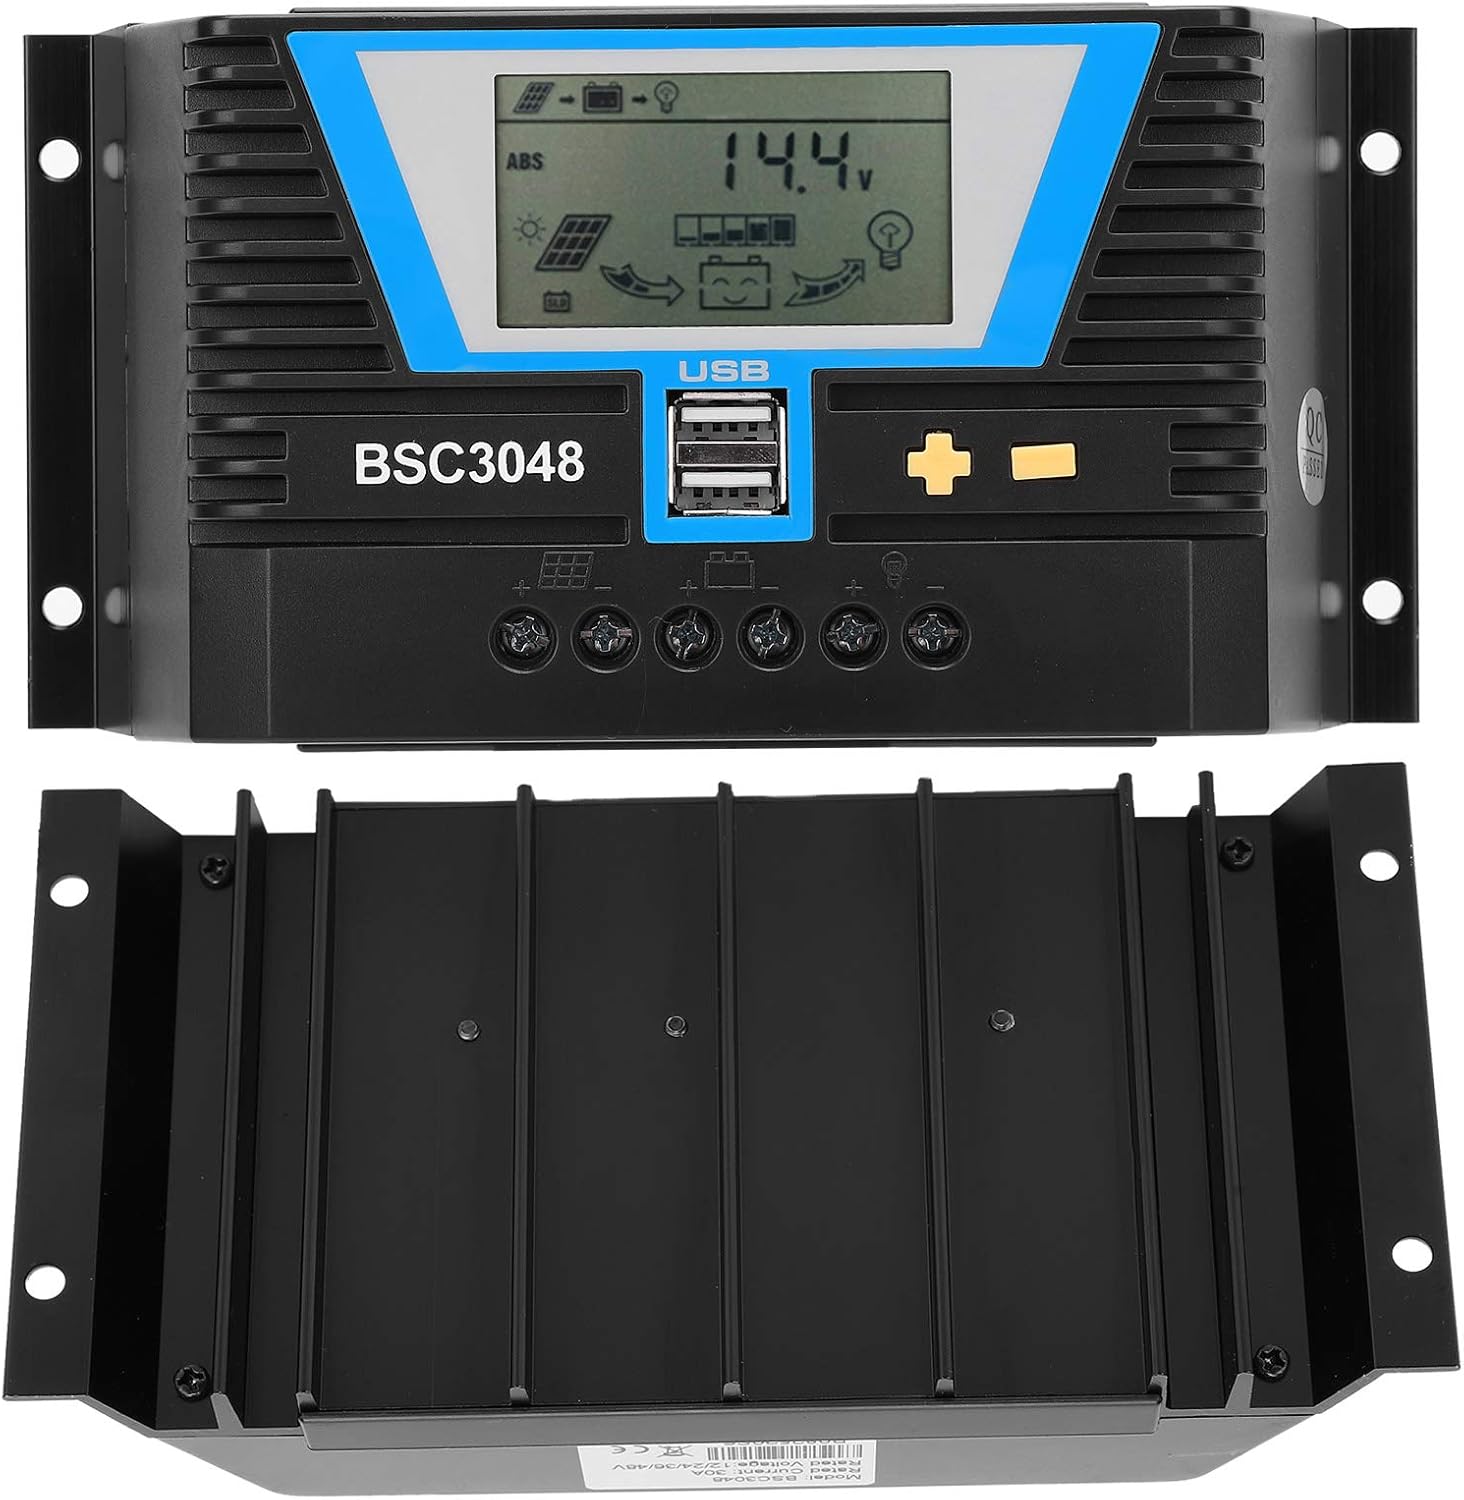
Figura 2: Parte anteriore e inferiore view of the solar controller, highlighting the heat sink fins for efficient cooling.
3. Specifiche
| Parametro | Valore |
|---|---|
| Tipo di articolo | Regolatore solare |
| Materiale | Plastica ingegneristica |
| Corrente nominale | 30A |
| Volume di lavoro nominaletage | 12V/24V/36V/48V (rilevamento automatico) |
| Ingresso pannello solare Voltage | ≤100 V |
| Perdita statica | ≤30mA |
| Loop Pressure Drop | ≤0.3 V |
| Uscita USB | 5V/2A x 2 |
| Temperatura di lavoro | -20~+55℃ |
| Livello di protezione | Grado di protezione IP32 |
| Umidità relativa | ≤95%, senza condensa |
| Dimensione terminale Terminal | 6 AWG/16 mm² |
| Dimensioni del pacco | 8.66 x 4.57 x 2.24 pollici |
| Peso dell'articolo | 1.1 libbre (0.5 chilogrammi) |
4. Configurazione e installazione
Proper installation is crucial for the safe and efficient operation of your solar charging system. Please follow these steps carefully:
4.1 Precauzioni di sicurezza
- Ensure all connections are secure and correct to prevent damage to the controller or other components.
- Collegare sempre prima la batteria, poi il pannello solare e infine il carico. Scollegare in ordine inverso.
- Installare il controller in un'area ben ventilata, lontano dalla luce solare diretta, da temperature elevate e dall'umidità.
- Use appropriate wire gauges for all connections to minimize power loss and prevent overheating.
4.2 Fasi di connessione
- Collegare la batteria: Connect the positive and negative terminals of your battery to the corresponding battery terminals on the solar controller. Ensure correct polarity. The LCD display should light up.
- Collegare il pannello solare: Connect the positive and negative terminals of your solar panel(s) to the corresponding solar panel terminals on the controller. Ensure correct polarity.
- Collegare il carico (facoltativo): If you are connecting a DC load directly to the controller, connect its positive and negative terminals to the load terminals on the controller.

Figura 3: primo piano view of the controller's connection terminals for solar panels, battery, and load.
5. Istruzioni per l'uso
The Cuifati solar controller features an intuitive LCD display and control buttons for easy operation and monitoring.
Display LCD e pulsanti 5.1
The LCD screen displays various system parameters such as battery voltage, charging current, discharge current, and operating modes. The controller typically has three buttons: a 'Mode' button, a '+' button, and a '-' button.

Figure 4: The controller's LCD display and control buttons, along with a guide to basic operations.
5.2 Operazioni di base
| Modalità | Istruzioni per l'uso |
|---|---|
| Modalità di navigazione | Short press the "+" or "-" button to cycle through display parameters. |
| Interruttore di carico | When the load is set to 24-hour mode, short press "+" on the main interface to toggle the load. Do not manually switch the load in other working modes. |
| Modalità impostata | In the settable interface, long press "+" to enter parameter setting. Short press "+" or "-" to adjust the parameter. Long press "+" again to confirm and save the parameter setting. (Long pressing "-" will not save parameters and restore to the last setting). |
| Reset | Long press "+" in the ambient temperature interface to reset the controller. |
5.3 Ricarica USB
The two 5V/2A USB ports can be used to charge compatible electronic devices such as mobile phones, tablets, and PCs. Simply connect your device using a standard USB cable.
6. Manutenzione
Regular maintenance ensures the longevity and optimal performance of your solar controller.
- Pulizia: Mantenere il controller pulito e privo di polvere e detriti. Utilizzare un panno asciutto per pulire la superficie.
- Connessioni: Periodically check all wire connections to ensure they are tight and free from corrosion. Loose connections can lead to power loss or overheating.
- Ventilazione: Assicurarsi che l'area di installazione sia ben ventilata per evitare il surriscaldamento del controller.
- Controllo ambientale: Verify that the controller is not exposed to excessive moisture, extreme temperatures, or direct sunlight, which can degrade its performance and lifespan.
7. Risoluzione Dei Problemi
If you encounter issues with your Cuifati solar controller, refer to the following common problems and solutions:
7.1 No Display on LCD Screen
- Controllare la connessione della batteria: Ensure the battery is correctly connected to the controller with the correct polarity. The controller draws power from the battery to operate its display.
- Volume batteriatage: Verificare che la batteria voltage is within the operating range (12V-48V). If the battery is completely discharged, the controller may not power on.
7.2 Batteria non in carica
- Connessione al pannello solare: Check if the solar panels are correctly connected to the controller with the correct polarity.
- Uscita del pannello solare: Ensure the solar panels are receiving sufficient sunlight and are producing voltage. Use a multimeter to check the open-circuit voltage dei pannelli solari.
- Impostazioni del controller: Verify that the battery type and charging parameters are correctly set in the controller's settings.
7.3 Load Not Working
- Connessione di carico: Ensure the load is correctly connected to the controller's load terminals.
- Load Switch Setting: Check the load switch setting on the controller. If it's in a timed mode, ensure the current time is within the active period.
- Volume batteriatage: Se il volume della batteriatage is too low, the controller may cut off the load to protect the battery.
- Protezione da sovraccarico: The controller has overload protection. Ensure the load current does not exceed the controller's rated load current.
8. Garanzia e supporto
The Cuifati 30A MPPT Solar Controller comes with a 12-month warranty. For any issues or support inquiries, please contact Cuifati customer service via email. Please have your product model number (CUIFATImipqrgdwyu) and purchase details ready when contacting support.
Sono disponibili piani di protezione opzionali per una copertura estesa:
- Piano di protezione biennale
- Piano di protezione biennale
For details on these plans, please refer to your purchase documentation or contact your retailer.