1. Introduzione
This manual provides essential information for the safe and efficient use of your AOC U34V5C/BK 34-inch WQHD LED Monitor. Please read this manual thoroughly before operating the device and retain it for future reference. The AOC U34V5C/BK is designed to deliver a high-quality visual experience with its 3440 x 1440 WQHD resolution and 21:9 aspect ratio, suitable for various applications from professional work to entertainment.
2. Informazioni sulla sicurezza
Per evitare danni al monitor e garantire la sicurezza personale, osservare le seguenti precauzioni di sicurezza:
- Non esporre il monitor alla pioggia o all'umidità per evitare rischi di incendio o scosse elettriche.
- Non aprire il monitor casing. All'interno non sono presenti parti riparabili dall'utente. Per qualsiasi intervento di assistenza, rivolgersi a personale qualificato.
- Posizionare il monitor su una superficie stabile e piana per evitare che cada.
- Assicurare una ventilazione adeguata attorno al monitor. Non ostruire le aperture di ventilazione.
- Utilizzare solo il cavo di alimentazione e l'adattatore forniti con il monitor.
- Scollegare il monitor dalla presa di corrente durante i temporali o quando non viene utilizzato per lunghi periodi.
3. Contenuto della confezione
Verificare che tutti gli articoli siano presenti nel pacco:
- AOC U34V5C/BK Monitor
- Supporto per monitor (base e collo)
- Cavo di alimentazione
- Cavo HDMI
- Cavo DisplayPort
- Cavo USB-C
- Manuale dell'utente (questo documento)
4. Prodotto finitoview
The AOC U34V5C/BK monitor features a 34-inch VA panel with WQHD resolution, USB-C connectivity with 65W Power Delivery, and a 100Hz refresh rate with AMD FreeSync support.
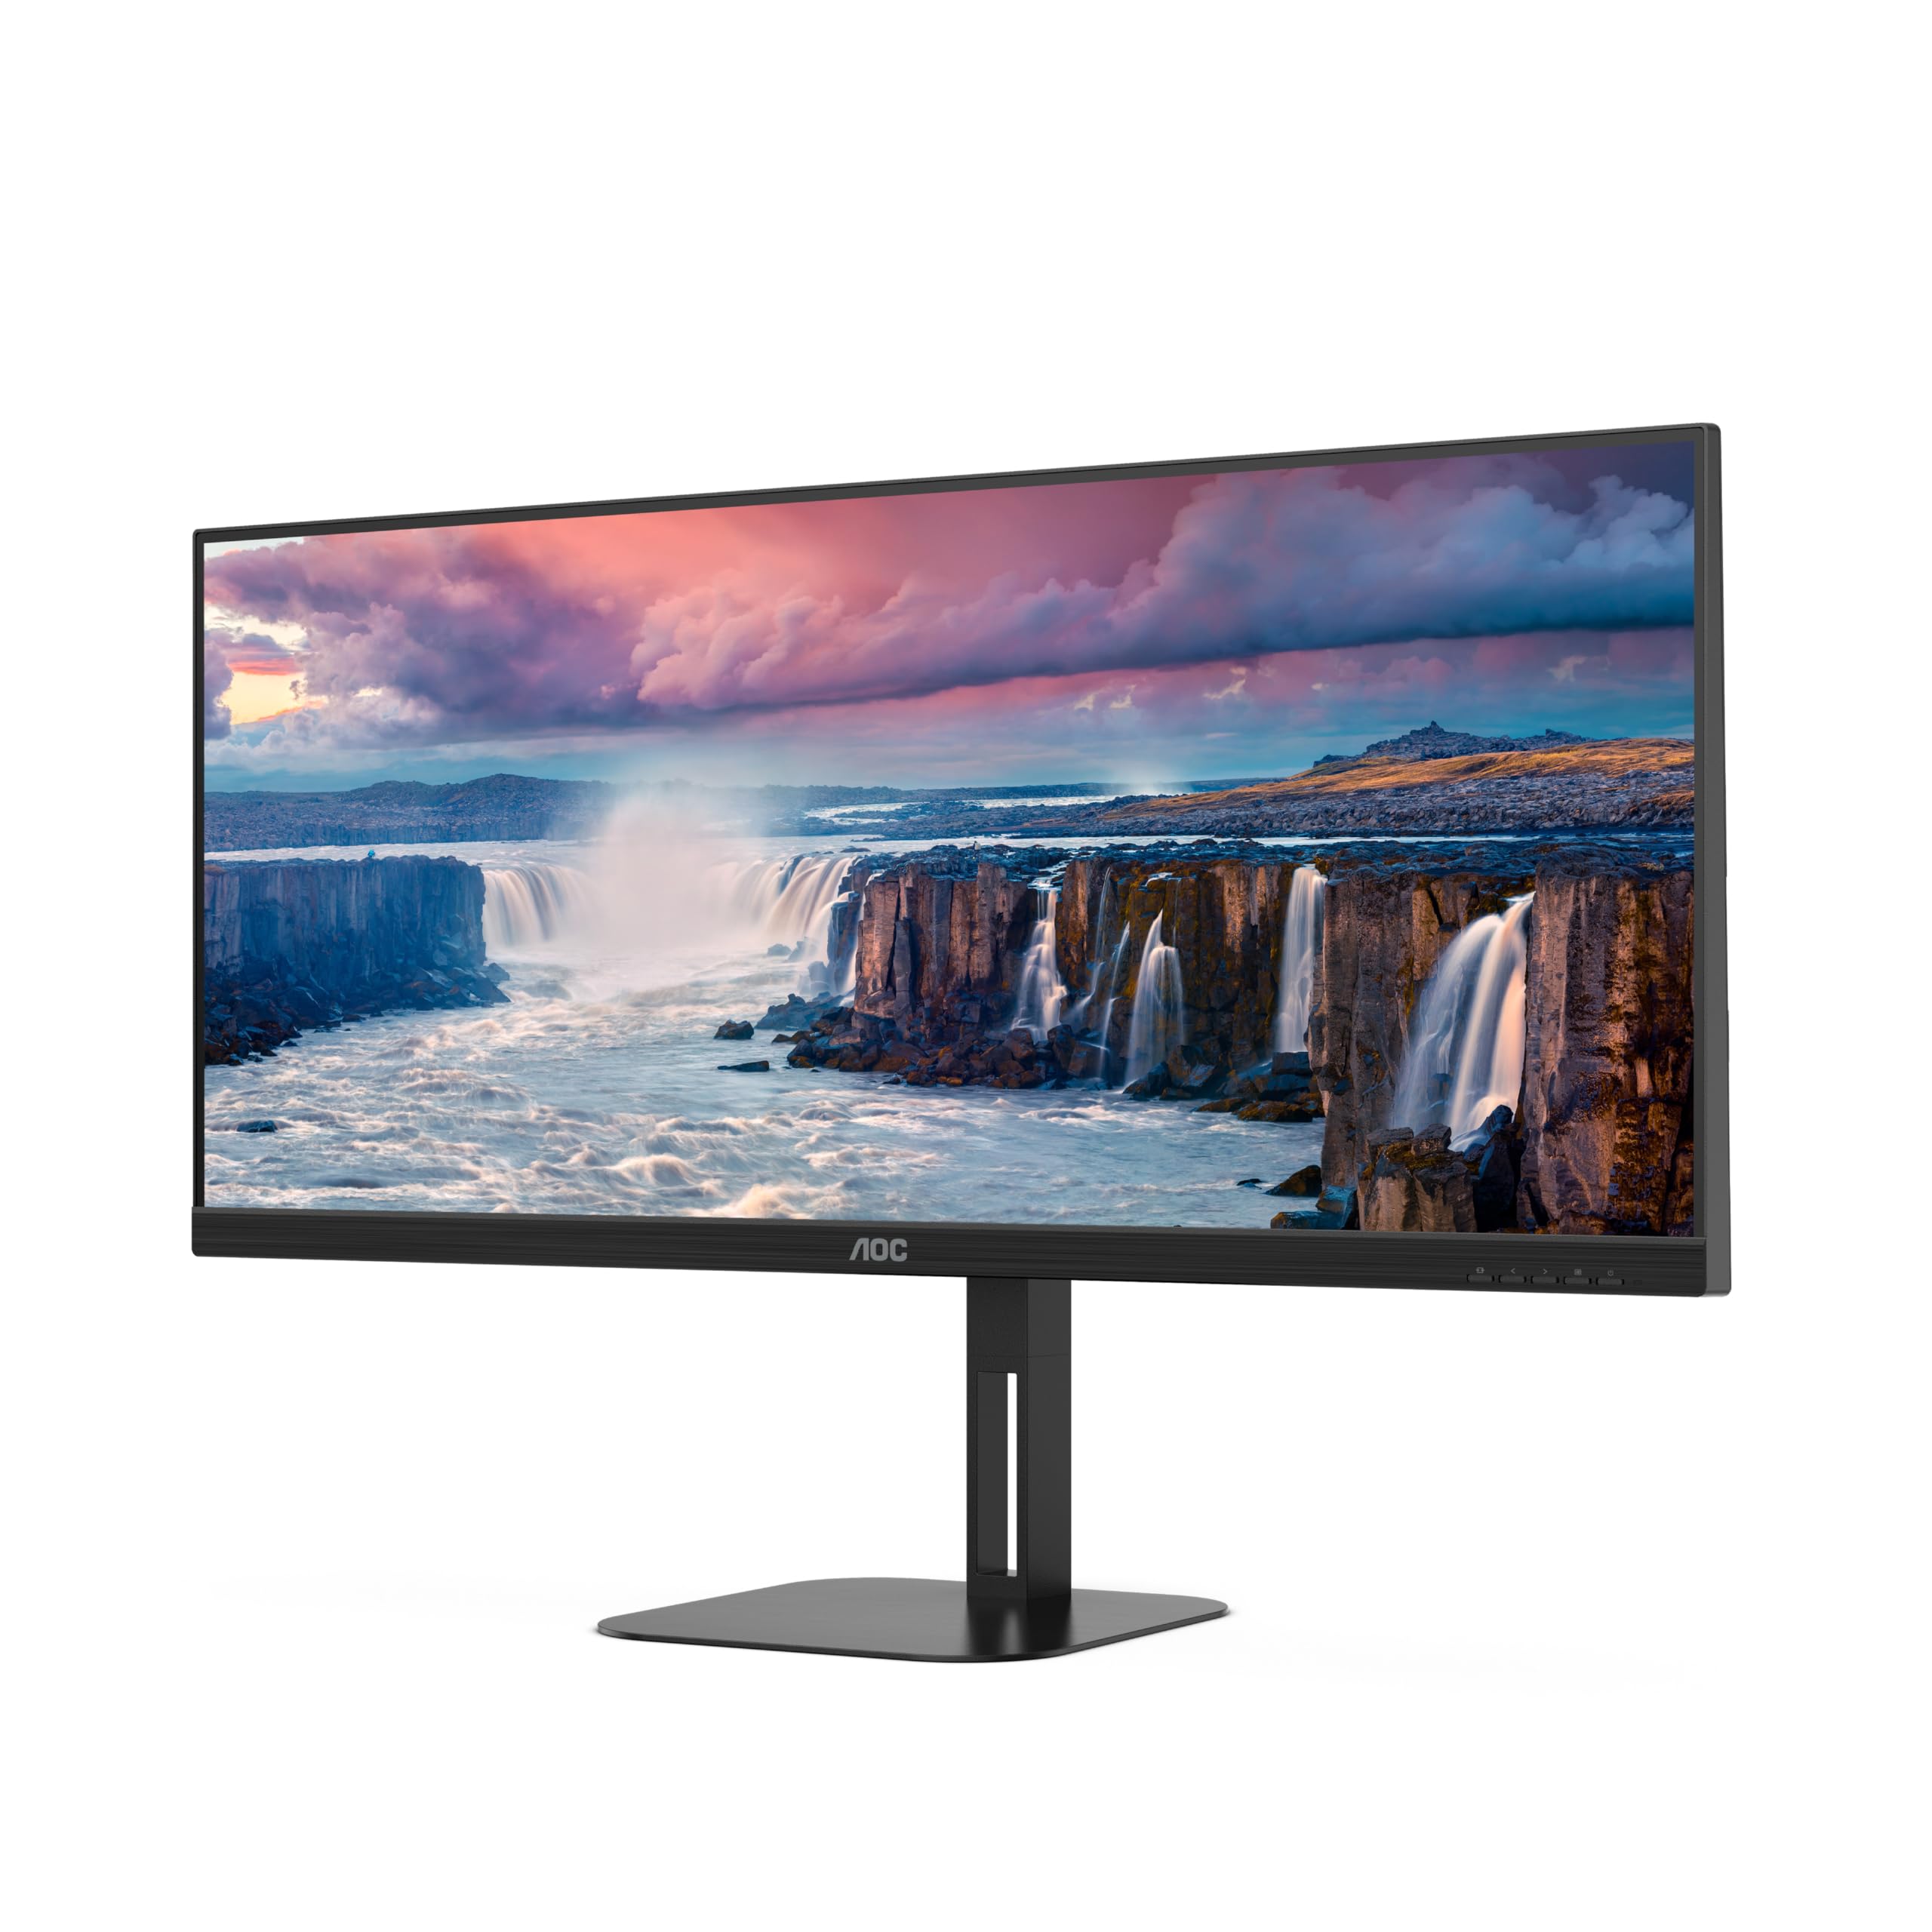
Figura 4.1: Fronte view of the AOC U34V5C/BK monitor highlighting its 34-inch VA panel, USB-C port with 65W Power Delivery, 100Hz refresh rate, and AMD FreeSync technology.
4.1 Componenti del monitor
Familiarize yourself with the various parts of your monitor:
- Pannello frontale: Display screen, OSD control buttons (usually located on the bottom right bezel).
- Pannello posteriore: Power input, video input ports (HDMI, DisplayPort, USB-C), USB hub ports, security lock slot.
- In piedi: Provides stable support and allows for height, tilt, and swivel adjustments.

Figura 4.2: Posteriore view of the AOC U34V5C/BK monitor, showing the VESA mount compatibility and the stand attachment point.

Figura 4.3: In basso view of the AOC U34V5C/BK monitor, detailing the power input, DisplayPort, HDMI, USB-C, and USB-A hub ports.
5. Impostazione
5.1 Montaggio del supporto
- Posizionare con cura il monitor a faccia in giù su un panno morbido e pulito per evitare graffi.
- Fissare il collo del supporto al retro del monitor finché non scatta in posizione o non è fissato con le viti (se applicabile).
- Fissare la base del supporto al collo del supporto e stringere la vite prigioniera nella parte inferiore della base.
- Sollevare con cautela il monitor e posizionarlo su una scrivania stabile.
5.2 Collegamento del monitor
Prima di effettuare qualsiasi collegamento, assicurarsi che il computer e il monitor siano spenti.
- Collegamento elettrico: Collegare il cavo di alimentazione all'ingresso di alimentazione del monitor e quindi a una presa elettrica dotata di messa a terra.
- Collegamento video: Scegli una delle seguenti opzioni:
- HDMI: Connect one end of the HDMI cable to your computer's HDMI output and the other end to an HDMI input on the monitor.
- Porta Display: Connect one end of the DisplayPort cable to your computer's DisplayPort output and the other end to the DisplayPort input on the monitor.
- USB-C: Connect one end of the USB-C cable to your computer's USB-C port (which supports video output) and the other end to the USB-C input on the monitor. This connection can also provide power delivery and USB data transfer.
- Collegamento hub USB (facoltativo): If using the monitor's USB hub, connect a USB upstream cable (USB-C to USB-A or USB-C to USB-C, depending on your computer) from your computer to the monitor's USB upstream port. This enables the monitor's USB-A ports for peripherals.
6. Funzionamento del monitor
6.1 Accensione/spegnimento
Press the power button, usually located on the bottom right bezel, to turn the monitor on or off. The power indicator light will illuminate when the monitor is on.
6.2 Menu di visualizzazione su schermo (OSD)
The OSD menu allows you to adjust various monitor settings. Use the control buttons (joystick or individual buttons) on the monitor's bezel to navigate the menu.
- Press the Menu button (or push the joystick) to open the OSD menu.
- Use the navigation buttons (or joystick) to move through the menu options.
- Press the Select button (or push the joystick) to enter a sub-menu or confirm a selection.
- Use the Exit button (or move the joystick left) to go back to the previous menu or exit the OSD.
6.3 Impostazioni OSD comuni
- Luminanza: Regola luminosità, contrasto e gamma.
- Impostazione immagine: Fine-tune image quality, sharpness, and pixel clock.
- Impostazione del colore: Select color temperature, sRGB mode, or user-defined color settings.
- Potenziamento immagine: Migliora aree specifiche dello schermo.
- Configurazione OSD: Regola la lingua, la posizione e la trasparenza dell'OSD.
- Impostazione del gioco: Enable/disable FreeSync, adjust overdrive, and game modes.
- Extra: Select input source, reset settings, view informazioni.
7. Manutenzione
7.1 Pulizia del monitor
- Scollegare sempre il monitor prima di pulirlo.
- Utilizzare leggermente un panno morbido e privo di lanugine dampcon acqua o con un detergente per schermi delicato e non abrasivo.
- Non utilizzare alcol, ammoniaca o detergenti abrasivi, poiché potrebbero danneggiare lo schermo o il casing.
- Wipe the screen gently. Do not apply excessive pressure.
7.2 Cura generale
- Evitare di posizionare oggetti pesanti sul monitor o sui suoi cavi.
- Tenere il monitor lontano dalla luce solare diretta, da fonti di calore e da temperature estreme.
- Do not expose the monitor to strong vibrations or impacts.
8. Risoluzione Dei Problemi
Se riscontri problemi con il monitor, fai riferimento ai seguenti problemi comuni e alle relative soluzioni:
| Problema | Possibile causa | Soluzione |
|---|---|---|
| Nessuna immagine sullo schermo | Monitor not powered on; Incorrect input source; Loose video cable | Press power button; Select correct input via OSD; Reconnect video cable securely |
| Immagine troppo scura/luminosa | Impostazioni di luminosità/contrasto errate | Adjust Brightness and Contrast in OSD menu |
| Immagine tremolante | Incorrect refresh rate; Faulty cable | Set refresh rate to 100Hz in display settings; Try a different video cable |
| Le porte USB non funzionano | Cavo USB upstream non collegato | Connect the USB-C upstream cable from the monitor to your computer |
If the problem persists after trying these solutions, contact AOC customer support.
9. Specifiche
Below are the technical specifications for the AOC U34V5C/BK monitor:

Figure 9.1: Product Information Sheet for AOC U34V5C/BK, detailing energy efficiency and technical parameters.
| Parametro | Valore |
|---|---|
| Marca | DOC (Doc di origine animale) |
| Modello | U34V5C/BK |
| Dimensioni dello schermo | 34 pollici (86.4 cm) |
| Risoluzione | Risoluzione 3440 x 1440 WQHD |
| Proporzioni | 21:9 |
| Tempo di risposta | 4 millisecondi |
| Frequenza di aggiornamento | 100 Hz (default 60 Hz) |
| Tecnologia del pannello | VA Panel, LED LCD |
| Viewangolo di ing | 178 gradi (orizzontale/verticale) |
| Interfaccia Hardware | DisplayPort, HDMI, USB-C |
| Porte USB totali | 4 (hub USB) |
| Alimentazione (USB-C) | 65W |
| Voltage | 5 Volts (Internal Power Supply) |
| Dimensioni del prodotto | Dimensioni: 50 x 25 x 40 cm; 7 kg |
| Classe di efficienza energetica (SDR) | G |
| Consumo energetico (SDR) | 34.0 L |
| Classe di efficienza energetica (HDR) | G |
| Consumo energetico (HDR) | 35.0 L |
| Potenza di standby | 0.5 L |
| Minimum guaranteed software/firmware updates | 8 anni |
| Minimum guaranteed spare parts availability | 7 anni |
| Supporto prodotto minimo garantito | 8 anni |
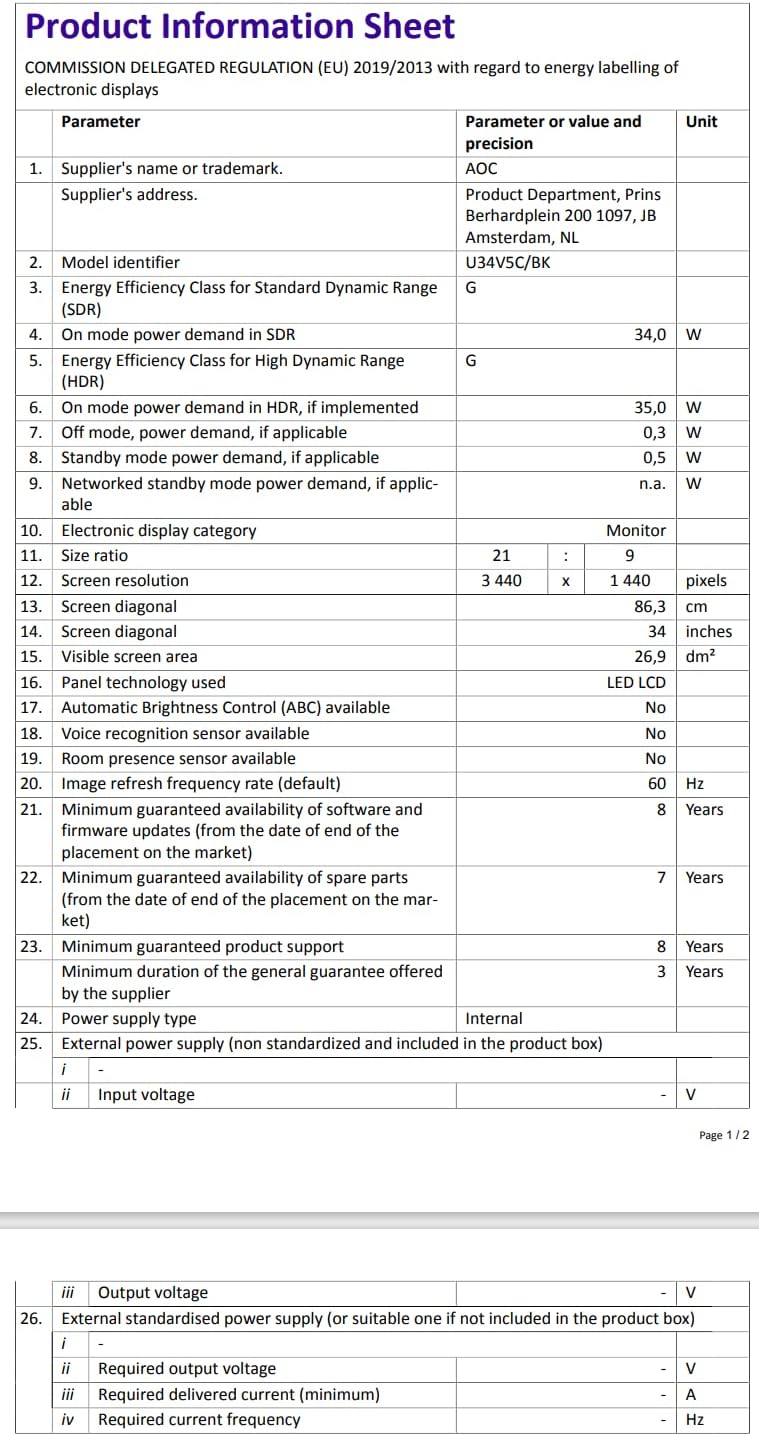
Figure 9.2: Energy Label for AOC U34V5C/BK. For more details, visit the Banca dati EPREL.
10. Garanzia e supporto
The AOC U34V5C/BK monitor comes with a minimum guaranteed general warranty of 3 anni forniti dal fornitore.
For technical support, warranty claims, or service inquiries, please visit the official AOC website or contact your local AOC customer service center. Ensure you have your monitor's model number (U34V5C/BK) and serial number ready when contacting support.