
Introduzione
Thank you for choosing the VIFLYKOO Weather Station. This device provides real-time indoor and outdoor temperature and humidity monitoring, atmospheric pressure readings, and a 12-hour weather forecast. This manual will guide you through the setup, operation, and maintenance of your weather station to ensure optimal performance.
Contenuto della confezione
Si prega di controllare il contenuto della confezione per assicurarsi che siano presenti tutti gli articoli:
- 1 x VIFLYKOO Weather Station Main Unit
- 3 sensori remoti wireless
- 1 cavo USB
- 1 x Manuale utente (multilingue)
Prodotto finitoview
Familiarize yourself with the main unit's components and controls:

This image shows the rear panel of the VIFLYKOO Weather Station main unit, highlighting key features and controls.
- Table stand hole
- Coperchio della batteria
- Max/Min reading button
- Resetting and sensor scanning button
- Data/Time setting button
- Gancio da parete
- Snooze/Light display button
- Display in °C or °F button
- Display in 12 or 24 hour format button
- Pulsante di impostazione della sveglia
- DC 5V power input socket
Impostare
1. Alimentazione dell'unità principale
The main weather station unit can be powered by either a USB cable or batteries.

This image illustrates the two power modes for the main unit (USB cable or 3 AAA batteries) and the battery compartment for the outdoor transmitter (2 AA batteries).
- Alimentazione USB: Connect the included USB cable to the DC 5V power input socket (11) on the back of the main unit and plug the other end into a USB power adapter (not included) or a computer USB port.
- Potenza della batteria: Open the battery cover (2) and insert 3 AAA batteries (not included) according to the polarity markings. When operating on batteries, the backlight will only illuminate for 8 seconds after pressing the 'Snooze/Light' button.
2. Installing Remote Sensors
Each wireless remote sensor requires 2 AA batteries (not included).
- Aprire il vano batterie sul retro di ciascun sensore remoto.
- Insert 2 AA batteries, observing the correct polarity.
- Chiudere bene il vano batterie.
3. Posizionamento del sensore
The remote sensors have a transmission range of up to 100 meters. Choose suitable locations for accurate readings.
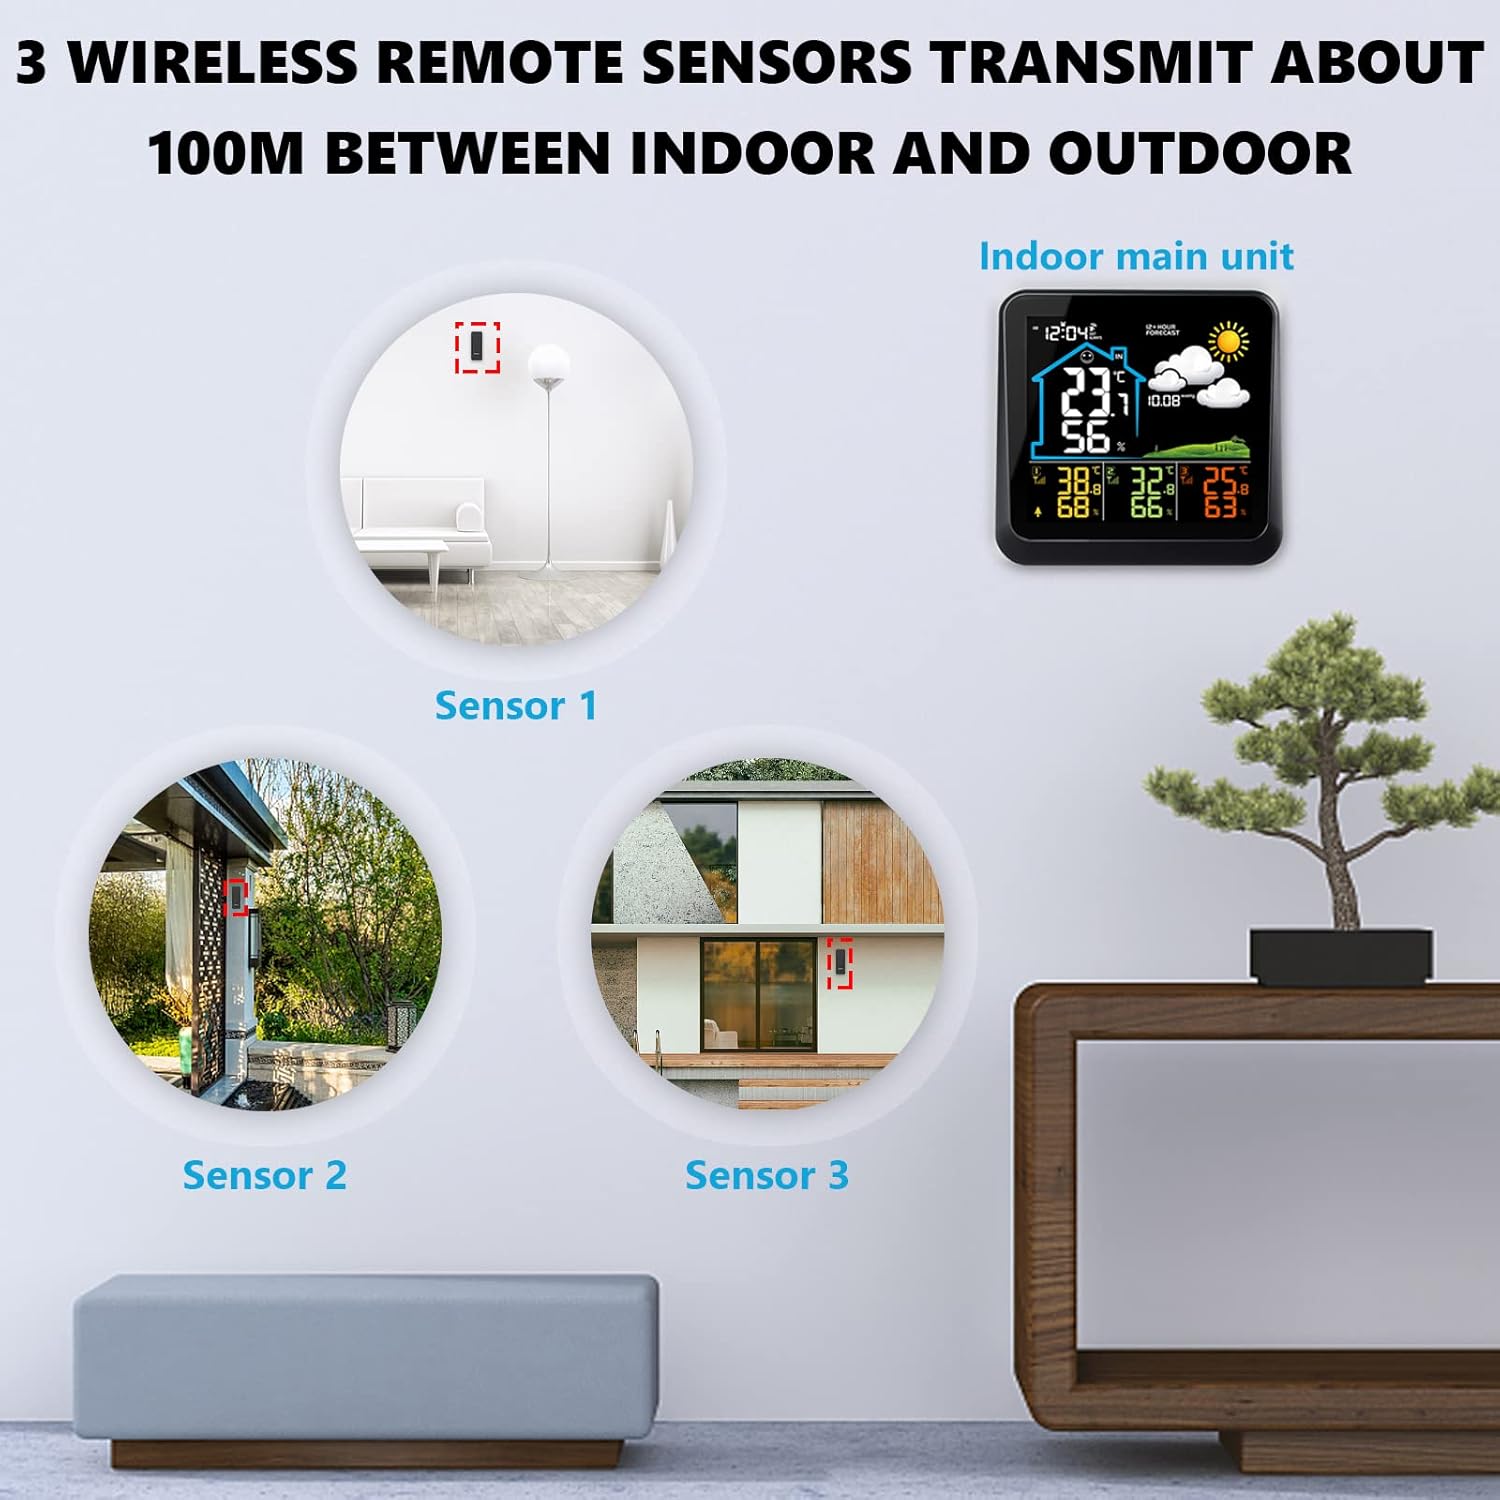
This image demonstrates suitable locations for placing the three wireless remote sensors, such as a baby's room, a wine cellar, or a garden, to monitor temperature and humidity.
- Place sensors in areas where you need to monitor temperature and humidity, such as baby rooms, wine cellars, gardens, or backyards.
- Ensure sensors are protected from direct sunlight and heavy rain for accurate outdoor readings.
- Avoid placing sensors near large metal objects or strong electromagnetic interference sources.
4. Impostazioni iniziali (ora, data, unità)
After powering on, the main unit will automatically search for the remote sensors. Once connected, you can set the time, date, and preferred units.
- Press the 'Data/Time setting' button (5) to enter time setting mode.
- Use the 'Max/Min reading' (3) and 'Resetting and sensor scanning' (4) buttons to adjust values.
- Press 'Data/Time setting' (5) again to confirm and move to the next setting (e.g., year, month, day, 12/24 hour format).
- To switch between Celsius (°C) and Fahrenheit (°F), press the 'Display in °C or °F' button (8).
- To switch between 12-hour and 24-hour time format, press the 'Display in 12 or 24 hour' button (9).
Istruzioni per l'uso
1. Caratteristiche dello schermo
The color LCD screen displays various information at a glance:
- Temperatura e umidità interna/esterna
- 12-Hour Weather Forecast
- Pressione atmosferica (hPa)
- Ora e data
- Indicatore del livello di comfort
- Indicatore della batteria
2. Impostazione della sveglia
Per impostare una sveglia:
- Press the 'Alarm setting' button (10) to enter alarm setting mode.
- Use the adjustment buttons (3, 4) to set the desired alarm time.
- Press 'Alarm setting' (10) again to confirm.
3. Snooze/Backlight Function
- Funzionamento a batteria: Press the 'Snooze/Light display' button (7) to illuminate the screen for 8 seconds.
- Funzionamento USB: Repeatedly press the 'Snooze/Light display' button (7) to cycle through low brightness, high brightness, or off modes.
- When an alarm sounds, press the 'Snooze/Light display' button (7) to activate the snooze function. The alarm will sound again after a short interval.
4. Max/Min Readings
Press the 'Max/Min reading' button (3) to view the maximum and minimum recorded temperature and humidity values. Press again to cycle through current, maximum, and minimum readings.
5. Previsioni del tempo
The station provides a 12-hour weather forecast based on atmospheric pressure trends. The forecast accuracy is approximately 75%.

This image shows the various weather forecast icons used by the station: Sunny, Freeze, Cloudy, Partly Cloudy, and Rainy.
Forecast icons include: Sunny, Sunny to Cloudy, Cloudy, Rainy, Snowy.
Note: If the weather station is moved, it may take 12 to 24 hours for the atmospheric pressure to adjust and recalculate the forecast.
6. Indoor Comfort Indicator
The display includes a comfort indicator based on indoor humidity levels:

This image displays the main unit's screen, indicating comfort levels: optimal (40-70% RH), high (70-100% RH), and low (0-40% RH).
- Ottimale: 40-70% di umidità relativa (UR)
- Alto: 70-100% UR
- Basso: 0-40% UR
Manutenzione
1. Sostituzione della batteria
- When the battery indicator appears on the main unit, replace the 3 AAA batteries.
- For remote sensors, replace the 2 AA batteries when their performance degrades.
- Sostituire sempre tutte le batterie contemporaneamente con batterie nuove dello stesso tipo.
2. Pulizia
Pulire l'unità principale e i sensori con un panno morbido e asciutto.amp panno. Non utilizzare detergenti abrasivi né immergere i dispositivi in acqua.
Risoluzione dei problemi
| Problema | Possibile causa | Soluzione |
|---|---|---|
| Nessun display sull'unità principale | Nessuna alimentazione o batterie scariche. | Connect USB power or replace AAA batteries. |
| Remote sensor not connecting / Incorrect outdoor readings | Sensor batteries low or dead; sensor out of range; interference. | Replace AA batteries in sensor. Move sensor closer to main unit. Avoid obstacles. Press 'Resetting and sensor scanning' button (4) on main unit to re-scan. |
| Display shows 'LL.L' or 'HH.H' | Temperature or humidity is outside the measurable range. | This indicates the reading is below the minimum ('LL.L') or above the maximum ('HH.H') operating range. The device is functioning as expected under extreme conditions. |
| Previsioni meteo imprecise | Station recently moved; forecast is an estimation. | Allow 12-24 hours for the station to recalibrate after moving. Forecasts are based on atmospheric pressure trends and are not 100% accurate. |
Specifiche

This image provides the physical dimensions of the main weather station unit (14.5cm x 14cm) and the remote sensor (10cm x 3.8cm).
| Caratteristica | Dettaglio |
|---|---|
| Marca | VIFLYKOO |
| Numero di modello | 3 sensore |
| Tipo di visualizzazione | LCD a colori |
| Tecnologia di connettività | Senza fili, USB |
| Fonte di alimentazione (unità principale) | Cavo USB (incluso) o 3 batterie AAA (non incluse) |
| Fonte di alimentazione (sensori remoti) | 2 batterie AA per sensore (non incluse) |
| Intervallo di temperatura interna | Da 0 °C a +50 °C (da 32 °F a 122 °F) |
| Intervallo di temperatura esterna | da -30 °C a +60 °C (da -22 °F a 140 °F) |
| Umidità ambiente | 20% al 90% di umidità relativa |
| Distanza di trasmissione wireless | Fino a 100 metri (all'aria aperta) |
| Caratteristiche speciali | 12-hour weather forecast, Max/Min records, Alarm, Snooze, Comfort indicator |
| Dimensioni dell'unità principale | Circa 14.5 cm x 14 cm |
| Dimensioni del sensore remoto | Circa 10 cm x 3.8 cm |
Garanzia e supporto
Le informazioni relative alla garanzia del prodotto e all'assistenza clienti sono in genere fornite con la documentazione di acquisto o sul sito ufficiale del produttore. websito. Per maggiori dettagli sulla copertura della garanzia, sui resi e sull'assistenza tecnica, fare riferimento a tali risorse.