
XTUGA CT120
Manuale utente del mixer audio a 12 canali XTUGA CT120
Modello: CT120
Introduzione
Thank you for choosing the XTUGA CT120 12-Channel Audio Mixer. This professional audio mixing console is designed for a wide range of applications, from live performances and webcasting to studio recording and home audio setups. It features versatile connectivity options, including Bluetooth and USB, along with precise sound control for optimal audio quality.
Please read this manual thoroughly before operating the device to ensure proper usage, maximize performance, and prevent damage.

Figura 1: Fronte view of the XTUGA CT120 12-Channel Audio Mixer, showcasing all inputs, controls, and outputs.
Precauzioni di sicurezza
To ensure safe operation and prolong the life of your XTUGA CT120 mixer, please observe the following:
- Operate the device in a well-ventilated environment, away from heat sources and open flames.
- Avoid contact with water or any liquids. Do not expose the mixer to rain or moisture.
- If the product is wireless, keep it away from other sources of interference during operation.
- Non tentare di smontare o riparare il dispositivo da soli. Per qualsiasi intervento di assistenza, rivolgersi a personale qualificato.
- For products requiring power, use only the standard power supply provided or specified. Incorrect voltage può danneggiare l'apparecchiatura.
- Avoid scratching the casing and surface of the equipment with sharp objects.

Figure 2: Important safety guidelines for handling and operating the mixer.
Impostare
Collegamento di potenza
Collegare l'adattatore di alimentazione in dotazione all'ingresso di alimentazione del mixer e quindi a una presa elettrica idonea. Assicurarsi che l'interruttore di alimentazione sia in posizione OFF prima di effettuare il collegamento.
Connessioni di ingresso
The CT120 mixer features 12 channels, each with XLR and 1/4-inch line inputs. Connect your microphones, instruments, or other audio sources to the appropriate input jacks.
- Ingressi XLR: Per microfoni e altre sorgenti audio bilanciate.
- 1/4-inch Line Inputs: For instruments, line-level devices, and unbalanced audio sources.

Figure 3: The +48V phantom power feature, essential for condenser microphones. Each channel supports independent phantom power.
Alimentazione phantom +48 V: For condenser microphones, activate the +48V phantom power switch. This supplies the necessary voltage to the microphone via the XLR cable. Ensure dynamic microphones are not connected when phantom power is engaged, unless they are designed to handle it.
Connessioni di uscita
Connect your main speakers or recording devices to the L MAIN OUT R (XLR or 1/4-inch TRS) outputs. Use the PHONES output for headphone monitoring.
Istruzioni per l'uso
Funzionamento di base
- Accensione: After all connections are made, switch on the power.
- Regolazione del guadagno: Use the GAIN knob for each channel to set the input level. Adjust until the signal is strong but does not clip (indicated by the PEAK LED).
- Volume canale: Use the channel faders to control the individual volume of each input.
- Miscela principale: Adjust the L MAIN R faders to control the overall output volume.
Equalizzazione (EQ)
Each channel features a 3-band equalizer (HI, MF, LF) for tone shaping. Adjust these knobs to enhance or cut specific frequencies:
- HI (High Frequency): Adjusts treble.
- MF (Mid Frequency): Adjusts midrange.
- LF (bassa frequenza): Adjusts bass.

Figura 4: dettagliata view of the 3-band EQ controls, allowing for precise sound adjustments for each channel.
Connettività Bluetooth
The CT120 supports wireless Bluetooth streaming. To connect a device:
- Activate Bluetooth on your mobile phone, tablet, or other smart device.
- On the mixer's digital MP3 player section, select the Bluetooth mode.
- Cercare "BT-Speaker" in your device's Bluetooth settings and pair.
- Una volta effettuato il collegamento, è possibile trasmettere l'audio in modalità wireless al mixer.

Figure 5: The mixer's Bluetooth function allows seamless wireless audio streaming from compatible smart devices.
USB/MP3 Player and Recording
The integrated USB interface allows for direct playback from USB drives and connection to a computer for recording and editing.
- Riproduzione USB: Insert a USB flash drive containing MP3/WAV/WMA files into the USB port. Use the digital MP3 player controls to navigate and play tracks.
- Connessione al computer: Connect the mixer to your computer via a USB cable. The mixer will be recognized as an audio interface, allowing you to record the mixed audio directly to your computer or play audio from your computer through the mixer.

Figure 6: The USB port enables connection to computers for recording and playback, and direct playback from USB flash drives.
Monitoraggio
Use the 3.5mm PHONES jack for real-time monitoring of your mix. Adjust the HEADPHONES volume knob to control the monitoring level.

Figure 7: The dedicated headphone output allows for real-time monitoring of the audio mix.
Indicatori di livello
The PFL/AFL and L MAIN R LED level indicators provide visual feedback on signal levels, helping you prevent clipping and ensure optimal audio output.
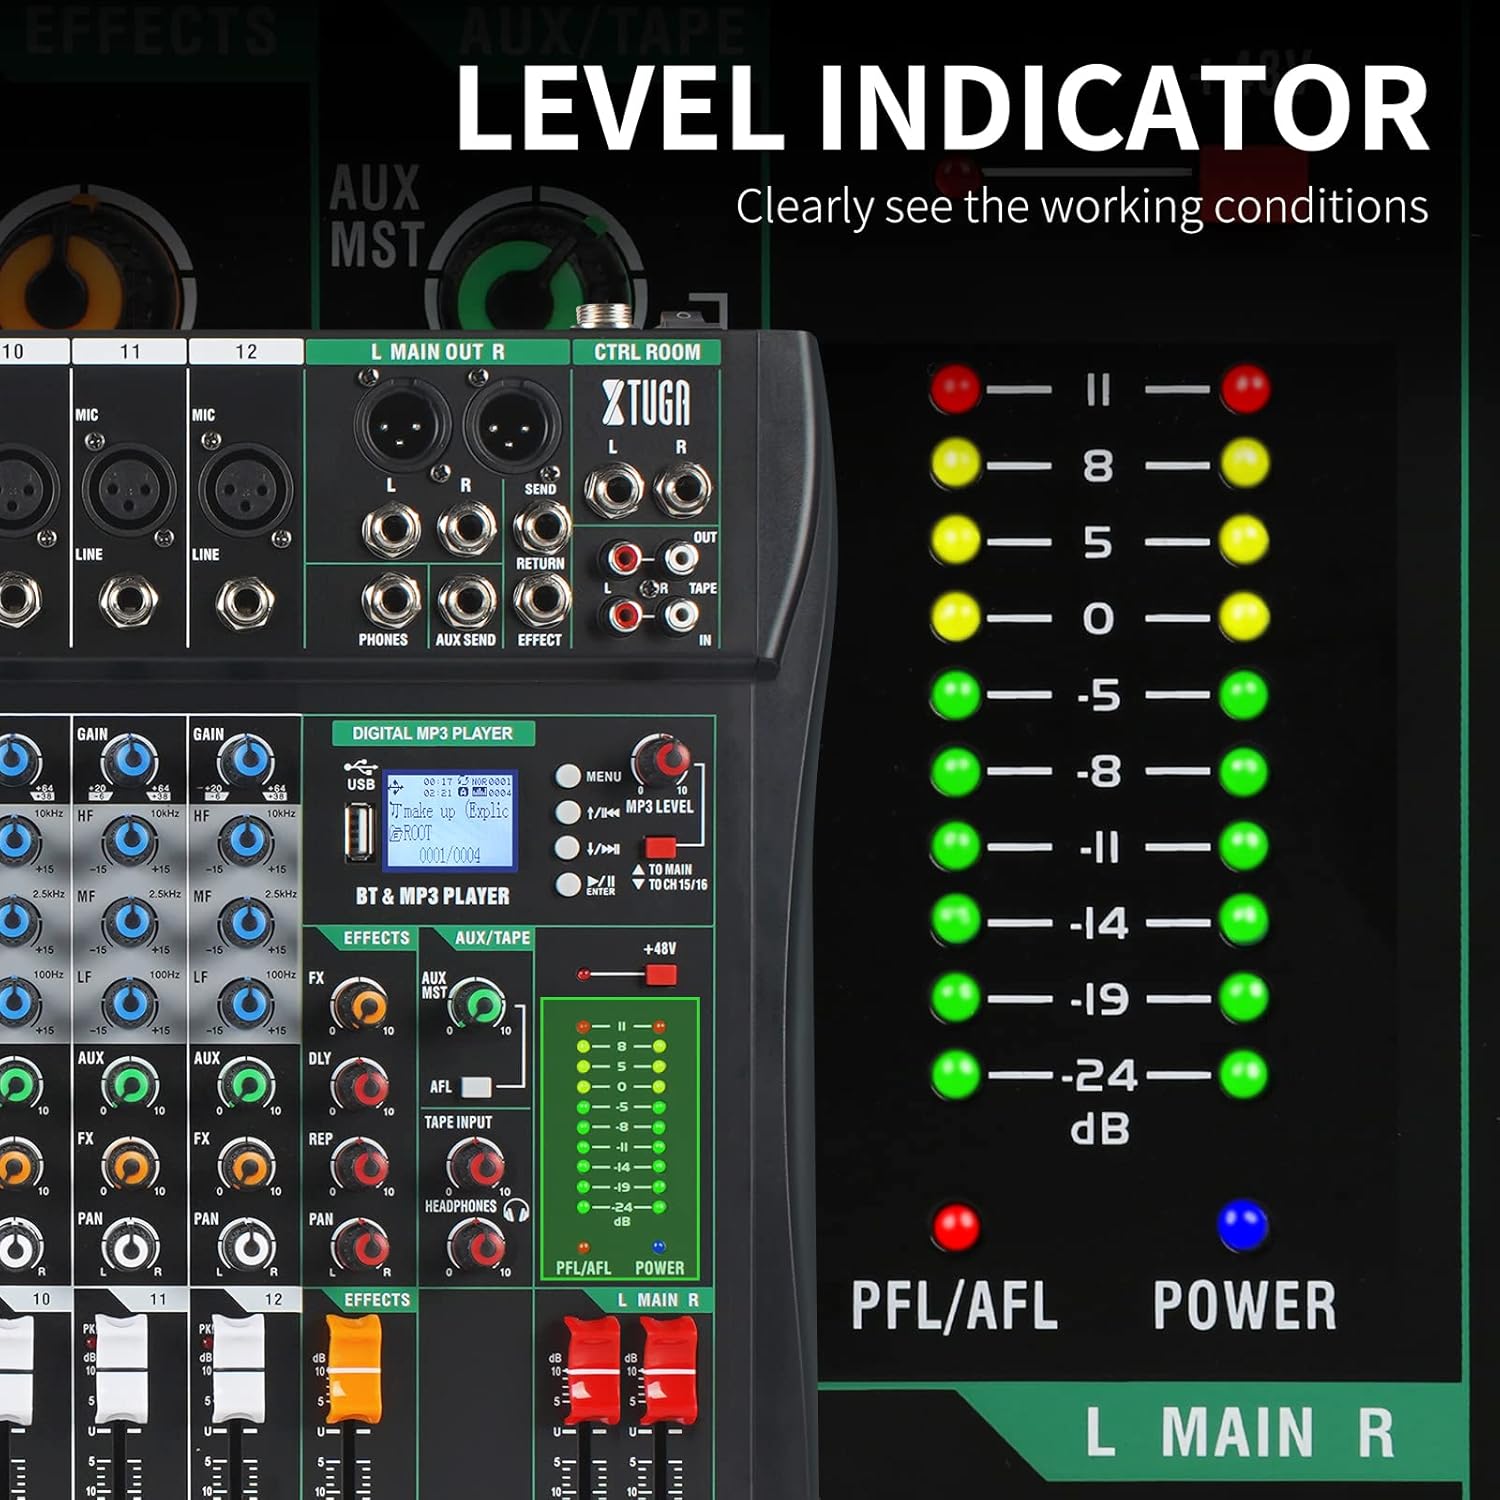
Figure 8: The LED level indicators clearly display the working conditions and signal strength of the audio output.
Manutenzione
Regular maintenance helps ensure the longevity and optimal performance of your XTUGA CT120 mixer.
- Pulizia: Utilizzare un panno morbido e asciutto per pulire l'esterno del mixer. Per lo sporco ostinato, un panno leggermente damp È possibile utilizzare un panno, seguito da un panno asciutto. Non utilizzare detergenti abrasivi, solventi o cere.
- Protezione dalla polvere: Keep the mixer covered when not in use to prevent dust accumulation, especially on faders and knobs. The sealed rotary controls are designed to resist dust, but general cleanliness is still important.
- Magazzinaggio: Store the mixer in a cool, dry place, away from direct sunlight and extreme temperatures.
- Gestione dei cavi: Ensure all cables are neatly organized and not under strain to prevent damage to the connectors and ports.
Risoluzione dei problemi
| Problema | Possibile causa | Soluzione |
|---|---|---|
| Nessun potere | Power cable not connected; Power switch off; Faulty power adapter/outlet | Check power cable connection; Ensure power switch is ON; Try a different power outlet or adapter. |
| Nessuna uscita audio | Main volume faders down; Channel faders down; Incorrect input/output connections; Mute engaged | Increase main and channel faders; Verify all audio connections; Check for any mute buttons. |
| Suono distorto | Input gain too high; Output level too high; Faulty cable/microphone | Reduce GAIN knob for the affected channel; Lower main output level; Test with different cables/microphones. |
| Il Bluetooth non si connette | Mixer not in Bluetooth mode; Device not discoverable; Interference | Ensure mixer is in Bluetooth mode; Make sure your device's Bluetooth is on and discoverable; Move closer to the mixer; Restart both devices. |
| L'alimentazione phantom non funziona | Phantom power switch off; Faulty XLR cable; Condenser microphone not connected | Ensure +48V switch is ON; Check XLR cable integrity; Confirm a condenser microphone is in use. |
Specifiche
| Caratteristica | Dettaglio |
|---|---|
| Modello | CT120 |
| Numero di canali | 12 |
| Ingressi audio | XLR, Balanced Line (1/4 inch TRS) |
| Tipo di connettore di uscita | 1/4 inch TRS jack, XLR |
| Potenza fantasma | +48V (selectable per channel) |
| Tecnologia di connettività | USB, Bluetooth |
| Fonte di alimentazione | Cavo elettrico |
| Dimensioni (confezione) | 57.29 x 45.6 x 12.2 cm (22.56 x 17.95 x 4.8 pollici) |
| Peso dell'articolo | 5.57 chilogrammi (12.28 libbre) |
| Produttore | XTUGA |
| Paese di origine | Cina |
Garanzia e supporto
For warranty information and technical support, please contact XTUGA customer service. Details regarding warranty periods and service procedures are typically provided with your purchase documentation or can be found on the official XTUGA websito.
When contacting support, please have your product model (CT120) and purchase details ready.
Risorse online: For additional support, FAQs, and driver downloads (if applicable), please visit the official XTUGA websito.
Ask a question about this manual
Ask about setup, troubleshooting, compatibility, parts, safety, or missing instructions. Manuals+ will review the question and use this page’s manual context to help answer it.