
Introduzione
This manual provides detailed instructions for the installation, operation, and maintenance of your THINKWARE X700 Dual Dash Cam. Please read this manual thoroughly before using the product to ensure proper functionality and to prevent damage.
Contenuto della confezione
Verificare che tutti gli articoli siano presenti nel pacco:
- Front X700 Dash Cam
- Telecamera posteriore
- Scheda MicroSD da 32 GB
- Caricabatteria per auto 12V
- Cavo di cablaggio
- Supporto per parabrezza
- Cavo telecamera posteriore
- Guida rapida
Prodotto finitoview
The THINKWARE X700 is a dual dash cam system designed to record both front and rear views of your vehicle in Full HD 1080p resolution. It features a 2.7-inch LCD touchscreen for easy control and playback, a G-Sensor for incident detection, and night vision capabilities for clear recordings in low light.

Figura 1: Davanti view of the THINKWARE X700 Dash Cam, showing the main lens and "FHD RECORDER" label.

Figura 2: Angolato view of the THINKWARE X700 Dash Cam, highlighting the power (PWR) and MicroSD card slots on the side.
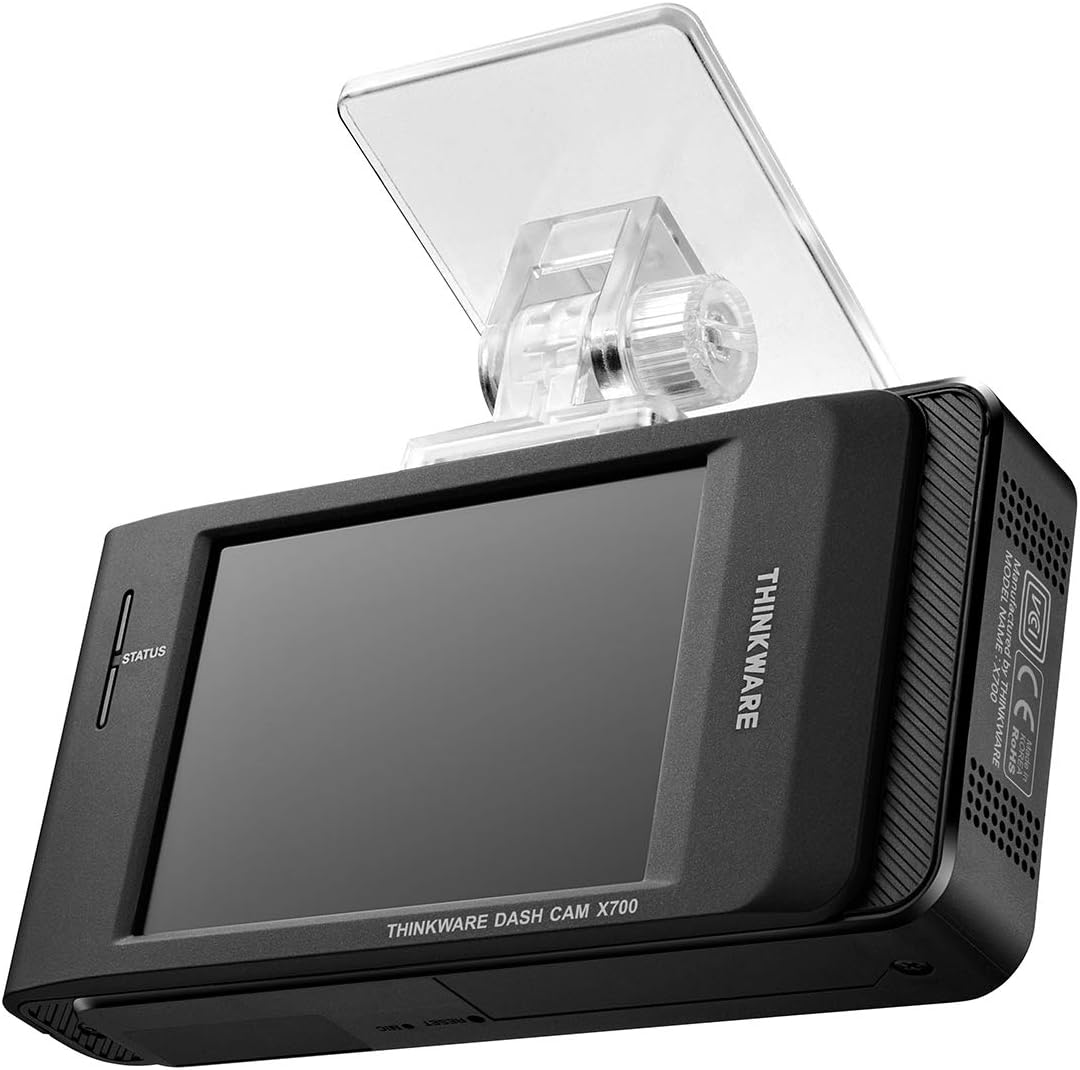
Figura 3: Posteriore view of the THINKWARE X700 Dash Cam, displaying the LCD screen and the attached windshield mount.
Impostare
1. Inserimento della scheda MicroSD
- Assicurarsi che la dash cam sia spenta.
- Individuare lo slot per la scheda MicroSD sul lato dell'unità principale.
- Insert the provided 32GB MicroSD card into the slot until it clicks into place.
- Per rimuoverla, spingere delicatamente la scheda finché non scatta fuori.
2. Montaggio della Dash Cam anteriore
- Pulisci la zona del parabrezza dove verrà montata la dash cam.
- Attach the windshield mount to the main dash cam unit.
- Rimuovere la pellicola protettiva dal cuscinetto adesivo sul supporto.
- Press the mount firmly onto the windshield, ensuring the camera has a clear view of the road and does not obstruct the driver's vision.
- Regola l'angolazione della telecamera secondo necessità.

Figura 4: The THINKWARE X700 Dash Cam installed on the windshield, positioned to capture the road ahead.
3. Collegamento della telecamera posteriore
- Montare la telecamera posteriore sul lunotto posteriore, assicurandosi che la visuale sia chiara view.
- Connect the rear camera cable to the rear camera and route the cable neatly to the front dash cam.
- Plug the other end of the rear camera cable into the designated port on the main X700 unit.
4. Collegamento elettrico
Scegli una delle seguenti opzioni di alimentazione:
- Caricabatterie per auto da 12 V: Connect the 12V car charger to your vehicle's cigarette lighter socket and the other end to the dash cam's power input. The camera will power on and off with your vehicle's ignition.
- Hardwiring Cable (for Parking Mode): For continuous recording in Parking Mode, connect the hardwiring cable to your vehicle's fuse box according to the instructions provided with the hardwiring kit (sold separately or included in some packages). Professional installation is recommended for hardwiring.
Utilizzo della Dash Cam
1. Accensione/Spegnimento
- The dash cam automatically powers on when connected to power and the vehicle ignition is on.
- It powers off automatically when the ignition is turned off (unless hardwired for Parking Mode).
- To manually power off, disconnect the power cable.
2. Modalità di registrazione
- Registrazione continua: Records continuously while driving. Older files are overwritten by newer ones when the MicroSD card is full.
- Registrazione dell'incidente: Registra e salva automaticamente footage when an impact is detected by the G-Sensor. These fileI messaggi sono protetti dalla sovrascrittura.
- Registrazione manuale: Press the manual record button to save a segment of footage manualmente.
- Modalità parcheggio (opzionale): If hardwired, the dash cam can record events while the vehicle is parked, including motion detection and impact detection.

Figura 5: The X700's LCD screen displaying recording status and menu options.
3. Using the LCD Touchscreen
The 2.7-inch LCD touchscreen allows you to:
- View cibo vivotage dalle telecamere anteriore e posteriore.
- Riproduzione di video registrati.
- Access and adjust camera settings (e.g., resolution, G-Sensor sensitivity, time zone).
- Formatta la scheda MicroSD.
4. Viewing Recorded Footage
- Sulla Dash Cam: Use the touchscreen to navigate to the playback menu and select desired videos.
- Su un computer: Remove the MicroSD card from the dash cam and insert it into a computer's card reader. Use the THINKWARE PC Viewer software (available for download from the THINKWARE website) for optimal viewing and analysis of footage, including GPS data (if applicable).
Manutenzione
1. Gestione della scheda MicroSD
- Formattazione: Regularly format the MicroSD card (at least once a month) using the dash cam's menu or the THINKWARE PC Viewer to ensure optimal performance and prevent recording errors.
- Sostituzione: MicroSD cards have a limited lifespan. Replace the card if you experience frequent recording errors or data corruption. Use high-endurance MicroSD cards designed for dash cam use.
2. Pulizia della Dash Cam
- Use a soft, dry cloth to clean the camera lens and the LCD screen.
- Do not use chemical cleaners or abrasive materials, as they may damage the surfaces.
3. Aggiornamenti del firmware
Periodically check the official THINKWARE website for firmware updates. Updating the firmware can improve performance, add new features, and resolve potential issues. Follow the instructions provided on the website for firmware update procedures.
Risoluzione dei problemi
| Problema | Possibile causa | Soluzione |
|---|---|---|
| La dash cam non si accende. | Nessuna alimentazione; cavo difettoso; problema con la presa di corrente del veicolo. | Check power cable connection. Test the 12V car charger in another vehicle or outlet. Ensure vehicle ignition is on. |
| Errori di registrazione o danneggiamento files. | MicroSD card error; card needs formatting; card lifespan expired. | Format the MicroSD card. Try a different, high-endurance MicroSD card. |
| Scarsa qualità video. | Lente sporca; pellicola protettiva ancora sulla lente; impostazioni errate. | Clean the camera lens. Ensure protective film is removed. Check video resolution settings. |
| G-Sensor not detecting incidents or too sensitive. | Incorrect G-Sensor sensitivity setting. | Adjust G-Sensor sensitivity in the dash cam settings menu. |
| Rear camera not recording. | Collegamento allentato; cavo o telecamera difettosi. | Check the rear camera cable connection to both the rear and front units. |
Specifiche
| Caratteristica | Dettaglio |
|---|---|
| Nome del modello | X700 |
| Risoluzione di acquisizione video | 1080p Full HD (Front and Rear) |
| Campo di View | 142 gradi |
| Frequenza dei fotogrammi | 30 fotogrammi al secondo |
| Caratteristiche speciali | Automatic Incident Detection, Night Vision, G-Sensor |
| Dimensioni dello schermo | 2.7 pollici |
| Tipo di visualizzazione | LCD |
| Metodo di controllo | Tocco |
| Tipo di memoria flash | MicroSD (32GB included) |
| Tipo di montaggio | Supporto per parabrezza |
| Dimensioni del prodotto | Dimensioni: 10 x 5.4 x 2.9 cm |
| Peso | 610 grammi |
Garanzia e supporto
THINKWARE products are covered by a limited warranty. For specific warranty terms and conditions, please refer to the warranty card included in your package or visit the official THINKWARE websito.
For technical support, frequently asked questions, and driver/firmware downloads, please visit the official THINKWARE support page: