1. Introduzione
This manual provides detailed instructions for the installation, operation, and maintenance of the RHOX Red Hawk LGT-143A Turn Signal Switch with Flasher Relay. This product is designed to provide turn signal functionality for compatible golf carts. Please read this manual thoroughly before installation and use to ensure proper function and safety.
2. Prodotto finitoview
The Red Hawk LGT-143A is a turn signal switch assembly that includes an integrated flasher relay. It is designed as a replacement or upgrade component for golf carts, providing essential signaling capabilities for safe operation. The unit is engineered for reliable performance and ease of integration.
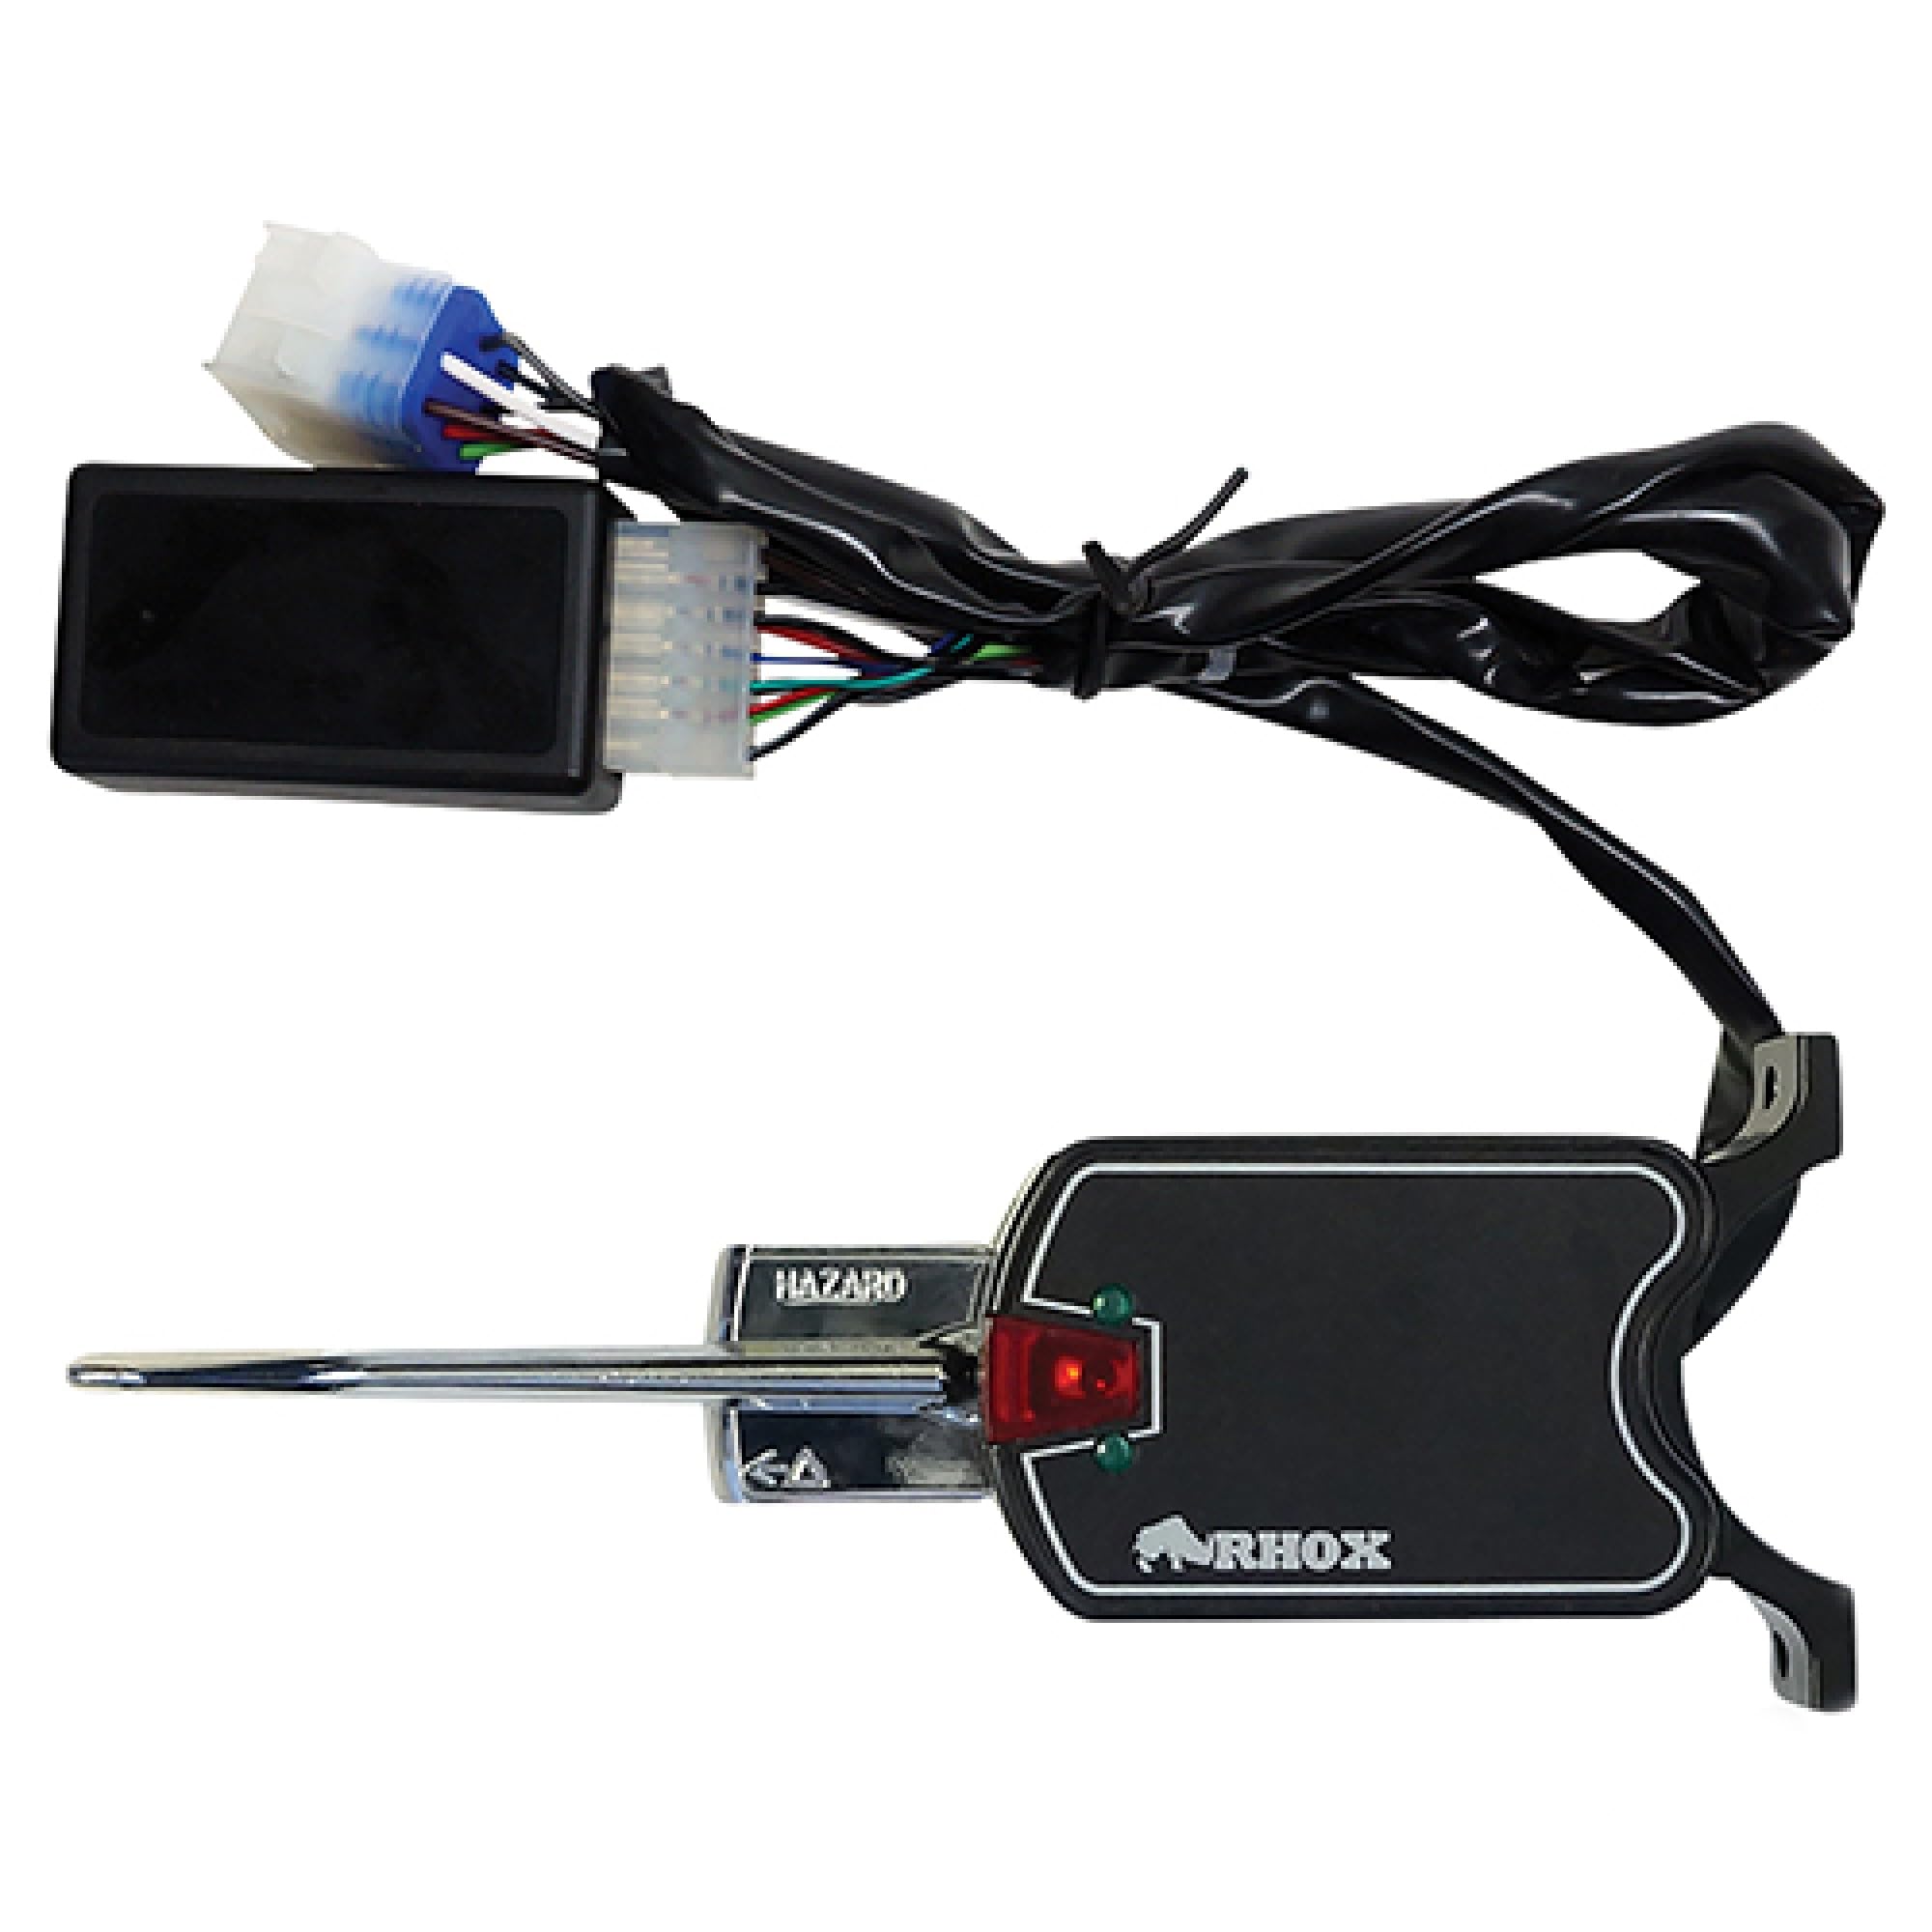
Image showing the Red Hawk LGT-143A turn signal switch and its integrated flasher relay.
3. Informazioni sulla sicurezza
- Always disconnect the golf cart's battery before performing any electrical work to prevent electrical shock or damage.
- Assicurarsi che tutti i collegamenti siano sicuri e adeguatamente isolati per evitare cortocircuiti.
- In caso di dubbi su una qualsiasi fase dell'installazione, consultare un tecnico qualificato.
- Durante l'installazione indossare adeguati dispositivi di protezione individuale (DPI).
4. Contenuto della confezione
Verificare che tutti gli elementi siano presenti prima di iniziare l'installazione:
- 1 x Red Hawk LGT-143A Turn Signal Switch with Flasher Relay
- Mounting hardware (clamps, screws, washers) - Based on typical inclusions for similar products.

Image displaying the mounting clamps and screws typically included for securing the turn signal switch to a golf cart steering column.
5. Installazione
The Red Hawk LGT-143A is often described as a 'plug and play' component for compatible golf cart models. However, specific wiring may vary depending on your golf cart's make and model. Always refer to your golf cart's service manual for detailed wiring diagrams.
Passaggi generali di installazione:
- Scollegare la batteria: Turn off the golf cart and disconnect the negative terminal of the battery to prevent electrical hazards.
- Individuare la posizione di montaggio: Identify a suitable location on the steering column or dashboard for the turn signal switch.
- Montare l'interruttore: Use the provided mounting hardware (clamps and screws) to securely attach the turn signal switch to the chosen location. Ensure it does not interfere with steering or other controls.
- Collegare il cablaggio: Connect the wiring harness from the LGT-143A switch to the golf cart's existing wiring. This typically involves connecting to the main power, ground, and individual turn signal wires (front left, front right, rear left, rear right). If your golf cart has a dedicated harness for turn signals, this may be a direct plug-in connection.
- Connessioni sicure: Assicurarsi che tutti i collegamenti elettrici siano ben saldi e adeguatamente isolati.
- Ricollegare la batteria: Ricollegare il terminale negativo della batteria.
- Funzionalità di prova: Turn on the golf cart and test the turn signals (left, right, and hazard if applicable) to ensure they are working correctly.
6. Istruzioni per l'uso
To operate the turn signal switch:
- Svolta a sinistra: Push the turn signal lever down. The left turn signal lights will flash.
- Svolta a destra: Push the turn signal lever up. The right turn signal lights will flash.
- Cancel Turn: Return the lever to the center position to turn off the signal.
- Hazard Lights (if applicable): Some models may include a separate button or a specific lever position for hazard lights. Consult your golf cart's manual for details.
7. Manutenzione
The Red Hawk LGT-143A Turn Signal Switch requires minimal maintenance:
- Ispezione regolare: Periodically check the switch and its wiring for any signs of wear, damage, or loose connections.
- Pulizia: Keep the switch free from dirt and debris. Use a soft, dry cloth for cleaning. Avoid using harsh chemicals or abrasive cleaners.
- Flasher Relay: The flasher relay is integrated. If turn signals stop flashing, check the bulbs first. If bulbs are functional, the flasher relay may need replacement.
8. Risoluzione Dei Problemi
| Problema | Possibile causa | Soluzione |
|---|---|---|
| Turn signals do not light up. | No power, loose connection, faulty bulb, faulty switch. | Check battery connection. Verify all wiring connections. Inspect turn signal bulbs. Test the switch for continuity. |
| Turn signals light up but do not flash. | Faulty flasher relay, incorrect bulb type (e.g., LED without compatible flasher). | The LGT-143A has an integrated flasher. If bulbs are good, the flasher relay within the switch may be faulty. Ensure correct bulb types are used. |
| Turn signals flash too fast or too slow. | Incorrect flasher relay, incorrect bulb wattage. | The LGT-143A has a specific flasher. Verify all bulbs are of the correct wattage for your golf cart system. |
| Switch lever is loose or unresponsive. | Usura o danni meccanici. | The switch may need to be replaced. |
9. Specifiche
- Modello: LGT-143A
- Tipo: Turn Signal Switch with Flasher Relay
- Sostituisce i numeri OEM: Red Hawk: LGT-143A, Red Hawk: LGT-143
- Dimensioni del prodotto: Circa 10.2 x 3.9 x 3.5 pollici
- Peso dell'articolo: Circa 1.4 libbre
- Produttore: Red Hawk
10. Garanzia e supporto
Questo prodotto viene fornito con un Politica di reso di 30 giorni e un Garanzia di 1 anno. If the product is not what you expected, it may be returned within 30 days for a refund, provided it is in its original packaging and good condition. Outside of 30 days, the manufacturer will replace the item anytime within one year of your order.
For technical support or warranty claims, please contact the retailer or manufacturer directly. Ensure you have your purchase details and product model number (LGT-143A) available.