
1. Prodotto finitoview
The VEVOR Sewer Camera (Model WP9600F) is a professional pipeline inspection system designed for examining sewer lines, drain pipes, and other hard-to-reach areas. It features a 9-inch 720p LCD screen, a 1-megapixel IP68 waterproof camera with 12 adjustable LED lights, and a 300 ft (91.5 m) semi-rigid cable. The system includes DVR functionality for recording video and capturing photos, stored on a 16 GB SD card. A 4500mAh lithium battery provides up to 6 hours of continuous operation.

Image: The VEVOR Sewer Camera system, showing the monitor, control unit, and cable reel.
2. Componenti e caratteristiche
- Schermo LCD da 9 pollici 720p: Provides clear and vivid images for detailed inspection.
- Telecamera impermeabile IP68: Equipped with a 1-megapixel sensor and 12 adjustable LED lights for illumination in dark environments. Features a 303 stainless steel housing and sapphire lens for durability.
- 300 ft (91.5 m) Semi-Rigid Cable: Flexible yet robust cable with length markings for accurate distance measurement. Includes a cable reel for organized storage and deployment.
- Funzionalità DVR: Allows for video recording and photo capture.
- 16 GB SD Card: Included for storing inspection footage e immagini.
- Batteria al litio da 4500 mAh: Offers up to 6 hours of continuous working time.
- Design compatto e portatile: Housed in a durable case for easy transport and protection.

Image: The 9-inch 720p LCD monitor with controls and an inserted 16GB SD card.

Image: The IP68 waterproof camera head with 12 adjustable LED lights for dark spaces.
3. Istruzioni per l'installazione
- Disimballare i componenti: Carefully remove all items from the packaging. Verify that all listed components are present: camera unit, monitor, cable reel, battery, 2 camera covers, 16GB SD card, and power adapter.
- Mettere in carica la batteria: Connect the power adapter to the battery unit and a power outlet. Ensure the battery is fully charged before initial use. The battery provides approximately 6 hours of operation.
- Assemble System:
- Place the monitor unit securely on the cable reel frame.
- Connect the camera cable from the reel to the designated input on the monitor/control unit.
- Insert the 16GB SD card into the designated slot on the monitor unit.
- Accensione: Premere il pulsante di accensione sull'unità monitor per accendere il sistema.
- Impostazioni iniziali: Adjust language, brightness, and other display settings as needed using the control buttons on the monitor.
Video: Official VEVOR 9-inch Sewer Camera Operation Guide. This video demonstrates the setup and basic operation of the camera system.
4. Istruzioni per l'uso
4.1 Installazione della telecamera
- Prepare Inspection Area: Ensure the access point to the pipe is clear and safe.
- Inserisci telecamera: Carefully feed the camera head into the pipe. Use the cable reel to control the cable's length and direction.
- Monitor Footage: Observe the live video feed on the 9-inch LCD screen.
- Regola le luci a LED: Use the adjustment knob on the control unit to increase or decrease the brightness of the 12 LED lights on the camera head for optimal visibility in dark pipes.
- Navigare: Gently push and guide the cable through the pipe. The semi-rigid cable allows for navigation around bends. Avoid bending the cable more than 90 degrees sharply to prevent damage.
- Read Length Markings: The cable features clear length markings to help estimate the distance the camera has traveled into the pipe.
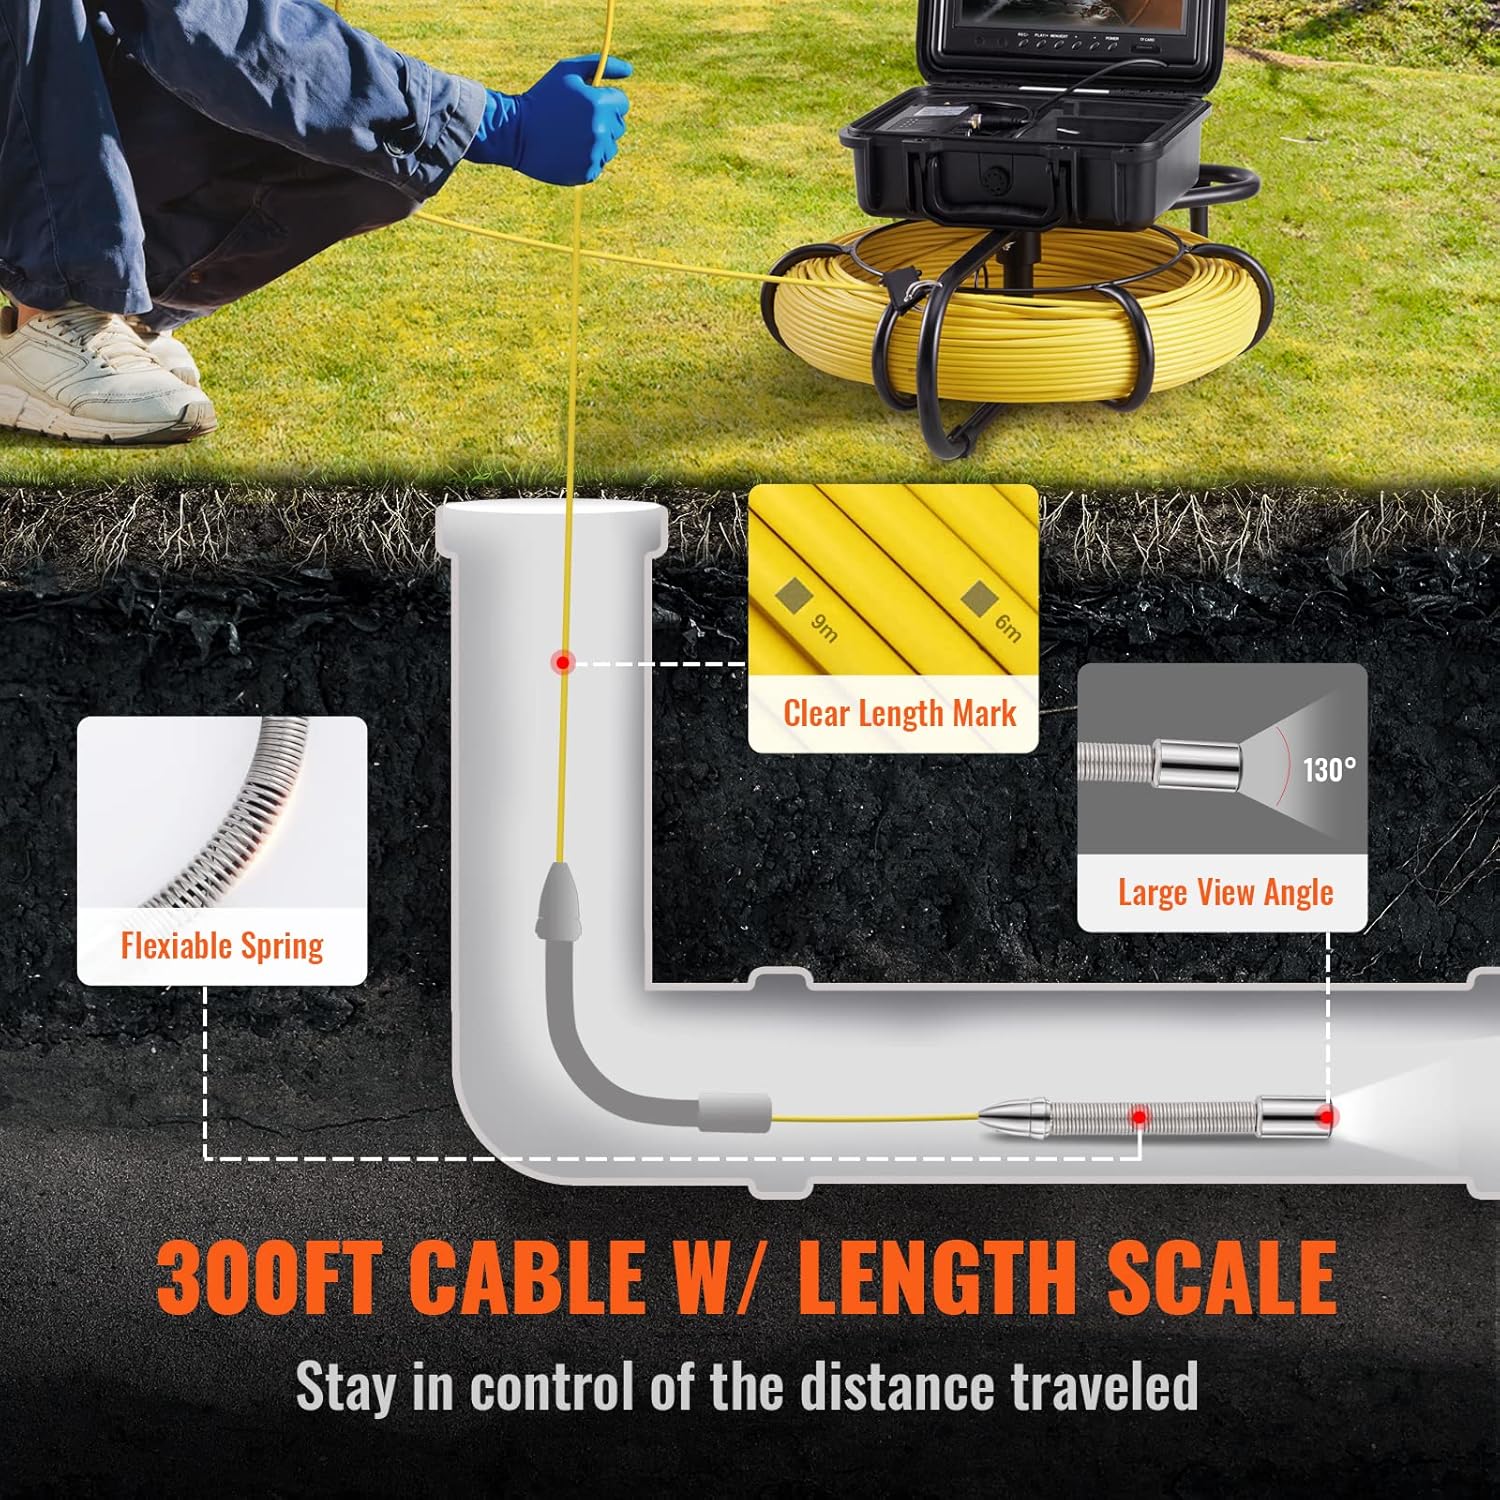
Image: Demonstrates feeding the camera cable into a pipe, highlighting the length markings.
Video: VEVOR 9" 720p Pipe Inspection Camera in action. This video shows the camera being used for pipe inspection.
4.2 Recording and Capturing
- Avvia la registrazione: Press the "REC/-" button on the monitor to begin video recording. Press it again to stop.
- Cattura foto: Use the designated button (often labeled "PHOTO" or similar) to capture still images during inspection.
- Review Pippotage: Access the recorded videos and photos via the menu options on the monitor.
- Trasferimento dati: Per trasferire files, remove the SD card and insert it into a computer, or connect the monitor unit to a computer via USB (if supported).

Image: Illustration of transferring recorded data from the SD card to a computer for analysis.
5. Manutenzione
- Pulizia della testa della telecamera: After each use, especially in dirty environments, gently clean the camera lens and housing with a soft, damp stoffa. Evitare detergenti abrasivi.
- Cura del cavo: Wind the cable neatly onto the reel after use. Avoid kinks or sharp bends that could damage the internal wiring.
- Pulizia del monitor: Wipe the screen with a soft, lint-free cloth. Do not use harsh chemicals.
- Manutenzione della batteria: Store the battery in a cool, dry place. If not used for extended periods, charge it periodically to maintain battery health.
- Magazzinaggio: Store the entire system in its protective case in a dry, temperature-controlled environment to prevent damage.
6. Risoluzione Dei Problemi
| Problema | Possibile causa | Soluzione |
|---|---|---|
| Nessuna immagine sullo schermo |
|
|
| Scarsa qualità dell'immagine |
|
|
| Cannot record video/photos |
|
|
| Durata breve della batteria |
|
|
7. Specifiche
| Caratteristica | Dettaglio |
|---|---|
| Numero di modello | WP9600F |
| Dimensioni dello schermo | 9 pollici |
| Risoluzione di acquisizione video | Formato: 720p |
| Risoluzione del sensore fotografico | 1 MP |
| Lunghezza del cavo | 300 piedi (91.5 m) |
| Diametro della telecamera | 0.9 pollici (23 mm) |
| Livello di resistenza all'acqua | IP68 impermeabile |
| Luci LED | 12 LED regolabili |
| Capacità della batteria | 4500mAh |
| Durata media della batteria | 6 ore |
| Tipo di supporto | SD Card (16 GB included) |
| Formato di acquisizione video | MP4 |
| File Format (Photos) | Formato JPEG |
| Tecnologia di connettività | USB |
| Peso dell'articolo | 20.9 libbre |
| Dimensioni dell'articolo (P x L x A) | 5.9"P x 12.6"L x 20"A |
8. Garanzia e supporto
This VEVOR Sewer Camera (Model WP9600F) comes with a Garanzia di 2 anno. For warranty claims, technical assistance, or any questions regarding the product, please contact VEVOR customer support. You can find contact information on the official VEVOR websito o tramite la tua piattaforma di acquisto.
Per ulteriori risorse e informazioni sul prodotto, visita il negozio ufficiale VEVOR: Negozio VEVOR su Amazon.