
1. Introduzione
This manual provides detailed instructions for the safe and effective operation of your VETEK A06-2 8K Camcorder. Please read this manual thoroughly before using the device to ensure proper functionality and to prevent damage. This camcorder is designed for amateur use and may not include advanced professional features such as autofocus or optical zoom.

Image: The VETEK A06-2 8K Camcorder, showcasing its 8K Ultra HD video resolution, 48.0 megapixels still image recording, 3.0-inch IPS touch screen, and WiFi capabilities. The camera is positioned against a backdrop of mountains.
2. Contenuto della confezione
Verifica che tutti gli articoli elencati di seguito siano inclusi nel tuo pacchetto:
- VETEK A06-2 8K Camcorder
- 2 batterie ai polimeri di litio
- Cavo USB
- Manuale dell'utente (questo documento)
3. Prodotto finitoview
3.1 Componenti della fotocamera

Image: A diagram illustrating the front and top controls of the VETEK A06-2 camcorder. Key components include the Power/OK button, Mode button, UP/WiFi button, Menu button, DOWN button, Built-in flash, Built-in microphone sound, and IR Night Vision Function.
- Pulsante di accensione/OK: Used to power on/off the camera and confirm selections. Short press to display night vision or built-in flash functions. Long press to shut down.
- Pulsante MODE: Switches between different camera modes.
- Pulsante SU/WiFi: Navigates up in menus or activates WiFi function.
- Pulsante MENU: Accesses the camera's menu settings.
- Pulsante GI: Consente di navigare verso il basso nei menu.
- Flash integrato: Provides illumination for photos and videos in low light.
- Microfono incorporato: Cattura l'audio.
- IR Night Vision Function: Enables recording in low-light or dark conditions.

Image: A diagram illustrating the side ports and controls of the VETEK A06-2 camcorder. Key components include the Zoom Key, Quick photo key, Hot boots, Fast video key, Microphone interface, HDMI interface, and USB interface.
- Tasto Zoom: Regola il livello dello zoom digitale.
- Quick Photo Key: Scatta una fotografia.
- Slitta a contatto caldo: For attaching external accessories like microphones or lights.
- Fast Video Key: Quickly starts video recording.
- Interfaccia microfono: Connects an external microphone for improved audio.
- Interfaccia HDMI: Connects the camera to a TV or monitor for playback.
- Interfaccia USB: Connects to a computer for charging, data transfer (storage mode), or webcam functionality (PC camera mode).
4. Impostazione
4.1 Installazione e ricarica della batteria
The camcorder uses Lithium Polymer batteries. Ensure batteries are fully charged before first use.

Image: A visual representation of the two charging methods for the VETEK A06-2 camcorder batteries. One method shows batteries being charged in an external dual charger, and the other shows a battery installed in the camera being charged via a USB cable.
- Installa la batteria: Open the battery compartment and insert the battery according to the polarity indicators.
- Metodi di ricarica:
- Use the dual charger to charge the batteries directly.
- Install a battery in the camera and connect the camera to a power source using the provided USB cable.
4.2 Installazione della scheda di memoria
The camcorder supports SD flash memory cards (4-128GB SD Card Class 10 or higher recommended). A memory card is required for recording.
- Individuare lo slot della scheda di memoria sulla fotocamera.
- Inserire la scheda SD con i contatti metallici rivolti nella direzione corretta finché non scatta in posizione.
- For first-time use, format the memory card through the camera's menu settings. This ensures compatibility and optimal performance.
5. Istruzioni per l'uso
5.1 Funzionamento di base
- Accensione/spegnimento: Long press the Power/OK button to turn the camera on or off.
- Selezione della modalità: Press the MODE button to switch between video recording, photo taking, and playback modes.
- Navigazione nel menu: Use the MENU button to access settings. Use the UP/WiFi and DOWN buttons to navigate, and the Power/OK button to confirm.
5.2 Registrazione video
Assicurarsi che la telecamera sia in modalità di registrazione video.
- Press the Fast Video Key or the Power/OK button to start recording.
- Premere nuovamente lo stesso pulsante per interrompere la registrazione.
- The camcorder records in 8K video resolution.

Image: A visual demonstrating the ULTRA HD 8K video resolution and 48MP image resolution capabilities of the VETEK A06-2 camcorder. It also highlights the 18x digital zoom feature with comparative shots.
5.3 Scattare foto
Ensure the camera is in photo taking mode.
- Press the Quick Photo Key to capture a still image.
- The camcorder supports 48MP image resolution.

Image: Three sequential images demonstrating time-lapse photography with the VETEK A06-2 camcorder, showing options for 2-second, 5-second, and 10-second intervals.
5.4 Visione notturna
The camera features IR Night Vision for recording in low-light conditions.
- Short press the Power/OK button to activate the night vision function.
- The camera will record in black and white in night vision mode.

Image: The VETEK A06-2 camcorder displaying an image captured using its IR Night Vision feature, showing a vivid black and white scene in the dark.

Image: A split image comparing the view from the VETEK A06-2 camcorder in Night Vision mode (left, monochrome) versus Normal mode (right, color) of a city skyline at night.
5.5 Connessione Wi-Fi
The camcorder features built-in WiFi for remote control and sharing.
- Press the UP/WiFi button to activate the WiFi function.
- Connect your smartphone or tablet to the camera's WiFi network.
- Use the dedicated app to control the camera remotely and share photos/videos.

Image: The VETEK A06-2 camcorder on a tripod, being controlled remotely by a smartphone and a physical remote control, demonstrating its WiFi connectivity for sharing content on social media.

Image: A user interacting with the VETEK A06-2 camcorder's touch screen while a smartphone displays the camera's WiFi connection interface and live view, illustrating remote control via an app.
5.6 WebFunzione camma
La videocamera può essere utilizzata come webcam per videochiamate e streaming live.
- Collega la fotocamera al computer tramite il cavo USB.
- Select "PC camera mode" when prompted on the camera screen.
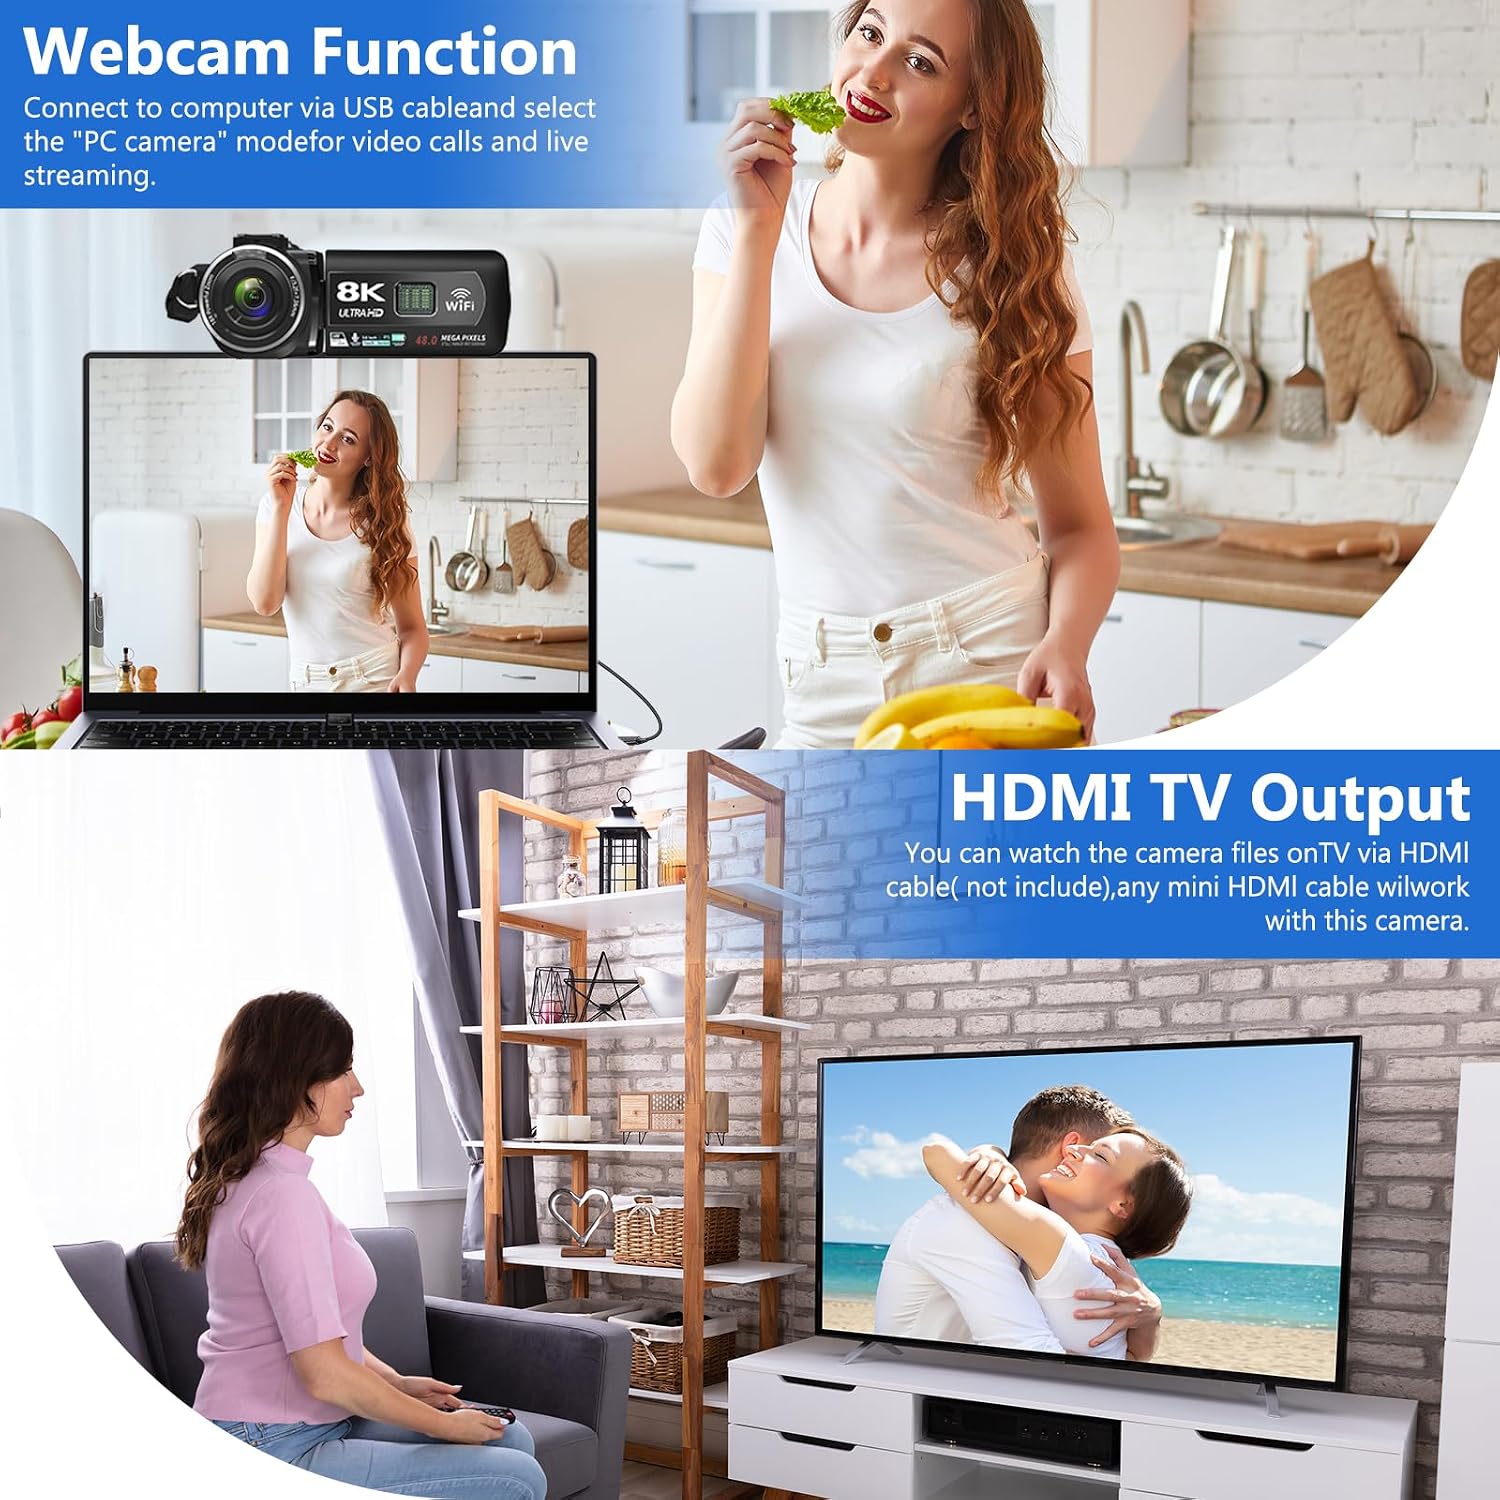
Image: The VETEK A06-2 camcorder connected to a laptop via USB, demonstrating its webcam function for video calls. Below, the camera is connected to a television via HDMI for viewing recorded content.
5.7 HDMI TV Output
View i tuoi video e le tue foto registrati su uno schermo più grande.
- Connect the camera to a TV or monitor using an HDMI cable (not included).
- Selezionare l'ingresso HDMI appropriato sulla TV.

Image: The VETEK A06-2 camcorder connected to a large television screen via an HDMI cable, showing content from the camera being displayed on the TV for a family to watch.
5.8 Riduzione del rumore
The camcorder includes a built-in noise reduction function to improve audio quality.
- Activate the noise reduction function in the camera's settings menu.
- For enhanced audio, an external microphone can be connected to the microphone interface.

Image: A woman playing a guitar, with a VETEK A06-2 camcorder recording her. Text indicates that the camera's built-in noise reduction and external microphone support help improve audio quality.
6. Manutenzione
6.1 Pulizia
- Per pulire il corpo della fotocamera, utilizzare un panno morbido e asciutto.
- Per la pulizia delle lenti, utilizzare un panno e una soluzione specifici per la pulizia delle lenti. Evitare di toccare direttamente le lenti.
6.2 Conservazione
- Conservare la fotocamera in un luogo fresco e asciutto, lontano dalla luce solare diretta e da temperature estreme.
- Rimuovere le batterie se si prevede di non utilizzare la fotocamera per un periodo prolungato.
7. Risoluzione Dei Problemi
Se riscontri problemi con la videocamera, fai riferimento ai seguenti problemi comuni e alle relative soluzioni:
| Problema | Possibile causa | Soluzione |
|---|---|---|
| La fotocamera non si accende. | La batteria è scarica o non è installata correttamente. | Caricare la batteria o reinstallarla correttamente. |
| Impossibile registrare video/scattare foto. | La scheda di memoria è piena, non è inserita o non è formattata. | Insert a memory card, format it, or delete unnecessary files. |
| Scarsa qualità delle immagini/video. | Insufficient lighting, dirty lens, or shooting too close. | Ensure adequate lighting, clean the lens, and maintain a shooting distance of over 1.5m/4ft. |
| Problemi di connessione WiFi. | Incorrect password or app issues. | Verify WiFi password, restart camera and device, or reinstall the app. |
Se il problema persiste, contattare l'assistenza clienti.
8. Specifiche
| Caratteristica | Dettaglio |
|---|---|
| Marca | VETEK |
| Numero di modello | A06-2 |
| Risoluzione di acquisizione video | 8K |
| Tecnologia del sensore fotografico | CMOS |
| Risoluzione dell'immagine | 48 Megapixel |
| Dimensioni dello schermo | 3 pollici |
| Tecnologia di connettività | USB, Wi-Fi |
| Tipo di memoria flash | SD (Supports 4-128GB Class 10 or higher) |
| Caratteristiche speciali | Face Detection, Night Vision, Anti-Shake, Image Stabilization, Time Lapse, Low Light, Noise Reduction |
| Batterie | 2 batterie ai polimeri di litio (incluse) |
| Dimensioni del prodotto | 5.12 x 2.36 x 2.17 pollici |
| Peso dell'articolo | 2.2 libbre |
9. Note importanti
- This camcorder is designed for amateurs and does not feature autofocus or optical zoom.
- The camera does not have a focus function. Maintain a shooting distance above 1.5m (4ft) for clear pictures or videos.
- After recording video, check the video effect on a computer. Checking it on the camera reduces the resolution of the video.
- To connect to a computer, use the digital cable provided, select the storage method, and then view the video on the computer.

Image: A graphic titled 'Warm Tips' reiterating key usage instructions such as reading the manual, the camera being for amateurs, lack of autofocus, checking video on a computer, maintaining shooting distance, and formatting the memory card.
10. Assistenza clienti
For any questions, technical assistance, or warranty claims, please contact VETEK customer service. All products are eligible for a free return within 30 days of purchase.

Image: A smiling customer service representative wearing a headset, indicating 24-hour customer service availability.