
Introduzione
This manual provides detailed instructions for the safe and efficient installation, operation, and maintenance of your Kanto DML1000 Single Monitor Desktop Arm. Please read this manual thoroughly before installation and retain it for future reference.
Informazioni importanti sulla sicurezza
AVVERTIMENTO: Failure to read and follow these instructions may result in serious personal injury, property damage, or voiding of your warranty. If you do not understand these instructions or have doubts about the safety of the installation, please contact Kanto Customer Support.
- Do not install this product if the desk surface is not structurally sound or if there are hidden obstructions such as electrical wiring or plumbing.
- Ensure the monitor weight and size are within the specified limits (17" to 34" monitors, up to 22.1 lbs / 10 kg). Exceeding these limits may result in instability and potential injury.
- Always use two people for lifting and positioning the monitor during installation to prevent injury.
- Stringere saldamente tutte le viti, ma non eccessivamente. Un serraggio eccessivo può danneggiare le viti o la superficie di montaggio.
- Tenere tutte le piccole parti e i materiali di imballaggio fuori dalla portata dei bambini.
Contenuto della confezione
Verify that all components are present and undamaged before beginning installation. If any parts are missing or defective, contact Kanto Customer Support.

Immagine: Oltreview of the Kanto DML1000 monitor stand and its main components.
Il tuo pacchetto dovrebbe includere:
- Gruppo braccio monitor
- Scrivania Clamp Assemblea
- Hardware per montaggio passacavo
- Piastra per monitor VESA
- Clip di gestione dei cavi
- Assorted Screws and Washers for Monitor Attachment
- Hex Keys for Adjustment
Configurazione e installazione
The DML1000 offers two installation methods: desk clamp e montaggio tramite occhiello. Scegli il metodo più adatto alla tua scrivania.
1. Scrivania Clamp Installazione
- Fissare la scrivania clamp to the main pole of the monitor arm.
- Position the monitor arm assembly on the edge of your desk. Ensure the desk thickness is between 0.4" and 2.8" (10mm and 70mm).
- Stringere la clamp avvitare fino a quando il braccio non è saldamente fissato alla scrivania. Non stringere eccessivamente.
2. Installazione del supporto passacavo
- If your desk has a grommet hole, insert the grommet bolt through the hole from the top.
- From underneath the desk, attach the grommet plate and tighten the nut onto the bolt until the arm is secure.
3. Fissaggio del monitor
The DML1000 features a detachable VESA monitor plate for easier installation.

Image: VESA mounting plate showing 75mm and 100mm hole patterns.

Image: Illustration of the detachable monitor plate and desk clamp/opzioni di montaggio tramite passacavo.
- Remove the VESA plate from the monitor arm by sliding it upwards.
- Attach the VESA plate to the back of your monitor using the appropriate screws and washers provided. Ensure your monitor has VESA 75x75mm or 100x100mm mounting holes.
- With assistance, carefully slide the monitor (with the attached VESA plate) onto the monitor arm until it clicks securely into place.
Istruzioni per l'uso
The DML1000 allows for various adjustments to achieve an ergonomic viewesperienza di acquisizione.
Regolazione dell'altezza

Image: Monitor arm showing the height adjustment lever and 360° rotation capability.
To adjust the monitor height, loosen the toolless lever on the main pole. Move the monitor arm up or down to your desired height (between 5.1" and 16.7" / 13cm and 42cm from the desk surface). Tighten the lever firmly to secure the position.
Tilt and Swivel Adjustment
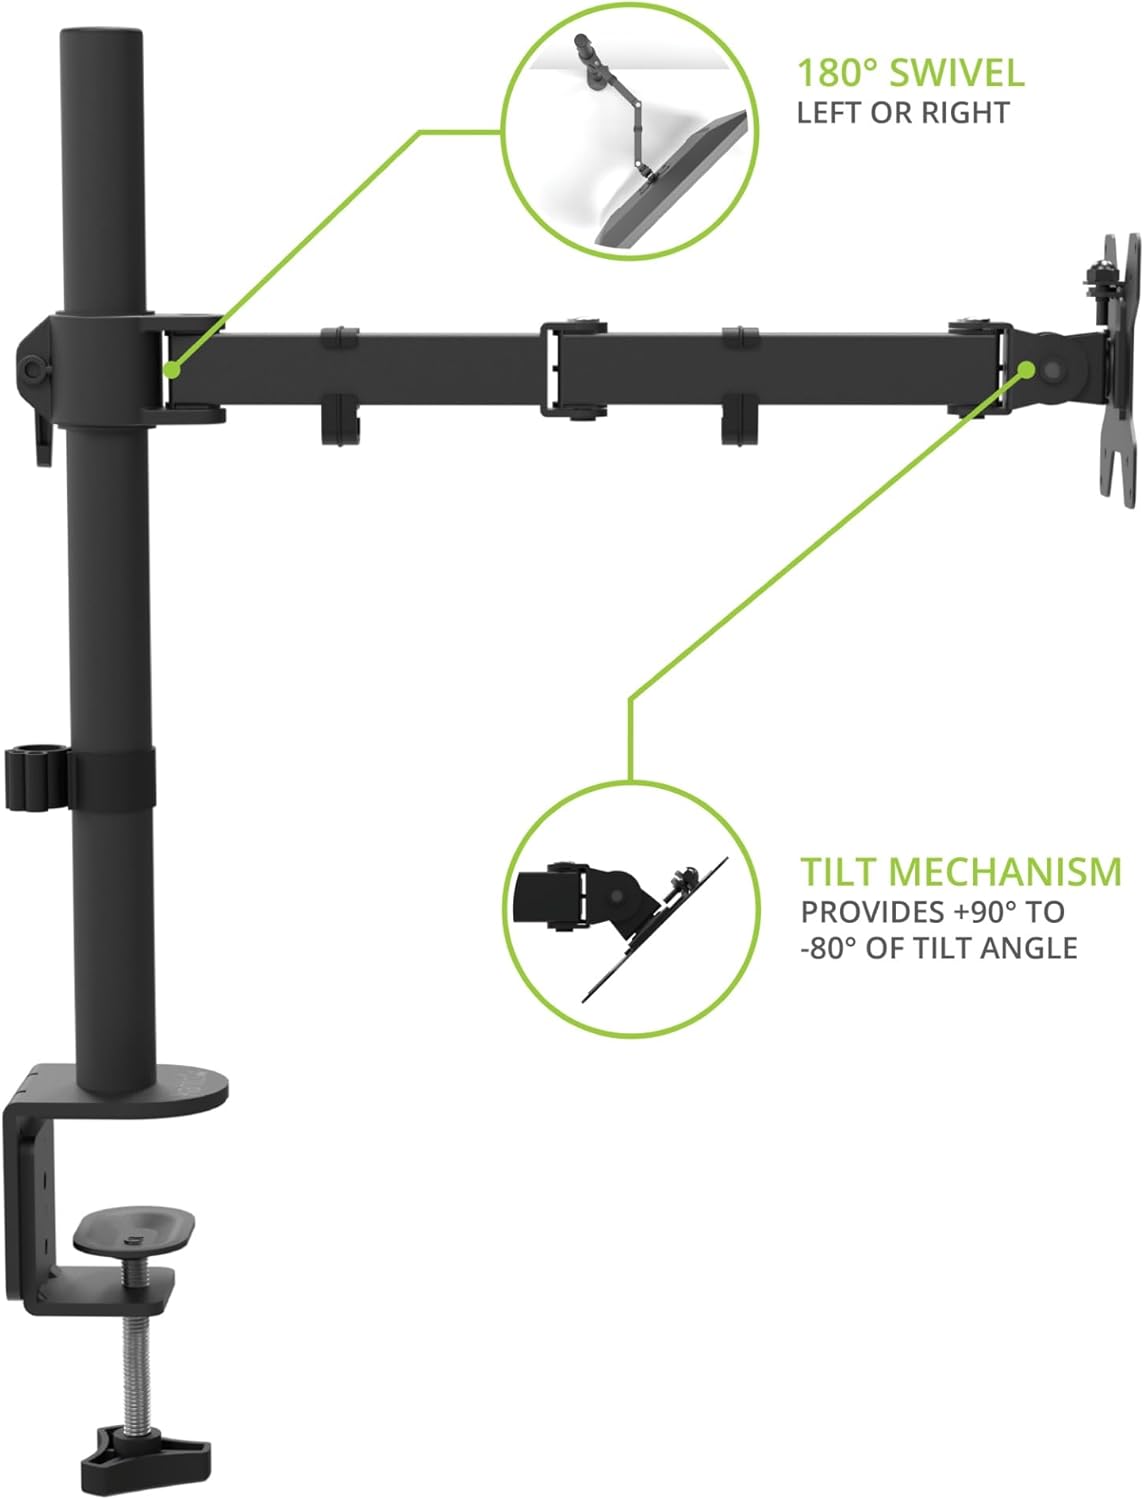
Image: Monitor arm illustrating 180° swivel left or right and tilt mechanism from +90° to -80°.
The monitor can be tilted from +90° to -80° and swiveled 180° left or right. Gently adjust the monitor to your preferred viewing angle. Use the provided hex key to adjust the tension of the tilt mechanism if the monitor is too loose or too stiff.
Rotazione

Image: A monitor mounted on the DML1000 in portrait orientation, demonstrating 360° rotation.
The monitor can be rotated 360° to switch between landscape and portrait orientations. Simply turn the monitor gently to achieve the desired orientation.
Gestione dei cavi
The DML1000 includes cable management clips to keep your workspace tidy and reduce clutter.

Image: Close-up of the monitor arm showing cables routed through the integrated cable management clips.
Route your monitor and power cables through the clips located along the arm and down the main pole. This helps to organize cables and maintain a clean aesthetic.
Manutenzione
- Pulizia: Wipe the monitor arm with a soft, dry cloth. Do not use abrasive cleaners or solvents.
- Controlli periodici: Controllare periodicamente tutte le viti e i collegamenti per assicurarsi che siano ben serrati e sicuri. Serrare nuovamente se necessario.
- Lubrificazione: Non è richiesta alcuna lubrificazione per le parti mobili.
Risoluzione dei problemi
- Il monitor si abbassa o non mantiene la posizione: Ensure the VESA plate screws are tight. For tilt adjustment, use the provided hex key to increase the tension on the tilt mechanism. For height adjustment, ensure the lever on the main pole is fully tightened.
- Arm is unstable: Check that the desk clamp or grommet mount is securely fastened to the desk. Ensure the desk surface is stable and can support the weight of the monitor and arm.
- Difficulty rotating monitor: Assicurarsi che nessun cavo sia impigliato o impedisca il movimento.
Specifiche
| Caratteristica | Dettaglio |
|---|---|
| Modello | DML |
| Tipo di montaggio | Desktop (Clamp o Occhiello) |
| Materiale | Acciaio legato |
| Colore | Nero |
| Dimensioni del monitor compatibili | Da 17" a 34" |
| Capacità di peso del monitor | Fino a 22.1 libbre (10 kg) |
| Compatibilità VESA | 75x75mm, 100x100mm |
| Gamma di regolazione dell'altezza | Da 5.1" a 16.7" (da 13 cm a 42 cm) |
| Angolo di inclinazione | da +90° a -80° |
| Angolo di rotazione | 180° |
| Rotazione | 360° (Ritratto/Paesaggio) |
| Scrivania Clamp Spessore | 0.4" to 2.8" (10 mm to 70 mm) |
Informazioni sulla garanzia
The Kanto DML1000 is backed by a Five Year Manufacturer's Warranty. For specific terms and conditions, please refer to the warranty card included with your product or visit the official Kanto websito.
Assistenza clienti
If you encounter any issues or have questions regarding your Kanto DML1000 monitor arm, please contact Kanto Customer Support for assistance.
Websito: www.kantoaudio.com
E-mail: Refer to Kanto's official websito per le informazioni di contatto del supporto.
Telefono: Refer to Kanto's official websito per le informazioni di contatto del supporto.