
CRUXGG 55854d46-84c5-48f2-8749-9927a6f8f352
MUSA 6.5 Qt. Air Pro Cook & Fry Pressure Cooker And Air Fryer User Manual
Model: 55854d46-84c5-48f2-8749-9927a6f8f352 | Brand: CRUXGG
Introduzione
Welcome to the MUSA 6.5 Qt. Air Pro Cook & Fry Pressure Cooker and Air Fryer. This innovative appliance combines the functionality of a pressure cooker and an air fryer into a single, compact unit, designed to simplify your cooking process. With its versatile cooking modes, including Pressure Cook, Slow Cook, Air Fry, Roast, Bake, Broil, Steam, Sauté, Rice/Grains, Proof, and Dehydrate, you can prepare a wide variety of meals efficiently. This manual provides essential information for safe operation, setup, maintenance, and troubleshooting to ensure you get the most out of your appliance.
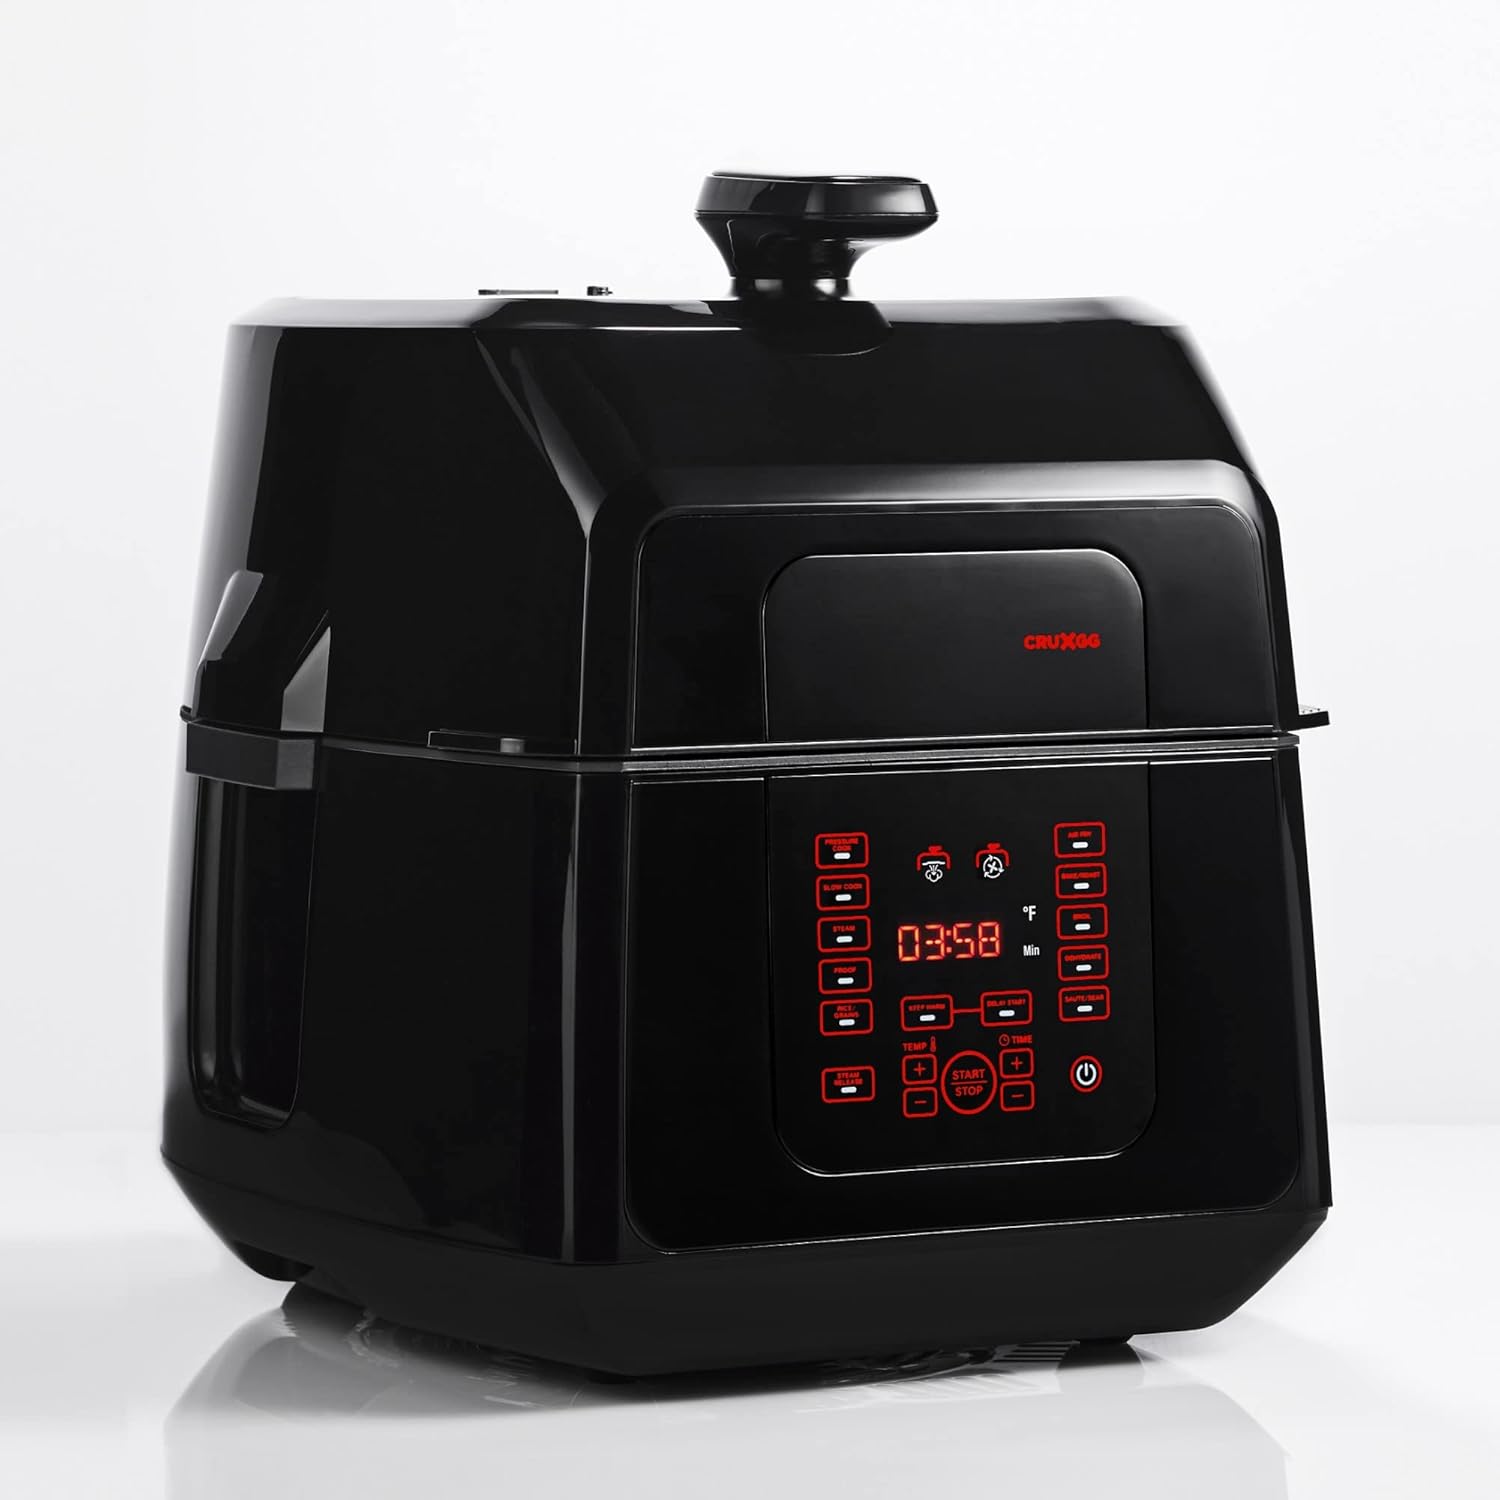
Figura 1: Fronte view of the MUSA 6.5 Qt. Air Pro Cook & Fry Pressure Cooker and Air Fryer.
Importanti misure di sicurezza
Quando si utilizzano apparecchi elettrici, è necessario adottare sempre le seguenti precauzioni di sicurezza di base per ridurre il rischio di incendi, scosse elettriche e/o lesioni alle persone, tra cui:
- Leggere tutte le istruzioni prima di utilizzare l'apparecchio.
- Non toccare le superfici calde. Utilizzare maniglie o manopole.
- Per proteggersi da scosse elettriche, non immergere il cavo, le spine o l'unità principale in acqua o altri liquidi.
- È necessaria un'attenta supervisione quando un elettrodomestico viene utilizzato da bambini o nelle loro vicinanze.
- Scollegare dalla presa quando non in uso e prima di pulire. Lasciare raffreddare prima di mettere o togliere parti.
- Non utilizzare alcun apparecchio con un cavo o una spina danneggiati oppure dopo che l'apparecchio stesso non funziona correttamente o è stato danneggiato in qualsiasi modo.
- L'uso di accessori non consigliati dal produttore dell'apparecchio può causare lesioni.
- Non utilizzare all'aperto.
- Non lasciare che il cavo penda dal bordo del tavolo o del bancone o che tocchi superfici calde.
- Non posizionare sopra o vicino a un fornello a gas o elettrico caldo, oppure in un forno caldo.
- Prestare la massima attenzione quando si sposta un apparecchio contenente olio bollente o altri liquidi bollenti.
- Collegare sempre prima la spina all'apparecchio, quindi collegare il cavo alla presa a muro. Per scollegarlo, posizionare un qualsiasi interruttore su "off", quindi rimuovere la spina dalla presa a muro.
- Non utilizzare l'apparecchio per scopi diversi da quelli previsti.
- Questo apparecchio cuoce sotto pressione. L'uso improprio può provocare ustioni. Assicurarsi che l'unità sia chiusa correttamente prima di utilizzarla.
- Never force open the appliance. Ensure pressure is completely released before opening.
- Non riempire l'unità oltre i 2/3 della sua capacità. Quando si cucinano alimenti che si espandono durante la cottura, come riso o verdure secche, non riempire l'unità oltre la metà.
- Prima dell'uso, controllare sempre che la valvola di rilascio della pressione e la valvola a galleggiante non siano intasate.
Prodotto finitoview
Componenti e accessori
The MUSA Air Pro Cook & Fry comes with several key components and accessories to facilitate various cooking methods.
- Unità principale: L'apparecchio principale che ospita l'elemento riscaldante e il pannello di controllo.
- Single-Lid Design: An innovative lid that easily switches between pressure cooking and air frying functions.
- 6.5-Qt. Nonstick Pressure Cooking Pot: The main cooking vessel with handles, featuring a PFOA/PFOS-free ultra-nonstick GG Red surface.
- 4-Qt. Crisping Basket: Used for air frying, roasting, and dehydrating.
- Reversible Steam Rack: For steaming and elevating food during pressure cooking.
- Pressure Plate Insert: Essential for pressure cooking operations.
- Air Fry Grate: Placed inside the crisping basket for optimal air circulation during air frying.
- Plate Handle: Per inserire e rimuovere in sicurezza gli accessori caldi.
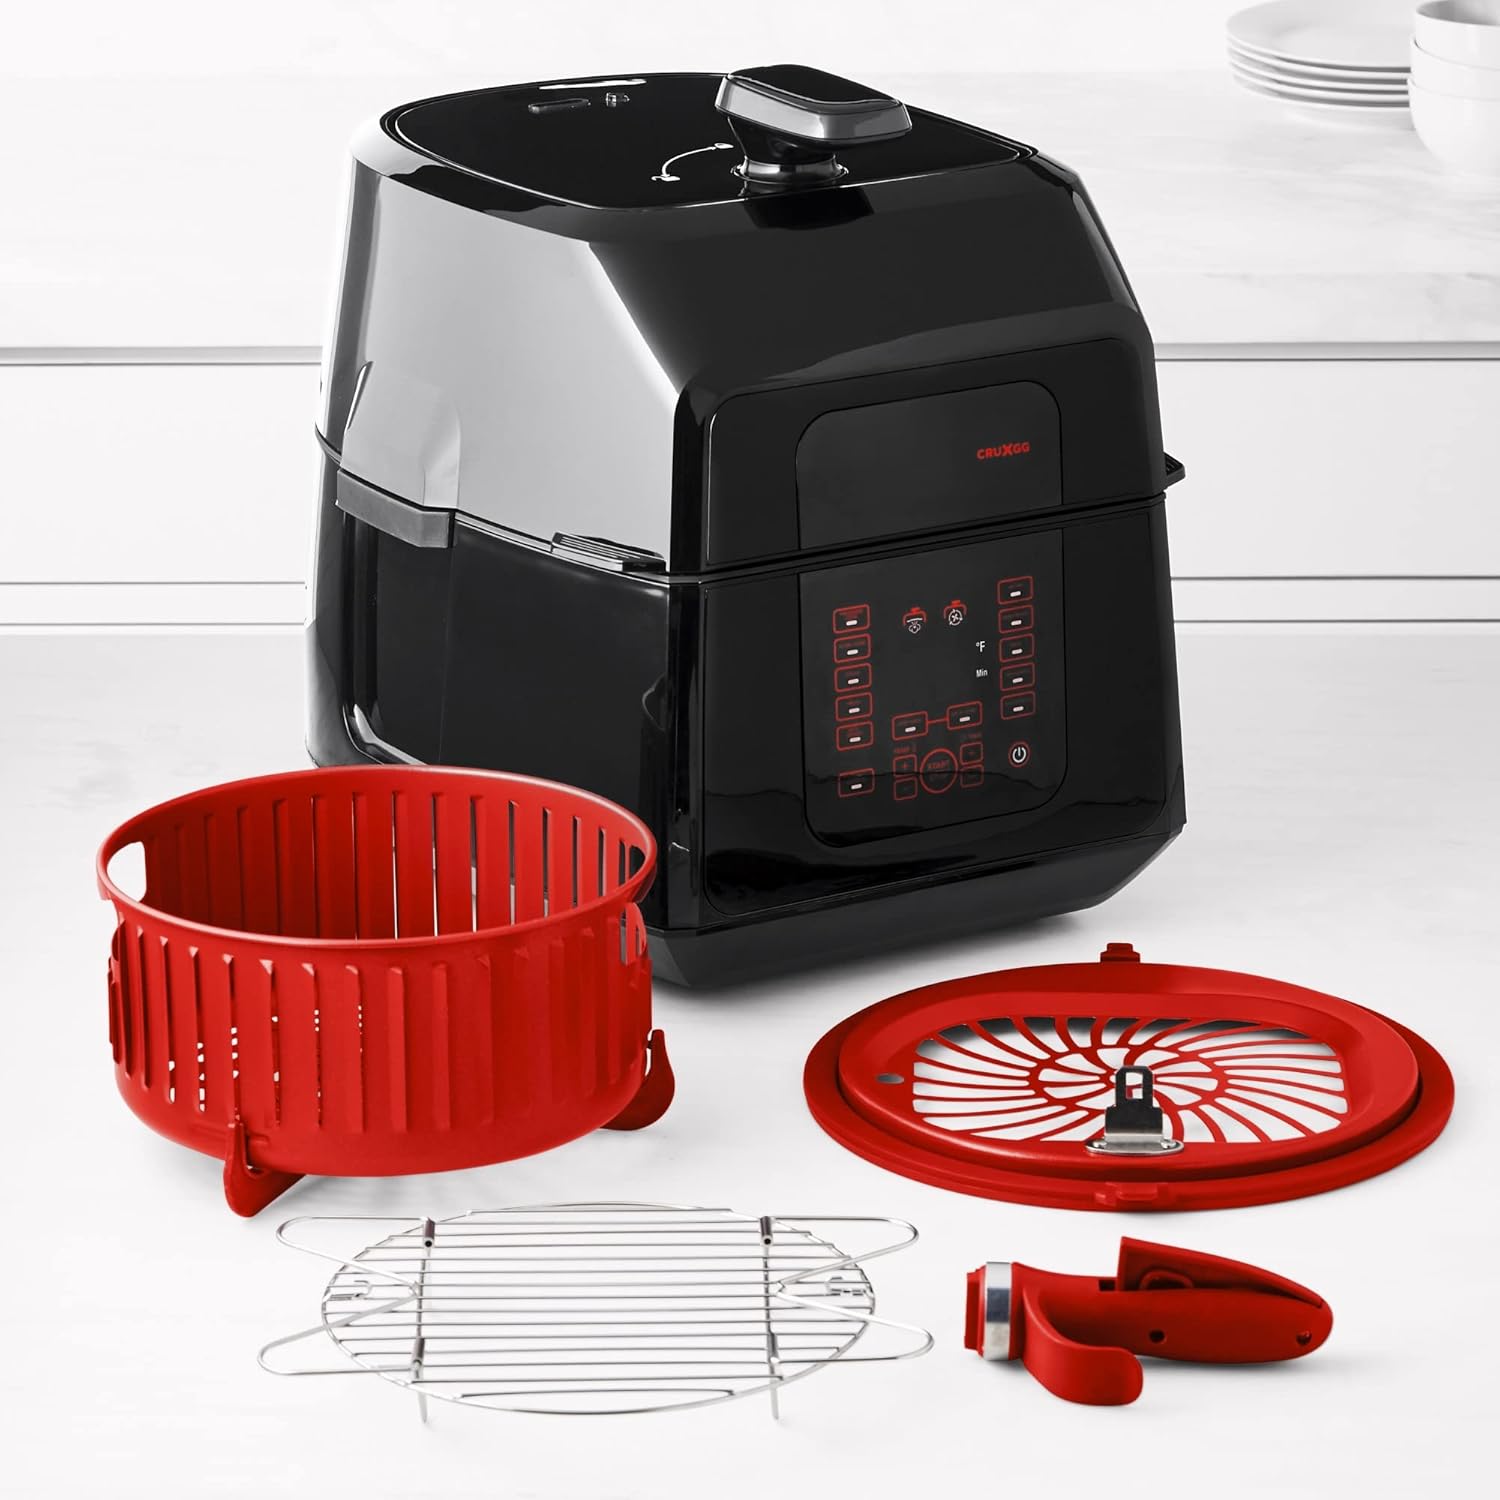
Figure 2: MUSA Air Pro Cook & Fry with its included accessories: pressure cooking pot, crisping basket, reversible steam rack, pressure plate insert, air fry grate, and plate handle.
Pannello di controllo
The Signature GG Glow control panel features Precision Touch controls and a digital display for easy operation.
- Display digitale: Mostra il tempo di cottura, la temperatura e gli indicatori di stato.
- Pulsanti funzione: Dedicated buttons for Pressure Cook, Slow Cook, Air Fry, Roast, Bake, Broil, Steam, Sauté, Rice/Grains, Proof, and Dehydrate.
- Pulsanti TEMP +/-: Regolare la temperatura di cottura.
- TIME +/- Buttons: Regolare il tempo di cottura.
- Pulsante AVVIO/ARRESTO: Avvia o annulla un programma di cottura.
- Pulsante MANTENERE CALDO: Mantiene la temperatura degli alimenti dopo la cottura.
- DELAY START Button: Imposta un orario di inizio ritardato per la cottura.
- STEAM RELEASE Button: Manually releases pressure after pressure cooking.
- Pulsante di accensione: Accende o spegne l'apparecchio.

Figura 3: dettagliata view of the Signature GG Glow control panel with Precision Touch controls.
Installazione e primo utilizzo
- Disimballaggio: Carefully remove all components and accessories from the packaging. Retain packaging materials for future storage or transport if needed.
- Pulizia iniziale: Before first use, wash the pressure cooking pot, crisping basket, steam rack, pressure plate insert, air fry grate, and plate handle in warm, soapy water. Rinse thoroughly and dry completely. Wipe the main unit with a damp stoffa. Non immergere l'unità principale in acqua.
- Posizionamento: Place the appliance on a stable, level, heat-resistant surface, away from walls or other appliances to allow for proper air circulation. Ensure there is adequate space above and around the unit.
- Collegamento elettrico: Collegare il cavo di alimentazione a una presa elettrica con messa a terra. Il display digitale si illuminerà.
- Lid Orientation: Familiarize yourself with the single-lid design. The lid can be positioned for pressure cooking (sealed) or air frying (vented, or removed for certain functions).
Istruzioni per l'uso
Cottura a pressione
- Place the pressure cooking pot into the main unit.
- Add ingredients and the required liquid to the pot. Ensure the liquid level is at least 1 cup for proper pressure build-up. Do not exceed the MAX fill line (2/3 full, or 1/2 full for expanding foods).
- Place the pressure plate insert over the food if required by the recipe.
- Close the lid, ensuring it is properly sealed for pressure cooking. The lid should click into place.
- Press the "Pressure Cook" button. The default time and temperature will appear.
- Use the "TEMP +/-" and "TIME +/-" buttons to adjust settings as needed.
- Press "START/STOP" to begin cooking. The unit will preheat and build pressure. Once pressure is reached, the float valve will rise, and the cooking timer will begin.
- Once cooking is complete, the unit will beep and may automatically switch to "KEEP WARM" mode.
- Rilascio della pressione:
- Rilascio naturale: Allow pressure to release naturally. This is suitable for foods that benefit from continued cooking or for foamy foods. The float valve will drop when pressure is fully released.
- Rilascio rapido: Press the "STEAM RELEASE" button to quickly release pressure. Keep hands and face away from the steam vent. Only use for recipes that specify quick release. The float valve will drop when pressure is fully released.
- Once pressure is fully released and the float valve has dropped, carefully open the lid.
Frittura ad aria
- Place the crisping basket into the main unit. If using, place the air fry grate inside the crisping basket.
- Add food to the crisping basket. Do not overfill; ensure air can circulate around the food.
- Close the lid, ensuring it is properly positioned for air frying (it may not seal completely like pressure cooking, allowing for air circulation).
- Press the "Air Fry" button. The default time and temperature will appear.
- Use the "TEMP +/-" and "TIME +/-" buttons to adjust settings as needed.
- Press "START/STOP" to begin cooking. The unit will preheat, and the fan will start.
- During cooking, you may pause the cycle to shake or flip food for even crisping. Close the lid to resume.
- Once cooking is complete, the unit will beep. Carefully open the lid and remove food using heat-resistant utensils.
Altre modalità di cottura
The MUSA Air Pro Cook & Fry offers additional cooking modes. Refer to the specific function buttons on the control panel and adjust time/temperature as required by your recipe.
- Cottura lenta: Ideal for tenderizing meats and simmering stews over extended periods.
- Roast/Bake/Broil: Use with the crisping basket for oven-like results.
- Vapore: Requires liquid in the pot and the steam rack for healthy steaming.
- Rosolare/Scottatura: Use the pressure cooking pot directly for browning ingredients before other cooking methods.
- Rice/Grains: Optimized settings for various grains.
- Prova: Provides a warm environment for dough rising.
- Disidratare: Low-temperature cooking for drying fruits, vegetables, or jerky.

Figure 4: The MUSA Air Pro Cook & Fry in operation, demonstrating its versatility in meal preparation.
Manutenzione e pulizia
Regular cleaning and maintenance will extend the life of your MUSA Air Pro Cook & Fry and ensure optimal performance. Always unplug the appliance and allow it to cool completely before cleaning.
- Pentola interna e accessori: The 6.5-qt. nonstick pressure cooking pot, 4-qt. crisping basket, reversible steam rack, pressure plate insert, air fry grate, and plate handle are dishwasher-safe. For best results, hand wash with warm, soapy water and a non-abrasive sponge. Rinse thoroughly and dry completely.
- Coperchio: Pulisci il coperchio con l'annuncioamp cloth. Pay attention to the sealing ring and float valve area, ensuring they are free of food debris. The sealing ring can be removed for thorough cleaning and should be reinserted correctly before next use.
- Unità principale: Wipe the exterior of the main unit and the control panel with a soft, damp panno. Non utilizzare detergenti abrasivi o pagliette. Non immergere mai l'unità principale in acqua o altri liquidi.
- Magazzinaggio: Assicurarsi che tutti i componenti siano puliti e asciutti prima di riporli. Conservare l'apparecchio in un luogo fresco e asciutto.
Risoluzione dei problemi
If you encounter issues with your MUSA Air Pro Cook & Fry, consult the table below for common problems and their solutions.
| Problema | Possibile causa | Soluzione |
|---|---|---|
| L'unità non si accende. | Non collegato; problema con la presa di corrente; malfunzionamento dell'unità. | Ensure cord is securely plugged into a working outlet. Check household circuit breaker. If problem persists, contact customer support. |
| Pressure not building during pressure cook. | Lid not properly sealed; sealing ring not in place or damaged; insufficient liquid; steam release valve open. | Ensure lid is fully closed and locked. Check sealing ring for proper placement and damage. Add at least 1 cup of liquid. Ensure steam release valve is in the sealed position. |
| Food not crisping during air fry. | Overcrowding the basket; insufficient cooking time/temperature; food not flipped. | Do not overcrowd the basket; cook in batches if necessary. Increase cooking time or temperature. Flip or shake food halfway through cooking. |
| Codice di errore visualizzato. | Problema interno specifico. | Note the error code and refer to the full troubleshooting guide on the manufacturer's websito o contattare l'assistenza clienti. |
Specifiche
| Numero di modello | 55854d46-84c5-48f2-8749-9927a6f8f352 |
| Marca | CRUXGG |
| Capacità | 6.5 quarti |
| Cosatage | 1500 watt |
| Dimensioni (P x L x A) | 16.5"P x 13.25"L x 15.5"A |
| Materiale | Plastic (exterior), Nonstick (inner pot) |
| Colore | Nero |
| Metodo di controllo | Tocco |
| Parti lavabili in lavastoviglie | Inner pot, crisping basket, steam rack, pressure plate insert, air fry grate, plate handle |
| Codice UPC | 829486149801 |
Garanzia e supporto
The MUSA 6.5 Qt. Air Pro Cook & Fry Pressure Cooker And Air Fryer is backed by a manufacturer's warranty. Please refer to the warranty card included with your purchase for specific terms and conditions, including warranty period and coverage details.
For technical support, troubleshooting assistance beyond this manual, or warranty claims, please contact CRUXGG Customer Service.
- Assistenza clienti: Refer to the contact information provided on the CRUXGG official websito o sulla confezione del prodotto.
- Risorse online: Visit the official CRUXGG website for FAQs, recipe ideas, and additional product information.
Ask a question about this manual
Ask about setup, troubleshooting, compatibility, parts, safety, or missing instructions. Manuals+ will review the question and use this page’s manual context to help answer it.