1. Introduzione e oltreview
This manual provides detailed instructions for the installation, operation, and maintenance of your Yansoo 3-Channel Dash Cam. Please read this manual thoroughly before using the device to ensure proper functionality and safety.
Caratteristiche del prodotto:
- Registrazione a 3 canali: Simultaneously captures video from the front (170° wide-angle), rear (165°), and inside (140°) of your vehicle.
- Video ad alta definizione: Supports 1080P Front video + AHD-720P Rear video + AHD-720P Inside video.
- Visione notturna migliorata: Features 4 unique infrared LED fill lights, F1.8 aperture, and WDR technology for optimal performance in low light.
- Blocco di emergenza (sensore G): Automatically detects sudden shocks or collisions and locks the current video footage per impedire la sovrascrittura.
- Registrazione in loop: Continuously records and automatically overwrites the oldest unlocked video files quando la scheda di memoria è piena.
- Monitoraggio del parcheggio: Activates recording when motion or shocking is detected while parked (requires separate hardwire kit for 24/7 monitoring).
- Telecamera interna regolabile: The interior lens can be rotated 60° for flexible positioning.
Contenuto della confezione:
- Yansoo 3-Channel Dash Cam Unit
- Fotocamera posteriore con cavo
- Supporto a ventosa
- Caricabatteria da auto (tipo C)
- Cavo dati USB
- Manuale d'uso
- Mounting Hardware for Rear Camera
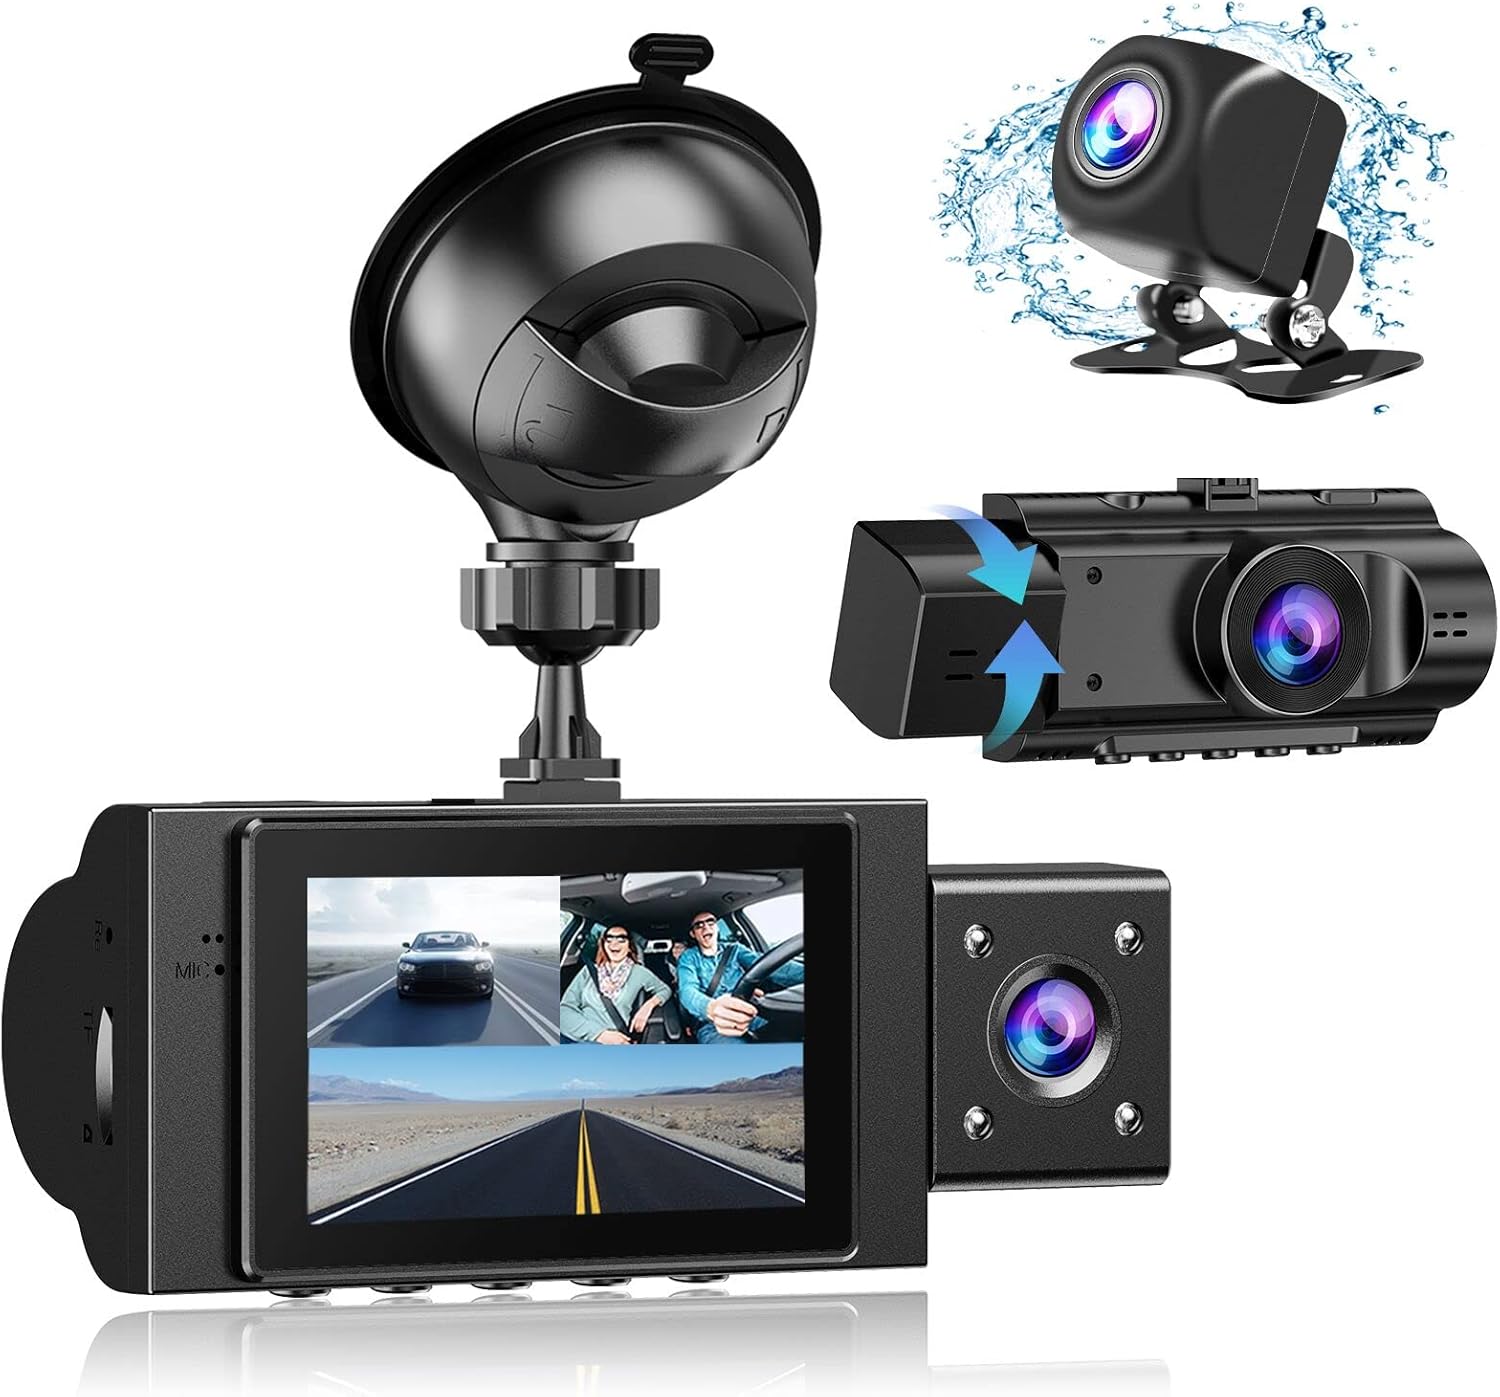
Image: The Yansoo 3-Channel Dash Cam unit with its suction cup mount and the separate rear camera, illustrating the complete package.
2. Impostazione
2.1 Inserimento della scheda di memoria
The dash cam supports Micro Memory cards up to 64GB (Class 10 or above recommended, not included). Please format the card in the camera menu before first use.
- Locate the memory card slot on the side of the dash cam.
- Insert the Micro Memory card into the slot until it clicks into place.
- Per rimuoverla, spingere delicatamente la scheda finché non fuoriesce.

Image: A four-panel illustration showing the steps to insert a Micro SD card into the dash cam's slot.
2.2 Montaggio della Dash Cam
Mount the main dash cam unit to your windshield using the provided suction cup mount. Choose a location that does not obstruct your view durante la guida.
- Pulisci accuratamente la zona scelta sul parabrezza.
- Fissare il supporto a ventosa all'unità della dash cam.
- Premere saldamente la ventosa contro il parabrezza e ruotare la leva per fissarla.
- Regolare l'angolazione della telecamera per garantire una visione chiara view della strada da percorrere.

Image: The Yansoo 3-Channel Dash Cam mounted on a car's windshield, showing its position relative to the driver's view.
2.3 Installazione della telecamera posteriore
La telecamera posteriore fornisce una view of the vehicle's rear. It can be installed inside the rear window or externally above the license plate.
- Collegare il cavo della telecamera posteriore all'unità principale della dash cam.
- Route the cable neatly along the vehicle's interior trim to the rear.
- Montare la telecamera posteriore nella posizione desiderata, assicurandosi che l'immagine sia chiara view.

Image: A diagram illustrating the recommended cable routing path for the dash cam and rear camera within a car's interior.
2.4 Collegamento di alimentazione
Connect the dash cam to your vehicle's cigarette lighter socket using the provided car charger. The camera will automatically power on and begin recording when the vehicle starts.

Image: The Yansoo 3-Channel Dash Cam connected to a power source, indicating its readiness for operation.
3. Istruzioni per l'uso
3.1 Funzionamento di base
- Accensione/spegnimento: The camera powers on/off automatically with your vehicle's ignition. You can also manually power on/off by pressing and holding the power button.
- Avvia/Interrompi registrazione: Recording starts automatically when the camera powers on. Press the "OK" button to manually stop or start recording.
- Cambia visualizzazione Views: Press the "Up" button to cycle through different display modes (Front, Inside, Rear, Picture-in-Picture combinations).
Video: Demonstration of the Yansoo X88 Dash Cam's recording capabilities, showcasing la sua capacità di catturare video nitidi footage.
Video: Footage from the Yansoo X88 Dash Cam demonstrating its clear day and night recording capabilities.
Video: A demonstration of the Yansoo X88 Dash Cam's 1080P Full HD recording quality.
3.2 Impostazioni del menu
To access the menu settings, stop recording (if active) by pressing the "OK" button, then press the "M" button twice.
- Risoluzione: Adjust video resolution for front, inside, and rear cameras.
- Registrazione in loop: Imposta la durata dei segmenti video (ad esempio, 1, 3, 5 minuti).
- Sensibilità del sensore G: Adjust the sensitivity of the emergency lock feature.
- Monitoraggio del parcheggio: Enable or disable the parking monitoring function.
- Data/Ora: Imposta la data e l'ora corrette per ottenere orari precisiamps sulle registrazioni.
- Lingua: Seleziona la lingua preferita per il menu.
Video: A step-by-step guide on how to set the date and time on the Yansoo Dash Cam.
4. Manutenzione
- Formattazione normale: Format the memory card regularly (e.g., once a month) to prevent data corruption and ensure optimal recording performance.
- Pulizia delle lenti: Mantenere pulite le lenti della fotocamera utilizzando un panno morbido e privo di lanugine. Evitare materiali abrasivi che potrebbero graffiare le lenti.
- Aggiornamenti del firmware: Check the official Yansoo websito per eventuali aggiornamenti firmware disponibili per migliorare le prestazioni e aggiungere nuove funzionalità.
- Considerazioni sulla temperatura: Evitare di esporre la dash cam a temperature estreme per periodi prolungati.
5. Risoluzione Dei Problemi
| Problema | Possibile causa | Soluzione |
|---|---|---|
| La fotocamera non si accende. | Nessuna corrente dall'accendisigari; collegamento allentato. | Check car charger connection; ensure vehicle ignition is on. |
| La registrazione si interrompe inaspettatamente. | Memory card full or corrupted; G-Sensor triggered. | Format memory card; adjust G-Sensor sensitivity. |
| Video pippotage è sfocato. | Protective film on lens; dirty lens. | Remove protective film; clean lenses with a soft cloth. |
| La data/ora non è corretta. | Date/Time not set or battery low. | Set Date/Time in menu; ensure continuous power supply. |
| La fotocamera si blocca o non funziona correttamente. | Problema software. | Use a needle to press the "RE" (Reset) button. |
6. Specifiche
| Caratteristica | Dettaglio |
|---|---|
| Dimensioni del prodotto | 4.13 x 1.57 x 1.77 pollici |
| Peso dell'articolo | 1.23 libbre |
| Risoluzione di acquisizione video | 1080p (Front), 720p (Inside & Rear) |
| campo di View | 170° (Front), 140° (Inside), 165° (Rear) |
| Tecnologia di connettività | USB |
| Caratteristica speciale | G-Sensor, Loop Recording, Parking Monitor, Night Vision |
| Tipo di montaggio | Supporto di aspirazione |
| Produttore | Yansu |
7. Garanzia e supporto
Yansoo offers comprehensive after-sales support for your dash cam.
- Garanzia: 1-YEAR warranty from the date of purchase.
- Servizio tecnico: 7*24 hours technical service is available.
- Contatto: For any questions or issues, please contact our customer service team via Amazon or the after-sales email provided in the original product packaging.
- Manuale utente (PDF): È disponibile per il download una versione digitale del manuale utente Qui.