
1. Introduzione
This manual provides detailed instructions for the setup, operation, maintenance, and troubleshooting of your Cosmic Byte ARES Wired Controller for PC. Designed for an enhanced gaming experience, this controller features Hall Effect joysticks and triggers, dual vibration, and customizable Turbo functions.
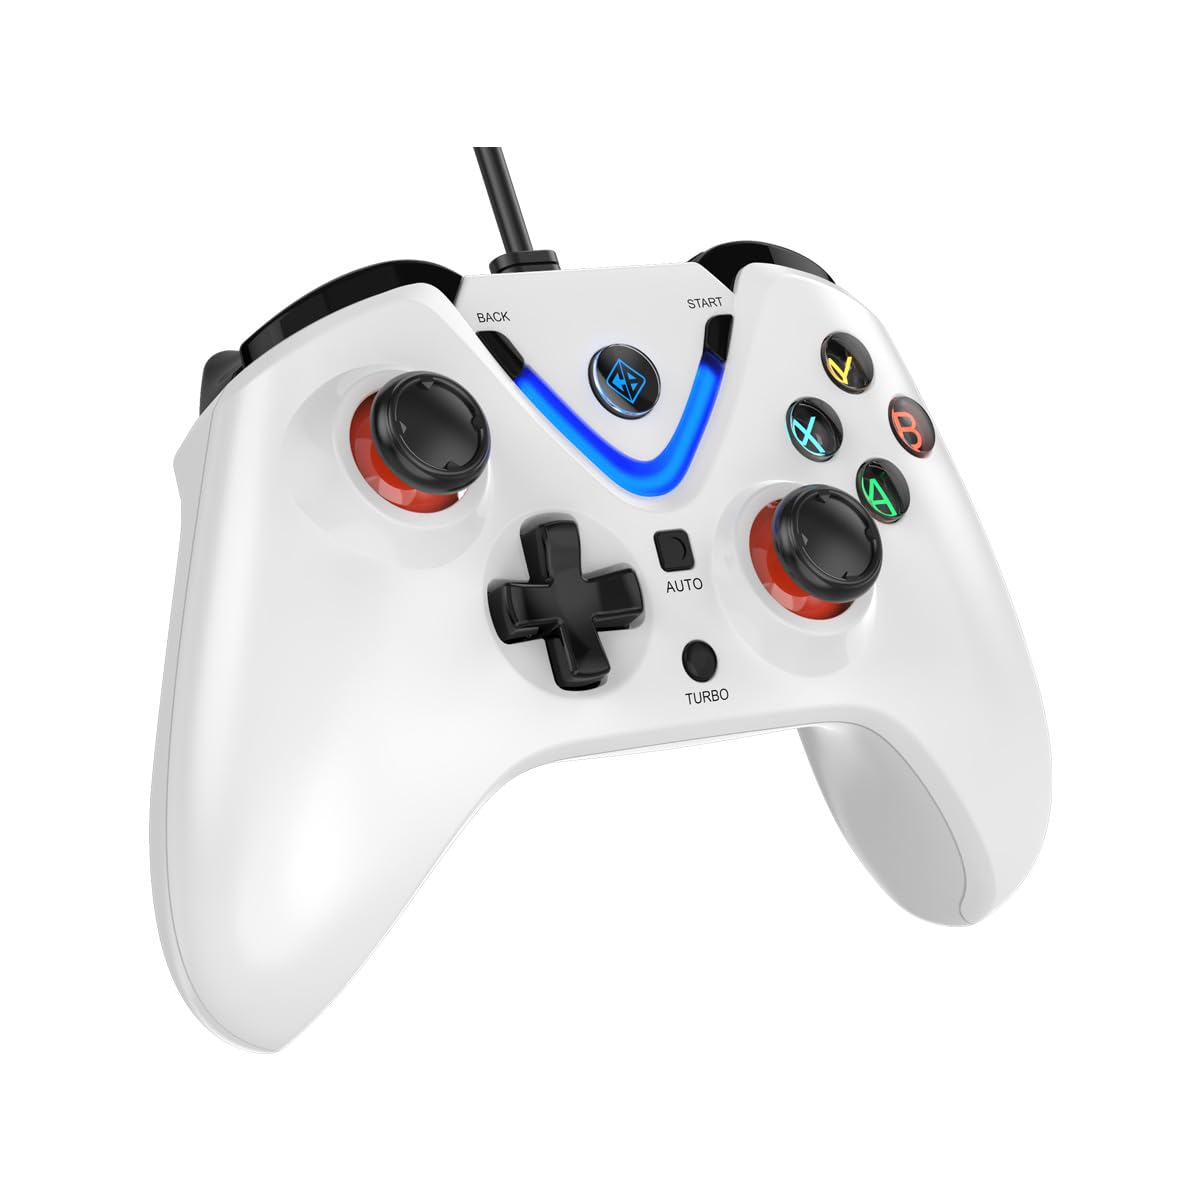
Image 1: The Cosmic Byte ARES Wired Controller in white, showcasing il suo design ergonomico.
2. Istruzioni per l'installazione
2.1 Collegamento al PC
- Assicurati che il PC sia acceso.
- Individua una porta USB disponibile sul tuo computer.
- Plug the USB connector of the Cosmic Byte ARES Wired Controller into the USB port.
- Il sistema operativo rileverà e installerà automaticamente i driver necessari. Questo processo potrebbe richiedere alcuni istanti.
- Una volta completata l'installazione, il controller è pronto per l'uso.

Image 2: The controller connected via its wired USB connection, ensuring fast response.
3. Istruzioni per l'uso
3.1 Controlli di base
The Cosmic Byte ARES controller features standard gamepad layouts, including:
- Left and Right Analog Joysticks: Per movimenti precisi e controllo della telecamera.
- Tasto direzionale: Per l'input direzionale, spesso utilizzato nei menu o per azioni di gioco specifiche.
- Pulsanti di azione (A, B, X, Y): For primary game interactions.
- Pulsanti dorsali (L1, R1) e grilletti (L2, R2): For various in-game functions like shooting, aiming, or accelerating.
- Pulsanti Start e Indietro: For pausing games, accessing menus, or specific in-game commands.
- Pulsante turbo: Per attivare le funzioni di fuoco rapido.
- Pulsante automatico: For activating automatic rapid-fire functions.
3.2 Joystick e trigger ad effetto Hall
The controller is equipped with Hall Effect joysticks and triggers, which use magnetic sensors instead of physical contacts. This technology provides:
- Precisione migliorata: More accurate and responsive input.
- Maggiore durata: Reduces wear and tear, preventing stick drift over time.
- Funzionamento regolare: Consistent and linear response for triggers, allowing for nuanced control in games.

Immagine 3: Un esploso view illustrating the Hall Effect joystick mechanism and the Hall Effect triggers.
3.3 Feedback a doppia vibrazione
The controller features dual vibration motors that provide tactile feedback during gameplay, enhancing immersion by simulating in-game events such as impacts, explosions, or engine rumbling.
3.4 Backlit LED Buttons
The action buttons (A, B, X, Y) and the central V-shaped indicator feature LED backlighting, providing visibility in low-light conditions and adding to the controller's aesthetic.

Image 4: The controller with its LED buttons illuminated and visual representation of vibration effects.
3.5 Turbo and Auto Turbo Functions
The Turbo and Auto Turbo functions allow for rapid, repeated input of a button press without continuously pressing the button.
- Attivazione Turbo: Press and hold the desired action button (e.g., A) and then press the Turbo button. The button will now rapidly repeat its input as long as you hold it down.
- Activating Auto Turbo: Press and hold the desired action button (e.g., A) and then press the Auto button. The button will now rapidly repeat its input automatically without needing to be held down.
- Deactivating Turbo/Auto Turbo: To deactivate, repeat the activation steps for the specific button, or press the Chiaro button (if available) or disconnect and reconnect the controller.

Image 5: Close-up of the controller showing the Turbo and Auto function buttons.
4. Manutenzione
- Pulizia: Utilizzare un panno morbido e asciutto per pulire il controller. Per lo sporco ostinato, un panno leggermenteamp cloth can be used, ensuring no liquid enters the controller. Avoid harsh chemicals or abrasive cleaners.
- Magazzinaggio: Conservare il controller in un luogo fresco e asciutto, lontano dalla luce solare diretta e da temperature estreme. Evitare di posizionare oggetti pesanti sul controller.
- Cura del cavo: Do not sharply bend or pull the USB cable. Always grasp the plug when disconnecting from the PC.
5. Risoluzione Dei Problemi
- Controller non riconosciuto:
- Ensure the USB cable is securely connected to both the controller and the PC.
- Prova a collegare il controller a una porta USB diversa.
- Riavvia il computer.
- Check Device Manager on Windows to see if the controller is listed and if there are any driver issues.
- Pulsanti/joystick non rispondono:
- Verify the controller is recognized by your PC (see above).
- Test the controller in a different game or a controller testing utility to rule out game-specific issues.
- Assicurarsi che nessun altro dispositivo di input interferisca.
- Vibrazione non funzionante:
- Controlla le impostazioni di gioco per assicurarti che il feedback tramite vibrazione sia abilitato.
- Some games may not support vibration or may have limited vibration effects.
6. Specifiche
| Caratteristica | Dettaglio |
|---|---|
| Marca | Byte cosmico |
| Nome del modello | Ares |
| Dispositivi compatibili | PC |
| Tipo di controllore | Controllo di gioco |
| Tecnologia di connettività | USB |
| Caratteristiche del prodotto | Ergonomic |
| Quantità del pulsante | 16 |
| Piattaforma hardware | PC |
| Tipo di fonte di alimentazione | Elettrico con filo, cavo USB |
| Peso dell'articolo | 220 grammi |
| Dimensioni dell'articolo | 6 x 10 x 4 centimetri |
| Colore | Bianco |
| Paese di origine | Cina |

Image 6: A comparison table highlighting features of different ARES controller models.
7. Garanzia e supporto
7.1 Informazioni sulla garanzia
The Cosmic Byte ARES Wired Controller comes with a 1 anno di garanzia contro i difetti di fabbricazione dalla data di acquisto. Conservare la prova d'acquisto per eventuali reclami in garanzia.
7.2 Informazioni di contatto del produttore
For support, service, or warranty inquiries, please contact:
Byte cosmicoPrakash Warehousing, S. No.163, Hissa No 1-2-3-4-5A-5B/2/1,
Phursungi, Pune 412308, Maharashtra, India
For further assistance, please visit the official Cosmic Byte websito o contattare il loro servizio clienti.