
1. Introduzione
This manual provides comprehensive instructions for the installation, operation, and maintenance of your Splenssy 433MHz WiFi GSM Wireless Home Security Alarm System. Please read this manual thoroughly before installation and use to ensure proper functionality and safety. Keep this manual for future reference.
2. Contenuto della confezione
Verifica che tutti gli articoli elencati di seguito siano presenti nel tuo pacco:
- 1 x Wireless Alarm Panel
- 1 sensore di movimento PIR wireless
- 3 sensori wireless per porte/finestre
- 2 x telecomandi
- 2 carte RFID
- 1 x sirena cablata
- 1 x supporto per sensore PIR
- 1 x set di viti di montaggio
- 1 cavo di ricarica USB
- 1 adattatore di alimentazione CC 5V/1A
- Batteries for sensors and remote controls (pre-installed or included separately)
- 1 x Manuale utente (inglese)
3. Specifiche
| Caratteristica | Specificazione |
|---|---|
| Adattatore di alimentazione | CC 5V/1A |
| Corrente di lavoro | <120mA |
| Corrente di standby | <80uA |
| Frequenza senza fili | 433 MHz |
| Modalità codificata | 1527 |
| standard wireless | IEEE802.11b/g/n2.4G |
| Batteria del pannello di allarme | Li-ion CC 3.7 V 500 mAh |
| Batteria del sensore PIR | 3 batterie AAA da 1.5 V |
| Batteria del sensore della porta | 1 batterie CR2450 da 3 V |
| Batteria del telecomando | 2 batterie CR2025 da 3 V |
| Volume sirena | 110 dB |
| Intervallo di temperatura | 0℃~55℃ |
| Umidità ambiente | <80% RH (senza condensa) |
| Metodo di controllo | Remote, Smartphone App, RFID |
| Portata wireless massima | 100 Metres (open area) |
| Battery Average Life (Panel) | 72 ore (in standby) |
| Display | 2.4" TFT LCD Screen |
4. Informazioni sulla sicurezza
- Assicurarsi che l'adattatore di alimentazione sia collegato a una presa di corrente idonea.
- Do not expose the alarm panel to water or extreme temperatures.
- Tenere il dispositivo lontano da forti interferenze elettromagnetiche.
- Replace batteries in sensors and remote controls as needed to maintain optimal performance.
- Non tentare di smontare o riparare da soli il dispositivo. Contatta l'assistenza clienti per assistenza.
5. Impostazione
5.1 Installazione del pannello di allarme
The alarm panel can be installed in two ways: wall-mounted or desktop placement.

Image: The alarm panel can be placed on a desktop using its integrated stand or mounted on a wall. The image shows both side and rear views of the panel's versatile placement options.
- Installazione desktop: Simply unfold the stand at the back of the panel and place it on a flat, stable surface.
- Installazione a parete: Use the provided mounting screws and the PIR sensor holder (which can also be used for the panel) to secure the panel to a wall at a suitable height. Ensure the location allows for good Wi-Fi and GSM signal reception.
5.2 Installazione del sensore
PIR sensore di movimento: Install the PIR sensor in a corner or on a wall where it can cover the desired area without obstructions. Avoid placing it directly facing heat sources or windows where direct sunlight or drafts might cause false alarms. Insert 3 x 1.5V AAA batteries.
Sensori per porte/finestre: Install the two parts of the door/window sensor on the frame and the movable part of a door or window. Ensure the two parts are aligned and within 1cm of each other when the door/window is closed. Insert 1 x CR2450 3V battery.
5.3 Collegamento della sirena cablata
Collegare la sirena cablata all'apposita porta sul pannello di allarme. Assicurarsi che il collegamento sia saldo.
5.4 Accensione e configurazione iniziale
- Connect the alarm panel to power using the USB charging cable and DC 5V/1A power adapter.
- Il pannello si accenderà automaticamente. Seguire le istruzioni sullo schermo per la configurazione iniziale.
- Insert a valid GSM SIM card (if using GSM features) into the designated slot on the panel.
- Connessione Wi-Fi: Access the system settings on the LCD screen to connect the panel to your 2.4GHz Wi-Fi network. This enables app control and smart home integration.
5.5 App Connection and Smart Home Integration
Download the dedicated mobile application (available for Android and iOS) from your device's app store. Follow the in-app instructions to add your alarm system. This allows for remote control, parameter configuration, and accessory management.

Image: The alarm system can link to various smart home products, including smart speakers, cameras, and smart bulbs, all controllable via a smartphone application.
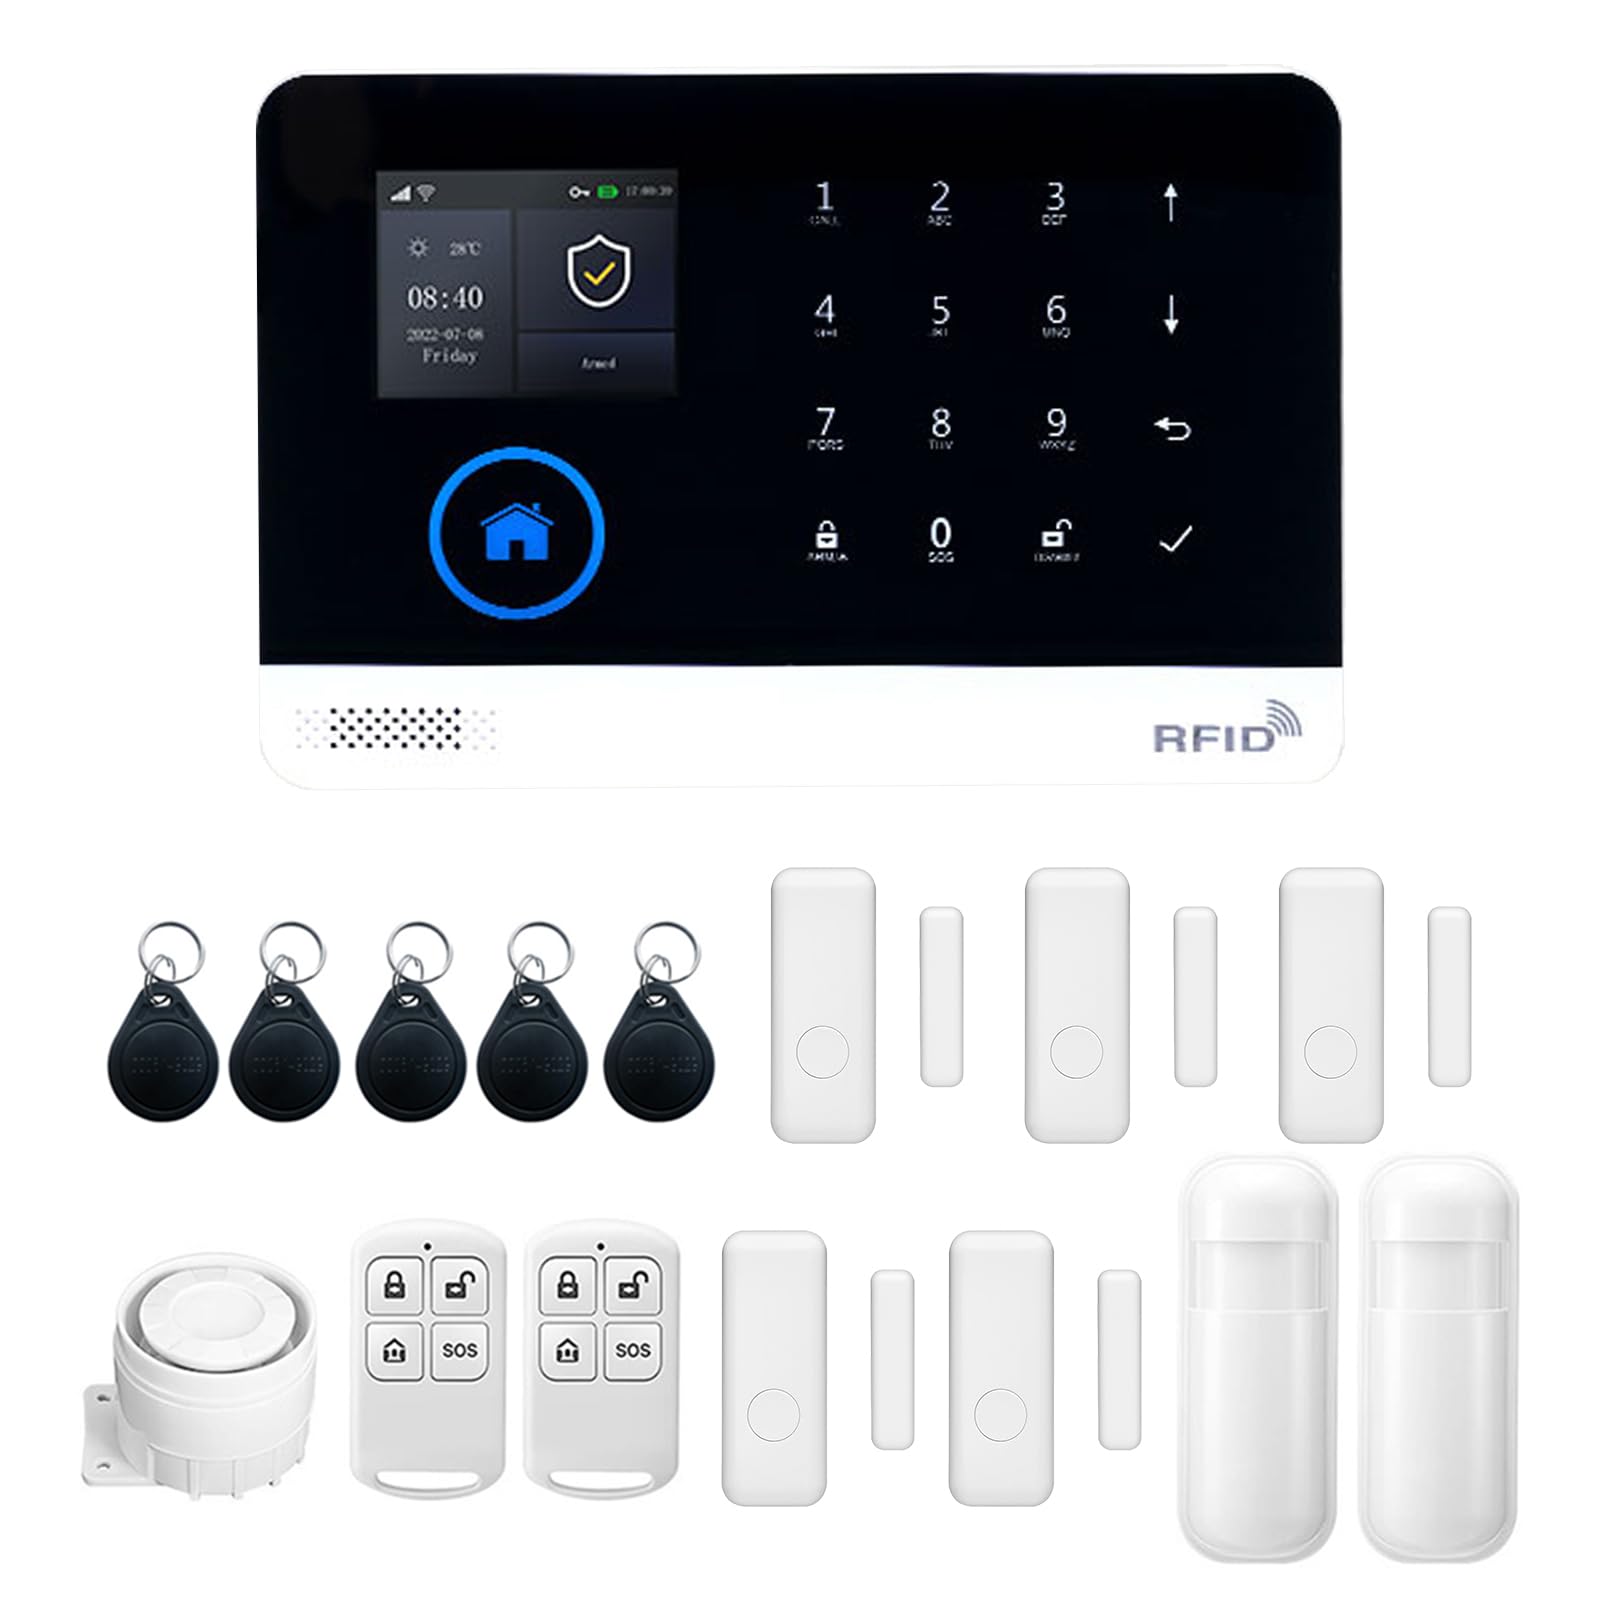
Image: The alarm panel supports eight defense areas and can link to a number of other wireless devices, offering various functions like intelligent prevention, ordinary zone, doorbell mode, and SOS.
6. Istruzioni per l'uso
6.1 Inserimento e disinserimento
Il sistema può essere attivato o disattivato utilizzando diversi metodi:
- Telecomando: Press the arm/disarm buttons on the provided remote controls.
- Carta RFID: Tap an authorized RFID card on the panel's RFID reader.
- Applicazione mobile: Use the dedicated smartphone application for remote arming/disarming.
- Funzione timer: Set scheduled arming and disarming times through the panel settings or mobile app.

Image: The alarm panel features a timer function for automatic arming and disarming, allowing users to set specific schedules, such as arming at 21:15 and disarming at 06:00.
6.2 Interfono vocale bidirezionale
The alarm panel supports two-way voice communication. When an alarm is triggered or a call is initiated, you can communicate through the panel using your smartphone app.

Image: The system offers a two-way voice intercom feature, enabling communication between the alarm panel and a smartphone, useful for family members to stay connected.
6.3 Voice Control (Alexa Support)
The system supports voice control integration with compatible smart assistants like Amazon Alexa. Once configured through the mobile app, you can use voice commands to arm or disarm your system.

Image: The anti-theft alarm host supports Alexa voice control, allowing users to arm or disarm the system using voice commands through a smart speaker.
6.4 Impostazioni della lingua
The alarm panel supports multiple languages. You can switch the display language through the system settings menu on the LCD screen. No restart is required after changing the language.

Image: The alarm panel supports 9 languages, including Chinese, English, German, Russian, Spanish, Polish, Greek, French, and Portuguese, allowing users to switch freely without restarting the device.
6.5 Adding/Managing Accessories
New wireless sensors, remote controls, or RFID cards can be added to the system via the mobile app or the alarm panel's settings menu. Refer to the on-screen instructions for pairing new devices.
6.6 Alarm Functions and Zones
The system features various defense areas and alarm types:
- Intelligent Prevention Area: For critical areas requiring immediate alerts.
- Zona ordinaria: Standard detection zone.
- Modalità campanello: Configures a sensor to act as a doorbell.
- Welcome Mode Prevention Area: For entry points with a welcome chime.
- Emergency Prevention Area: For specific emergency sensors.
- Left-behind Prevention Area: For monitoring items left behind.
- SOS Distress Function: Attiva un allarme di emergenza.
Configure these zones and their behaviors through the system settings.
7. Manutenzione
7.1 Sostituzione della batteria
Regularly check the battery status of your wireless sensors and remote controls. Replace batteries promptly when low battery indicators appear on the alarm panel or app.
- Sensore PIR: Replace with 3 x 1.5V AAA batteries.
- Sensore porta: Replace with 1 x CR2450 3V battery.
- Telecomando: Replace with 2 x CR2025 3V batteries.
The alarm panel has a built-in Li-ion battery for backup power during outages. This battery is designed for long endurance.

Image: The alarm panel features a low power consumption main board and a super long endurance built-in lithium battery, allowing it to dial phone calls and send SMS even during power outages.
7.2 Pulizia
Pulire il pannello di allarme e i sensori con un panno morbido e asciutto. Non utilizzare detergenti abrasivi o solventi, poiché potrebbero danneggiare le superfici del dispositivo.
8. Risoluzione Dei Problemi
- Il sistema non si accende: Ensure the power adapter is correctly connected and the power outlet is functional. Check the USB cable for damage.
- I sensori non rispondono: Check the batteries in the sensors and replace if necessary. Ensure sensors are within the wireless range of the alarm panel. Re-pair the sensor if needed.
- Nessuna connessione Wi-Fi: Verify your Wi-Fi network is 2.4GHz. Ensure the Wi-Fi password is entered correctly. Check your router for issues.
- Nessun segnale GSM: Assicurati che la scheda SIM sia inserita correttamente e che abbia un piano tariffario attivo. Verifica la copertura di rete nella tua zona.
- Falsi allarmi: Review sensor placement to avoid environmental triggers (e.g., direct sunlight, drafts, pets). Adjust sensor sensitivity if applicable.
- Problemi di connettività dell'app: Ensure your smartphone has an active internet connection. Restart the app and the alarm panel.
9. Garanzia e supporto
This product comes with a standard manufacturer's warranty. Please refer to the warranty card included in your package or contact your retailer for specific warranty terms and conditions.
For technical support, troubleshooting assistance, or inquiries regarding your Splenssy Home Security Alarm System, please contact the retailer or manufacturer's customer service. Contact details are typically provided on the product packaging or the manufacturer's official websito.