1. Prodotto finitoview
The SUVCON Dash Cam Front and Rear 2K is a high-definition vehicle recording system designed to capture clear video footage of your journeys. It features both a front-facing camera and a rear-facing camera, providing comprehensive coverage. Equipped with advanced features such as Wi-Fi connectivity, G-sensor for incident detection, seamless loop recording, and a 24-hour parking monitor, this dash cam offers enhanced safety and peace of mind for drivers.
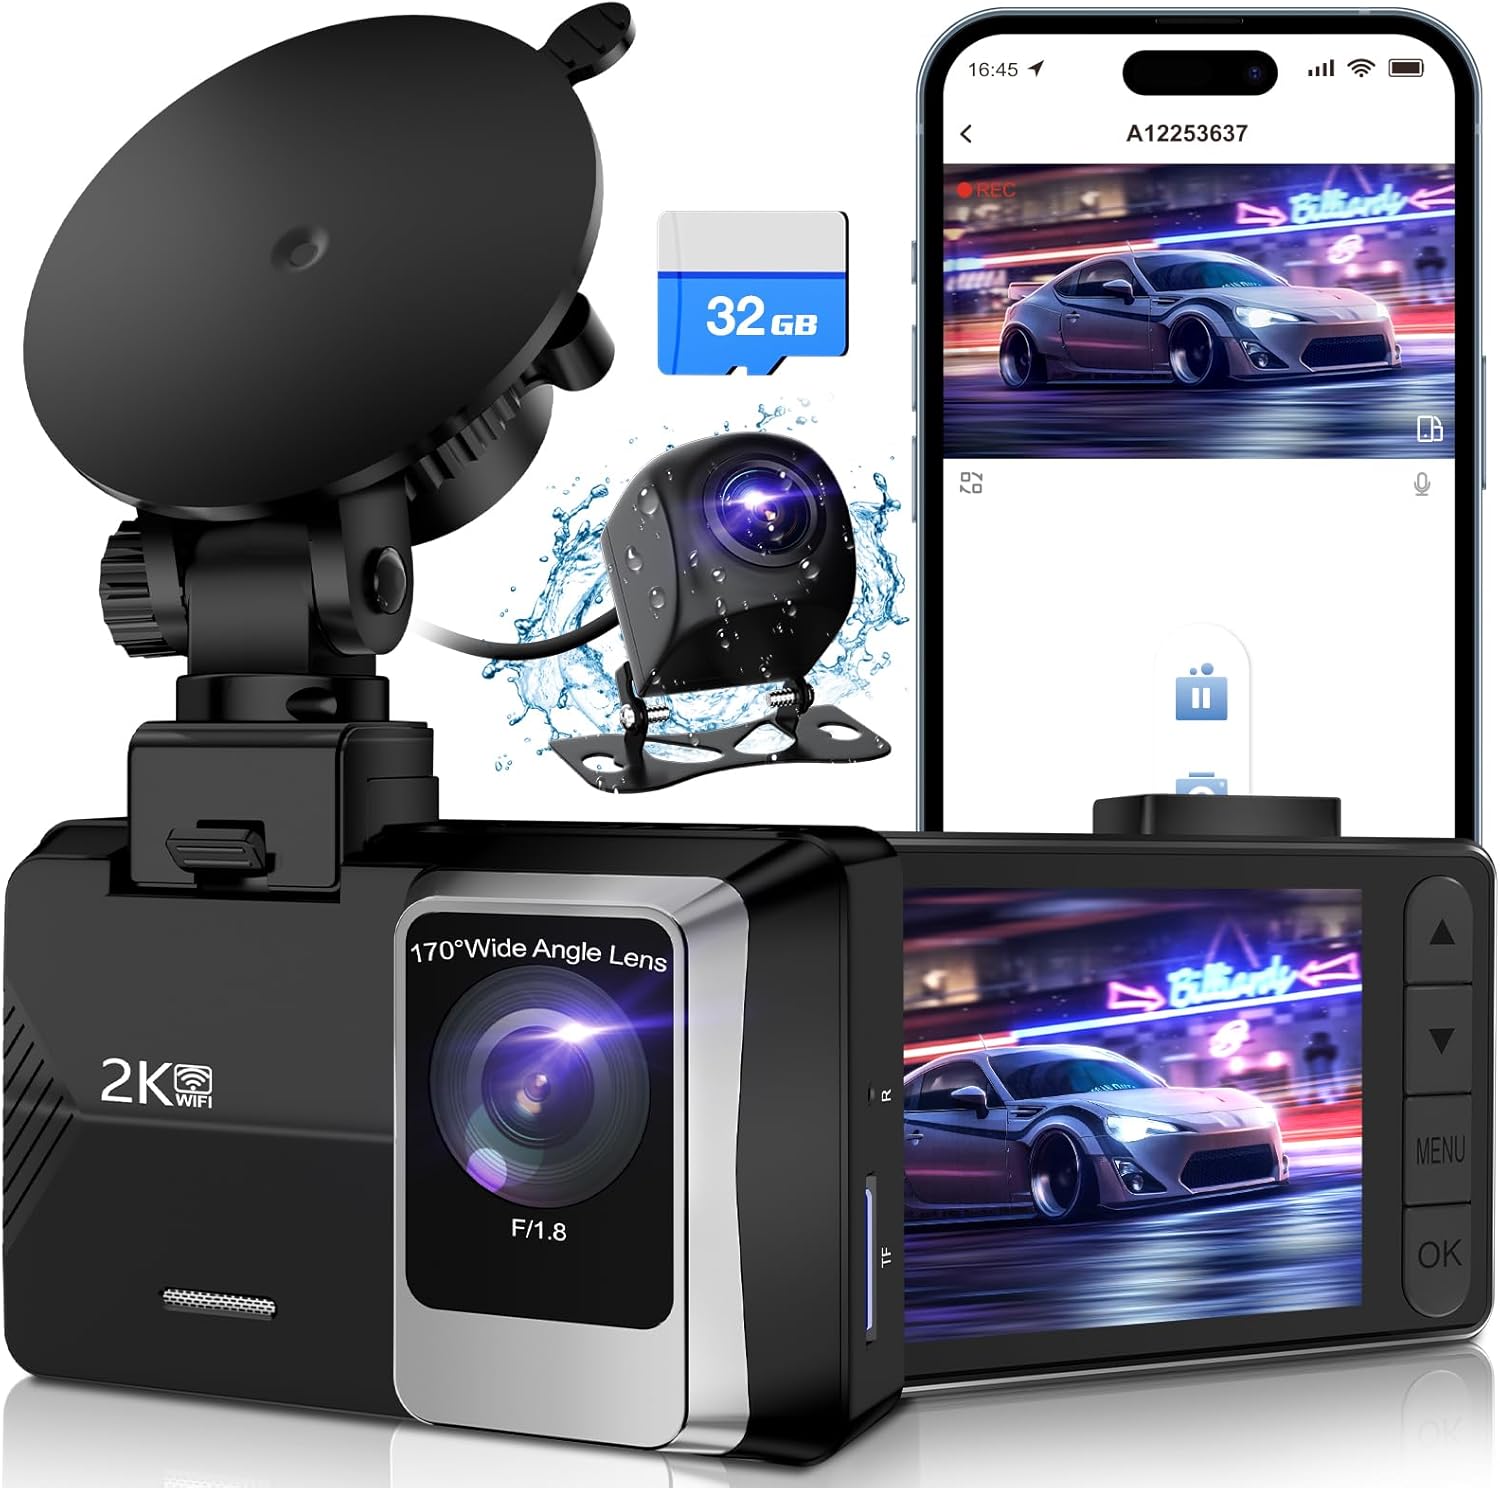
Image: The SUVCON Dash Cam system, showing the main unit, rear camera, and included 32GB memory card.
2. Contenuto della confezione
Prima dell'installazione, verificare che tutti gli elementi siano presenti nella confezione:
- SUVCON Dash Cam (Main Unit)
- Telecamera posteriore
- Scheda di memoria 32GB
- Caricabatterie per auto
- Cavo telecamera posteriore
- Supporto a ventosa
- Manuale d'uso
- Cable Clips and Adhesive Pads

Immagine: Un completo view of all components included in the SUVCON Dash Cam package.
3. Configurazione e installazione
Per una corretta installazione del tuo sistema dash cam, segui questi passaggi:
- Inserire la scheda di memoria: Ensure the included 32GB memory card is inserted into the main dash cam unit's TF card slot.
- Montare la telecamera anteriore: Attach the suction cup mount to the front dash cam unit. Clean a spot on your windshield, preferably behind the rearview mirror, and firmly press the suction cup to secure the dash cam. Adjust the camera angle to ensure a clear view della strada da percorrere.
- Installare la telecamera posteriore: Connect the rear camera to the main unit using the provided cable. Route the cable neatly along the vehicle's interior trim to the rear of the car. Mount the rear camera on the rear windshield, ensuring it has a clear view.
- Connetti alimentazione: Plug the car charger into your vehicle's 12V power outlet (cigarette lighter socket). Connect the other end of the charger cable to the main dash cam unit. The dash cam will automatically power on and begin recording when your vehicle starts.

Image: Visual guide demonstrating the straightforward installation process of the dash cam within a vehicle.
4. Istruzioni per l'uso
4.1 Funzionamento di base
- Accensione/spegnimento: The dash cam powers on automatically with vehicle ignition and powers off when the ignition is turned off. You can also manually power it on/off using the power button.
- Registrazione: Once powered on, the dash cam automatically begins loop recording. A red indicator light or on-screen icon typically confirms recording is active.
- Visualizzazione dello schermo: Lo schermo IPS da 2.0 pollici visualizza il calcio in tempo realetage from the front and/or rear cameras. You can switch between views or turn off the screen display to avoid distraction while driving.
4.2 Caratteristiche principali
The SUVCON Dash Cam includes several important features:
- Registrazione in loop: Quando la scheda di memoria è piena, la dash cam sovrascrive automaticamente il video sbloccato più vecchio filecon nuove registrazioni, garantendo un funzionamento continuo.
- Sensore G (blocco di emergenza): The built-in G-sensor detects sudden shakes or collisions. In such an event, it automatically locks the current video segment, preventing it from being overwritten by loop recording.
- Monitoraggio del parcheggio 24 ore su 24: This feature provides continuous surveillance even when your vehicle is parked. It requires a hardwire kit (not included) for constant power supply. When activated, the dash cam will automatically record if it detects a collision or motion while parked.
- Connettività Wi-Fi: Connect your smartphone to the dash cam via Wi-Fi using the dedicated app (e.g., Viidure app). This allows you to view cibo vivotage, download recorded videos, and adjust settings directly from your phone.

Image: Illustration of the dash cam's built-in Wi-Fi feature, enabling easy viewing, download e condivisione di footage tramite un'app per smartphone.
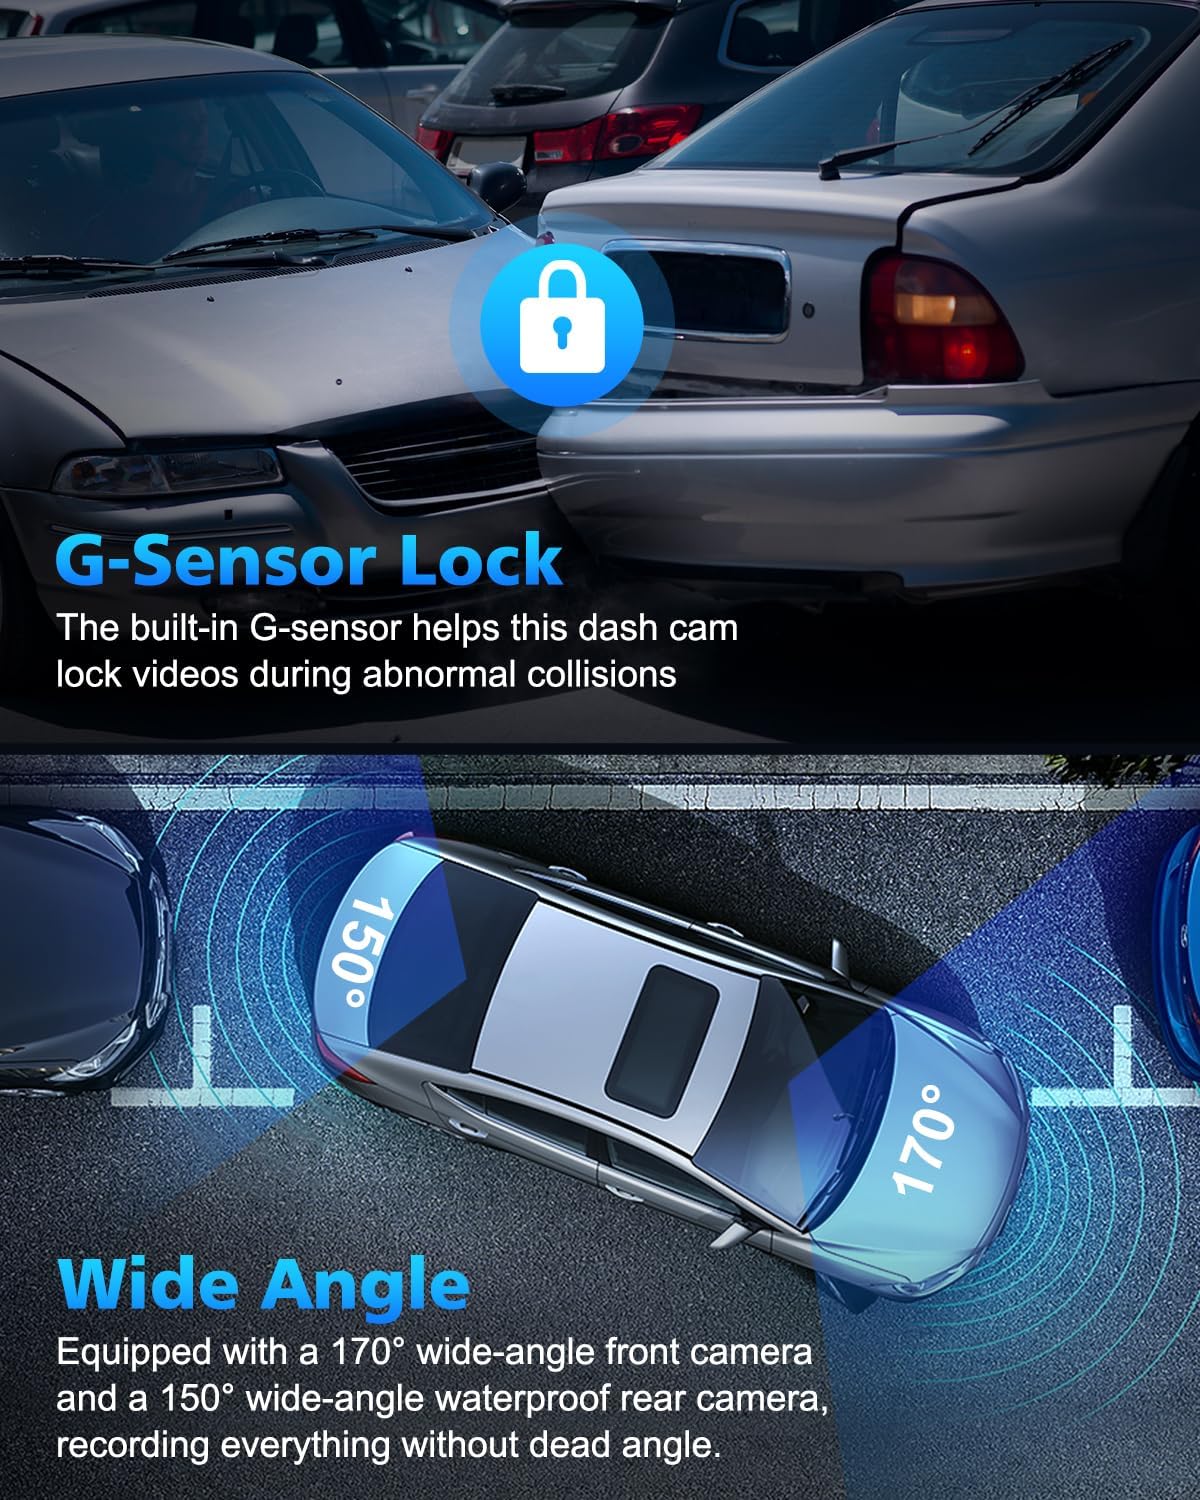
Image: Depiction of the G-Sensor locking mechanism during an impact and the wide 170-degree front and 150-degree rear camera angles.

Image: Visual representation of seamless loop recording, where older files are automatically replaced by new ones when the memory card is full.
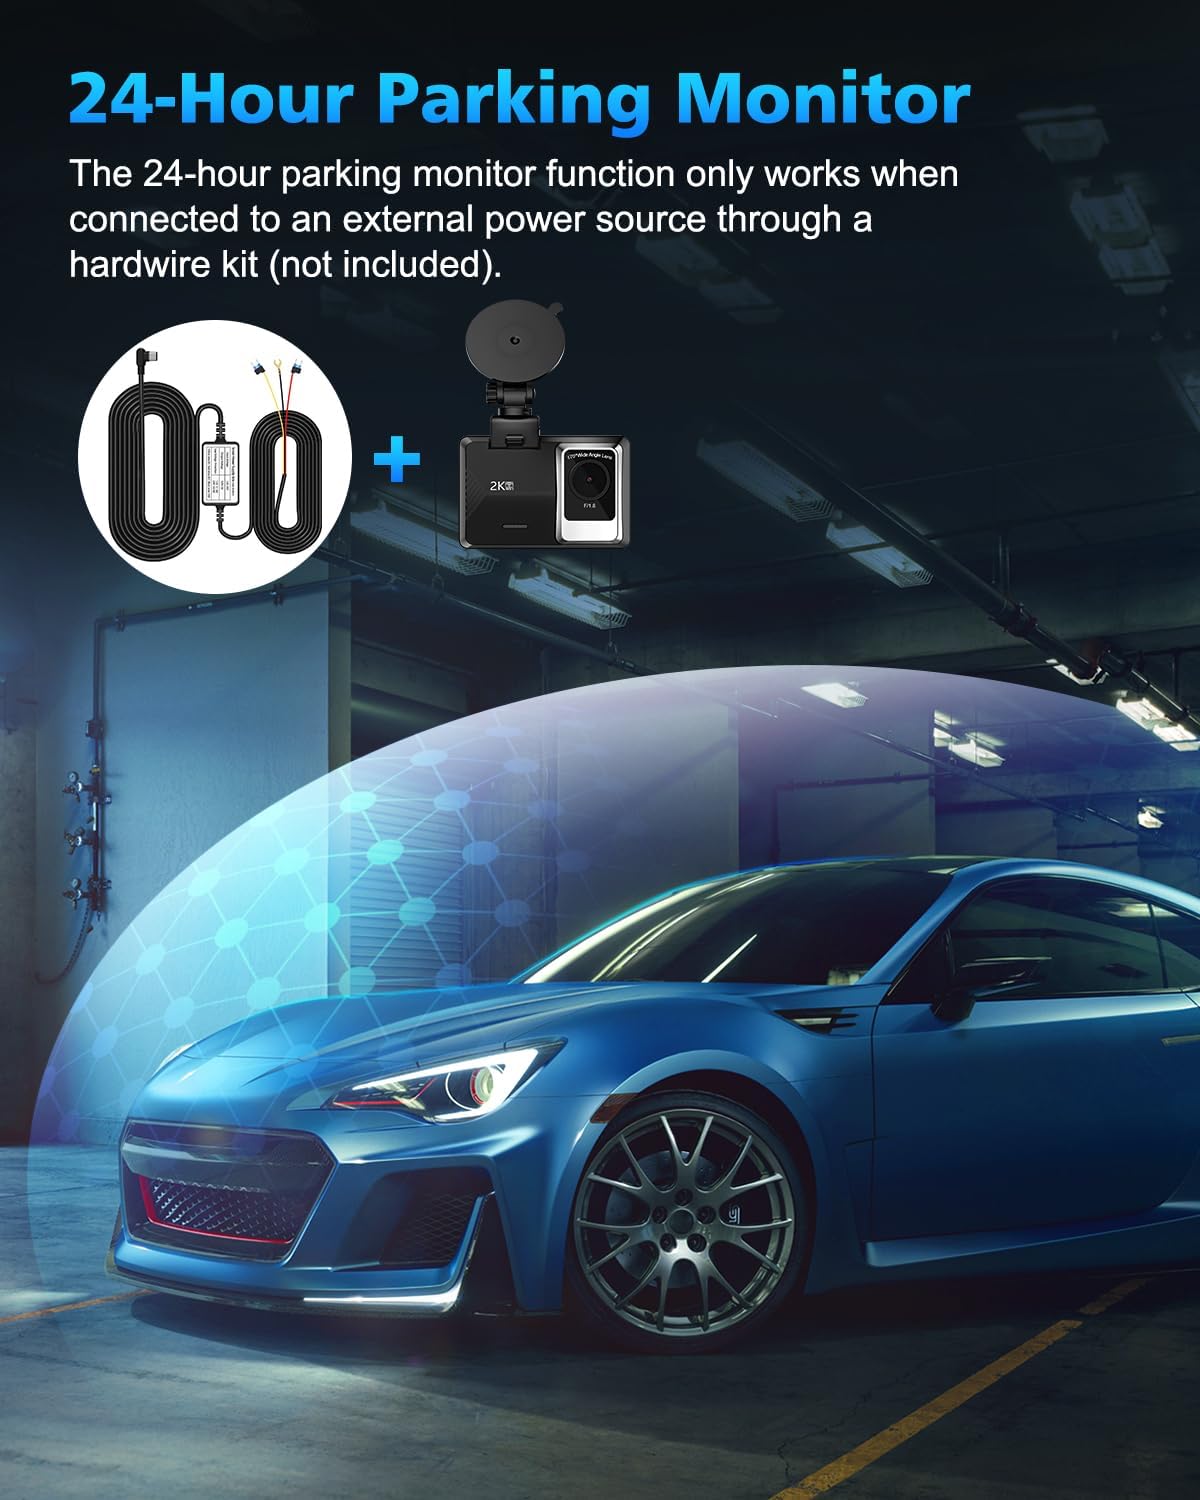
Image: Illustration of the 24-hour parking monitor function, noting its requirement for an external hardwire kit.
5. Manutenzione
To ensure optimal performance and longevity of your SUVCON Dash Cam, follow these maintenance guidelines:
- Lenti pulite: Pulisci regolarmente le lenti della fotocamera anteriore e posteriore con un panno morbido e privo di lanugine per garantire una qualità video nitida. Evita materiali abrasivi che potrebbero graffiare le lenti.
- Formattazione della scheda di memoria: It is recommended to format the memory card every 2-4 weeks to prevent data corruption and ensure smooth loop recording. This can usually be done through the dash cam's settings menu.
- Controllo della temperatura: Avoid exposing the dash cam to extreme temperatures for prolonged periods. If parked in direct sunlight, consider removing the dash cam or using a sunshade.
- Gestione dei cavi: Ensure all cables are securely routed and not interfering with driving controls or vision. Use the provided cable clips to keep wiring tidy.
6. Risoluzione Dei Problemi
Se riscontri problemi con la tua dash cam, fai riferimento alle seguenti soluzioni comuni:
| Problema | Possibile causa | Soluzione |
|---|---|---|
| La dash cam non si accende. | Nessuna alimentazione; collegamento allentato. | Check car charger connection to both the dash cam and the vehicle's 12V outlet. Ensure the vehicle's ignition is on. |
| La registrazione si interrompe o si blocca. | Memory card error; full memory card; incompatible card. | Format the memory card. Ensure you are using a high-speed (Class 10 or U3) microSD card. Try a different memory card. |
| Scarsa qualità video. | Lente sporca; pellicola protettiva ancora presente sulla lente. | Clean the camera lenses. Remove any protective film from the lenses. |
| Problemi di connessione Wi-Fi. | Incorrect app; Wi-Fi not enabled on dash cam. | Ensure you have downloaded the correct app (e.g., Viidure). Enable Wi-Fi on the dash cam through its settings. Restart both the dash cam and your smartphone. |
7. Specifiche
Key technical specifications for the SUVCON Dash Cam Front and Rear 2K:
- Modello: A12
- Risoluzione della fotocamera frontale: 1440P (2K)
- Risoluzione fotocamera posteriore: 720P
- Angolo della fotocamera frontale: Grandangolo di 170 gradi
- Angolo della telecamera posteriore: Grandangolo di 150 gradi
- Display: Schermo IPS da 2.0 pollici
- Magazzinaggio: Supports MicroSD Card (32GB included, up to 256GB supported)
- Caratteristiche: Wi-Fi Control, Loop Recording, G-Sensor, Parking Monitor, Voice Recording
- Tecnologia di connettività: Linea elettrica, wireless (Wi-Fi)
- Dimensioni del prodotto: 1 x 1 x 1 pollici
- Peso dell'articolo: 15.2 once
- Produttore: SUVCON
- Data prima disponibilità: 8 luglio 2023
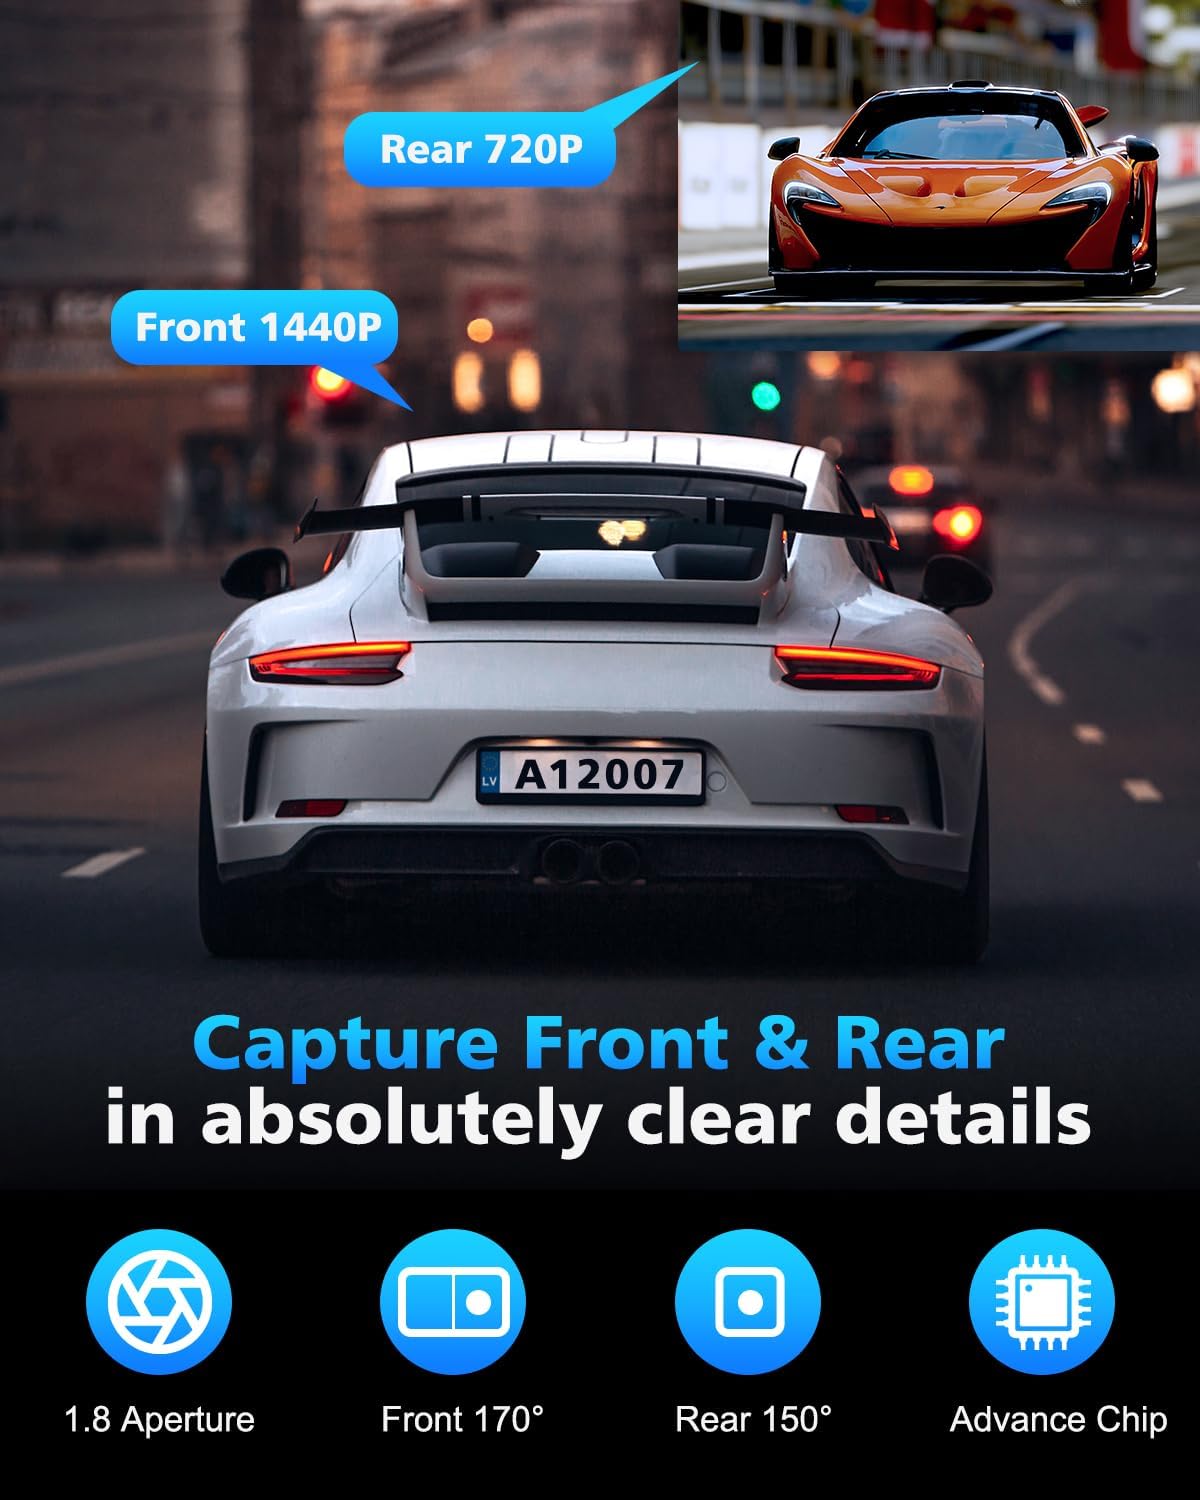
Image: Visual representation of the front camera's 1440P resolution and the rear camera's 720P resolution capabilities.
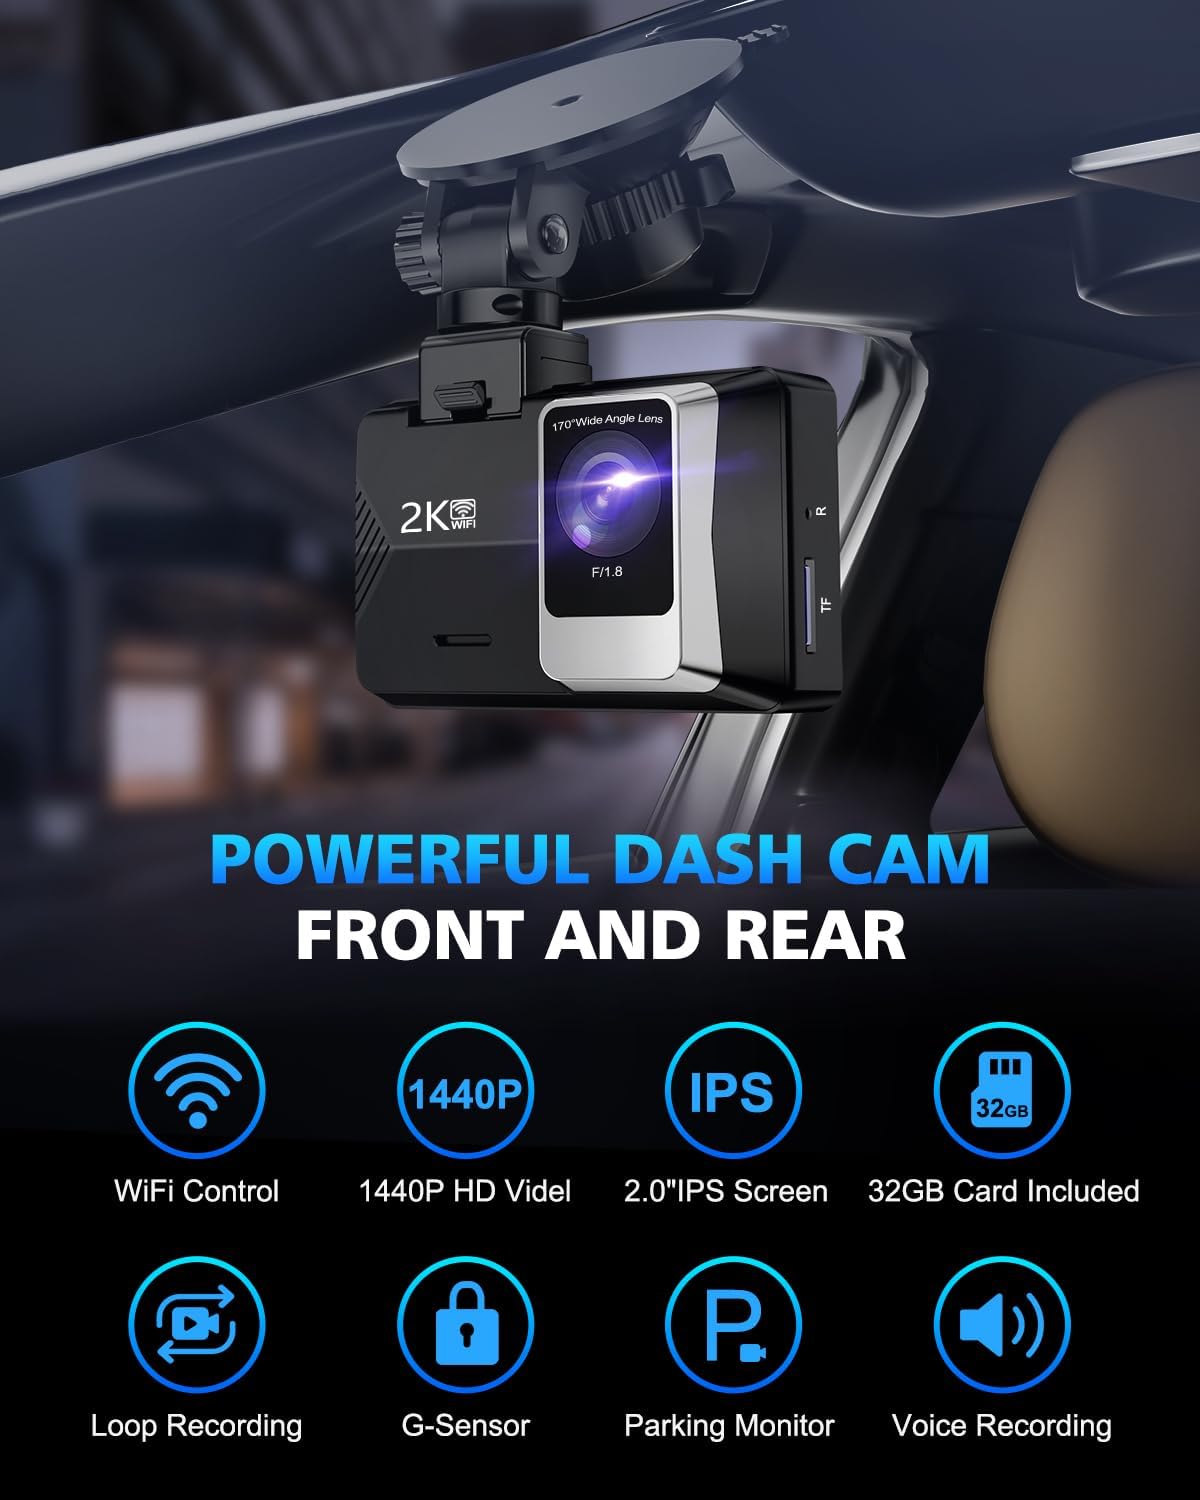
Immagine: Un overview of the powerful features of the SUVCON Dash Cam, highlighting its core functionalities.
8. Garanzia e supporto
For warranty information and technical support regarding your SUVCON Dash Cam, please refer to the official SUVCON website or contact their customer service directly. Details are typically provided on the product packaging or within the included documentation.
You may also find additional resources and frequently asked questions on the product's Amazon listing page or by visiting the SUVCON Store on Amazon.