
Introduzione
Thank you for choosing the Makita PM001GZ01 40V Max XGT Cordless Backpack Sprayer. This manual provides important information regarding the safe use, operation, and maintenance of your sprayer. Please read it thoroughly before first use and keep it for future reference.
Istruzioni generali di sicurezza
Osservare sempre le seguenti precauzioni di sicurezza per ridurre il rischio di lesioni personali o danni all'utensile.
- Leggi tutte le istruzioni: Familiarize yourself with the controls and proper use of the sprayer.
- Indossare adeguati dispositivi di protezione individuale (DPI): This includes eye protection, gloves, and respiratory protection, especially when handling chemicals.
- Chemical handling: Always follow the instructions and safety warnings provided by the chemical manufacturer. Do not spray flammable liquids.
- Sicurezza della batteria: Use only Makita XGT 40V Max batteries and chargers. Do not expose batteries to water, heat, or direct sunlight.
- Tenere lontani i bambini e gli astanti: Non permettere ai bambini o a persone non addestrate di utilizzare lo spruzzatore.
- Mantenere una posizione stabile: Ensure stable balance when operating the backpack sprayer.
- Ispezionare prima dell'uso: Check for damaged parts, loose connections, or leaks before each operation.
- Scollegare la batteria: Always remove the battery pack before making adjustments, changing accessories, or storing the sprayer.
Prodotto finitoview
The Makita PM001GZ01 is a powerful 40V Max XGT cordless backpack sprayer designed for efficient application of liquids. Key components are illustrated below.
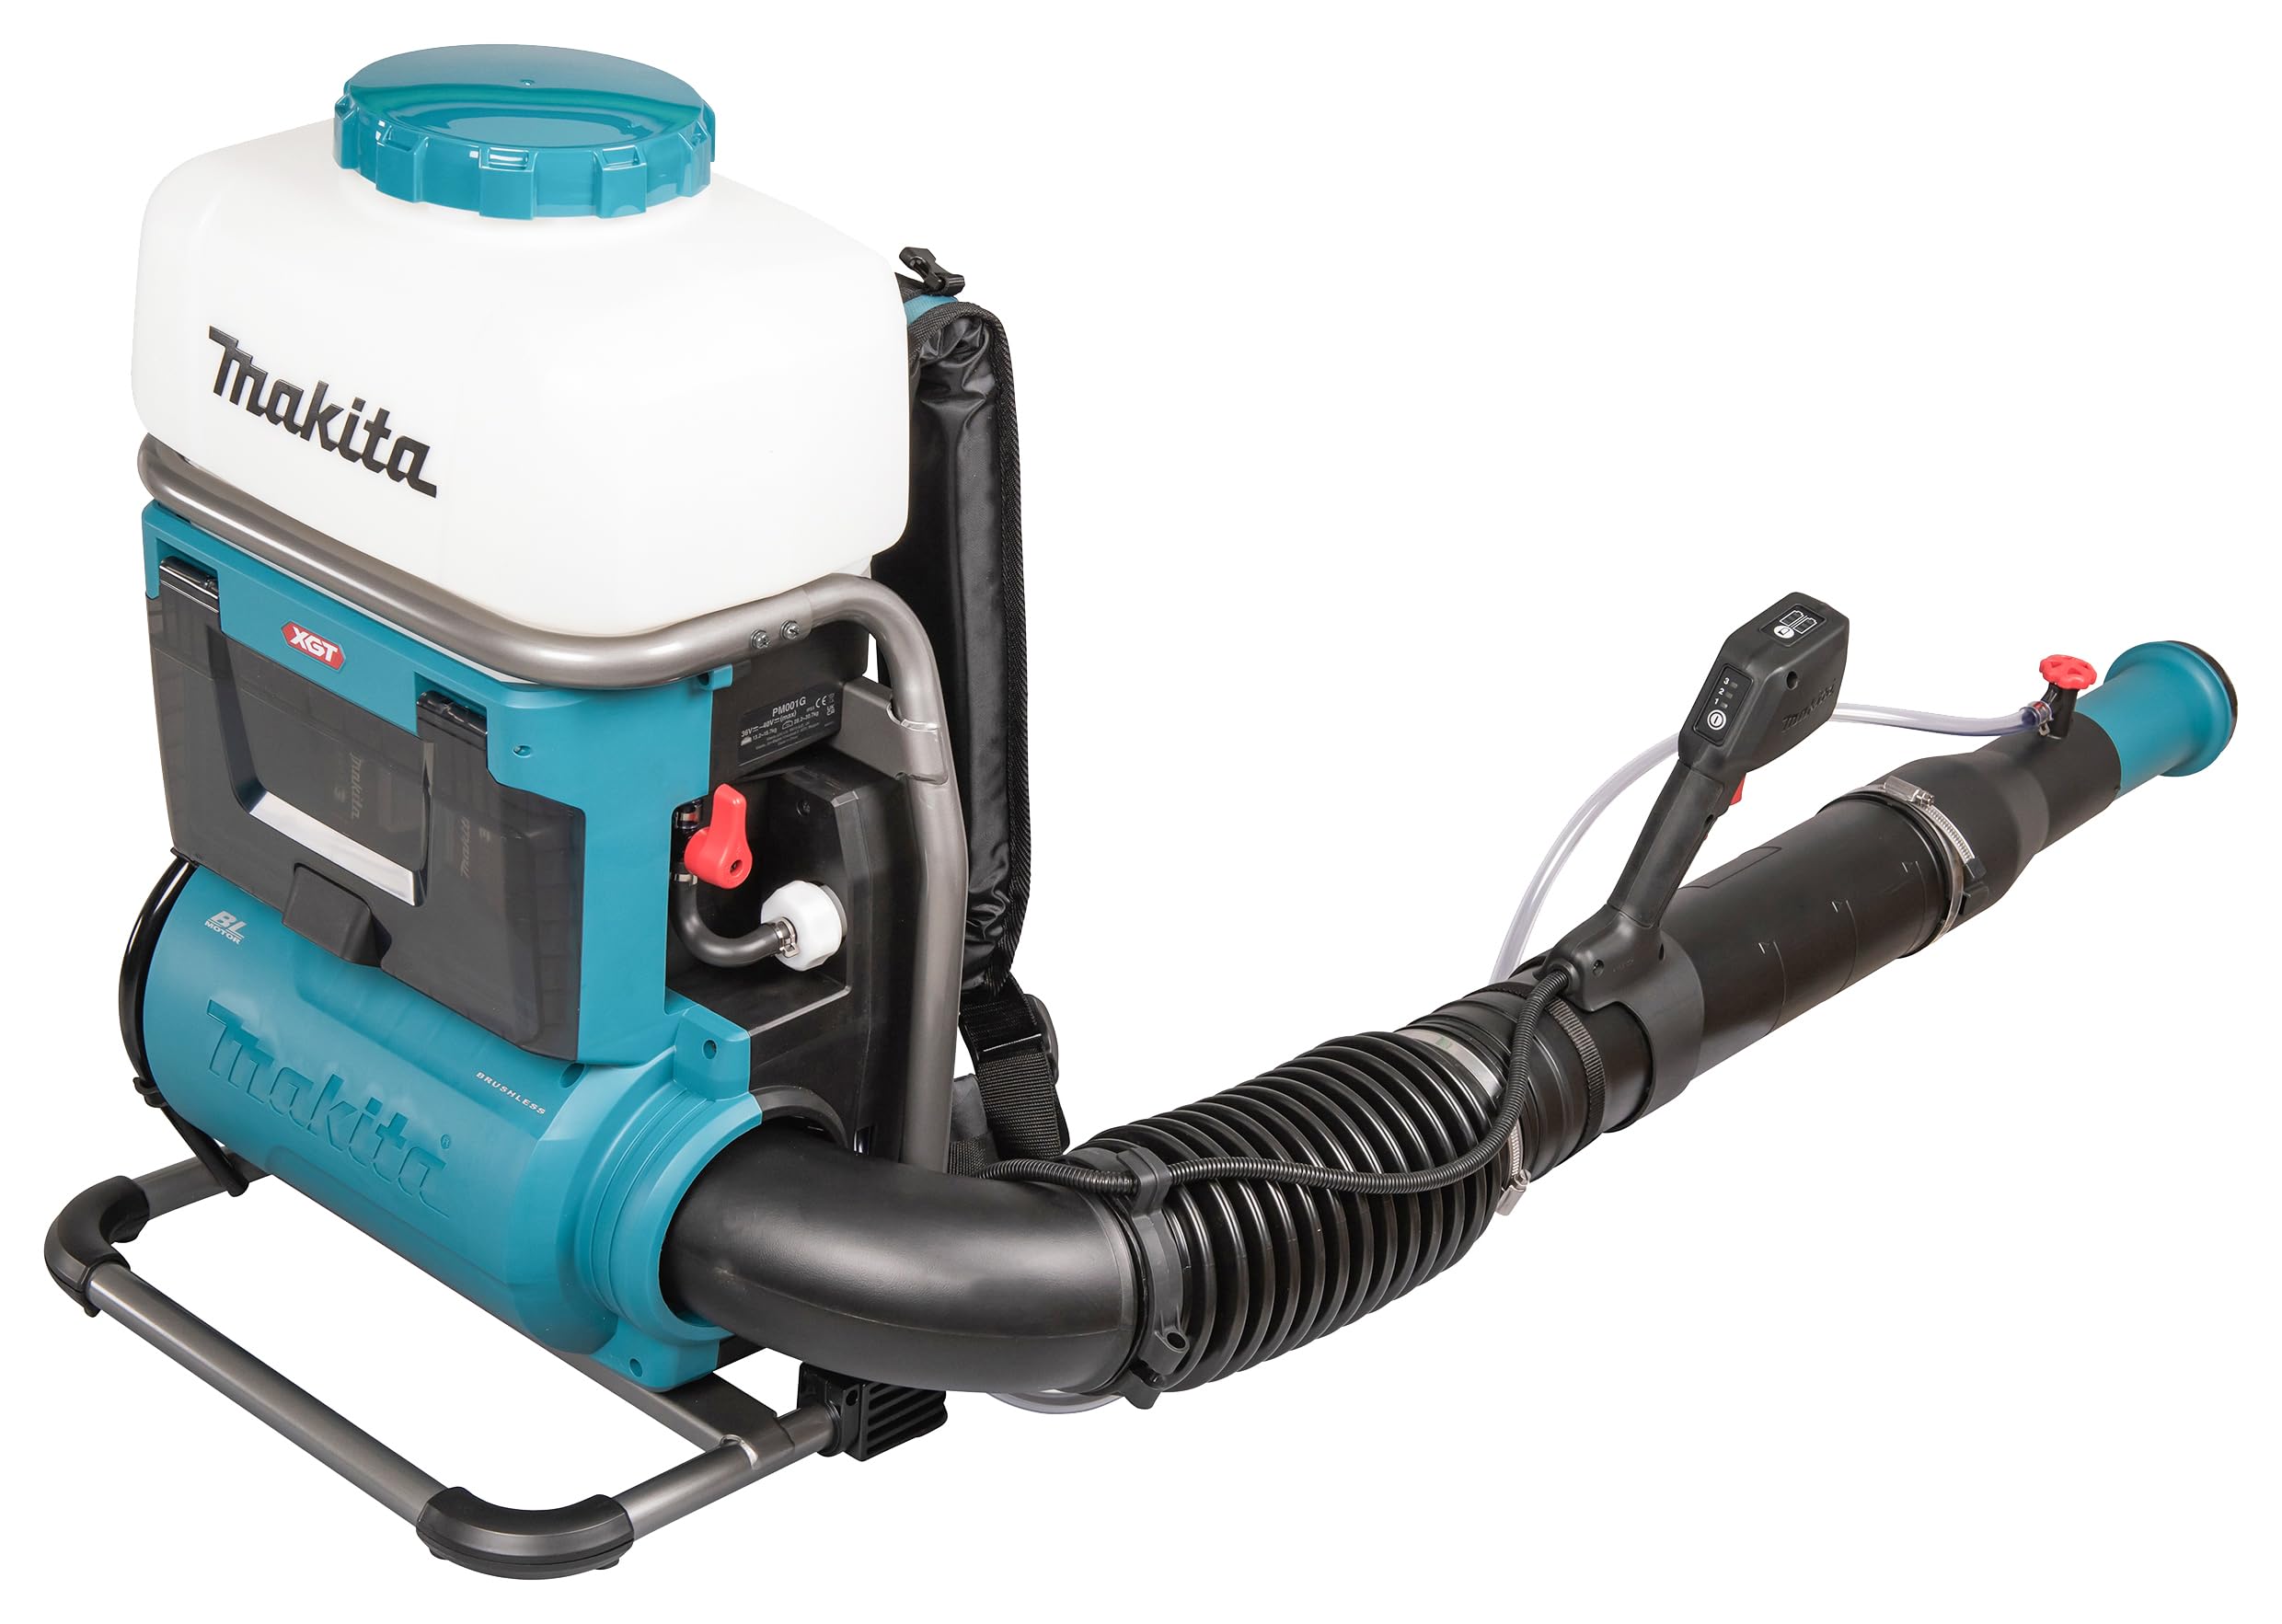
Figura 1: Complessivamente view of the Makita PM001GZ01 backpack sprayer, showing the main unit, tank, and spray wand assembly.

Figura 2: Posteriore view of the sprayer, highlighting the comfortable backpack straps and padded back support for extended use.

Figura 3: Lato profile of the sprayer, illustrating the robust frame and the connection point for the spray hose.
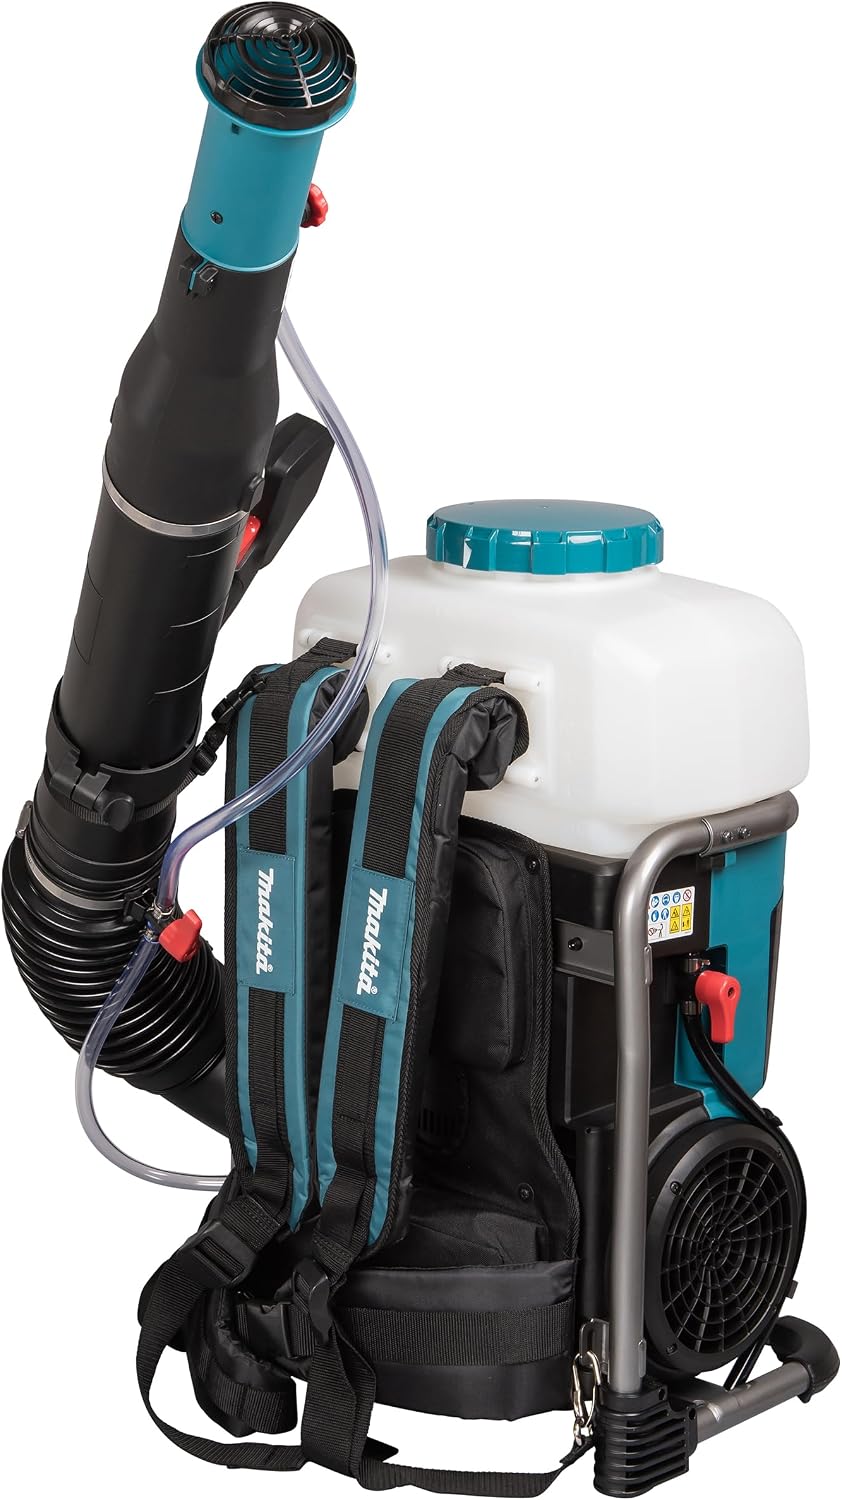
Figura 4: Dettagliato view of the main power unit, featuring the XGT battery system compartment and fan housing.
Impostare
1. Installazione della batteria
Ensure the sprayer is turned off before installing or removing the battery.
- Aprire il coperchio del vano batterie.
- Align the battery pack with the battery slot and slide it in until it clicks into place.
- Chiudere saldamente il coperchio del vano batterie.

Figura 5: Correct method for inserting the 40V Max XGT battery into the designated compartment.

Figura 6: The battery compartment is designed to hold two XGT batteries for extended operation.
2. Hose and Nozzle Assembly
Connect the spray hose and nozzle securely before filling the tank.
- Attach the flexible hose to the main unit's outlet and the spray wand's inlet. Ensure all connections are tight to prevent leaks.
- Secure the spray nozzle to the end of the spray wand.

Figura 7: Detail of the hose connection to the main unit, showing the secure clamp.

Figura 8: The clear hose connecting to the spray wand, with an inline control valve for liquid flow.
3. Riempimento del serbatoio
Always fill the tank with the sprayer on a stable, level surface and the battery removed.
- Svitare il tappo del serbatoio.
- Carefully pour the desired liquid into the tank, observing maximum fill lines.
- Richiudere saldamente il tappo del serbatoio.
Operazione
1. Accensione e spegnimento
The sprayer is controlled via the handle assembly.
- To power on, press the main power button on the control handle.
- To begin spraying, depress the trigger on the handle. Release the trigger to stop spraying.
- To power off, press and hold the main power button until the indicator lights turn off.

Figura 9: The ergonomic control handle features a trigger for spray activation and a power button with LED indicators.
2. Adjusting Spray Settings
The sprayer offers adjustable settings for optimal application.
- Regolazione della portata: Use the red rotary knob on the spray wand to adjust the liquid flow rate. Settings typically range from 1 (low) to 4 (high).
- Nozzle Pattern Adjustment: Rotate the nozzle head to change the spray pattern from a fine mist to a more concentrated stream.

Figura 10: The red knob on the spray wand allows for precise adjustment of the liquid output volume.

Figura 11: The nozzle can be rotated to select different spray patterns, from a wide mist to a narrow stream.
3. Indicatore del livello della batteria
The control handle features LED indicators to show the remaining battery charge.

Figura 12: Pressing the power button illuminates the LED indicators, showing the current battery charge level.

Figura 13: Three green lights indicate a full or near-full battery charge.
Manutenzione
Una manutenzione regolare garantisce la longevità e le prestazioni ottimali del vostro spruzzatore.
- Pulizia del serbatoio: After each use, especially when using chemicals, thoroughly rinse the tank with clean water. Operate the sprayer with clean water to flush the hose and nozzle.
- Pulizia degli ugelli: If the nozzle becomes clogged, remove it and clean any debris. Use a soft brush or needle if necessary.
- Cura della batteria: Conservare le batterie in un luogo fresco e asciutto, lontano dalla luce solare diretta. Non conservare batterie completamente scariche per periodi prolungati.
- Ispezione generale: Periodically check all hoses, connections, and the main unit for signs of wear, damage, or leaks. Replace any damaged parts immediately.
- Magazzinaggio: Store the sprayer in a dry, secure location, out of reach of children. Ensure the tank is empty and clean before storage.
Risoluzione dei problemi
Fare riferimento a questa sezione per i problemi più comuni e le relative soluzioni.
1. Sprayer Does Not Turn On
- Controllare la batteria: Ensure the battery is fully charged and correctly inserted into the compartment.
- Collegamento della batteria: Verificare che il coperchio del vano batteria sia chiuso saldamente.
- Pulsante di accensione: Ensure the power button on the control handle is pressed firmly.
2. No Spray or Weak Spray
- Check Tank Level: Ensure there is sufficient liquid in the tank.
- Intasamento dell'ugello: Inspect the nozzle for any blockages and clean if necessary.
- Hose Kinks/Blockages: Check the spray hose for kinks or internal blockages.
- Flow Rate Setting: Ensure the flow rate adjustment knob is not set to minimum or off.
- Carica della batteria: A low battery can result in reduced spray pressure. Recharge or replace the battery.
3. Perdite
- Connessioni: Stringere tutti i raccordi dei tubi e degli ugelli.
- Tappo del serbatoio: Ensure the tank cap is securely fastened.
- Componenti danneggiati: Inspect hoses, seals, and the tank for cracks or damage. Replace any compromised parts.
Specifiche
| Caratteristica | Dettaglio |
|---|---|
| Nome del modello | PM001GZ01 |
| Marca | Makita |
| Fonte di alimentazione | Alimentato a batteria |
| Voltage | 40 Volt (XGT Max) |
| Fattore di forma | Zaino |
| Caratteristica speciale | Design compatto |
| Peso dell'articolo | 13.8 chilogrammi |
| Colore | Black/Petrol (Teal) |
| Componenti inclusi | 1 x Makita PM001GZ01 (Battery and Charger not included) |
| Paese di origine | Cina |
Garanzia e supporto
Per informazioni sulla garanzia, supporto tecnico o richieste di assistenza, fare riferimento al sito ufficiale Makita website or contact your local Makita authorized service center. Keep your purchase receipt as proof of purchase for warranty claims.
Risorse online: www.makita.com