
1. Introduzione
This manual provides essential information for the safe and efficient operation of your DURATECH Hotsplash HS40-4KW Pool Heat Pump. Please read this manual thoroughly before installation, operation, or maintenance to ensure proper use and to prevent damage or injury.
The Hotsplash HS40-4KW is a compact and efficient heat pump designed for heating swimming pools up to 12 cubic meters. It features an environmentally friendly R32 gas refrigerant, a corrosion-resistant titanium heat exchanger, and an intuitive control panel for ease of use. It is designed to operate effectively in ambient temperatures of +10 °C and above.
2. Informazioni sulla sicurezza
Always adhere to the following safety guidelines to prevent electric shock, fire, injury, or damage to the unit:
- Ensure the unit is installed by a qualified professional in accordance with local electrical and plumbing codes.
- Non utilizzare l'unità se il cavo di alimentazione o la spina sono danneggiati.
- Tenere bambini e animali domestici lontani dall'unità durante il funzionamento.
- Do not insert objects into the fan grille or any openings.
- Scollegare l'alimentazione prima di effettuare qualsiasi operazione di manutenzione o pulizia.
- Garantire un'adeguata ventilazione attorno all'unità.
3. Componenti del prodotto
Familiarize yourself with the main components of your Hotsplash HS40-4KW heat pump:

Figura 3.1: Complessivamente view of the Hotsplash HS40-4KW pool heat pump, blue and black, with power cord and water hose connected. This image shows the compact design and the main connections.

Figura 3.2: Davanti view of the Hotsplash HS40-4KW pool heat pump, showing the main fan and the "Hot Splash" logo, along with the water inlet and outlet connections. The fan draws air in for heat exchange.

Figura 3.3: Lato view of the Hotsplash HS40-4KW pool heat pump, highlighting the water inlet and outlet ports and the fan grille. These ports are crucial for connecting to your pool's filtration system.
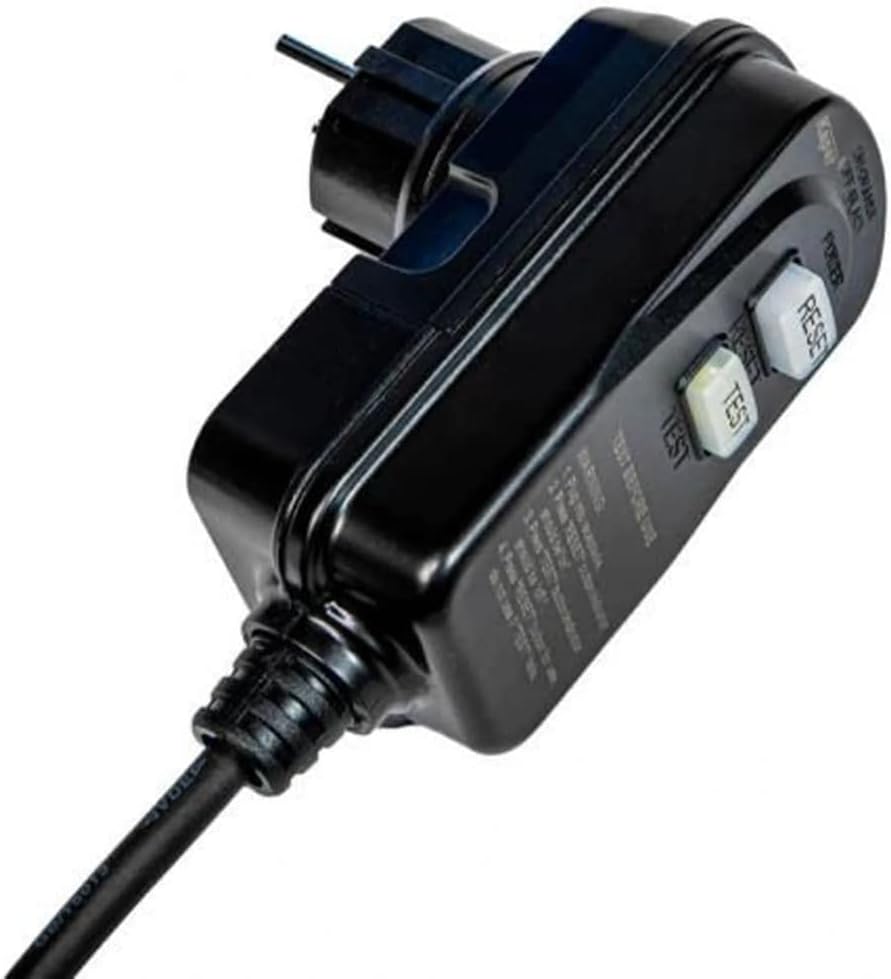
Figura 3.4: Close-up of the power plug for the Hotsplash HS40-4KW, featuring "TEST" and "RESET" buttons for safety. Always test the RCD/GFCI before each use.

Figura 3.5: A hand demonstrating the integrated carrying handle on the top of the Hotsplash HS40-4KW pool heat pump, highlighting its portability.
4. Configurazione e installazione
Proper installation is crucial for the performance and longevity of your heat pump. The unit should be placed on a stable, level surface with adequate clearance for air circulation (at least 50 cm around the fan outlet).
4.1. Posizionamento
- Place the heat pump outdoors, ensuring it is not exposed to direct sunlight for prolonged periods or heavy rain without adequate cover.
- Ensure the ambient temperature is above +10 °C for optimal operation.
- Consider the noise level and air discharge direction when choosing a location.
4.2. Connessioni idriche
Connect the heat pump to your pool's filtration system. The unit uses a full-flow technology, meaning the entire pool water flow passes through the heat pump.
- Identify the water inlet and outlet ports on the heat pump (refer to Figure 3.3).
- Connect the outlet of your pool filter pump to the heat pump's IN porta.
- Connect the heat pump's FUORI port back to your pool's return line.
- Assicurarsi che tutti i collegamenti siano sicuri e a tenuta stagna per evitare perdite.
4.3. Connessione elettrica
The Hotsplash HS40-4KW comes with a pre-wired power cord and a safety plug (RCD/GFCI).
- Ensure the power outlet is suitable for the unit's electrical requirements (refer to specifications).
- Collegare il cavo di alimentazione a una presa elettrica dotata di messa a terra.
- Before each use, press the "TEST" button on the plug, then the "RESET" button to ensure the safety device is functioning correctly.
5. Istruzioni per l'uso
The Hotsplash HS40-4KW features an intuitive control panel with three buttons for easy operation.
5.1. Avviamento iniziale
- Ensure the pool filter pump is running and water is flowing through the heat pump. The heat pump requires water flow to operate.
- Plug in the heat pump and perform the RCD/GFCI test (Section 4.3).
- The unit will typically start automatically or can be turned on using the power button on the control panel.
5.2. Impostazione della temperatura desiderata
Use the control panel buttons to adjust the target water temperature. Refer to the display for the current water temperature and the set temperature.
- Premere il tasto IMPOSTATO pulsante per accedere alla modalità di regolazione della temperatura.
- Utilizzare il UP E GIÙ arrows to increase or decrease the desired temperature.
- Premere IMPOSTATO di nuovo oppure attendere qualche secondo affinché l'impostazione venga salvata.
5.3. Funzionamento normale
The heat pump will automatically turn on and off to maintain the set temperature, provided there is continuous water flow from the pool pump. The fan will operate to draw in ambient air for heat exchange.
6. Manutenzione
Una manutenzione regolare garantisce prestazioni ottimali e prolunga la durata della pompa di calore.
6.1. Pulizia
- Pulire periodicamente l'esterno dell'unità con un panno morbido eamp stoffa. Non utilizzare prodotti chimici aggressivi o detergenti abrasivi.
- Ensure the air intake and exhaust grilles are free from debris, leaves, and other obstructions. Blockages can reduce efficiency.
6.2. Winterization (If Applicable)
If you live in an area where temperatures drop below +10 °C and you will not be using the pool, it is recommended to winterize the heat pump:
- Scollegare l'alimentazione elettrica.
- Drain all water from the heat pump by disconnecting the water hoses.
- Store the unit in a dry, protected area, or cover it with a breathable, waterproof cover if left outdoors.
7. Risoluzione Dei Problemi
Questa sezione fornisce soluzioni ai problemi più comuni che potresti riscontrare.
| Problema | Possibile causa | Soluzione |
|---|---|---|
| L'unità non si accende | No power; RCD/GFCI tripped; Insufficient water flow | Check power connection; Reset RCD/GFCI; Ensure pool pump is running and water flow is adequate. |
| Scarsa prestazione di riscaldamento | Low ambient temperature; Dirty coils/grilles; Incorrect temperature setting; Pool size too large | Ensure ambient temperature is above +10 °C; Clean unit; Verify temperature setting; Confirm pool volume is within recommended limits (up to 12 m³). |
| Rumore insolito | Debris in fan; Loose components; Unit not level | Inspect and remove debris; Check for loose parts; Ensure unit is on a stable, level surface. |
| Perdita d'acqua | Loose hose connections; Damaged O-rings | Stringere tutti i raccordi dei tubi flessibili; ispezionare e sostituire gli O-ring se danneggiati. |
Se il problema persiste dopo aver provato queste soluzioni, contattare l'assistenza clienti.
8. Specifiche
| Caratteristica | Specificazione |
|---|---|
| Numero di modello | HS40 |
| Dimensioni del prodotto | 30 cm (L) x 30 cm (L) x 35 cm (A) |
| Peso del prodotto | 16 chilogrammi |
| Materiale | Plastica |
| Colore | Blu |
| Funzione speciale | Hot Water (Pool Heating) |
| Volume piscina consigliato | Fino a 12 m³ |
| Temperatura operativa ambientale minima | +10 °C |
| Refrigerante | R32 (Environmentally friendly) |
| Scambiatore di calore | Titanium (Corrosion-resistant) |
9. Informazioni sulla garanzia
DURATECH products are manufactured to high-quality standards and are covered by a manufacturer's warranty. Please refer to the warranty card included with your product or visit the official DURATECH websito per termini e condizioni di garanzia dettagliati. Conservare la prova d'acquisto per eventuali reclami in garanzia.
10. Assistenza clienti
For technical assistance, troubleshooting beyond this manual, or spare parts inquiries, please contact DURATECH customer support. Have your product model number (HS40) and purchase details ready when contacting support.
You can typically find contact information on the DURATECH official websul sito o sulla confezione del prodotto.