1. Introduzione
Thank you for choosing the GenMachine Mini PC. This compact yet powerful computer is designed to deliver exceptional performance for a variety of tasks, including gaming, office productivity, and creative design. Equipped with an AMD Ryzen 7 3750H processor, ample memory, and fast storage, it offers a seamless computing experience. This manual provides essential information for setting up, operating, maintaining, and troubleshooting your new Mini PC.
2. Cosa c'è nella scatola
Si prega di verificare che tutti gli articoli siano presenti e in buone condizioni al momento del disimballaggio.
- 1 x GenMachine Mini PC
- 1 cavo HDMI
- 1 x adattatore di alimentazione
- 1 x Manuale utente (questo documento)
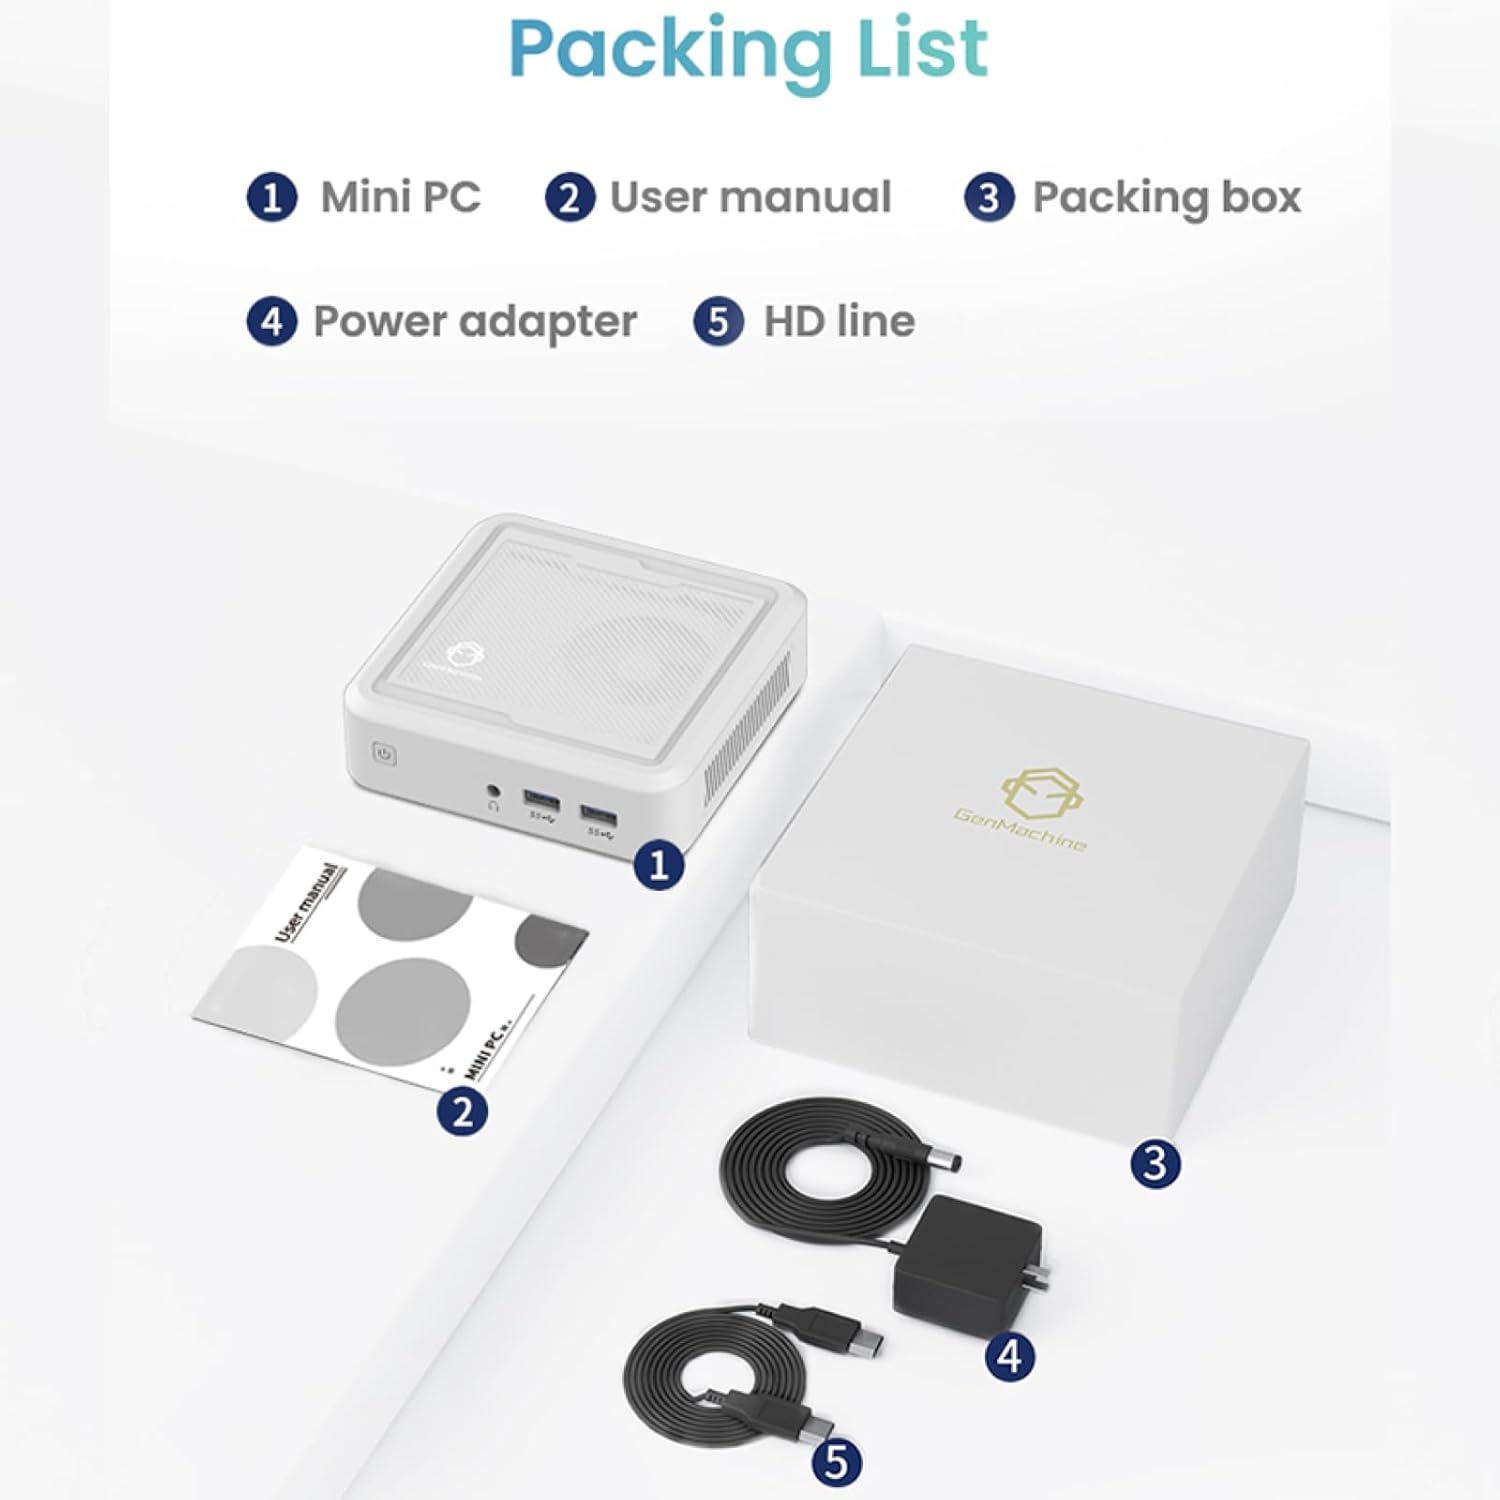
Figure 2.1: Packaging contents of the GenMachine Mini PC.
3. Caratteristiche del prodotto
The GenMachine Mini PC is engineered with features to enhance your computing experience:
- Prestazioni potenti: Equipped with an AMD Ryzen 7 3750H processor, delivering speeds up to 4.0GHz with 4 cores and 8 threads for demanding tasks.
- Ample Memory and Storage: Features 8GB of DDR4 RAM and a 256GB SSD with M.2 NVMe support for seamless multitasking and quick file accesso.
- Connettività versatile: Advanced WiFi 6 and Bluetooth 5.2 capabilities ensure high-speed internet and smooth device pairing.
- Design compatto: A sleek, small form factor that fits easily into any workspace or gaming setup.
- Opzioni di visualizzazione multiple: HDMI and DisplayPort outputs support dual 4K displays for expanded productivity and immersive visuals.

Figura 3.1: Fronte view of the GenMachine Mini PC.
3.1 Rich Interface for Easy Connection
The Mini PC offers a comprehensive set of ports to meet various connectivity needs:
- 3.0 porte USB 4
- HDMI x 1
- DisplayPort (DP) x 1
- 1 porta LAN (Ethernet)
- 1 jack audio da 3.5 mm
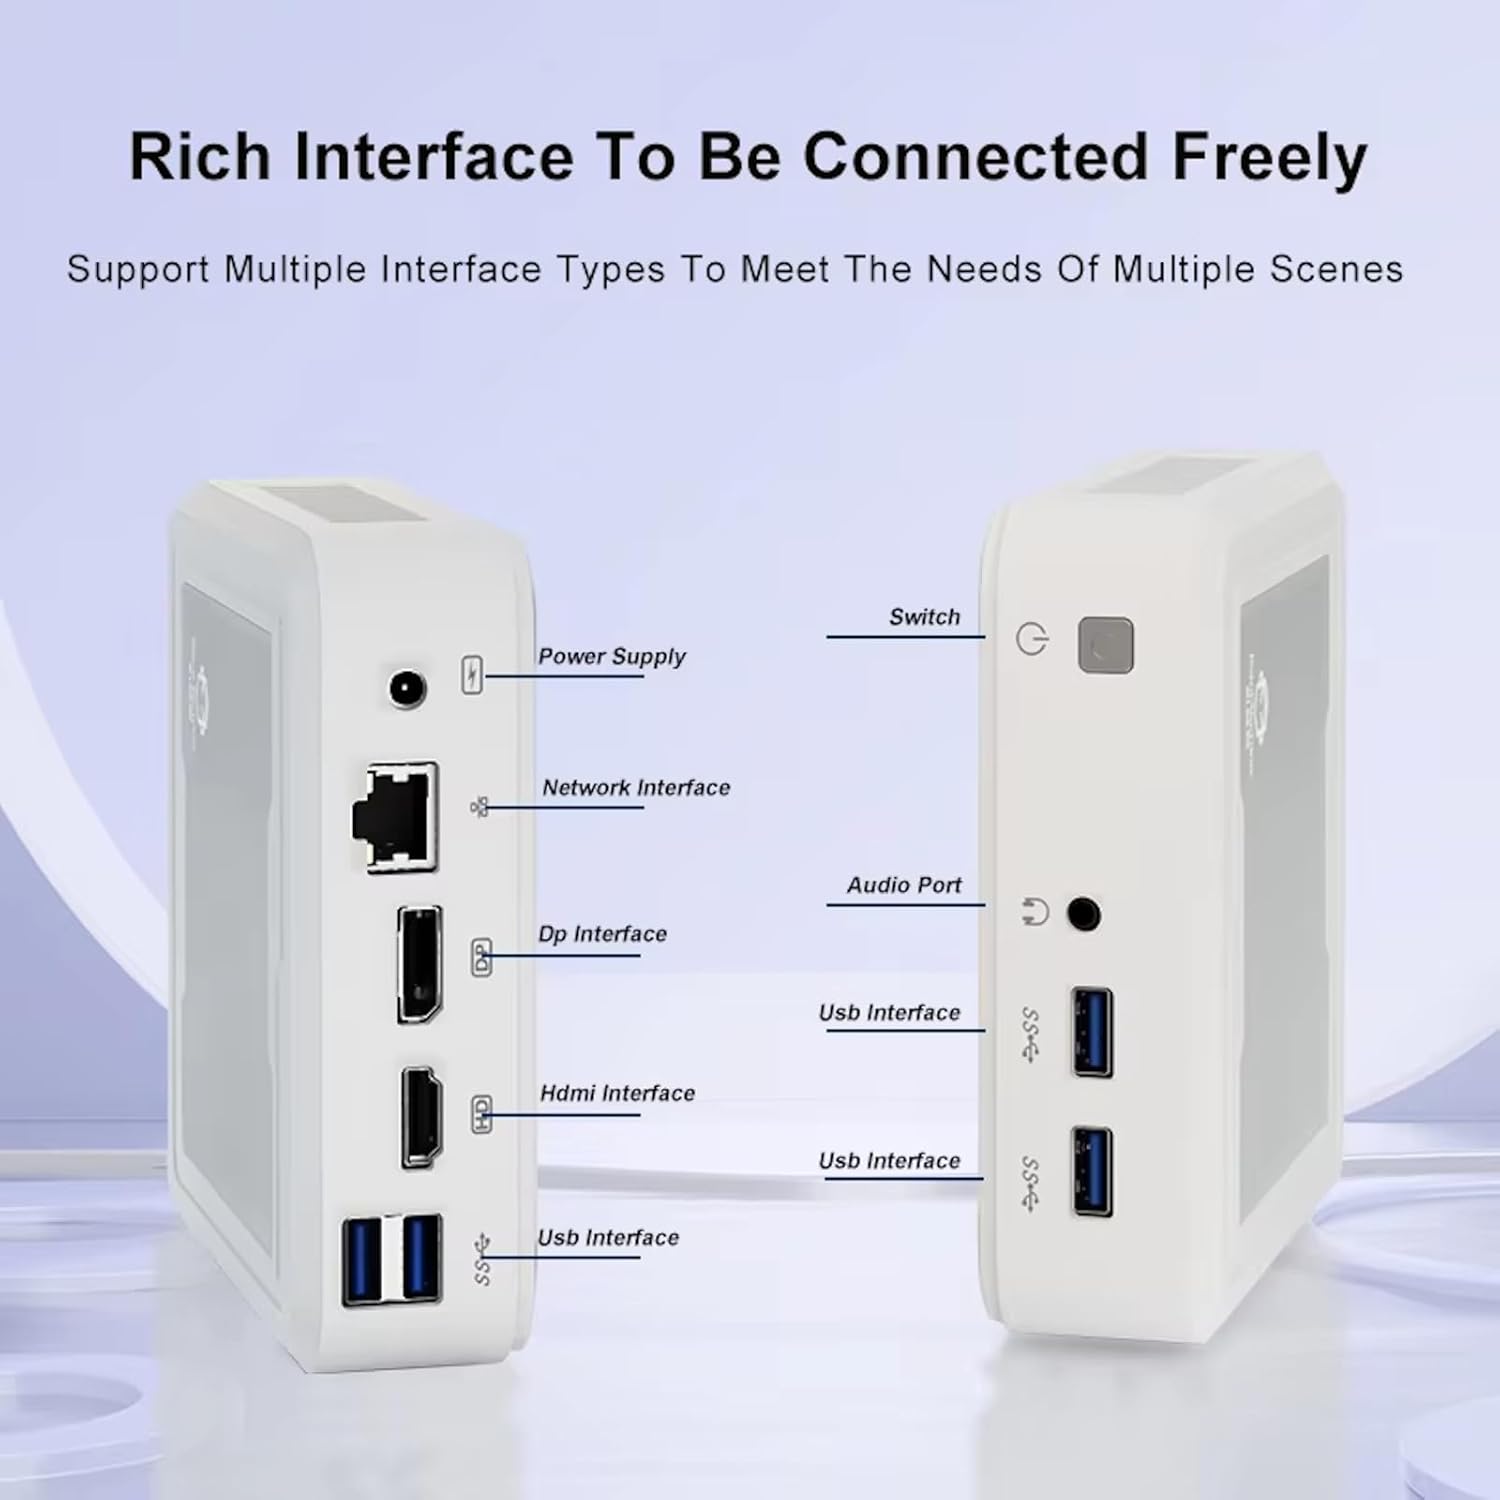
Figure 3.2: Available ports on the GenMachine Mini PC.
3.2 Dual Monitor Support
Enhance your productivity or gaming experience by connecting up to two 4K displays simultaneously using the HDMI and DisplayPort outputs.

Figure 3.3: Dual 4K display setup with the GenMachine Mini PC.
Video 3.1: Demonstration of the GenMachine Mini PC supporting two monitors simultaneously.
3.3 Efficienza energetica e funzionamento silenzioso
Designed for low noise operation, the Mini PC maintains a quiet environment, making it suitable for various settings.

Figure 3.4: Noise level comparison of the GenMachine Mini PC.
3.4 Compact and Durable Design
The Mini PC features an ultra-durable, lightweight metal casing, making it space-saving and robust for any work environment.
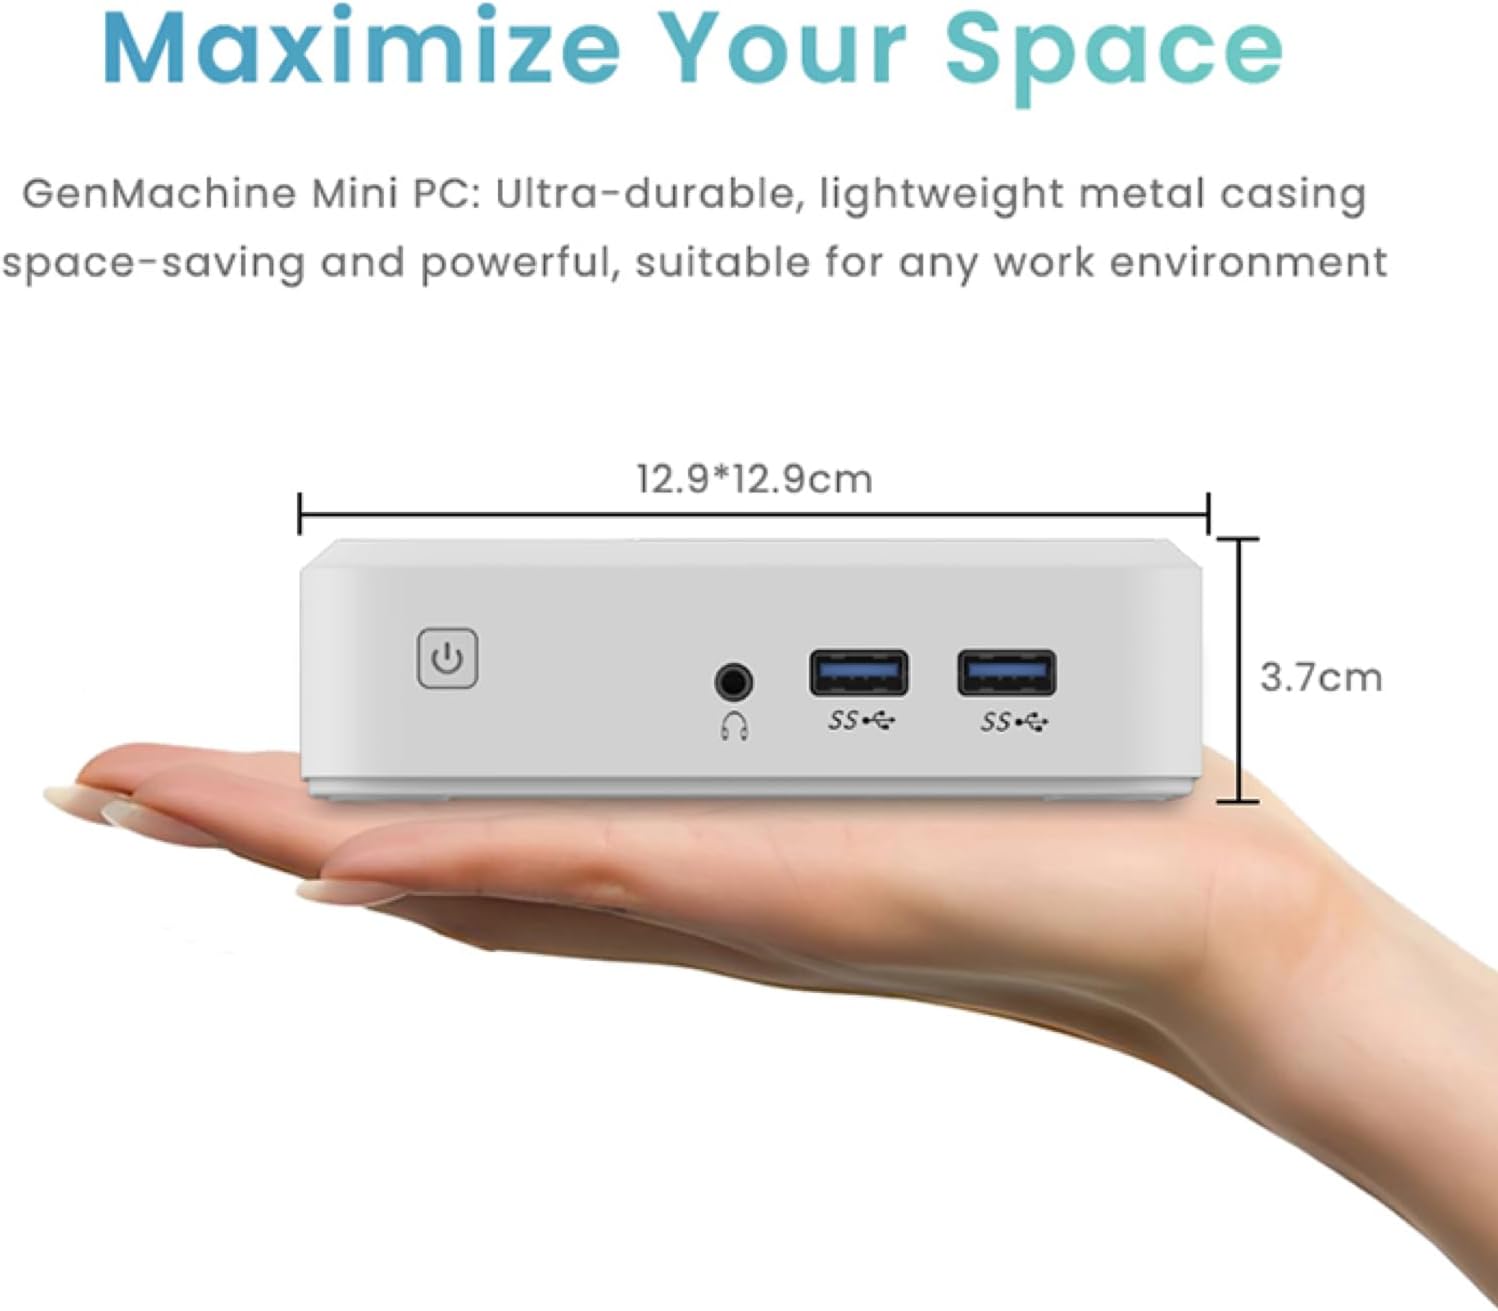
Figure 3.5: Compact size of the GenMachine Mini PC.
Video 3.2: Oltreview of the GenMachine Mini PC's features and compact design.
4. Guida all'installazione
Follow these steps to set up your GenMachine Mini PC:
- Disimballare il Mini PC: Rimuovere con attenzione tutti i componenti dalla confezione.
- Collegamento a un display: Use the provided HDMI cable to connect the Mini PC to your monitor or TV. If using a DisplayPort monitor, use a compatible DP cable (not included).
- Connetti le periferiche: Collega la tastiera, il mouse e qualsiasi altro dispositivo USB alle porte USB 3.0 disponibili.
- Connettiti alla rete (facoltativo): Per una connessione Internet cablata, collega un cavo Ethernet alla porta LAN. Per una connessione wireless, assicurati che la tua rete Wi-Fi sia disponibile durante la configurazione iniziale.
- Connetti alimentazione: Collegare l'adattatore di alimentazione alla porta DC-in del Mini PC, quindi collegare l'adattatore a una presa di corrente.
- Accensione: Press the power button on the front of the Mini PC. The system should boot up.
5. Istruzioni per l'uso
5.1 Avvio iniziale e configurazione del sistema operativo
Upon first power-on, the Mini PC will guide you through the operating system setup process. Follow the on-screen prompts to configure language, region, user accounts, and network settings.
5.2 Gestione dell'alimentazione
- Accensione: Premere una volta il pulsante di accensione.
- Fermare: Access the power options through the operating system's start menu and select 'Shut down'.
- Ricomincia: Access the power options through the operating system's start menu and select 'Restart'.
- Modalità risparmio: Access the power options through the operating system's start menu and select 'Sleep'.
5.3 Connessione a Wi-Fi e Bluetooth
To connect to a wireless network or Bluetooth device, use the respective settings within your operating system. The Mini PC supports WiFi 6 and Bluetooth 5.2 for fast and reliable connections.
6. Manutenzione
Una manutenzione regolare contribuisce a garantire la longevità e le prestazioni ottimali del tuo Mini PC:
- Pulizia: Use a soft, dry cloth to clean the exterior. For dust in vents, use compressed air. Ensure the device is powered off and unplugged before cleaning.
- Ventilazione: Assicurarsi che il Mini PC sia posizionato in un'area ben ventilata. Non ostruire le prese d'aria.
- Aggiornamenti software: Regularly update your operating system, drivers, and applications to ensure security and performance.
- Backup dei dati: Eseguire periodicamente il backup dei dati importanti su un'unità esterna o su un archivio cloud.
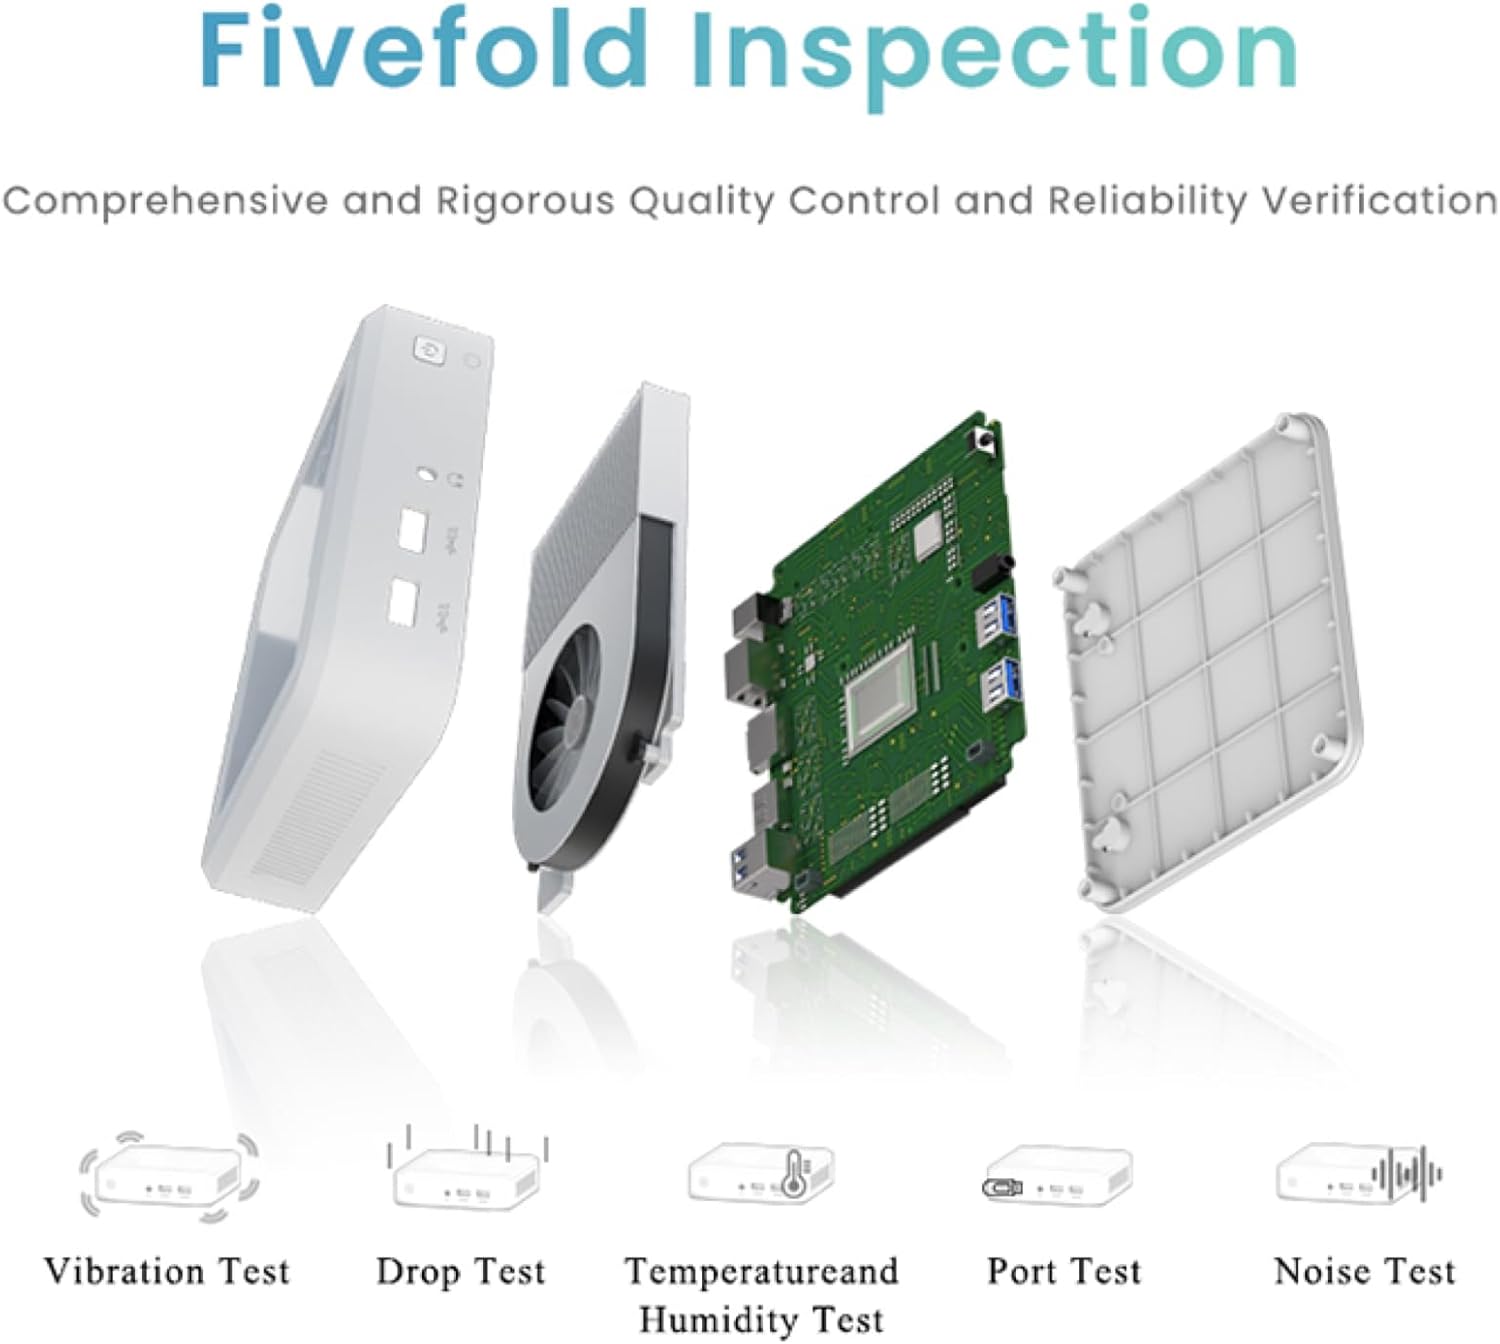
Figure 6.1: GenMachine's Fivefold Inspection process for quality control.
7. Risoluzione Dei Problemi
Se riscontri problemi con il tuo Mini PC, fai riferimento ai seguenti problemi comuni e alle relative soluzioni:
- Nessun potere:
- Assicurarsi che l'adattatore di alimentazione sia collegato saldamente sia al Mini PC sia a una presa di corrente funzionante.
- Prova una presa di corrente diversa.
- Nessuna visualizzazione:
- Verificare che il cavo HDMI o DisplayPort sia collegato saldamente sia al Mini PC che al monitor.
- Assicurarsi che il monitor sia acceso e impostato sulla sorgente di input corretta.
- Se possibile, provare un cavo di visualizzazione o un monitor diverso.
- Il sistema si blocca o non risponde:
- Perform a hard reset by holding the power button for 5-10 seconds until the device powers off, then restart.
- Assicurarsi che il sistema operativo e i driver siano aggiornati.
- Controllare che non vi sia surriscaldamento; garantire una ventilazione adeguata.
- Run a system diagnostic or memory test if the issue persists.
- Nessuna connessione internet:
- Per le connessioni cablate, controllare lo stato del cavo Ethernet e del router.
- Per quanto riguarda il Wi-Fi, assicurati che il Wi-Fi sia abilitato nel sistema operativo e che tu sia connesso alla rete corretta con la password corretta.
- Riavvia il router/modem.
8. Specifiche
| Caratteristica | Specificazione |
|---|---|
| Processore | AMD Ryzen 7 3750H (4 cores, 8 threads, up to 4.0GHz) |
| Memoria RAM | 8 GB DDR4 |
| Magazzinaggio | 256GB SSD (with M.2 NVMe support) |
| Coprocessore grafico | Grafica AMD Radeon Vega 10 |
| Risoluzione massima dello schermo | 3840 x 2160 pixel (4K) |
| Tipo senza fili | 802.11ac (WiFi 6), Bluetooth 5.2 |
| Porte USB | 4 porte USB 3.0 |
| Uscite video | HDMI, DisplayPort |
| Sistema operativo | Sistema operativo (preinstallato) |
| Peso dell'articolo | 2.1 libbre |
| Dimensioni del prodotto | 4.9 x 4.9 x 1.4 pollici |
| Colore | Nero |
9. Garanzia e supporto
For warranty information and technical support, please refer to the warranty card included with your product or visit the official GenMachine websito. Conservare la ricevuta d'acquisto come prova d'acquisto per eventuali reclami in garanzia.
If you require further assistance, please contact GenMachine customer support through the channels provided on their official websito.