1. Introduzione
Thank you for choosing the Depusheng T9 Wireless Microphone System. This system provides a reliable and high-quality wireless solution for dynamic and condenser microphones, mixers, PA systems, and speakers. Designed for ease of use and versatility, it offers stable signal transmission and excellent sound performance for various applications.

Image 1.1: Depusheng T9 Wireless Microphone System connected to a microphone and mixer.
2. Caratteristiche del prodotto
- Tecnologia wireless UHF: Utilizes UHF frequency band for stable and interference-free transmission.
- 16 Adjustable Frequencies: Supports multiple units operating simultaneously without interference.
- Batteria ad alta capacità: Built-in 1000mAh battery provides 6-8 hours of continuous use.
- Qualità audio HD Lossless: Garantisce una trasmissione audio chiara e ad alta fedeltà.
- Bassa latenza: Less than 0.3ms delay for real-time audio performance.
- Ampio raggio d'azione: Effective operating distance of 60-80 meters (196-262 feet) in open areas.
- Ampia compatibilità: Compatible with dynamic microphones, condenser microphones (with external 48V phantom power), mixers, PA systems, speakers, sound cards, and electric guitars.
- Collega e usa: Simple setup with automatic infrared frequency pairing.
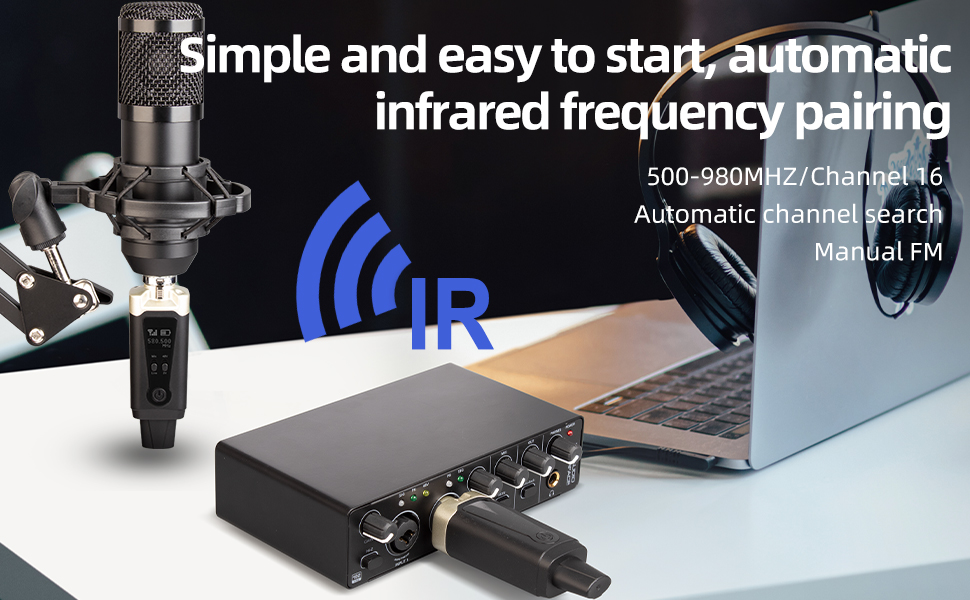
Image 2.1: Key features of the Depusheng T9 Wireless System.
3. Componenti del prodotto
The Depusheng T9 Wireless Microphone System package includes the following items:
- 1 x Wireless Transmitter (XLR)
- 1 x Wireless Receiver (XLR)
- 1 x Manuale utente
- 2 x 6.35mm to XLR Plugs (one male, one female)
- Cavo di ricarica 1 x USB-C

Image 3.1: Package contents of the Depusheng T9 Wireless Microphone System.
4. Istruzioni per l'installazione
4.1 Ricarica dei dispositivi
Before first use, fully charge both the transmitter and receiver using the provided USB-C charging cable. The devices can also be used while charging, allowing for continuous operation.
- Connect the USB-C cable to the charging interface on both the transmitter and receiver.
- Collegare l'altra estremità del cavo USB-C a un adattatore di alimentazione USB standard (non incluso) o a una porta USB alimentata.
- The battery level display will indicate charging status. A full charge typically takes a few hours.

Image 4.1: Battery life indicator and charging port.
4.2 Connecting the Transmitter and Receiver
The T9 system is designed for simple plug-and-play operation with automatic frequency pairing.
- Collegare il trasmettitore: Plug the XLR end of the transmitter directly into your dynamic microphone. If using a condenser microphone, ensure it has its own 48V phantom power supply, as the T9 transmitter does not provide phantom power.
- Connetti il ricevitore: Plug the XLR end of the receiver into the XLR input of your mixer, PA system, speaker, or other audio equipment. Use the provided 6.35mm to XLR plugs if your equipment requires a 6.35mm input.
- Accensione: Press and hold the power button on both the transmitter and receiver to turn them on.
- Associazione automatica: The transmitter and receiver will automatically search for and pair with each other. The display will show the connected frequency.

Image 4.2: Transmitter and Receiver interfaces and controls.

Image 4.3: Wide compatibility with various audio devices.
5. Istruzioni per l'uso
5.1 Accensione/spegnimento
Press and hold the power button on both the transmitter and receiver for approximately 2-3 seconds to turn them on or off.
5.2 Frequency Adjustment (for multiple units)
The T9 system supports 16 adjustable frequencies, allowing multiple sets to be used simultaneously without interference. If you are using multiple T9 systems, you may need to manually adjust the frequency for each pair to avoid conflicts.
- Ensure only one transmitter and receiver pair is powered on initially. They will automatically pair.
- To change the frequency on the transmitter, double-click the power button. Each double-click will increase the frequency by 500 MHz.
- Once the transmitter's frequency is set, power on the corresponding receiver. It will automatically synchronize with the transmitter's new frequency.
- Repeat this process for each additional T9 system, ensuring each pair operates on a unique frequency.

Image 5.1: Multiple T9 systems can operate on different frequencies.
5.3 Audio Gain Switching Key (Transmitter)
The transmitter features an audio gain switching key (labeled 'Mic' and 'Line') to optimize the input level for different sources:
- Mic: Use this setting for microphones to ensure proper signal strength.
- Linea: Use this setting for line-level audio sources (e.g., from a mixer's output) to prevent signal clipping.
5.4 48V/5V Voltage Input Switching Key (Transmitter)
This switch is for specific microphone types. Ensure it is set correctly based on your microphone's requirements. For most dynamic microphones, the default setting is appropriate. If using a condenser microphone that requires external phantom power, ensure the external power is supplied and this switch is set accordingly.
5.5 Visualizzazione del livello della batteria
Both the transmitter and receiver feature a battery level display on their screens, allowing you to monitor the remaining power. Recharge the devices when the battery indicator is low.

Image 5.2: Suitable occasions for using the Depusheng T9 system.
6. Manutenzione
To ensure the longevity and optimal performance of your Depusheng T9 Wireless Microphone System, follow these maintenance guidelines:
- Pulizia: Use a soft, dry cloth to clean the devices. Avoid using harsh chemicals, solvents, or abrasive cleaners.
- Magazzinaggio: Conservare il sistema in un luogo fresco e asciutto, lontano dalla luce solare diretta, da temperature estreme e da elevata umidità.
- Cura della batteria: For long-term storage, charge the batteries to about 50% every few months to maintain battery health. Avoid fully discharging the batteries for extended periods.
- Maneggiare con cura: Avoid dropping or subjecting the devices to strong impacts, as this can damage internal components.
7. Risoluzione Dei Problemi
If you encounter issues with your Depusheng T9 Wireless Microphone System, refer to the following troubleshooting tips:
7.1 No Sound or Intermittent Signal
- Controlla la potenza: Ensure both the transmitter and receiver are powered on and have sufficient battery charge.
- Controllare le connessioni: Verify that the transmitter is securely plugged into the microphone and the receiver is securely plugged into the audio input device (mixer, speaker, etc.).
- Check Pairing/Frequency: Confirm that the transmitter and receiver are paired and operating on the same frequency. If using multiple units, ensure each pair is on a unique frequency (refer to Section 5.2).
- Distanza e ostacoli: Ensure the transmitter and receiver are within the effective operating range (60-80 meters) and there are no significant physical obstacles (walls, large metal objects, human bodies) blocking the line of sight, which can cause signal drops.
- Guadagno audio: Adjust the audio gain switch on the transmitter (Mic/Line) to match your input source.
- Funzionalità del microfono: Test your microphone with a wired connection to ensure it is working correctly.
7.2 Poor Sound Quality (Noise, Distortion)
- Interferenza: Change the operating frequency if you suspect interference from other wireless devices (refer to Section 5.2).
- Livello di ingresso: Ensure the microphone's output level is not too high, causing distortion. Adjust the audio gain switch on the transmitter.
- Qualità del cavo: If using adapter cables, ensure they are in good condition.
- Fattori ambientali: High levels of electromagnetic interference in the environment can affect sound quality. Try moving to a different location.
7.3 Durata breve della batteria
- Carica completa: Assicurarsi che i dispositivi siano completamente carichi prima dell'uso.
- Età della batteria: Over time, rechargeable batteries may degrade. If battery life significantly decreases, consider replacing the unit if it's outside the warranty period.

Image 7.1: Common problems addressed by the Depusheng T9 system.
8. Specifiche
| Caratteristica | Specificazione |
|---|---|
| Numero di modello | T9 |
| Marca | Depusheng |
| Tecnologia di connettività | XLR UHF Wireless |
| Fonte di alimentazione | Alimentato a batteria |
| Tipo di batteria | 1 agli ioni di litio (inclusa) |
| Capacità della batteria | 1000mAh |
| Tempo di utilizzo | 6-8 ore |
| Materiale | Metallo |
| Numero di canali | 16 (regolabile) |
| Risposta in frequenza | 20KHz |
| Campo di lavoro | 60-80 metri |
| Caratteristiche speciali | Battery indicator, Automatic pairing |
| Dispositivi compatibili | Dynamic microphone, Condenser microphone, Mixer |
9. Garanzia e supporto
Depusheng products are designed for reliability and performance. For warranty information and technical support, please refer to the documentation provided with your purchase or contact your retailer. Keep your proof of purchase for warranty claims.


