CANTANTE M3505
SINGER M3505 Motorised Automatic Zig-Zag Electric Sewing Machine
Modello: M3505
1. Introduzione e oltreview
The SINGER M3505 sewing machine is designed for a wide range of sewing projects, offering versatility with its selection of basic, decorative, and stretch stitches. This machine allows for customization of stitch width and length to suit various fabric types, from delicate sheers to durable denim. This manual provides essential information for setting up, operating, and maintaining your sewing machine to ensure optimal performance and longevity.

Figura 1.1: Fronte view of the SINGER M3505 sewing machine, showcasingrazie al suo design compatto e al selettore dei punti.
2. Caratteristiche del prodotto
- 32 Stitches: Offers a comprehensive selection for essential and decorative sewing needs.
- Infila ago: Integrated needle threader for quick and effortless threading, saving time.
- Front Loading Bobbin: Designed for easy winding and insertion of the bobbin.
- 1 Step Buttonhole: Simplifies the process of creating consistent and professional buttonholes.
3. Cosa c'è nella scatola
Upon unpacking your SINGER M3505 sewing machine, please ensure all the following components are present:
- Piede multiuso
- Piedino per cerniera
- Piedino per cucire bottoni
- Pico Foot
- Piedino per asole
- Piatto per rammendo
- Bobine
- Aghi
- Scucitore/Spazzola per pelucchi
- Blocca-spola
- Guida per bordi/trapuntatura
- Cacciavite a L
4. Guida all'installazione
4.1 Disimballaggio e posizionamento
Carefully remove the sewing machine and all accessories from the packaging. Place the machine on a stable, flat surface, ensuring there is adequate space for fabric handling. Connect the power cord to the machine's power input and then to a suitable electrical outlet.

Figura 4.1: Posteriore view of the SINGER M3505, indicating the location for power cord connection.
4.2 Installazione dell'ago
To install or replace a needle, ensure the machine is turned off. Loosen the needle clamp screw, insert the new needle with the flat side facing the back, and push it up as far as it will go. Tighten the needle clamp avvitare saldamente.
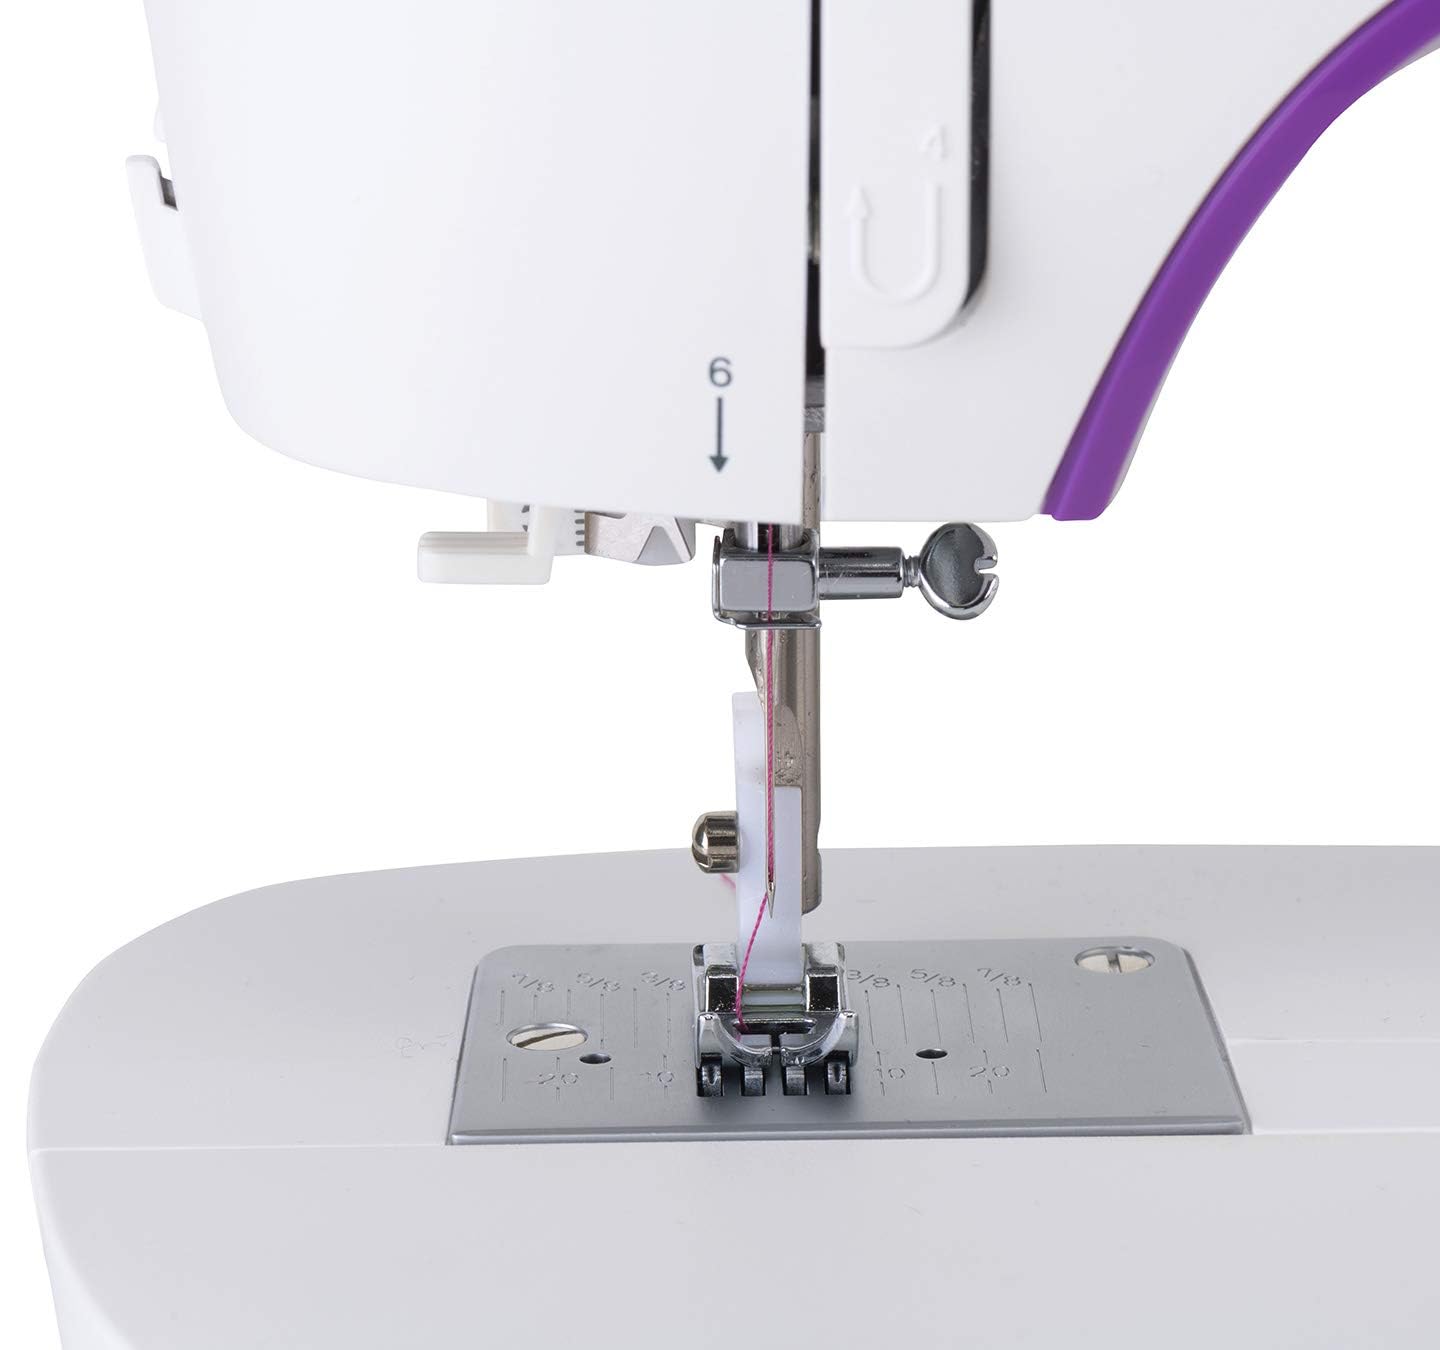
Figura 4.2: primo piano view of the needle and presser foot area, illustrating the needle's position.
4.3 Bobbin Winding and Insertion
Follow the marked path on the machine for bobbin winding. Once wound, open the front loading bobbin case, insert the bobbin, and ensure the thread is correctly routed through the tension spring. Close the bobbin case cover.
4.4 Infilatura della macchina
Place a spool of thread on the spool pin. Follow the numbered threading path indicated on the machine, ensuring the thread passes through all guides and the tension discs. Use the integrated needle threader to easily pass the thread through the eye of the needle.

Figura 4.3: dettagliata view of the upper threading path, showing the numbered guides for correct thread placement.
5. Istruzioni per l'uso
5.1 Selezione dei punti
Turn the stitch selector dial to choose from the 32 available stitches. Each stitch pattern is clearly marked on the dial. Refer to the stitch chart in the manual for specific stitch applications.

Figure 5.1: Close-up of the stitch selector dial, displaying the various stitch patterns available on the M3505.
5.2 Regolazione della lunghezza e della larghezza del punto
The SINGER M3505 allows for adjustment of stitch length and width to fine-tune your sewing. Consult the machine's top panel or the full instruction manual for the specific controls for these adjustments.
5.3 Basic Sewing Operations
Place your fabric under the presser foot. Lower the presser foot lever. Gently press the foot pedal to start sewing. To reverse stitch and secure seams, use the reverse lever/button. Release the foot pedal to stop sewing.
5.4 One-Step Buttonhole
Attach the buttonhole foot. Place the button in the designated slot on the foot. The machine will automatically sew a buttonhole to the correct size for your button in one continuous step. Refer to the full manual for detailed instructions on this feature.
6. Manutenzione
6.1 Pulizia
Regularly clean lint and dust from the bobbin area and feed dogs using the provided lint brush. Turn off and unplug the machine before cleaning. Avoid using harsh chemicals.
6.2 Sostituzione dell'ago
Replace needles frequently, especially when sewing different fabric types or if the needle becomes dull or bent. A dull needle can cause skipped stitches or damage to fabric.
6.3 Cura generale
Keep your sewing machine covered when not in use to protect it from dust. Store it in a dry environment. Do not force the machine if it jams; investigate the cause before resuming operation.
7. Risoluzione Dei Problemi
| Problema | Possibile causa | Soluzione |
|---|---|---|
| Punti saltati | Ago sbagliato, ago piegato, infilatura non corretta. | Replace needle with correct type/size, re-thread machine, check bobbin insertion. |
| Rottura del filo | Tensione errata, filo di scarsa qualità, ago installato in modo errato. | Adjust tension, use good quality thread, ensure needle is correctly installed. |
| Arricciatura del tessuto | Tension too high, incorrect stitch length for fabric. | Reduce upper thread tension, adjust stitch length. |
| La macchina non si avvia | Power cord not connected, foot pedal not connected, machine turned off. | Controllare tutti i collegamenti e assicurarsi che l'interruttore di alimentazione sia acceso. |
8. Specifiche
| Attributo | Dettaglio |
|---|---|
| Marca | SINGER |
| Numero di modello | Numero di modello: M3505 |
| Conteggio dei punti | 32 Decorative Stitches |
| Tipo di bobina | Caricamento frontale |
| Tipo di asola | Asola in 1 passaggi |
| Colore | Bianco |
| Peso dell'articolo | 7 kg 60 gr |
| Paese di origine | Vietnam |
| Componenti inclusi | All-Purpose Foot, Zipper Foot, Button Sewing Foot, Pico Foot, Buttonhole Foot, Darning Plate, Bobbins, Needles, Seam Ripper/Lint Brush, Spool Cap, Edge / Quilting Guide, L-Type Screw Driver |
9. Garanzia e supporto
For warranty information, technical support, or service inquiries regarding your SINGER M3505 sewing machine, please contact Singer India Ltd Customer Care.
Numero assistenza clienti: 1800 103 3474
Quando contatti l'assistenza, tieni a portata di mano il numero del modello (M3505) e i dettagli dell'acquisto.
Ask a question about this manual
Ask about setup, troubleshooting, compatibility, parts, safety, or missing instructions. Manuals+ will review the question and use this page’s manual context to help answer it.