
1. Introduzione
Benvenuti al Neroview Tab 16 user manual. This guide provides essential information for setting up, operating, maintaining, and troubleshooting your new Blackview Tab 16 Android tablet. Please read this manual carefully to ensure optimal performance and longevity of your device.

Immagine: Il Neroview Tab 16 tablet, showcasinil suo design elegante.
2. Cosa c'è nella scatola
Verifica che tutti gli articoli siano presenti nel tuo Blackview Tab 16 package:
- Neroview Tab 16 Tablet (x1)
- Manuale utente (x1)
- Adattatore di alimentazione (x1)
- Cavo USB (x1)
- Stilo (x1)
- TPU Protective Case (x1)
3. Prodotto finitoview
3.1 Physical Design
Il Neroview Tab 16 features a slim and lightweight design, making it highly portable for daily use.

Immagine: Il Neroview Tab 16, demonstrating its ultra-thin 7.95mm profile e leggero, pesa solo 533 g.
3.2 Visualizzazione
Experience immersive visuals on the 11-inch 2K Full View IPS display, offering vibrant colors and wide viewangoli di inclinazione.

Image: Visual representation of the 11-inch 2K Full View display, emphasizing its large screen for an enhanced viewesperienza di acquisizione.
3.3 Audio
The tablet is equipped with Quad-box Smart-K stereo speakers, providing rich and clear audio for all your multimedia needs.

Immagine: Il Neroview Tab 16 showcasing its Quad-box Smart-K speakers, designed for an immersive audio experience.
3.4 Prestazioni
Powered by an Octa-core Unisoc T616 processor, the Tab 16 ensures smooth operation and efficient multitasking.

Image: A visual representation of the Unisoc T616 Octa-core processor, highlighting its speed and efficiency.
Fotocamera a 3.5°
Capture moments with the 13MP AI rear camera and 8MP AI front camera. The integrated Google Smart Lens offers advanced scanning, detection, and translation features.

Immagine: Il Neroview Tab 16's camera system, featuring a 13MP AI camera and Google Smart Lens capabilities.
3.6 Batteria
The 7680mAh battery provides extended usage, supported by 18W fast charging for quick power-ups.

Immagine: Illustrazione del Neroview Tab 16's 7680mAh battery and 18W fast charging capability.
4. Impostazione
4.1 Ricarica del dispositivo
Prima del primo utilizzo, caricare completamente il tuo Blackview Tab 16 using the provided power adapter and USB cable. Connect the USB cable to the tablet's Type-C port and the adapter to a power outlet. The charging indicator will show the charging status.
4.2 Accensione/Spegnimento
- Per accendere: Premere e tenere premuto il pulsante di accensione finché il neroview il logo appare sullo schermo.
- Per spegnere: Tenere premuto il pulsante di accensione finché non viene visualizzato un menu. Selezionare "Spegni" e confermare.
- Ricominciare: Tieni premuto il pulsante di accensione finché non appare un menu. Seleziona "Riavvia" e conferma.
4.3 Configurazione iniziale
Upon first power-on, follow the on-screen instructions to configure your tablet:
- Seleziona la lingua preferita.
- Connettersi a una rete Wi-Fi.
- Accedi con il tuo account Google o creane uno nuovo.
- Imposta il blocco schermo (PIN, sequenza, password o riconoscimento facciale).
- Review e accettare i termini e le condizioni.
4.4 Installazione della scheda SIM e SD
Il Neroview Tab 16 supports Dual SIM and an SD card for expanded storage up to 1TB.
- Individuare il vassoio della scheda SIM/SD sul lato del tablet.
- Utilizzare lo strumento di espulsione SIM in dotazione per aprire il vassoio.
- Inserire con cura le schede Nano-SIM e/o microSD negli slot designati. Assicurarsi che siano orientate correttamente.
- Spingere delicatamente il vassoio nel tablet finché non scatta in posizione.
5. Istruzioni per l'uso
5.1 Navigazione di base
Il Neroview Tab 16 uses a touchscreen interface. Common gestures include:
- Rubinetto: Seleziona un elemento o apri un'app.
- Scorri: Scorri le pagine o i contenuti.
- Pizzico: Ingrandisci o rimpicciolisci le immagini e web pagine.
- Premere a lungo: Accedi ai menu contestuali o sposta le icone.
5.2 Connettività
- Wifi: Vai su Impostazioni > Rete e Internet > Wi-Fi per connetterti alle reti disponibili.
- Dati mobili (4G/LTE): Ensure your SIM card is installed and mobile data is enabled in Settings > Network & internet > Mobile network.
- Bluetooth: Associare ai dispositivi Bluetooth (cuffie, altoparlanti) tramite Impostazioni > Dispositivi connessi > Bluetooth.
5.3 Utilizzo della fotocamera
Open the Camera app to take photos or record videos. Utilize the Google Smart Lens feature for advanced functions:
- Scansione: Digitize documents or QR codes.
- Rilevare: Identify objects, plants, or animals.
- Tradurre: Traduci il testo in tempo reale.
5.4 Multimedia e intrattenimento
Enjoy movies, music, and games on your Tab 16. The 11-inch 2K display and Quad-box speakers provide an engaging experience. The tablet supports Widevine L1 for high-definition streaming.
5.5 Productivity
Il Neroview Tab 16 is suitable for office work and online learning. It supports external accessories like keyboards and mice for a PC-like experience.
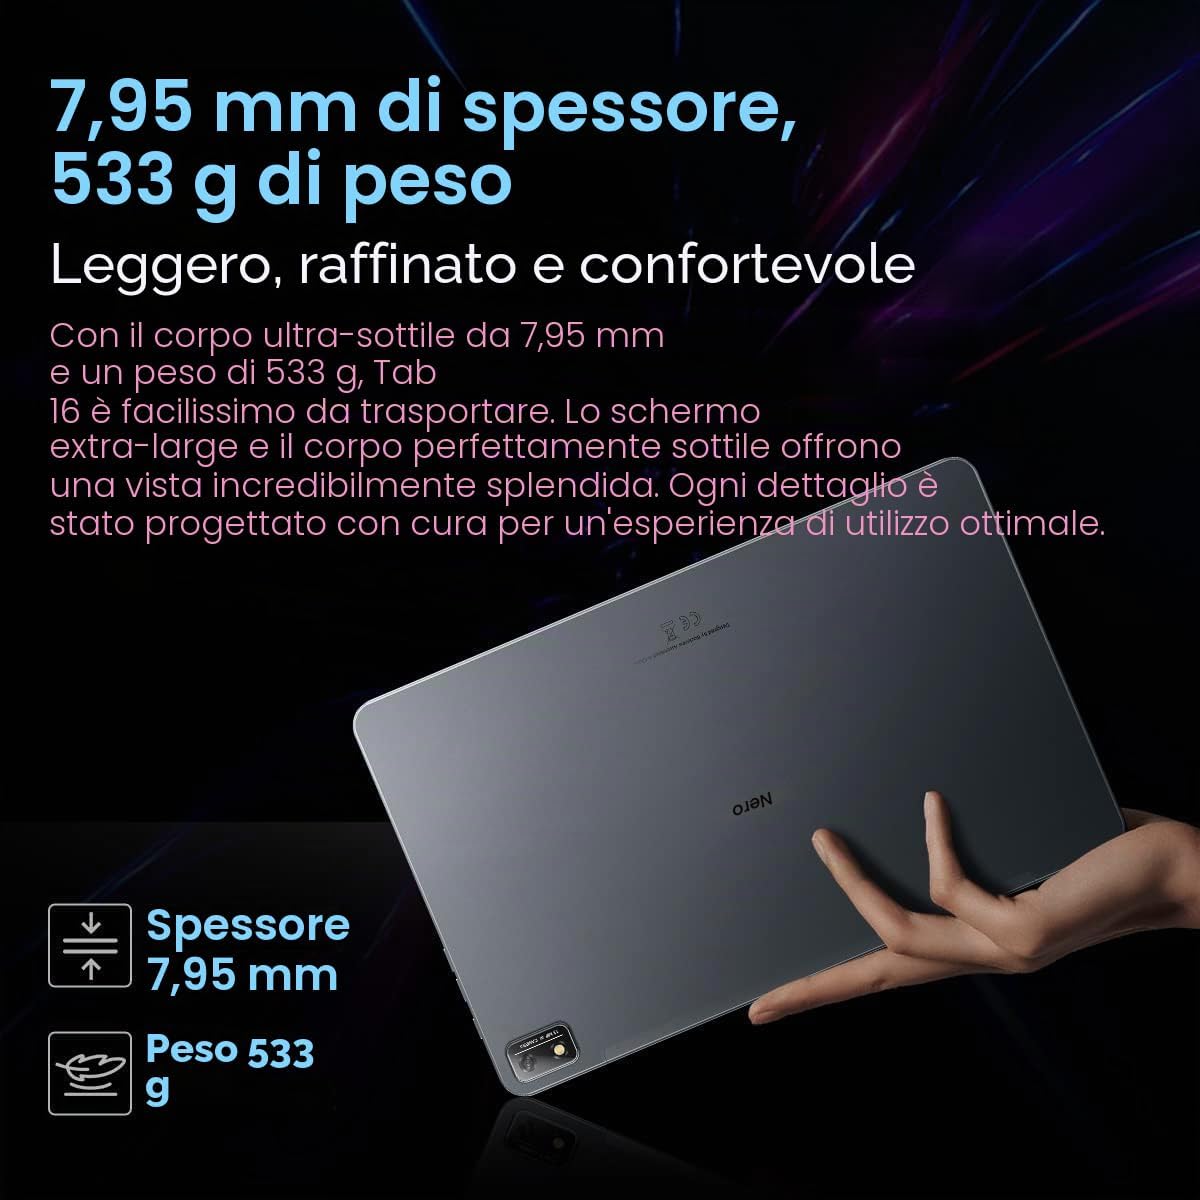
Immagine: Il Neroview Tab 16 paired with a keyboard and mouse, demonstrating its capability for a PC-like productivity experience.
5.6 Reading Modes
To reduce eye strain, the Tab 16 offers three eye protection modes, including a TÜV Rheinland Low Blue Light certified mode and a Dark Mode with 3 levels of darkness. Access these settings in the display options.
6. Manutenzione
6.1 Pulizia del dispositivo
Utilizzare un panno morbido e privo di lanugine per pulire lo schermo e il corpo del tablet. Evitare l'uso di prodotti chimici aggressivi o materiali abrasivi che potrebbero danneggiare la superficie.
6.2 Cura della batteria
Per prolungare la durata della batteria:
- Evitare temperature estreme.
- Non lasciare che la batteria si scarichi completamente regolarmente.
- Utilizzare il caricabatterie e il cavo originali.
6.3 Aggiornamenti software
Controlla regolarmente la presenza di aggiornamenti di sistema per assicurarti che il tuo tablet disponga delle funzionalità e delle patch di sicurezza più recenti. Vai su Impostazioni > Sistema > Aggiornamento di sistema.
6.4 Gestione dell'archiviazione
Manage your 256GB internal storage and any installed microSD card by regularly deleting unnecessary files and uninstalling unused applications. Go to Settings > Storage.
7. Risoluzione Dei Problemi
Se riscontri problemi con il tuo Blackview Tab 16, refer to the following common solutions:
| Problema | Possibile soluzione |
|---|---|
| Il dispositivo non si accende | Assicurati che la batteria sia carica. Tieni premuto il pulsante di accensione per almeno 10-15 secondi. |
| Il tablet non si carica | Check the charging cable and adapter for damage. Try a different power outlet. Ensure the charging port is clean. |
| Problemi di connessione Wi-Fi | Restart the tablet and your Wi-Fi router. Forget the network and reconnect. Ensure you are within range. |
| Le app si bloccano o si bloccano | Close and reopen the app. Clear the app's cache (Settings > Apps > [App Name] > Storage & cache). Restart the tablet. |
| Prestazioni lente | Chiudi le app in background. Svuota la cache. Libera spazio di archiviazione. Riavvia il tablet. |
If problems persist, consider performing a factory reset (Settings > System > Reset options > Erase all data), but back up your data first as this will delete all personal information.
8. Specifiche
Specifiche tecniche chiave per il Blackview Scheda 16:
- Nome modello: Scheda 16
- Sistema operativo: Androide 12
- Processore: Unisoc T616 Octa-core (2 GHz)
- Memoria RAM: 8 GB
- Memoria interna: 256 GB
- Archiviazione espandibile: microSD fino a 1 TB
- Display: 11-inch IPS 2K (2000 x 1200), 60 Hz, 16:10 aspect ratio
- Telecamera posteriore: 13 MP
- Fotocamera frontale: 8 MP
- Batteria: 7680 mAh (26 hours average duration)
- Ricarica: Ricarica rapida da 18 W
- Connettività: Wi-Fi, Bluetooth, 4G/LTE (Dual SIM), GPS
- Porte: USB di tipo C
- Dimensioni: 26 x 16.5 x 0.8 cm
- Peso: 533 grammi
- Caratteristiche speciali: Google Smart Lens, Widevine L1 1080P Support, 3 Reading Modes
9. Garanzia e supporto
Il tuo neroview Tab 16 is covered by a manufacturer's warranty. Please refer to the warranty card included in your package for specific terms and conditions. For technical support or service inquiries, please visit the official Blackview webo contattare il servizio clienti. Conservare la ricevuta d'acquisto come prova d'acquisto per eventuali reclami in garanzia.
Per maggiori informazioni, puoi visitare il sito Neroview Negozio su Amazon.