
1. Introduzione
This manual provides detailed instructions for the setup, operation, and maintenance of your DOACT Projection Alarm Clock. Please read this manual thoroughly before using the device to ensure proper function and to avoid damage.
2. Informazioni sulla sicurezza
- Non esporre il dispositivo a temperature estreme, alla luce solare diretta o a elevata umidità.
- Tenere il dispositivo lontano dall'acqua e da altri liquidi.
- Use only the specified power supply (AAA*2 batteries or 5V USB).
- Non tentare di smontare o riparare il dispositivo da soli. Contattare personale qualificato per l'assistenza.
- Tenere le batterie fuori dalla portata dei bambini.
3. Contenuto della confezione
Verificare che tutti gli articoli siano presenti nel pacco:
- 1 x DOACT Projection Alarm Clock
- 1 cavo USB
- 1 x Manuale utente (questo documento)
4. Prodotto finitoview
Familiarize yourself with the components of your projection alarm clock.

Figura 4.1: Posteriore View e controlli
This image displays the back of the projection clock, highlighting key controls and ports. These include the Mode button, UP/DOWN buttons for time adjustment, MAX/MIN button for temperature/humidity display, SNZ (snooze) button, probe hole, AAA battery compartment, external power interface, and supporting base.
- Schermo di visualizzazione: Shows time, temperature, humidity, and weather forecast icons.
- Lente di proiezione: Proietta il tempo su una superficie.
- Pulsante Modalità: Used to enter setup modes for time, alarm, etc.
- Pulsanti SU/GIÙ: Adjust values during setup or switch display modes.
- Pulsante MAX/MIN: Toggles between current, maximum, and minimum temperature/humidity readings.
- SNZ (Snooze) Button: Attiva la funzione snooze per la sveglia.
- Vano batteria: Holds 2 x AAA batteries (not included).
- Porta di alimentazione USB: For continuous power supply via USB cable.
5. Impostazione
5.1 Alimentazione del dispositivo
- Installazione della batteria: Open the battery compartment on the back of the clock. Insert 2 x AAA batteries (not included), ensuring correct polarity (+/-). Note: When using only batteries, the display will not be continuously on to conserve power. The display will be black when off and difficult to see.
- Alimentazione USB: For continuous display and optimal functionality, connect the provided USB cable to the USB power port on the back of the clock and plug the other end into a 5V USB power adapter (not included) or a USB port. The display will remain continuously on when powered via USB.
5.2 Impostazione iniziale di ora e data
- Premere e tenere premuto il tasto MODALITÀ per circa 3 secondi per accedere alla modalità di impostazione dell'ora. Le cifre delle ore lampeggeranno.
- Utilizzare il UP or GIÙ pulsanti per regolare l'ora.
- Premere MODALITÀ di nuovo per confermare l'ora e passare all'impostazione dei minuti. Le cifre dei minuti lampeggeranno.
- Utilizzare il UP or GIÙ pulsanti per regolare i minuti.
- Continua a premere MODALITÀ to cycle through and set other parameters such as year, month, and day, adjusting each with the UP or GIÙ pulsanti.
- Premere MODALITÀ one last time or wait for 10 seconds without input to exit the setting mode.
6. Istruzioni per l'uso
6.1 Funzione di proiezione temporale
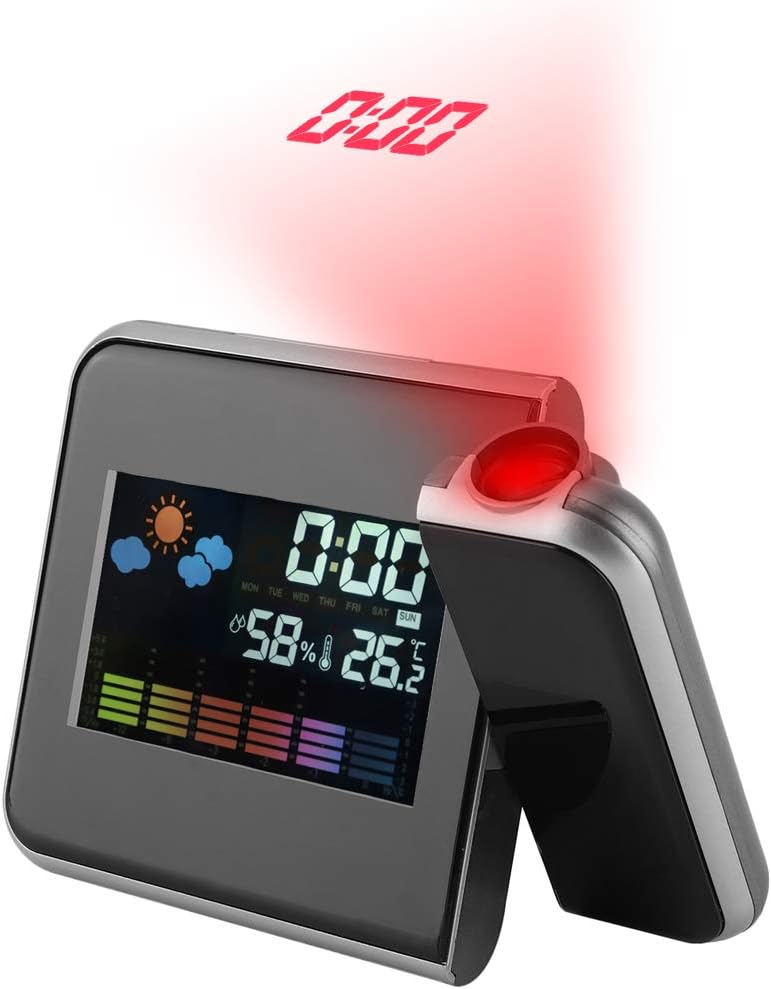
Figure 6.1: Time Projection
This image shows the projection clock actively displaying the time onto a surface, illustrating its projection capability. The projection distance is approximately 1 to 5 meters.
- The clock can project the time onto a ceiling or wall. The optimal projection distance is 1-5 meters.
- To activate the projection, ensure the clock is powered via USB or press a button if using batteries (projection is not continuous on battery power).
- Regolazione dell'angolo di proiezione: The projection lens can be rotated 180 degrees to direct the time display to your desired surface. Gently rotate the projection arm to adjust.
6.2 Visualizzazione della temperatura e dell'umidità
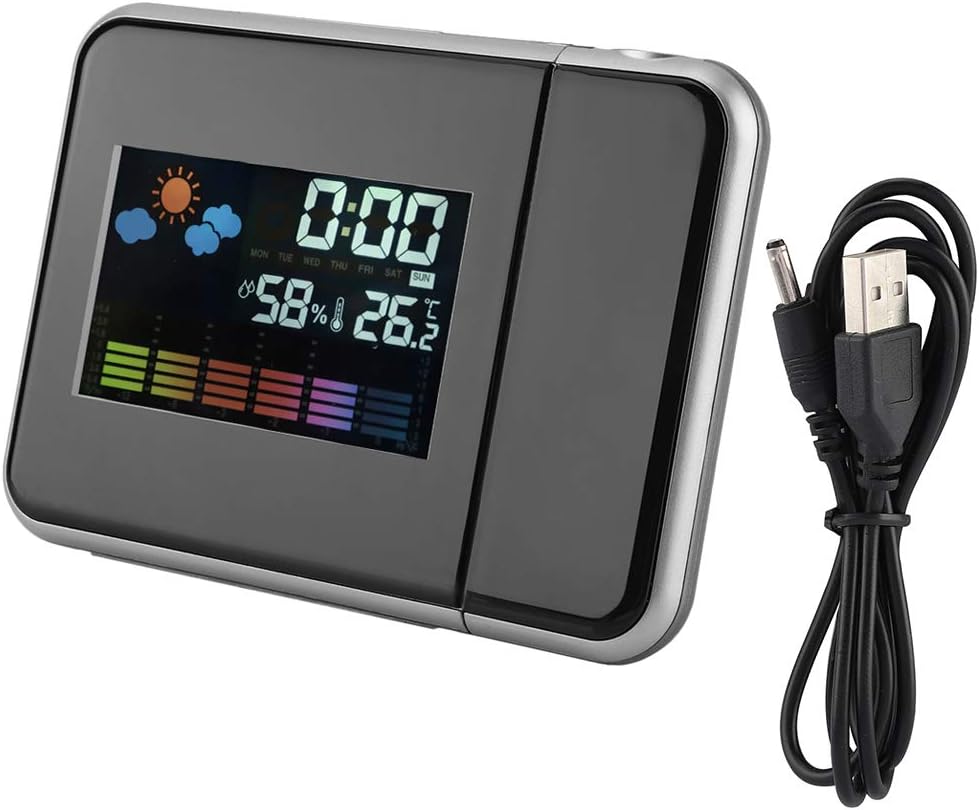
Figura 6.2: Display principale
Un chiaro view of the clock's front display, showing the digital time, current temperature, humidity percentage, and weather forecast icons. This illustrates the multi-functional display capabilities.
- The main display shows the current indoor temperature and humidity.
- Unità di temperatura: Per passare da Celsius (°C) a Fahrenheit (°F), premere il tasto GIÙ brevemente il pulsante.
- Maximum/Minimum Readings: Premere il tasto Massimo/minimo pulsante per view la temperatura e l'umidità massime registrate. Premere di nuovo per view the minimum recorded temperature and humidity. Press a third time to return to current readings. The readings reset daily or when the device is reset.
6.3 Funzione sveglia e snooze
- Impostazione della sveglia:
- Premere il tasto MODALITÀ una volta il pulsante per accedere alla modalità di impostazione della sveglia. L'ora della sveglia lampeggerà.
- Utilizzare il UP or GIÙ pulsanti per regolare l'ora della sveglia.
- Premere MODALITÀ again to confirm the hour and set the alarm minutes.
- Utilizzare il UP or GIÙ pulsanti per regolare i minuti della sveglia.
- Premere MODALITÀ again or wait for 10 seconds to exit alarm setting.
- Attivazione/disattivazione dell'allarme: Nella modalità di visualizzazione dell'ora normale, premere il tasto UP button briefly to toggle the alarm on or off. An alarm icon will appear on the display when activated.
- Funzione snooze: Quando suona la sveglia, premere il tasto SNZ button to activate the snooze function. The alarm will temporarily stop and sound again after a few minutes (default snooze time is typically 5-10 minutes, refer to specific model details if available). To turn off the alarm completely, press any other button.
7. Manutenzione
- Pulire il dispositivo con un panno morbido e asciutto. Non utilizzare detergenti abrasivi o solventi.
- Ensure the projection lens is clean for clear time projection.
- Se non si utilizza il dispositivo per un lungo periodo, rimuovere le batterie per evitare perdite.
8. Risoluzione Dei Problemi
| Problema | Possibile causa | Soluzione |
|---|---|---|
| Display is off or dim (on battery power) | Batteries are low or display is designed to turn off to save power. | Replace AAA batteries or connect the device to a USB power source for continuous display. |
| No time projection | Projection function not activated or device not powered via USB. | Ensure USB power is connected. If on battery, press a button to temporarily activate projection. Check if the projection lens is obstructed. |
| Ora/data errate | Ora/data non impostate correttamente o interruzione di corrente. | Per reimpostare l'ora e la data, fare riferimento alla Sezione 5.2. |
| L'allarme non suona | Allarme non attivato o impostato in modo errato. | Refer to Section 6.3 to ensure the alarm is set and activated (alarm icon visible). |
9. Specifiche
| Caratteristica | Dettaglio |
|---|---|
| Numero di modello | DOACTcuf6pq3yvr-01 |
| Tipo di visualizzazione | Digital, LED Color Screen |
| Fonte di alimentazione | 2 x AAA Batteries (not included), USB 5V (cable included) |
| Intervallo di visualizzazione della temperatura | Da -9.9°C a +60°C (da 14.2°F a 140°F) |
| Intervallo di visualizzazione dell'umidità | Da 20% RH a 90% RH |
| Distanza di proiezione | 1-5 metri |
| Angolo di proiezione | 180° girevole |
| Dimensioni del prodotto | 15 cm (5.9 pollici) L x 11 cm (4.3 pollici) A x 2 cm (0.8 pollici) P |
| Materiale | Plastica |
| Peso | ca. 246 g (8.7 once) |
| Caratteristiche speciali | Alarm, Snooze, Temperature Display, Humidity Display, Weather Forecast, Digital Time Display, Max/Min Temperature/Humidity |

Figura 9.1: Dimensioni del prodotto
This image provides a visual representation of the clock's dimensions, indicating its width (15cm / 5.9in), height (11cm / 4.3in), and depth (2cm / 0.8in).
10. Garanzia e supporto
Per informazioni sulla garanzia o assistenza tecnica, fare riferimento alle condizioni del rivenditore o contattare direttamente il produttore. Conservare la ricevuta d'acquisto come prova d'acquisto.