Introduzione
This manual provides instructions for the proper setup, operation, and maintenance of your MXR Phase 90 50th-Anniversary Pedal. Please read this manual thoroughly before use to ensure optimal performance and longevity of the product.
Informazioni sulla sicurezza
- Use only the specified power adapter (9 Volts DC, 2.1mm barrel connector, center-negative).
- Non esporre il pedale all'umidità o a temperature estreme.
- Do not attempt to open or modify the pedal casing.
- Tenere fuori dalla portata dei bambini.
Prodotto finitoview
The MXR Phase 90 is a classic phaser guitar effects pedal known for its distinctive modulation sound. This 50th-anniversary edition features a special gold finish and simple, single-knob operation.
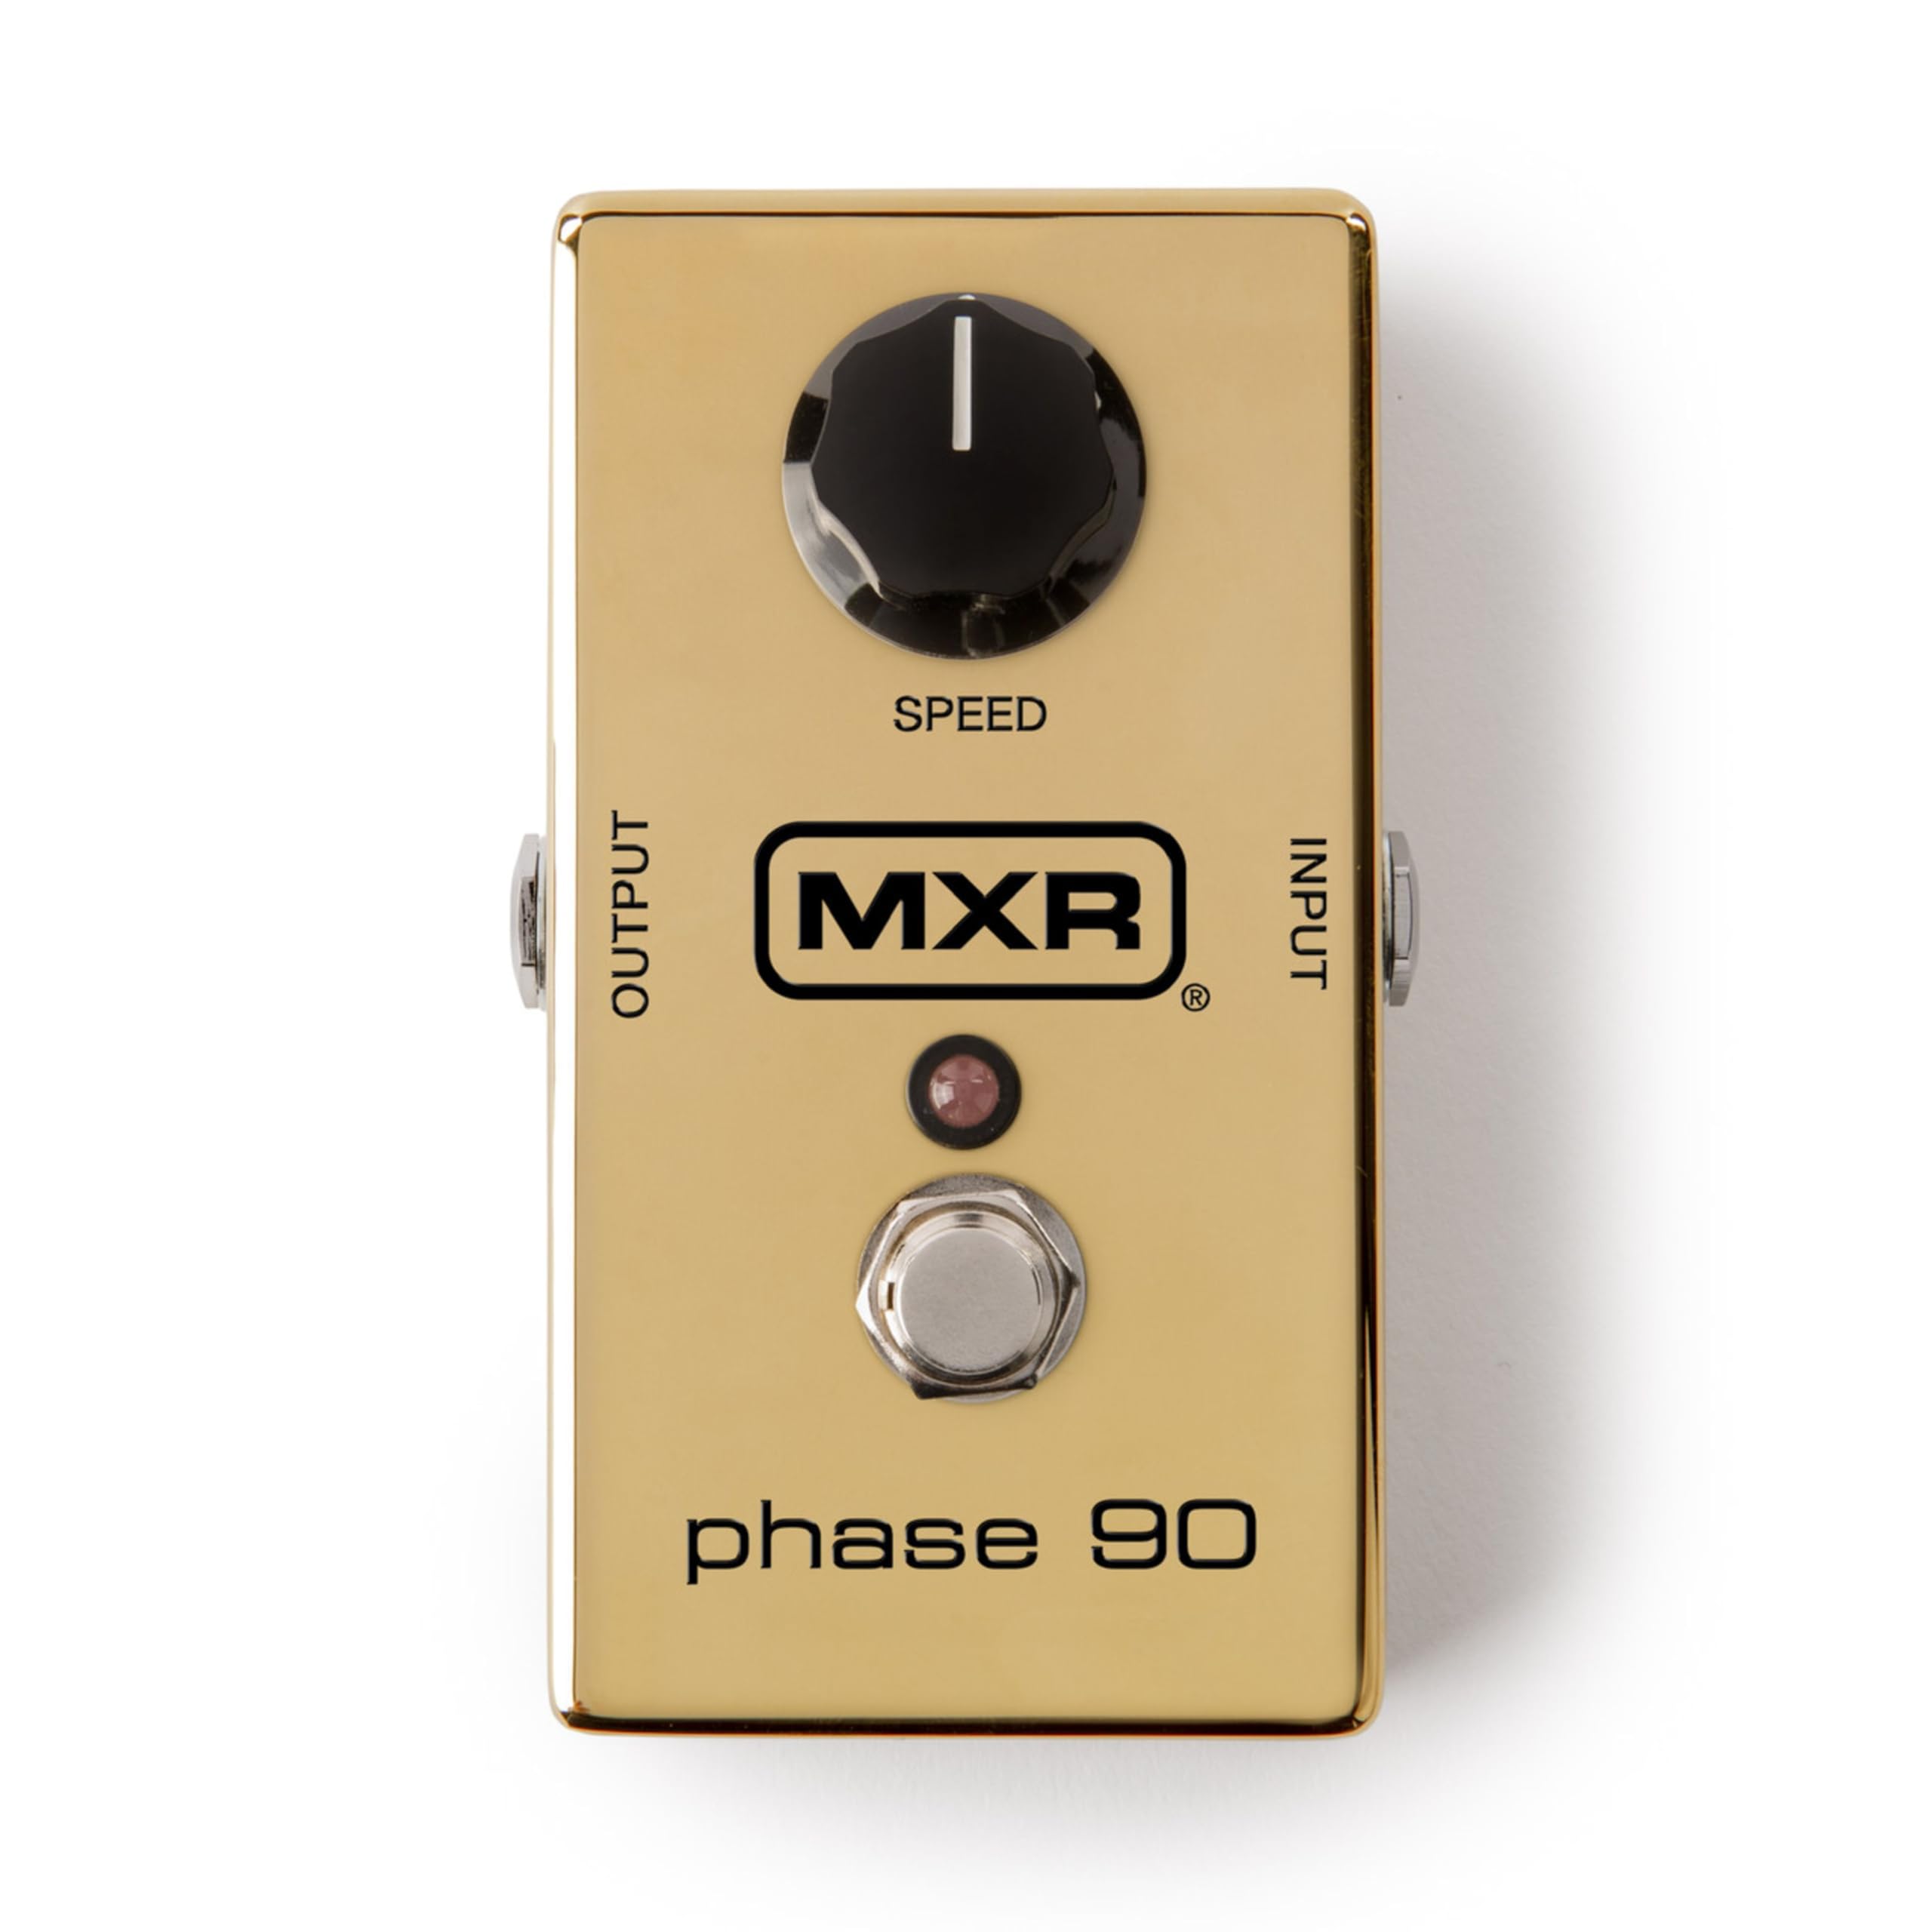
Immagine: dall'alto verso il basso view of the MXR Phase 90 50th-Anniversary Pedal. The pedal is gold-colored with a single black 'SPEED' knob on the top left, an input jack on the right side, an output jack on the left side, and a footswitch with an LED indicator in the center. The MXR logo and 'phase 90' are visible on the top surface.
Impostare
- Collegamento elettrico: Connect a 9-volt DC AC adapter (not included) to the power input jack on the side of the pedal. Ensure the adapter has a 2.1mm barrel connector and center-negative polarity.
- Input dello strumento: Connect your instrument (e.g., guitar) to the INPUT jack on the right side of the pedal using a standard 1/4-inch instrument cable.
- Amplifier Uscita: Collega il jack OUTPUT sul lato sinistro del pedale al tuo amplifier o il pedale successivo nella catena del segnale utilizzando un cavo per strumenti standard da 1/4 di pollice.
- Posizionamento: Place the pedal on a stable surface or integrate it into your pedalboard.

Immagine: Lato view of the MXR Phase 90 50th-Anniversary Pedal showing the power input jack (left) and the instrument input jack (right). The pedal is gold with a black 'SPEED' knob visible on the top surface.
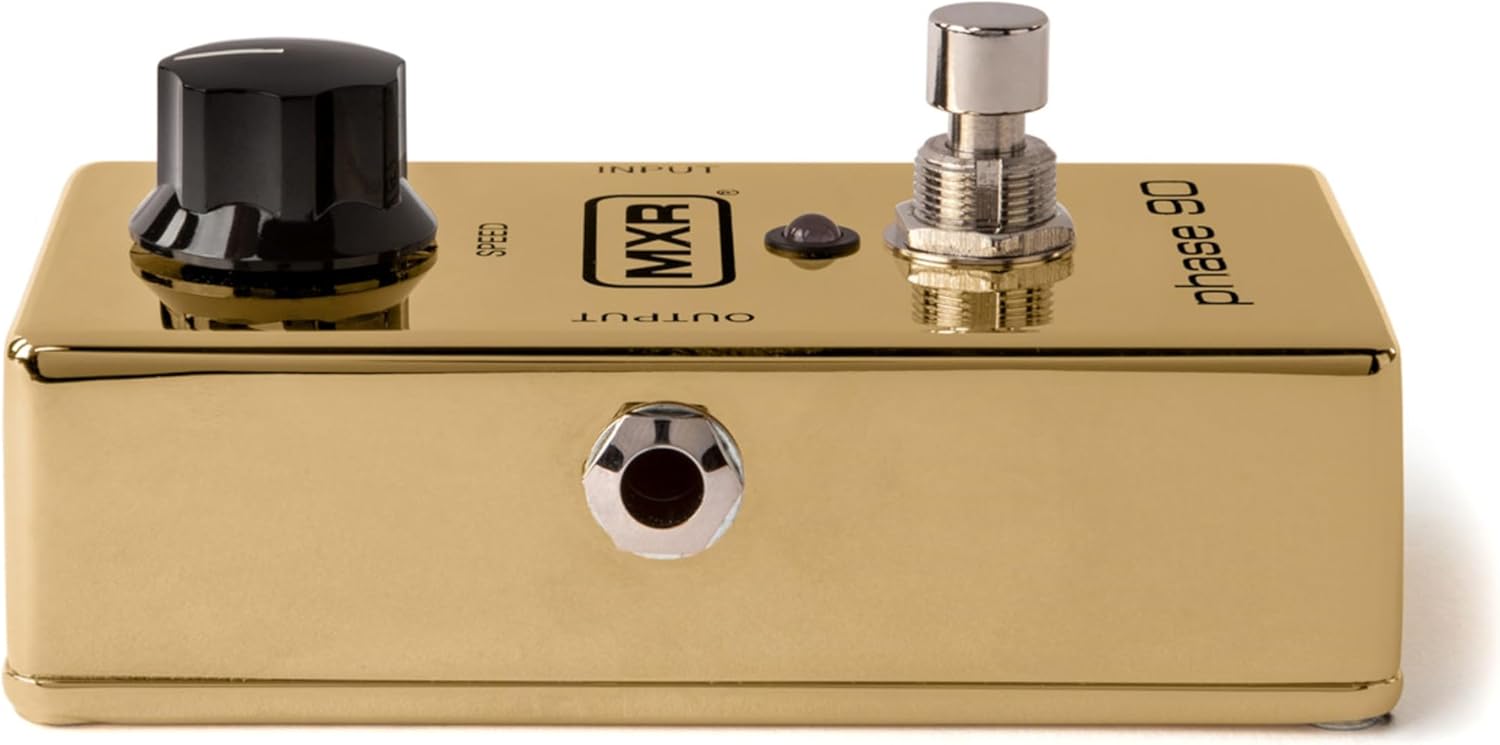
Immagine: in alto view of the MXR Phase 90 50th-Anniversary Pedal, highlighting the 'INPUT' and 'OUTPUT' labels near the respective jacks. The gold finish and black 'SPEED' knob are prominent.
Istruzioni per l'uso
Controlli
- Manopola VELOCITÀ: This is the only control on the Phase 90. Turning the knob clockwise increases the speed of the phasing effect, while turning it counter-clockwise decreases the speed. Experiment with different settings to achieve various modulation sounds, from subtle sweeps to fast, watery warbles.
- Interruttore a pedale: Press the footswitch to engage or bypass the phasing effect. The LED indicator will illuminate when the effect is active.

Immagine: Primo piano view of the black 'SPEED' knob on the MXR Phase 90 pedal. The knob has a white indicator line for setting the phase speed.

Immagine: Primo piano view of the chrome footswitch and the small red LED indicator on the MXR Phase 90 pedal. The footswitch is used to activate or deactivate the effect.
Funzionamento di base
- Ensure all connections (power, input, output) are secure.
- Accendi il tuo amppiù vivace.
- Press the footswitch to activate the Phase 90. The LED will light up.
- Adjust the SPEED knob to achieve your desired phasineffetto g.
- To bypass the effect, press the footswitch again. The LED will turn off.
Manutenzione
- Pulizia: Pulire il pedale con un panno morbido e asciutto. Non utilizzare detergenti abrasivi o solventi.
- Magazzinaggio: Store the pedal in a dry environment, away from direct sunlight and extreme temperatures, when not in use.
- Sostituzione della batteria: This pedal is designed for AC adapter use. There is no internal battery compartment.
Risoluzione dei problemi
Nessun suono
- Controllare tutti i collegamenti dei cavi (strumento, amplificatore, potere).
- Assicurarsi che l'adattatore di alimentazione sia collegato correttamente e fornisca energia (il LED dovrebbe accendersi quando inserito).
- Test with different cables and a different power supply if available.
- Bypassa il pedale per confermare il tuo strumento e ampil lifier funziona correttamente.
Effetto non coinvolgente
- Ensure the power adapter is connected and functional.
- Press the footswitch firmly. The LED should illuminate when the effect is active.
Rumore indesiderato
- Assicurarsi che tutti i cavi siano schermati e in buone condizioni.
- Check for ground loops in your setup. Try isolating the power supply.
- Ensure the power adapter is rated correctly for the pedal (9V DC, center-negative).
Specifiche
| Caratteristica | Dettaglio |
|---|---|
| Modello | M101GLD |
| tipo di effetto | Phaser |
| Controlli | 1x SPEED knob |
| Ingresso | 1/4-inch Instrument Jack |
| Produzione | 1/4-inch Instrument Jack |
| Energia | 9V DC, 2.1mm barrel connector, center-negative (AC adapter not included) |
| Dimensioni | 5.5 x 4.5 x 2.5 pollici (circa) |
| Peso | 1.16 libbre (circa) |
| Colore | Oro |
Informazioni sulla garanzia
This MXR product is covered by a 2-year warranty from the date of purchase. The warranty covers defects in materials and workmanship under normal use. It does not cover damage caused by misuse, accident, modification, or unauthorized repair. Please retain your proof of purchase for warranty claims.
Supporto
For technical assistance, troubleshooting beyond this manual, or warranty service, please contact MXR customer support through their official website or authorized service centers. Refer to the MXR websito per le informazioni di contatto più aggiornate.