
Introduzione
This manual provides instructions for the assembly, operation, and maintenance of your Flexson Floor Stand for the Sonos Era 300 speaker. Please read these instructions carefully before assembly and retain them for future reference. The stand is designed to position your Sonos Era 300 speaker at an optimal listening height, enhancing your audio experience.
Informazioni sulla sicurezza
- Prima del montaggio, assicurarsi che tutti i componenti siano presenti e integri.
- Do not exceed the weight capacity of the stand. This stand is specifically designed for the Sonos Era 300 speaker.
- Montare il supporto su una superficie morbida e pulita per evitare graffi.
- Tenere le parti di piccole dimensioni lontano dalla portata dei bambini.
- Always ensure the stand is placed on a stable, level surface to prevent tipping.
- Route cables safely to avoid tripping hazards.
Contenuto della confezione
Verifica che tutti i seguenti componenti siano inclusi nel pacchetto:
- Piastra di base
- Tubo di supporto
- Piastra di montaggio dell'altoparlante
- Plastic Foot (for base plate)
- Spikes (4x) for carpeted floors
- Rubber Feet (4x) for hard floors
- Screw Pack (various lengths)
- Cavo di prolunga di alimentazione
- Cable Management Rubber Strip
Installazione e assemblaggio
Follow these steps to assemble your Flexson Floor Stand:
- Step 1: Attach Feet to Base Plate.
Decide whether to use the spikes (for carpeted floors) or rubber feet (for hard floors). Screw the chosen feet into the designated holes on the underside of the base plate.
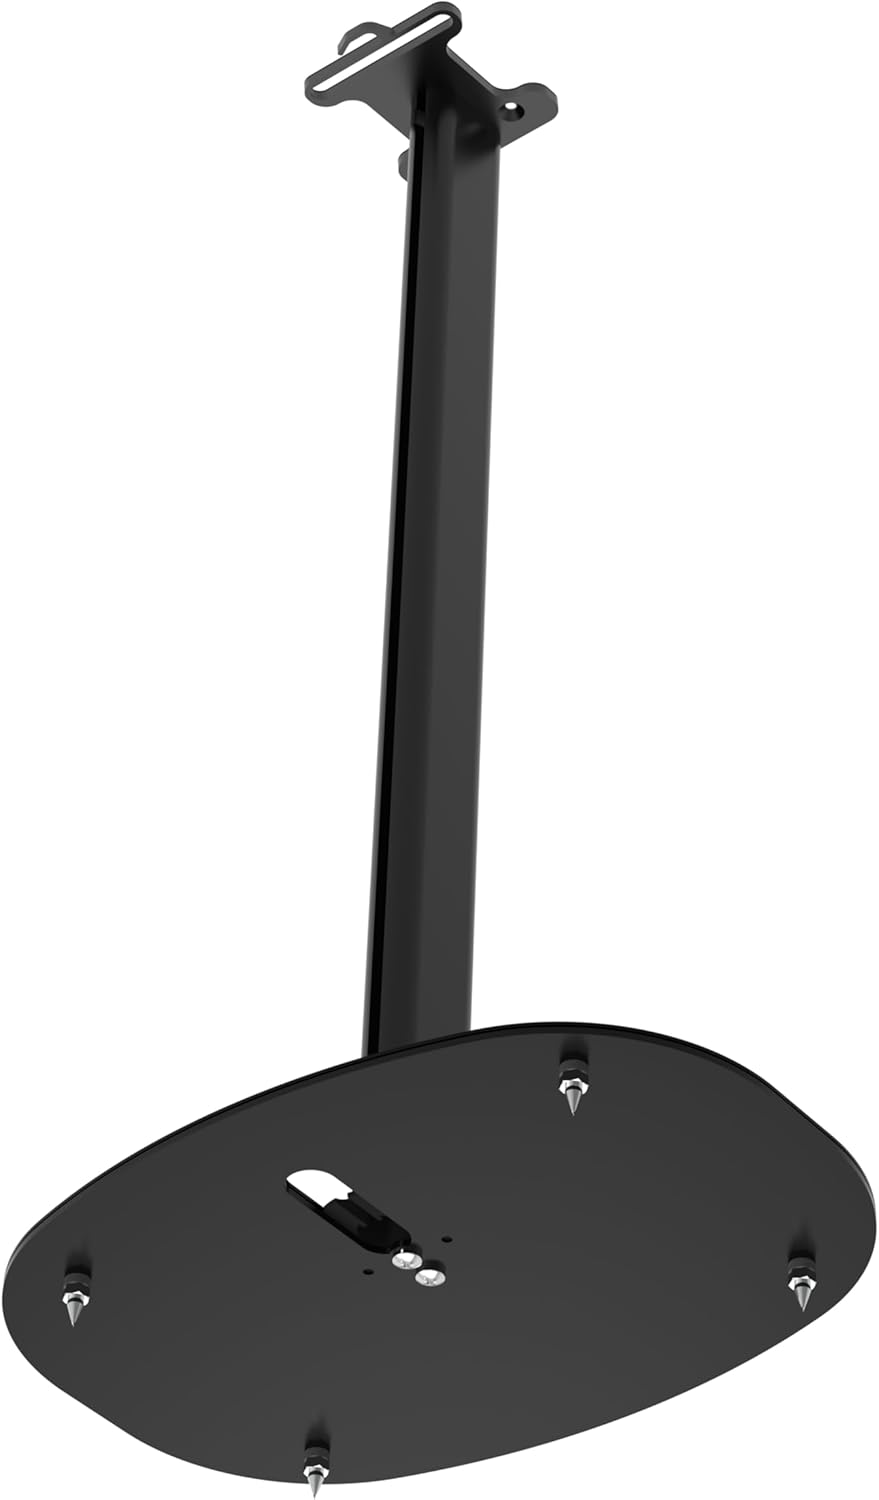
Image: Underside of the stand base plate showing the installation points for spikes or rubber feet.
- Step 2: Connect Plastic Foot and Stand Pipe to Base Plate.
Insert the plastic foot into the top opening of the base plate. Then, place the stand pipe onto the plastic foot. Secure the stand pipe to the base plate using the longest screws from the screw pack, fastening them from the underside of the base plate.

Image: The stand pipe connected to the base plate, viewvisto da un'angolazione.
- Step 3: Attach Speaker Mounting Plate to Stand Pipe.
Place the speaker mounting plate onto the top of the stand pipe. Secure it using the mid-length screws from the screw pack.

Image: The fully assembled floor stand, ready for the speaker.
- Step 4: Route Power Cable.
Before attaching the speaker, feed the power extension cable from the bottom opening of the base plate, up through the stand pipe, and out through the top opening of the speaker mounting plate. Ensure the cable is fully pulled through.
- Step 5: Attach Sonos Era 300 Speaker.
Carefully place your Sonos Era 300 speaker onto the speaker mounting plate, aligning the screw threads on the speaker with the holes on the mounting plate. Use the shortest screws from the screw pack to firmly attach the speaker to the stand. It is recommended to lay the speaker on its side or upside down on a soft surface for easier attachment.
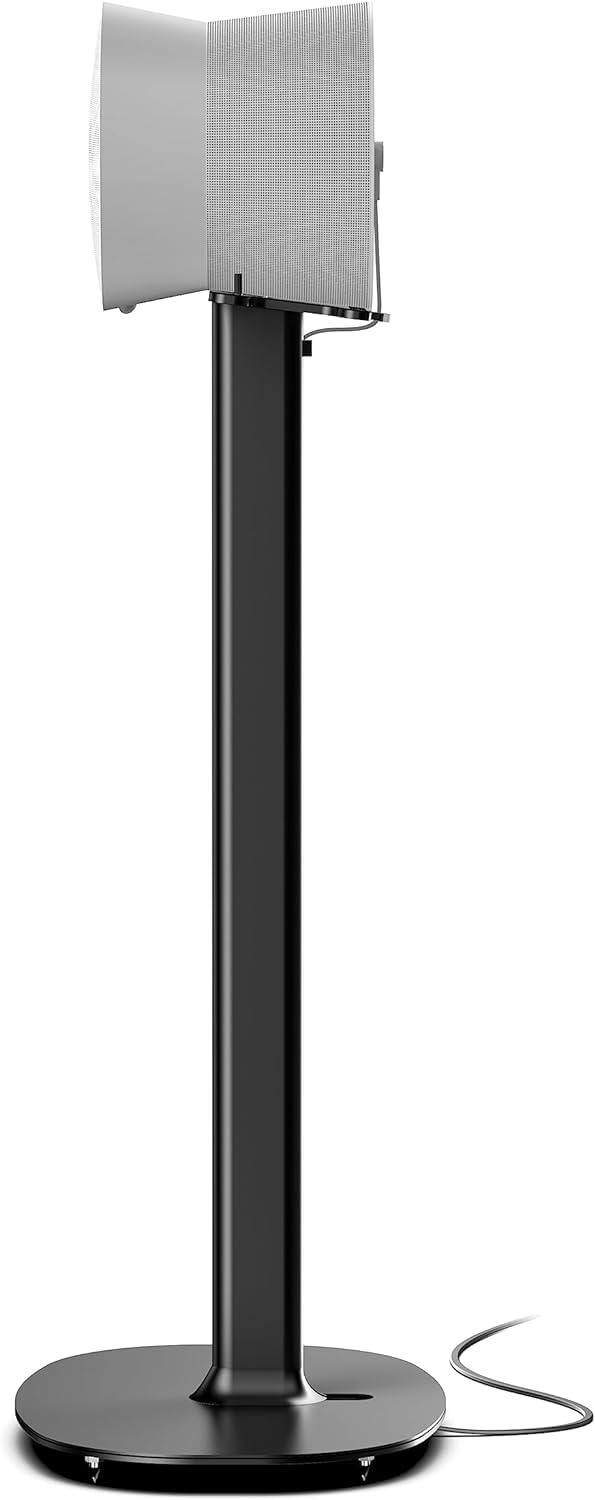
Image: A Sonos Era 300 speaker securely mounted on the Flexson floor stand.
- Step 6: Secure Cable Management.
Once the speaker is attached and the power cable is connected to the speaker, gently press the cable into the integrated cable track along the stand pipe. Insert the provided rubber strip near the speaker to secure the cable and prevent it from pulling out.
Istruzioni per l'uso
The Flexson Floor Stand is designed for optimal speaker placement. Once assembled, ensure the stand is positioned on a flat, stable surface. The stand holds the Sonos Era 300 speaker at an ideal listening height. No further operational adjustments are required for the stand itself.
- Posizionamento: Position the stand in your desired listening area, ensuring it is not in a high-traffic zone where it could be accidentally knocked over.
- Gestione dei cavi: Regularly check that the power cable remains securely within the cable track to maintain a tidy appearance and prevent tripping hazards.
Manutenzione
- Pulizia: Wipe the stand with a soft, dry cloth. Avoid using abrasive cleaners or solvents, as these may damage the finish.
- Ispezione: Controllare periodicamente tutte le viti e i collegamenti per assicurarsi che siano ben serrati. Serrare nuovamente se necessario.
- Stabilità: Ensure the stand remains stable on its chosen feet (spikes or rubber pads). If moving the stand, lift it carefully rather than dragging it.
Risoluzione dei problemi
- Il supporto sembra traballante:
- Assicurarsi che tutte le viti siano serrate saldamente.
- Verificare che il supporto sia posizionato su una superficie piana.
- Check that the correct feet (spikes for carpet, rubber for hard floors) are installed and fully screwed in.
- Cable not fitting in track:
- Ensure the power extension cable is the one provided with the stand.
- Gently press the cable into the track, starting from the bottom and working upwards.
- Speaker not attaching securely:
- Confirm you are using the shortest screws provided for attaching the speaker.
- Ensure the speaker is correctly aligned with the mounting plate holes.
Specifiche
| Marca | Flexson |
| Numero di modello | FLXE300FS1021 |
| Dimensioni del prodotto (L x P x A) | 10.35" x 14.21" x 27.24" (26.29 cm x 36.09 cm x 69.19 cm) |
| Peso dell'articolo | 4.19 chilogrammi (9.22 libbre) |
| Materiale | Acciaio legato |
| Colore | Nero |
Informazioni sulla garanzia
Specific warranty details are not provided in this manual. For information regarding the product warranty, please refer to the documentation included with your purchase or visit the official Flexson websito.
Supporto
If you encounter any issues or have questions not covered in this manual, please contact Flexson customer support. You can typically find contact information on the official Flexson websito o tramite il tuo rivenditore.
Per maggiori informazioni, visita: Flexson Store on Amazon


