Introduzione
This manual provides essential information for the safe and proper installation, operation, and maintenance of your Veepeak 30 Amp Flanged Outlet NEMA L14-30R Locking Receptacle. Please read all instructions carefully before installation and use. Retain this manual for future reference.
Informazioni sulla sicurezza
AVVERTIMENTO: Electrical shock hazard. Improper installation or use can result in serious injury or death. Always follow local electrical codes and consult a qualified electrician if you are unsure about any part of the installation process.
- Prima di installare o effettuare la manutenzione di questo dispositivo, scollegare sempre l'alimentazione dall'interruttore automatico o dalla scatola dei fusibili.
- Ensure all wiring connections are secure and correct according to the wiring diagram and local codes.
- Non superare i valori elettrici nominali specificati per il dispositivo.
- This product is designed for use with NEMA L14-30P compatible plugs only.
- Keep the weatherproof cap closed when the outlet is not in use to protect against moisture and dust.
Contenuto della confezione
- 1 x Veepeak 30 Amp NEMA L14-30R Flanged Outlet
- Viti di installazione
Specifiche
| Specificazione | Valore |
|---|---|
| Amprabbia | 30 Amps |
| Voltage | 125/250 Volt CA |
| Configurazione NEMA | L14-30R |
| Pali / Fili | Messa a terra a 3 poli e 4 fili |
| Carico massimo | 7500 Watt |
| Calibro del filo consigliato | 10 AWG/4C |
| Materiale | Cloruro di polivinile (PVC) |
| Certificazioni | ETL Listed (Conforms to UL & CSA standards) |
| Dimensione del foro richiesta | 2.5 pollici |
Configurazione e installazione
Strumenti necessari: Screwdriver, wire strippers, drill (for mounting hole), appropriate drill bit.
- Preparare la posizione di montaggio: Choose a suitable, dry location for installation. Drill a 2.5-inch diameter hole for the receptacle body. Ensure there is enough space behind the mounting surface for wiring connections.
- Collegamenti elettrici:
Refer to the wiring diagram below and the color-coded terminals on the back of the receptacle. Strip approximately 1/2 inch of insulation from each wire. Insert the wires into the corresponding terminals and tighten the screws securely. Ensure no bare wire strands are exposed outside the terminals.

Immagine: Posteriore view of the L14-30R outlet, displaying the four color-coded terminals for wiring connections (Green for Ground, White for Neutral, Red and Black for Hot).

Image: NEMA L14-30R configuration diagram. 'X' and 'Y' are hot lines (125V each to neutral, 250V between them), 'W' is neutral, and 'G' is ground.
- Green (G): Filo di terra.
- Bianco (W): Filo neutro.
- Black (X): Hot wire (Line 1).
- Red (Y): Hot wire (Line 2).
- Montare la presa: Insert the receptacle body into the drilled hole. Secure the flanged outlet to the mounting surface using the provided screws. Ensure it is flush and stable.
- Ripristina alimentazione: Una volta completata l'installazione e verificati tutti i collegamenti, ripristinare l'alimentazione all'interruttore automatico.
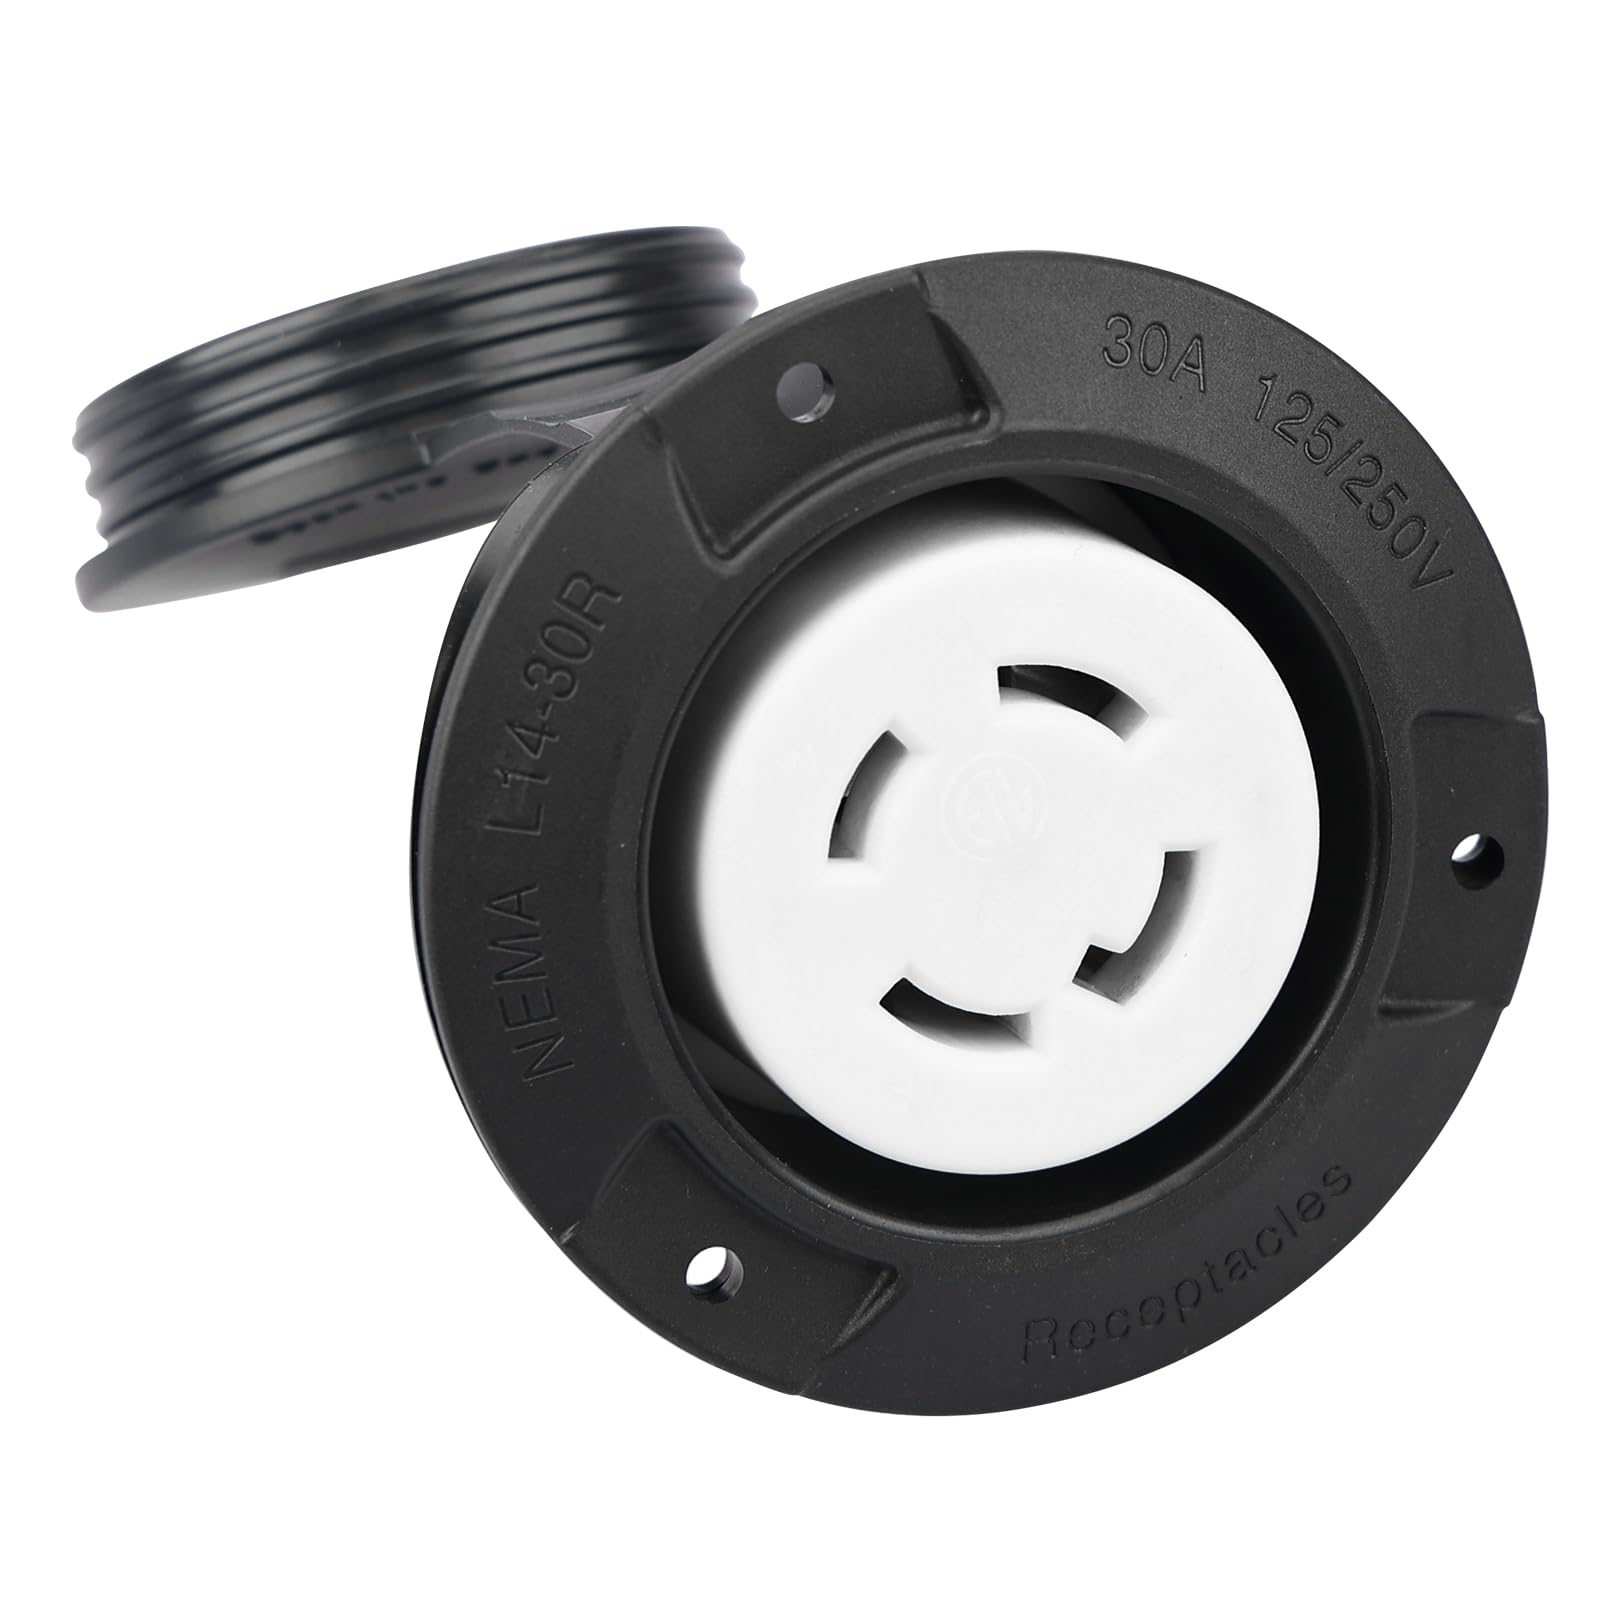
Immagine: Frontale view of the Veepeak L14-30R flanged outlet with its weatherproof cap open, revealing the NEMA L14-30R locking receptacle.
Istruzioni per l'uso
- Apertura del tappo: Lift the weatherproof cap to access the receptacle.
- Connecting a Plug: Align the NEMA L14-30P plug with the receptacle. Insert the plug and twist clockwise to lock it into place. Ensure the plug is fully seated and locked.
- Disconnecting a Plug: Twist the plug counter-clockwise to unlock, then pull it straight out from the receptacle.
- Closing the Cap: When the outlet is not in use, ensure the weatherproof cap is securely closed over the receptacle to protect it from environmental elements like rain, snow, and dust.

Immagine: Frontale view of the Veepeak L14-30R flanged outlet with its weatherproof cap securely closed, providing protection.
Manutenzione
Una manutenzione regolare garantisce prestazioni e sicurezza ottimali.
- Pulizia: Periodically clean the exterior of the outlet with a damp cloth. Do not use abrasive cleaners or solvents. Ensure the cap is closed during cleaning.
- Ispezione: Regularly inspect the outlet for any signs of damage, wear, or corrosion. Check the weatherproof cap for proper sealing.
- Verifica della connessione: Annually, or if issues arise, disconnect power and check the wiring connections for tightness. Loose connections can cause overheating.
Risoluzione dei problemi
- Nessun potere:
- Controllare l'interruttore automatico o il fusibile del circuito. Ripristinare se scattato.
- Verificare che la fonte di alimentazione sia attiva.
- Ensure the plug is fully inserted and locked into the receptacle.
- Collegamento allentato:
- If the plug feels loose or power is intermittent, disconnect power and inspect the wiring connections at the back of the receptacle for tightness.
- Inspect the plug on the appliance for damage.
- Damage to Outlet:
- If the outlet housing or terminals show signs of damage, cracking, or burning, discontinue use immediately and replace the unit.
Se le procedure di risoluzione dei problemi non risolvono il problema, consultare un elettricista qualificato.
Garanzia e supporto
Veepeak provides a one-year hassle-free replacement warranty for this product. For warranty claims or customer service inquiries, please contact Veepeak customer support through the retailer where the product was purchased or visit the official Veepeak websito.