1. Introduzione
Thank you for choosing the Treeligo 12V DC Mini Split Air Conditioner. This manual provides essential information for the safe and efficient installation, operation, and maintenance of your air conditioning unit. Please read this manual thoroughly before installation and use, and retain it for future reference.
This unit is designed to provide cooling for various vehicles, including semi-trucks, trailers, campers, RVs, crane loaders, and excavators, operating on a 12V DC power supply.
2. Informazioni sulla sicurezza
ATTENZIONE: la mancata osservanza di queste istruzioni di sicurezza potrebbe causare scosse elettriche, incendi, lesioni gravi o morte.
- Assicurarsi che l'alimentazione sia scollegata prima di eseguire qualsiasi installazione, manutenzione o risoluzione dei problemi.
- L'installazione deve essere eseguita da personale qualificato nel rispetto di tutte le normative elettriche locali e nazionali.
- Non utilizzare l'unità con le mani bagnate o quando si è immersi nell'acqua.
- Tenere bambini e animali domestici lontani dall'unità durante il funzionamento e la manutenzione.
- Do not block the air intake or outlet of the unit.
- Use only the specified refrigerant (R-134A) and ensure proper handling and disposal.
- The unit is designed for 12V DC power only. Connecting to an incorrect voltagpotrebbe causare danni o incendi.
- Assicurare una ventilazione adeguata attorno all'unità esterna per evitare il surriscaldamento.
3. Prodotto finitoview
The Treeligo 12V DC Mini Split Air Conditioner consists of an indoor unit and an outdoor unit, along with necessary accessories for installation and operation.

Image 3.1: Treeligo 12V DC Mini Split Air Conditioner (Indoor and Outdoor Units)
This image displays the complete Treeligo 12V DC Mini Split Air Conditioner system, featuring both the compact indoor unit and the robust outdoor unit. A semi-truck is visible in the background, illustrating a typical application for this product.
3.1. Caratteristiche principali
- Potente motore brushless: Equipped with a 960W brushless motor, providing rapid cooling with up to 3000 RPM and a wind speed of 265 CFM.
- Funzionamento a basso rumore: Operates at a low noise level of 45dB, ensuring a quiet environment.
- Variable Frequency Inverter Cooling: Adjusts operating frequency based on ambient temperature to optimize energy consumption.
- Alimentazione 12 V CC: Designed for direct 12V DC vehicle power systems.
- Basso volumetage Protezione: Automatically cuts off power to prevent battery drain, ensuring vehicle start-up. Includes over-voltage protezione da sovracorrente.
- Costruzione durevole: Shell made from sturdy ABS material, resistant to deformation and corrosion.
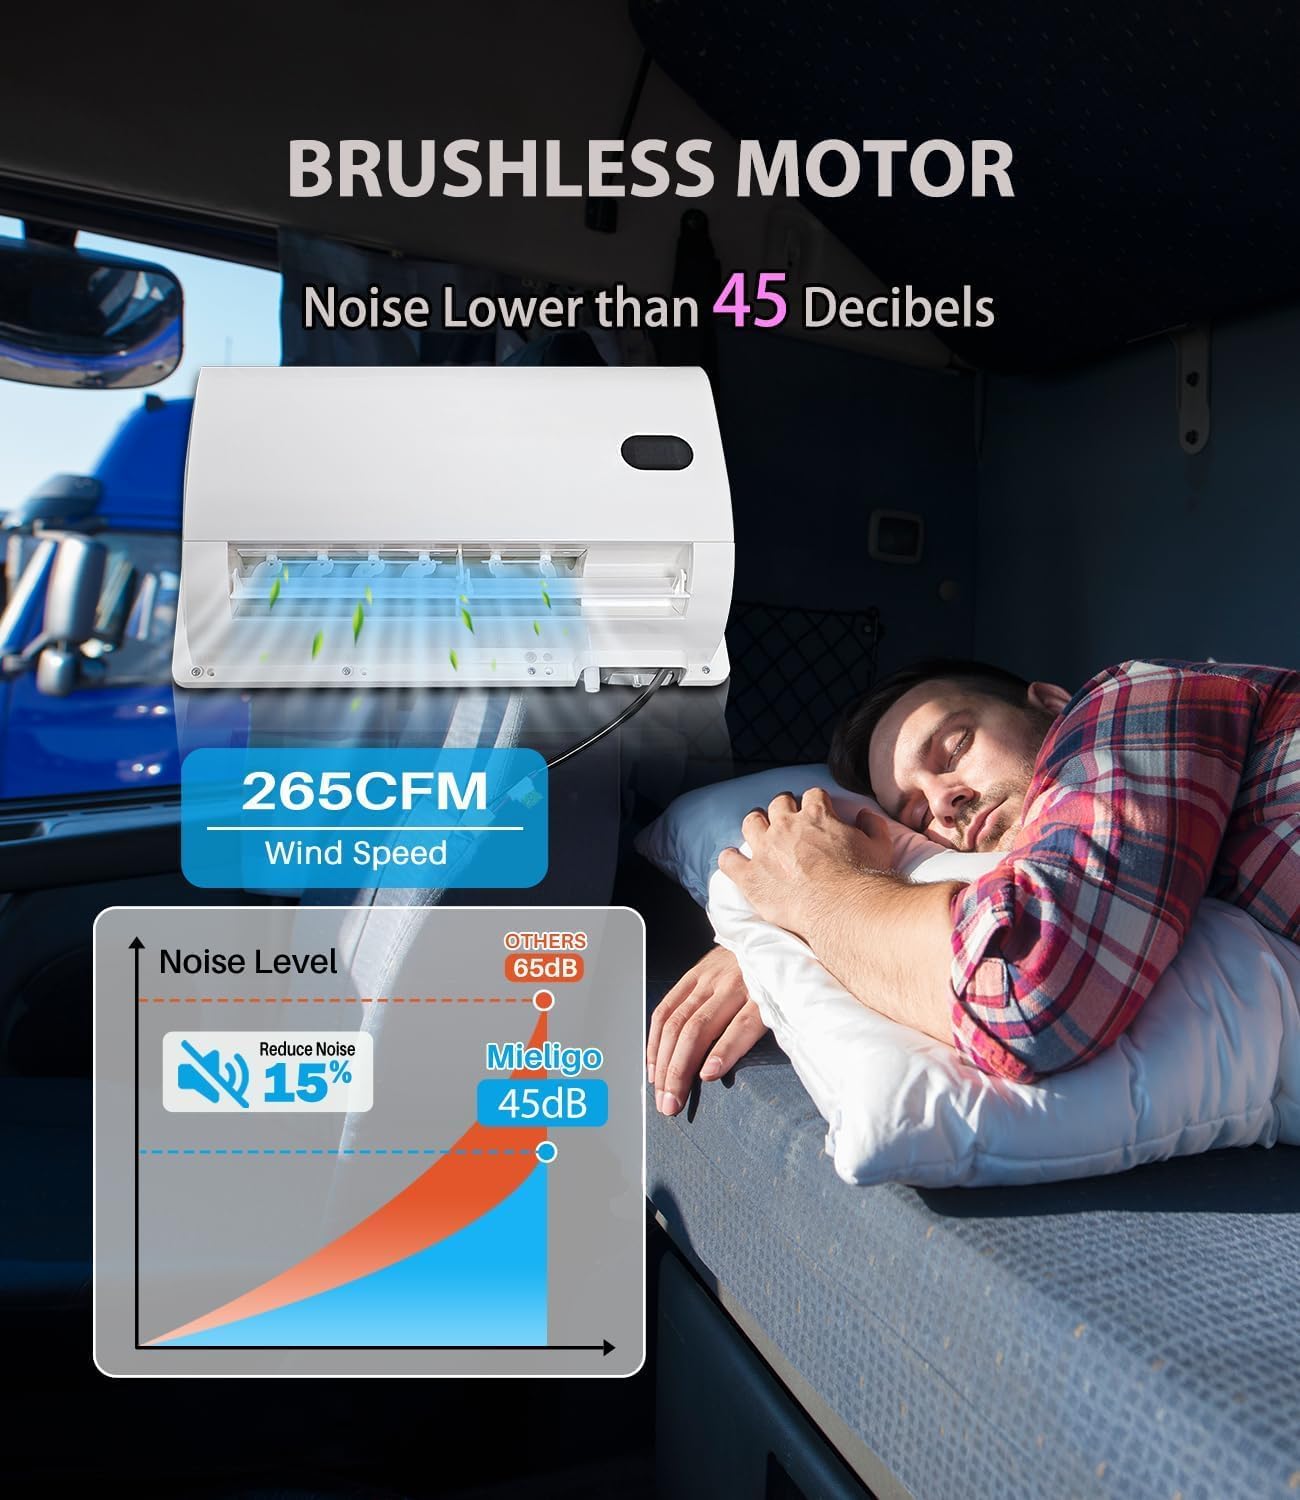
Image 3.2: Brushless Motor and Performance Overview
This graphic highlights the brushless motor technology, demonstrating the unit's low noise output (below 45dB) and efficient wind speed (265 CFM), contributing to a comfortable and quiet interior.
3.2. Indoor Unit Features
- Schermo LCD: Provides clear temperature and setting information.
- 360° Air Flow: Ensures even distribution of cool air.
- Telecomando: Per una comoda regolazione delle impostazioni.
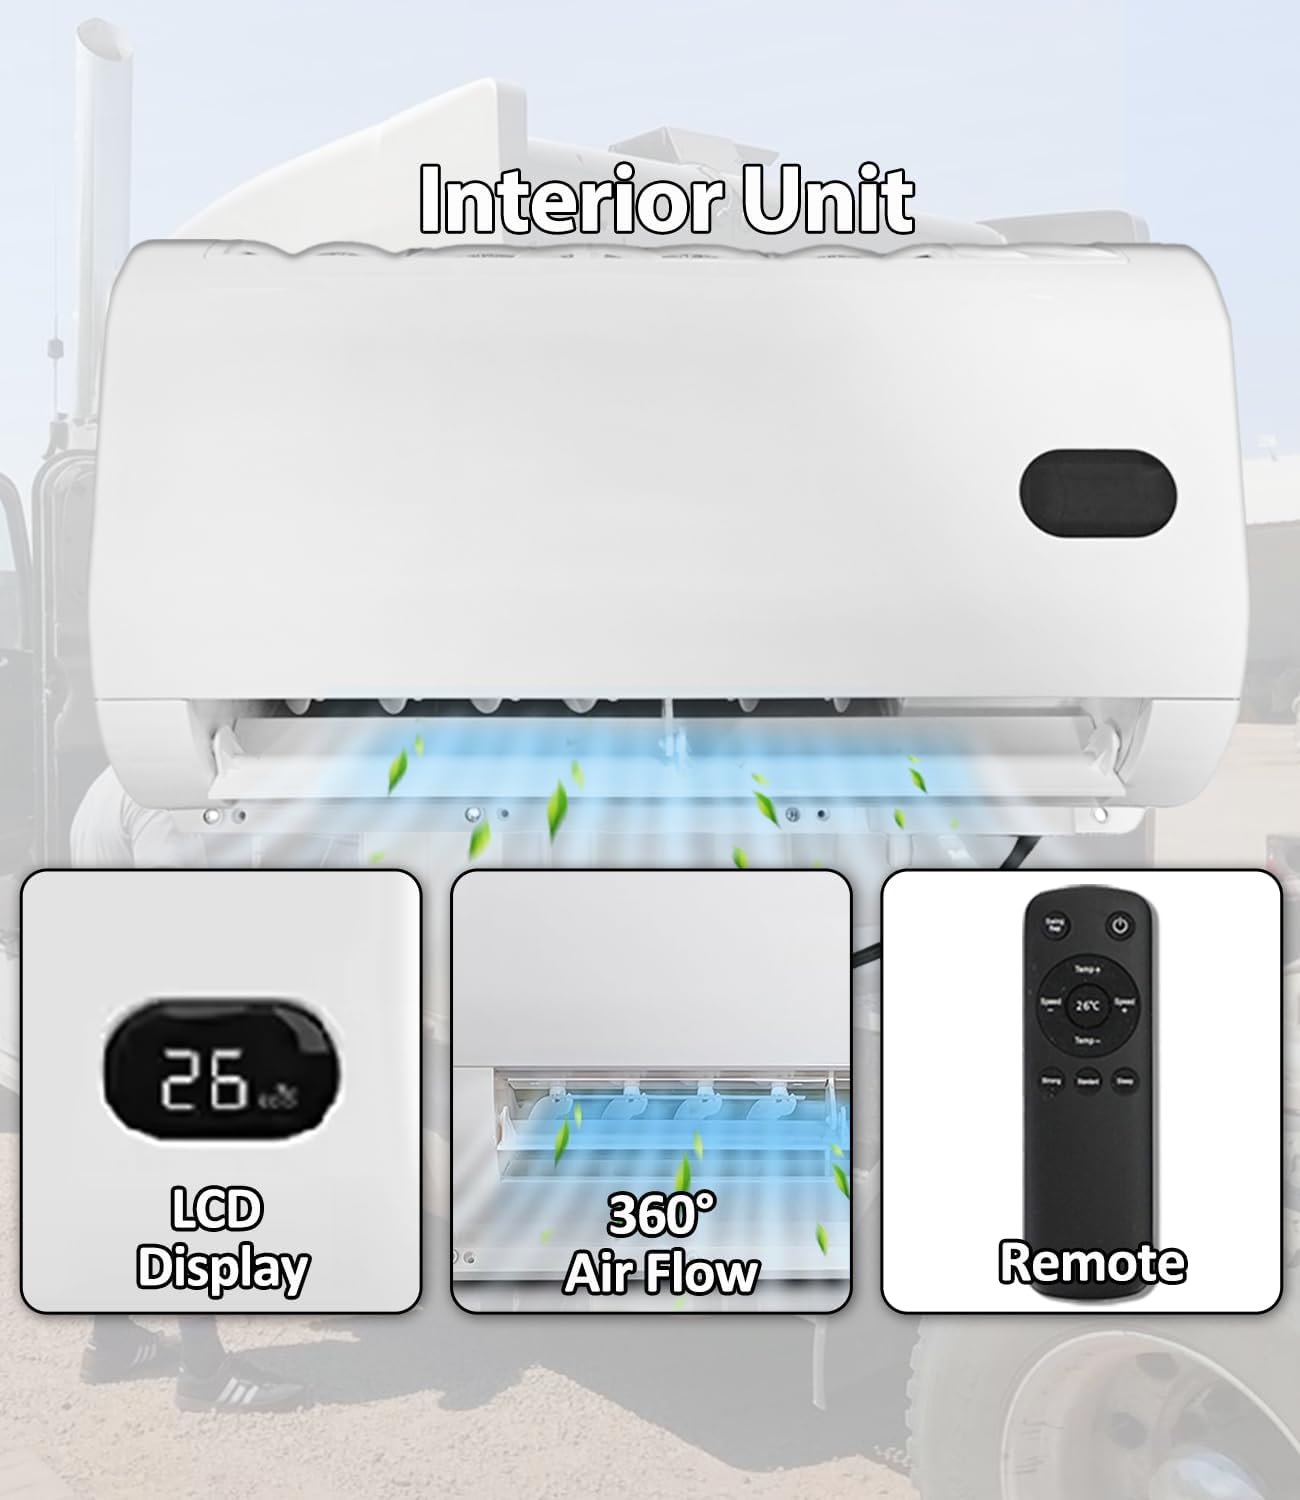
Image 3.3: Indoor Unit Controls and Airflow
This image focuses on the indoor unit, detailing its user interface with an LCD display, the 360-degree air flow capability, and the included remote control for ease of use.
3.3. Outdoor Unit Features
- IPX6K Waterproof Rating: Provides protection against strong jets of water, suitable for outdoor vehicle environments.
- Thickened Aluminum Condenser: Migliora la dissipazione del calore e la durata.
- 20CC Inverter Scroll Compressor: Efficient and reliable compressor for consistent cooling performance.

Image 3.4: Outdoor Unit Durability and Components
This image showcases the robust features of the outdoor unit, including its IPX6K waterproof design, the thickened aluminum condenser for efficient heat exchange, and the 20CC inverter scroll compressor.
3.4. Cosa c'è nella scatola
Il pacchetto include i seguenti componenti:
- Unità interna
- Unità esterna
- Telecomando
- Manuale di istruzioni
- Screw Accessories (various screws, washers, gaskets)
- Tubo a bassa pressione
- Tubo ad alta pressione
- Tubo di scarico
- Cavo di segnale
- Cavo della batteria
- Nastro adesivo
- Valvola di espansione
- Scheda di montaggio

Immagine 3.5: Contenuto della confezione
This image provides a visual representation of all items included in the product package, ensuring users can verify they have received all necessary parts for installation.
4. Specifiche tecniche
| Caratteristica | Specificazione |
|---|---|
| Marca | Treeligo |
| Numero di modello | EAC001.22.12 |
| Peso dell'articolo | 66 libbre |
| Dimensioni del prodotto (unità interna) | 7 x 13 x 23 pollici |
| Dimensioni del prodotto (unità esterna) | 20 x 9 x 26 inches (Can be mounted horizontally, or on top of the roof) |
| Efficienza | Efficiente |
| Capacità | 66 libbre |
| Consumo energetico annuale | 100 kilowattora all'anno |
| Livello di rumore | 55 Decibels (Operating below 45dB) |
| Tipo di installazione | Sistema diviso |
| Fattore di forma | Mini-Split |
| Caratteristiche speciali | Fast Cooling, Remote Control, Panel Control LCD Display |
| Colore | Bianco |
| Voltage | 12 Volt (CC) |
| Cosatage | 800 watts (Rated Power: 960W) |
| Potenza di raffreddamento | 10000 unità termiche britanniche (BTU) |
| Copertura dell'area del pavimento | 50 piedi quadrati |
| Rapporto di efficienza energetica stagionale (SEER) | 10 |
| Refrigerante | R-134A |
5. Istruzioni per l'installazione
Per ottenere prestazioni e sicurezza ottimali si consiglia l'installazione da parte di un professionista.
5.1. Elenco di controllo pre-installazione
- Verificare che tutti i componenti elencati nella Sezione 3.4 siano presenti e non danneggiati.
- Ensure the vehicle's electrical system can support a 12V DC, 800W (960W peak) load.
- Select appropriate mounting locations for both indoor and outdoor units, ensuring proper air circulation and drainage.
- Gather necessary tools: drill, wrenches, screwdrivers, vacuum pump, refrigerant gauges, safety glasses, gloves.
5.2. Installazione passo passo

Immagine 5.1: Passaggi di installazioneview
This diagram illustrates the eight primary steps involved in installing the Treeligo 12V DC Mini Split Air Conditioner, from mounting units to connecting power and refrigerant.
- Install External Machine: Securely mount the outdoor unit in the chosen location on the vehicle. Ensure it is level and has adequate clearance for airflow.
- Install Expansion Valve: Connect the expansion valve to the appropriate lines as per the diagram.
- Installare l'unità interna: Mount the indoor unit inside the vehicle cabin. Ensure it is securely fastened and positioned for optimal air distribution.
- Install High & Low Pressure Pipelines: Connect the high and low pressure refrigerant lines between the indoor and outdoor units. Ensure all connections are tight and leak-free.
- Install Connecting Line, Drain Pipe, and Power Line: Connect the signal cable, drain pipe, and main power cable. The drain pipe should be routed to allow condensate to exit the vehicle without causing damage.
- Vacuum and Add Refrigerant: Evacuate the system using a vacuum pump to remove air and moisture. Then, charge the system with the specified amount of R-134A refrigerant. This step requires specialized tools and expertise.
- Connect the Power Cord to the Battery: Connect the main power cable directly to the vehicle's 12V DC battery, ensuring correct polarity and a secure connection. Install an inline fuse if not already present.
- Turn on the Air Conditioner: Once all connections are secure and the system is charged, power on the unit and test its operation.
6. Istruzioni per l'uso
The Treeligo 12V DC Mini Split Air Conditioner can be operated using the control panel on the indoor unit or the provided remote control.
6.1. Pannello di controllo
The indoor unit features an LCD display and control buttons for direct operation. Refer to Image 3.3 for a visual guide.
- Pulsante di accensione: Accende/Spegne l'unità.
- Pulsante Modalità: Cycles through operating modes (e.g., Cool, Fan).
- Regolazione della temperatura: Pulsanti per aumentare o diminuire la temperatura desiderata.
- Velocità della ventola: Regola la velocità della ventola (bassa, media, alta, automatica).
6.2. Controllo remoto
The remote control provides convenient access to all functions from a distance. Point the remote control directly at the indoor unit's receiver when operating.
- Pulsante di accensione: Accende/Spegne l'unità.
- Selezione della modalità: Selects operating modes.
- Impostazione della temperatura: Regola la temperatura target.
- Controllo della velocità della ventola: Modifica la velocità della ventola.
- Funzione timer: Sets a timer for automatic ON/OFF.
- Modalità risparmio: Regola la temperatura e la velocità della ventola per un sonno confortevole.
6.3. Basso volumetage Protezione
The unit is equipped with a low voltage protection feature. If the vehicle battery voltage drops below a safe threshold, the AC unit will automatically shut off to prevent complete battery discharge, ensuring the vehicle can still start. This threshold is factory set and not user-adjustable.
7. Manutenzione
Regular maintenance ensures the longevity and efficient operation of your Treeligo air conditioner.
- Filtri dell'aria puliti: The indoor unit's air filters should be cleaned every 2-4 weeks, or more frequently depending on usage and environment. Remove filters, wash with mild soap and water, rinse thoroughly, and allow to dry completely before reinstallation.
- Pulire l'unità esterna: Periodically inspect and clean the outdoor unit's condenser coils to remove dirt, dust, and debris. Use a soft brush or vacuum cleaner. Ensure power is disconnected before cleaning.
- Check Drain Pipe: Ensure the drain pipe is clear of obstructions and allows for proper condensate drainage.
- Ispezionare i collegamenti elettrici: Annually, check all electrical connections for tightness and signs of corrosion.
- Controllo del livello del refrigerante: If cooling performance decreases, have a qualified technician check the refrigerant level. Refrigerant charging should only be performed by certified professionals.
8. Risoluzione Dei Problemi
Prima di contattare l'assistenza clienti, consultare la seguente tabella per i problemi più comuni e le relative soluzioni.
| Problema | Possibile causa | Soluzione |
|---|---|---|
| L'unità non si accende | Nessuna alimentazione; fusibile bruciato; basso livello della batteriatage; Power cord disconnected. | Check battery connections; Check vehicle fuse box; Recharge vehicle battery; Ensure power cord is securely connected. |
| Raffreddamento insufficiente | Dirty air filters; Blocked outdoor unit; Low refrigerant; Incorrect temperature setting; Doors/windows open. | Clean air filters; Clear obstructions from outdoor unit; Set desired temperature lower; Close all doors and windows; Contact technician for refrigerant check. |
| L'unità è rumorosa | Loose mounting; Fan obstruction; Abnormal compressor operation. | Check mounting screws; Remove any obstructions from fan; If noise persists, contact customer support. |
| Perdita d'acqua dall'unità interna | Blocked drain pipe; Improper installation angle. | Clear drain pipe; Ensure indoor unit is installed with a slight downward slope towards the drain. |
| Il telecomando non funziona | Batterie scariche; Ostruzione tra il telecomando e l'unità; Telecomando fuori portata. | Sostituire le batterie; rimuovere gli ostacoli; utilizzare il telecomando entro il raggio d'azione effettivo. |
9. Garanzia e assistenza clienti
Treeligo products are manufactured to high-quality standards and are backed by a manufacturer's warranty. For specific warranty terms and conditions, please refer to the warranty card included with your product or visit the official Treeligo websito.
If you encounter any issues that cannot be resolved using the troubleshooting guide, or if you require technical assistance, please contact Treeligo customer support. When contacting support, please have your product model number (EAC001.22.12) and purchase information ready.
Per maggiori informazioni, visita il Treeligo Store on Amazon.