
Cuifati H310 LGA 1151 Micro ATX DDR4 Motherboard
Cuifati H310 LGA 1151 Micro ATX DDR4 Motherboard Instruction Manual
Model: Cuifati H310 LGA 1151 Micro ATX DDR4 Motherboard
Marca: Cuifati
1. Introduzione
This manual provides comprehensive instructions for the Cuifati H310 LGA 1151 Micro ATX DDR4 Motherboard, covering installation, operation, maintenance, troubleshooting, and detailed technical specifications. Please read this manual thoroughly before installing or operating your motherboard to ensure proper functionality and longevity.
Caratteristiche principali:
- Wide CPU Compatibility: Supports 8th and 9th generation Intel Core CPUs (LGA 1151 socket).
- Memoria DDR4 a doppio canale: Features two DDR4 DIMM slots, supporting up to 32GB total memory at speeds of 1066, 1333, and 1600MHz.
- Alimentazione stabile: Equipped with a three-phase power supply and all solid-state capacitors for reliable power delivery to motherboard components.
- High-Speed Chipset: Utilizes the Intel H310 chipset for stable and efficient performance across various computing tasks.
- Grafica integrata: Includes an integrated graphics processor with DVI, HDMI, and VGA display ports for multi-monitor setups.

Figura 1: Dall'alto verso il basso view of the Cuifati H310 LGA 1151 Micro ATX DDR4 Motherboard.
2. Configurazione e installazione
Follow these steps carefully to install your Cuifati H310 motherboard and its components.
2.1 Layout della scheda madre

Figure 2: Detailed layout of the Cuifati H310 motherboard with key components labeled, including power connectors, memory slots, PCIe slots, and I/O interfaces.
2.2 Installazione della CPU
- Individuare il socket della CPU LGA 1151 sulla scheda madre.
- Spingere delicatamente verso il basso la leva di caricamento e tirarla via dal socket per aprire il telaio di fissaggio della CPU.
- Allineare il segno triangolare sulla CPU Intel LGA 1151 con il segno corrispondente sul socket. Inserire con cautela la CPU nel socket, senza forzarla.
- Chiudere il telaio di ritenzione e riportare la leva di caricamento nella posizione di blocco.
- Installare il dissipatore della CPU seguendo le istruzioni del produttore.

Figura 3: primo piano view of the LGA 1151 CPU socket on the motherboard, ready for CPU installation.
2.3 Installazione della memoria (RAM)
- Individuare i due slot DIMM DDR4.
- Aprire le clip su entrambe le estremità dello slot di memoria.
- Allineare la tacca sul modulo di memoria DDR4 con la chiave nello slot DIMM.
- Inserire saldamente il modulo di memoria nello slot finché le clip non scattano in posizione. Assicurarsi che entrambe le clip siano completamente chiuse.

Figure 4: Illustration highlighting the DDR4 memory slots, supporting dual-channel architecture.
2.4 Storage Device Installation (SATA)
- Locate the four SATA 3.0 (6Gb/s) ports on the motherboard.
- Collegare un'estremità di un cavo dati SATA a una porta SATA sulla scheda madre.
- Collegare l'altra estremità del cavo dati SATA al disco rigido SATA o all'SSD.
- Collegare un cavo di alimentazione SATA dall'alimentatore (PSU) al dispositivo di archiviazione.
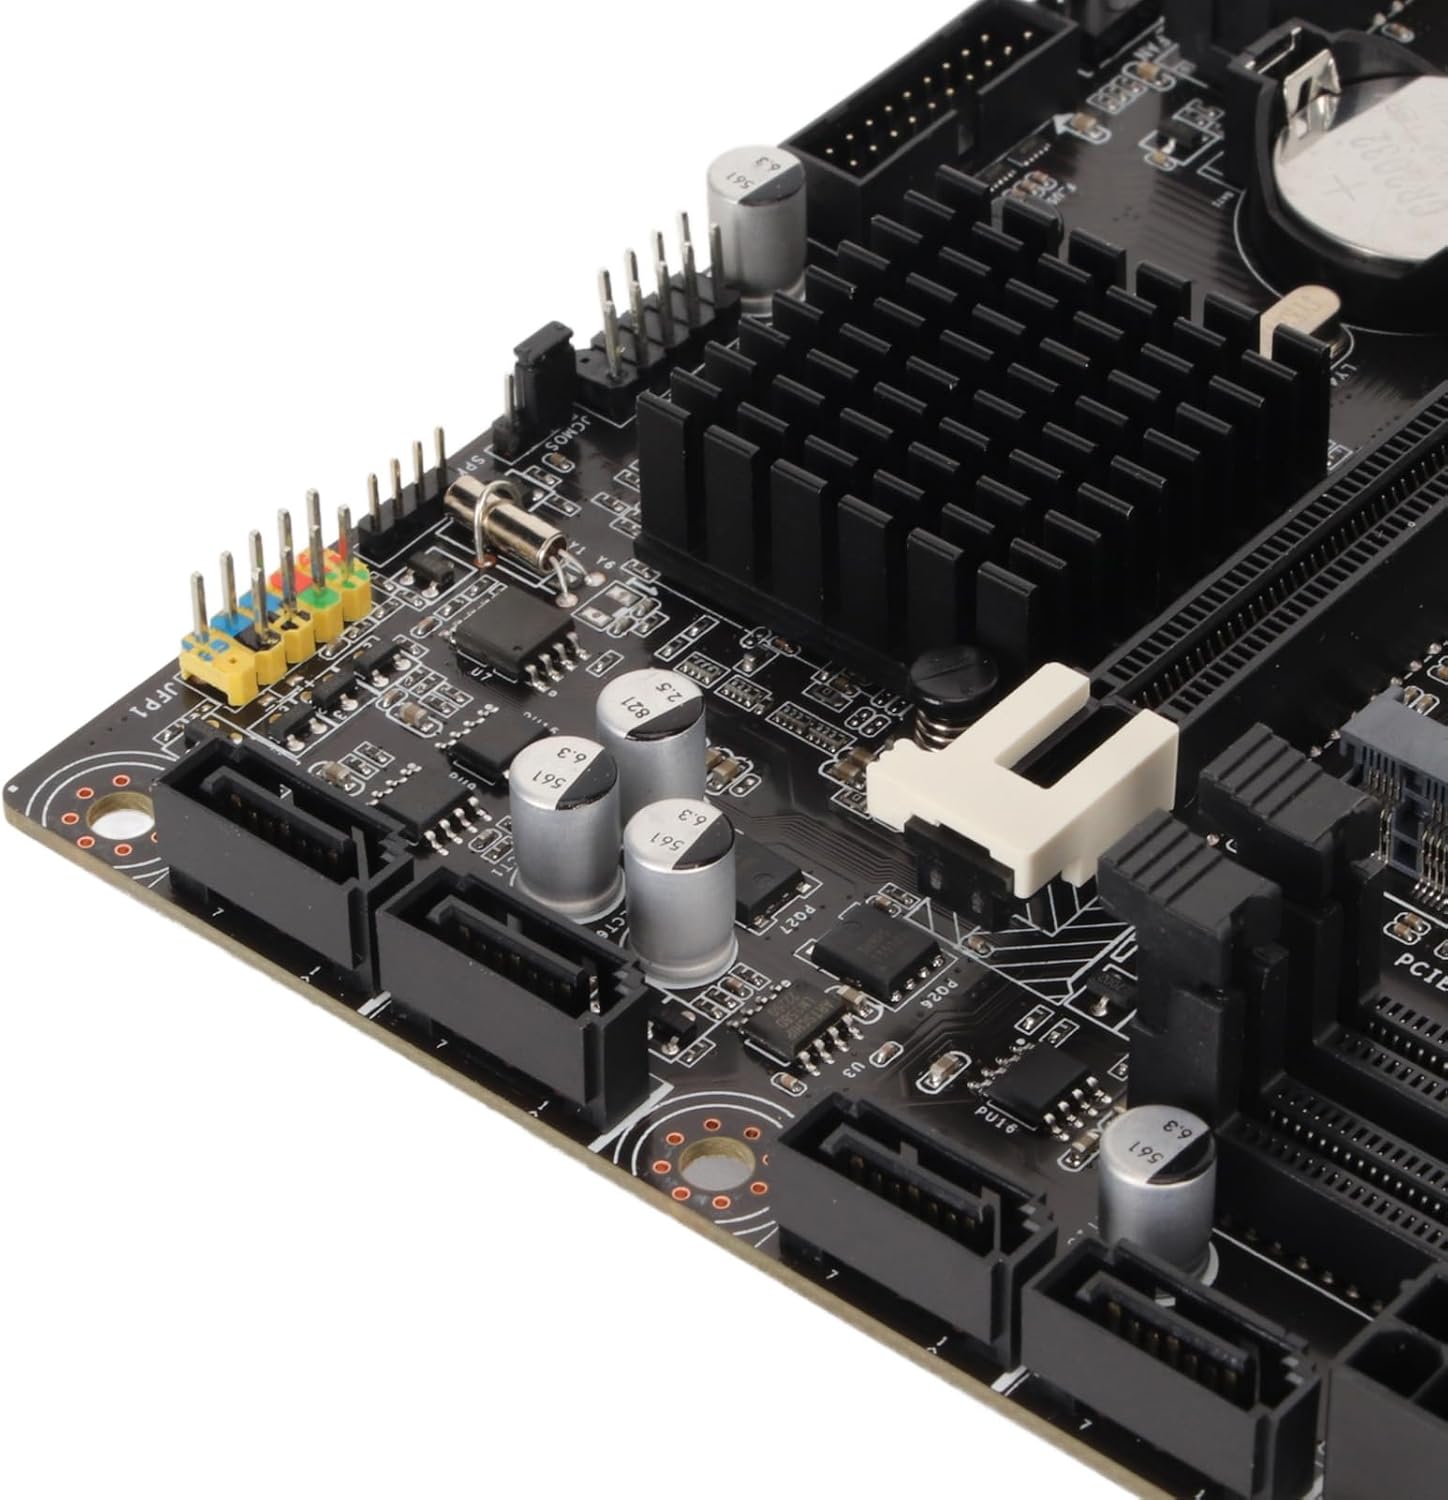
Figura 5: primo piano view of the four SATA 3.0 ports on the motherboard, used for connecting storage devices.
2.5 Installazione della scheda grafica (PCIe)
- Locate the PCIe x16 slot (the longest PCIe slot).
- Rimuovere il coperchio dello slot di espansione corrispondente dal case del PC.
- Align your graphics card with the PCIe x16 slot and press down firmly until it is securely seated and the retention clip locks.
- Fissare la scheda grafica al case del PC con una vite.
- Collegare tutti i cavi di alimentazione PCIe necessari dall'alimentatore alla scheda grafica.
2.6 Collegamento dell'alimentazione
- Collegare il connettore di alimentazione principale ATX a 24 pin dall'alimentatore alla scheda madre.
- Connect the 8-pin ATX 12V power connector from your PSU to the motherboard.
2.7 I/O Shield Installation
Before mounting the motherboard into your PC case, ensure you install the I/O shield into the case's rear opening. This protects the rear ports and prevents dust ingress.

Figure 6: Rear I/O panel of the Cuifati H310 motherboard, showing various ports including USB, LAN, and audio jacks.
3. Istruzioni per l'uso
3.1 Primo avvio e configurazione del BIOS
- Dopo aver assemblato il PC, collega un monitor, una tastiera e un mouse.
- Power on your system. During startup, repeatedly press the DEL key (or as indicated on screen) to enter the BIOS/UEFI setup.
- In the BIOS, configure settings such as boot order, date/time, and enable XMP for your RAM if applicable. Save changes and exit.
- Install your operating system (e.g., Windows 10) from a bootable USB drive or DVD.
3.2 Installazione del driver
After installing your operating system, install the necessary drivers for your motherboard components. These typically include chipset drivers, audio drivers, LAN drivers, and integrated graphics drivers. Drivers can usually be found on the Cuifati support website or on an included driver CD/USB drive.
3.3 Integrated Graphics Output
The motherboard supports multiple display outputs (DVI, HDMI, VGA). You can connect up to three monitors simultaneously using these ports, provided your CPU has integrated graphics capabilities.

Figura 7: primo piano view of the DVI, HDMI, and USB ports on the rear I/O panel.
4. Manutenzione
- Mantienilo pulito: Regularly clean your PC case and motherboard to prevent dust buildup, which can lead to overheating and component failure. Use compressed air to gently remove dust.
- Aggiornamenti del BIOS: Periodically check the Cuifati website for BIOS updates. BIOS updates can improve system stability, compatibility, and performance. Follow the update instructions carefully.
- Aggiornamenti driver: Mantieni aggiornati i driver per garantire prestazioni ottimali e compatibilità con nuovi software e hardware.
5. Risoluzione Dei Problemi
Se riscontri problemi con la scheda madre, prendi in considerazione i seguenti passaggi comuni per la risoluzione dei problemi:
- Nessuna alimentazione/Nessun avvio:
- Assicurarsi che tutti i cavi di alimentazione (ATX a 24 pin, ATX a 8 pin 12 V) siano collegati saldamente.
- Verify your PSU is switched on and functioning correctly.
- Check front panel connections (power button, reset button).
- Nessuna visualizzazione:
- Confirm your monitor is connected to the correct graphics output (integrated or dedicated GPU).
- Reinstallare la scheda grafica e i moduli RAM.
- If using a dedicated GPU, ensure it is properly powered.
- Instabilità/arresti anomali del sistema:
- Controllare le temperature della CPU e della GPU.
- Assicurarsi che i moduli RAM siano installati correttamente e compatibili.
- Aggiornare il BIOS e i driver.
- BIOS Q-Flash Plus Button: The motherboard features a BIOS Q-Flash Plus button on the rear I/O panel, allowing you to update the BIOS without a CPU, RAM, or graphics card installed. Refer to the manufacturer's websito per istruzioni dettagliate sull'utilizzo di questa funzionalità.
6. Specifiche
| Caratteristica | Dettaglio |
|---|---|
| Marca | Cuifati |
| Presa CPU | LGA1151 |
| Processori compatibili | Intel Core i3/i5/i7/i9 8th/9th Gen |
| Tipo di chipset | Intel H310 |
| Tecnologia della memoria RAM | DDR4 |
| Velocità di clock della memoria | 1600 MHz (Supports 1066, 1333, 1600MHz) |
| Capacità massima della RAM | Up to 32GB (2 x 16GB DIMM slots) |
| Dispositivi compatibili | Personal computer |
| Piattaforma | Finestre 10 |
| Interfacce di archiviazione | 4 x SATA 3.0 (6Gb/s) ports |
| Uscite di visualizzazione | DVI, HDMI, VGA |
| Porte USB (posteriori) | 4 x USB 2.0, 2 x USB 3.2 Gen 1, 1 x USB 3.2 Gen 2, 1 x USB 3.2 Gen 1 Type-C |
| Rete locale | 1 x Gigabit Ethernet |
| Audio | Audio ad alta definizione integrato |
| Peso dell'articolo | 1.13 libbre |
| Dimensioni del pacco | 10.24 x 7.87 x 1.97 pollici |
| Numero di modello | Cuifati0ohk6rbtdm |
7. Garanzia e supporto
For warranty information, technical support, and the latest driver/BIOS downloads, please visit the official Cuifati webluogo. Conserva la ricevuta di acquisto per eventuali richieste di garanzia.
For additional product information and visual guides, please refer to the product overview video qui sotto:
Video 1: Prodotto ufficiale finitoview for the Cuifati H310 Motherboard. This video provides a visual guide to the motherboard's features and components.
Ask a question about this manual
Ask about setup, troubleshooting, compatibility, parts, safety, or missing instructions. Manuals+ will review the question and use this page’s manual context to help answer it.