Introduzione
This manual provides detailed instructions for the setup, operation, maintenance, and troubleshooting of your Wolezek BL-C10A 2-in-1 Full Spectrum LED Grow Light. Please read this manual thoroughly before use to ensure proper function and longevity of your device.
The Wolezek BL-C10A is designed to provide optimal lighting conditions for indoor plants across various growth stages. It features a full spectrum LED array, multiple color modes, adjustable brightness, and a flexible gooseneck for precise light positioning.
Prodotto finitoview
The Wolezek BL-C10A grow light offers versatile lighting solutions for your indoor plants. Key features include:
- 2-in-1 Installation Options: Può essere clamped onto a pot or inserted directly into soil.
- LED a spettro completo: Equipped with 48 LEDs (12 Warm White, 33 Cool White, 3 Red) to support all plant growth stages.
- 3 modalità colore: Natural White (6500K), Warm White & Red (3000K), and All Light On (5000K).
- 5 Dimmable Brightness Levels: Regola l'intensità della luce dallo 20% al 100%.
- Timer automatico: Set for 6, 12, or 16 hours of continuous operation.
- Collo d'oca flessibile a 360°: Consente una regolazione precisa dell'angolazione della luce.
- Dissipazione efficiente del calore: Aluminum alloy lamp housing ensures safe and long-lasting operation.
- Cavo di alimentazione lungo: 80.7-inch cord for flexible placement.
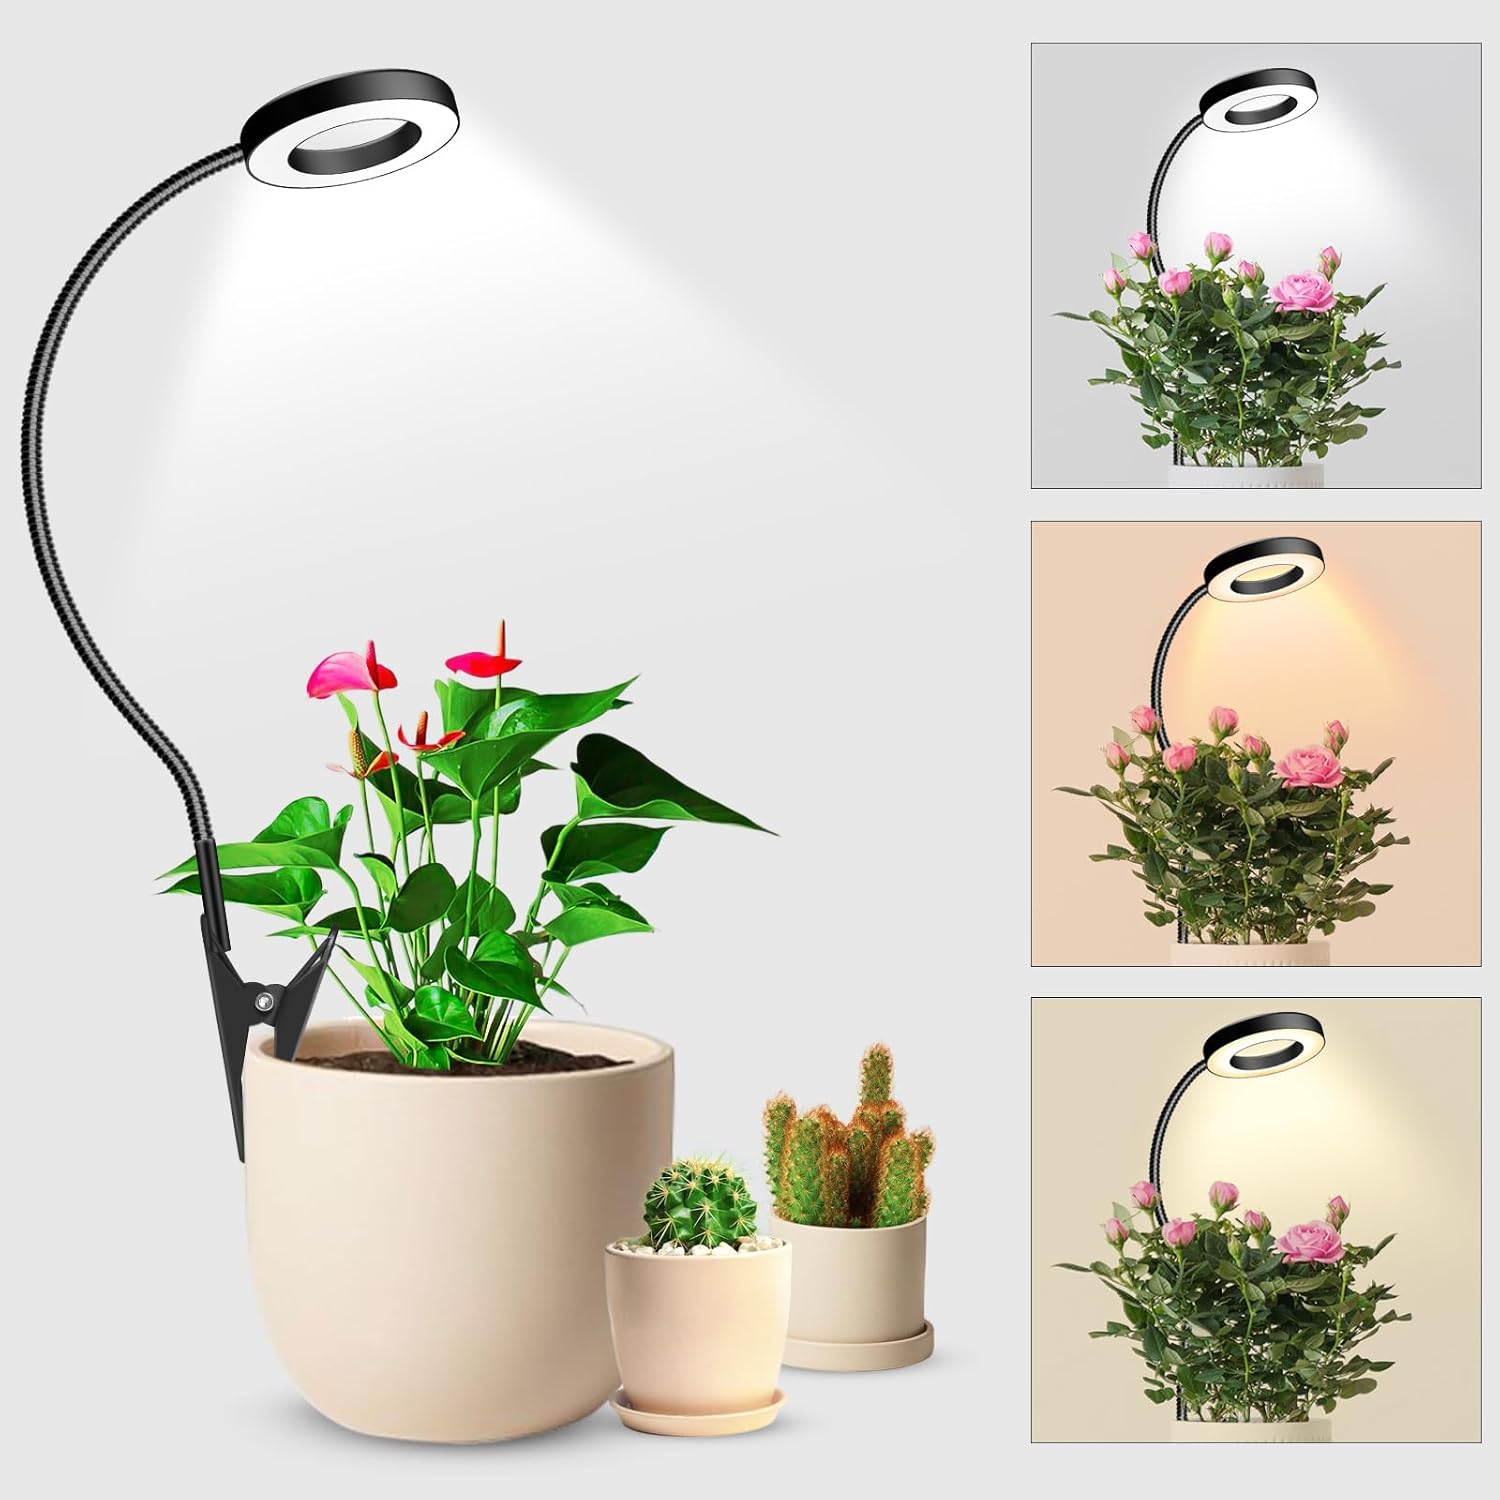
Image: The Wolezek BL-C10A grow light illuminating various indoor plants, demonstrating its adjustable light spectrum.
Istruzioni di installazione
The Wolezek BL-C10A offers two primary installation methods:
Metodo 1: clamp Montare
- Allega Clamp: Fissare saldamente il clamp to the edge of a plant pot, shelf, or table. Ensure the surface is stable and can support the light's weight.
- Regolare il collo d'oca: Bend the flexible gooseneck to position the light head directly above your plant, ensuring even light distribution.
- Connetti alimentazione: Plug the USB connector into a compatible 5V/2A power adapter (not included) and then into a wall outlet.
- Accensione: Press the power button on the inline controller to turn on the light.
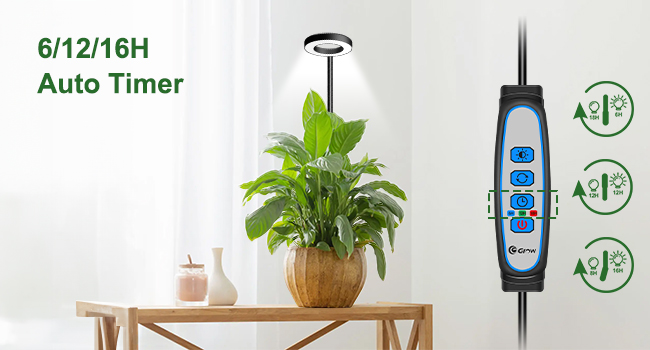
Image: Visual guide demonstrating the four steps for clamp-mounting the grow light to a plant pot.
Method 2: Soil Insertion
- Attach Stake: Svitare il clamp from the base of the gooseneck and attach the provided stake.
- Inserire nel terreno: Gently insert the stake into the soil of your plant pot. Ensure it is stable and does not damage the plant's roots.
- Regolare il collo d'oca: Position the light head above your plant using the flexible gooseneck.
- Connetti alimentazione: Plug the USB connector into a compatible 5V/2A power adapter (not included) and then into a wall outlet.
- Accensione: Press the power button on the inline controller to turn on the light.
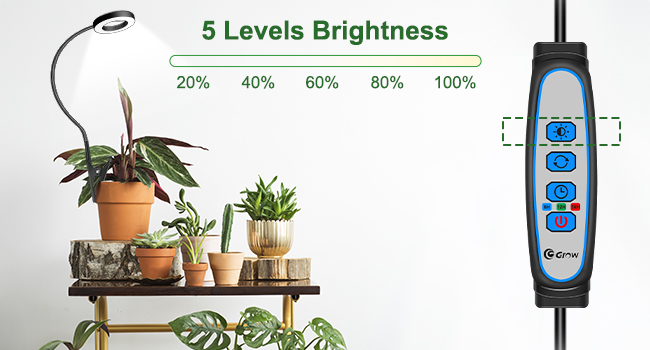
Image: Visual guide demonstrating the four steps for inserting the grow light into the soil of a plant pot.

Image: Comparison of the clamp-on and stake-in-soil installation methods for the Wolezek grow light.
Istruzioni per l'uso
The inline controller allows you to manage the light's settings:
Accensione/spegnimento
- Premere il tasto Pulsante di accensione (
 ) per accendere o spegnere la luce.
Regola la luminosità
- Premere il tasto Pulsante di regolazione della luminosità (
 ) to cycle through 5 brightness levels (20%, 40%, 60%, 80%, 100%).

Image: Illustration of the five adjustable brightness levels for the Wolezek grow light.
Change Color Mode
- Premere il tasto Pulsante modalità colore (
 ) to switch between the three color modes:
- Bianco naturale (6500K): Ideal for germination and early growth.
- Warm White & Red (3000K): Favorisce la fioritura e la fruttificazione.
- All Light On (5000K): Full spectrum for all growth stages.

Image: Visual representation of the three distinct color modes available on the grow light.
Imposta il timer
- Premere il tasto Pulsante timer () to select a timer setting: 6 hours, 12 hours, or 16 hours. The light will automatically turn off after the set duration and turn on again at the same time the next day.

Image: The grow light operating with its automatic timer function, showing options for 6, 12, or 16 hours.
Regolazione del collo d'oca
- The 360° flexible gooseneck allows you to direct light precisely where your plants need it most. Gently bend and shape the gooseneck to achieve the desired angle and height.

Image: The flexible gooseneck of the Wolezek grow light demonstrating its 360-degree adjustability for optimal plant illumination.
Manutenzione
To ensure the longevity and optimal performance of your Wolezek BL-C10A grow light, follow these maintenance guidelines:
- Pulizia: Periodically wipe the light head and gooseneck with a soft, dry cloth to remove dust and debris. Ensure the device is unplugged before cleaning. Do not use liquid cleaners or abrasive materials.
- Dissipazione del calore: The aluminum alloy lamp housing is designed for efficient heat dissipation. Ensure the lamp head is not obstructed to allow for proper airflow.
- Magazzinaggio: If storing the grow light for an extended period, unplug it, clean it, and store it in a cool, dry place away from direct sunlight and moisture.
Risoluzione dei problemi
If you encounter issues with your Wolezek BL-C10A grow light, refer to the following common problems and solutions:
| Problema | Possibile causa | Soluzione |
|---|---|---|
| La luce non si accende. | Nessuna alimentazione, connessione allentata o adattatore difettoso. | Check if the power adapter is securely plugged into the outlet and the USB connector is firmly inserted into the adapter. Ensure the outlet is functional. Try a different 5V/2A USB power adapter. |
| La funzione timer non funziona correttamente. | Impostazione errata del timer o interruzione di corrente. | Ensure the timer button was pressed to select the desired duration (6H, 12H, or 16H). If power was interrupted, reset the timer. |
| La luce tremola o si attenua inaspettatamente. | Alimentazione instabile o collegamento allentato. | Check power connections. Ensure the power adapter provides stable 5V/2A output. Avoid using with power strips that are overloaded. |
| Blue indicator light remains on when the unit is off. | Standard design feature for controller visibility. | This is a normal operational indicator. If you require complete darkness, unplug the unit from the power source. |
Specifiche
| Caratteristica | Dettaglio |
|---|---|
| Nome del modello | Wolezek Small Grow Light (BL-C10A) |
| Tipo di sorgente luminosa | LED (48 LEDs: 12 Warm White, 33 Cool White, 3 Red) |
| Modalità colore | Natural White (6500K), Warm White & Red (3000K), All Light On (5000K) |
| Livelli di luminosità | 5 (20%, 40%, 60%, 80%, 100%) |
| Impostazioni del timer | 6H, 12H, 16H |
| Collo d'oca | Flessibile a 360° |
| Tipo di installazione | Clamp Mount, Soil Insertion |
| Materiale | Alluminio |
| Fonte di alimentazione | Elettrico con cavo |
| Cosatage | 10.00 L |
| Voltage | 120 Volt |
| Dimensioni del prodotto | 3.5"P x 3.5"L x 18"A |
| Peso dell'articolo | 0.33 chilogrammi (11.7 once) |
| Lunghezza del cavo | 80.7 pollici |
| Usi specifici | Solo per uso interno |
Garanzia e supporto
Wolezek provides a comprehensive Garanzia di 12 mesi for this product. Additionally, customers receive supporto a vita e assistenza personalizzata per qualsiasi domanda o problema relativo ai prodotti.
For warranty claims, technical support, or any questions, please refer to the contact information provided on the product packaging or reach out to the seller directly through your purchase platform.