
1. Prodotto finitoview
The Andonstar AD246S-M Plus is a versatile 7-inch HDMI digital microscope designed for a wide range of applications, including electronics repair, coin observation, and biological slide examination. It features a 2160P UHD video record capability and comes with three interchangeable lenses (L, A, D) to provide varying magnification levels. The system includes an upgraded soldering station with helping hands and an extension base for enhanced workspace organization and stability.

Figure 1: Andonstar AD246S-M Plus Digital Microscope with included lenses and accessories.
2. Cosa c'è nella scatola
- 7 inch Microscope Monitor with Lens A
- Lente L
- Lente D
- Colonna
- Base metallica
- Clip
- Trave
- Portautensili
- Mani d'aiuto per la saldatura
- Extension Base (Plastic)
- Soldering Mat
- Bottom Light Stage
- Kit di diapositive
- Observation Box
- Pinzette
- Telecomando
- Scheda SD da 32 GB
- Adattatore
- Cavo di commutazione
- Cavo USB
- Cavo HDMI
- Manuale d'uso

Figura 2: Tutti i componenti inclusi nella confezione del prodotto.
3. Istruzioni per l'installazione
3.1 Assembling the Stand and Accessories
- Attach the column to the metal base.
- Mount the microscope monitor assembly onto the column.
- Secure the beam to the column and attach the tool holder.
- Install the soldering helping hands onto the beam.
- Place the plastic extension base and soldering mat onto the metal base. The extension base increases the workspace area and includes component storage boxes.
- Connect the bottom light stage if required for specific observations.

Figure 3: Assembled microscope station with helping hands and extension base.
3.2 Connecting the Microscope
- Connect the power adapter to the microscope and a power outlet.
- Insert the provided 32GB Micro SD card into the SD card slot on the monitor.
- For external display, connect the HDMI cable from the microscope to an HDMI-compatible monitor or TV.
- For PC connection and measurement software, use the USB cable to connect the microscope to your Windows PC.
Video 1: Detailed assembly steps for the stand and tips for using the Plus tool kit.
4. Istruzioni per l'uso
4.1 Selezione e utilizzo delle lenti
The microscope comes with three specialized lenses for different applications:
- Lens L (60-240x magnification): Ideal for soldering and repairing tasks, offering a suitable working distance.
- Lens A (18-720x magnification): Suitable for observing larger objects like coins, plants, and stones.
- Lens D (1560-2040x magnification): Progettato per un ingrandimento elevato viewing of biological slides.
To exchange lenses, carefully remove the current lens by unscrewing it and install the desired lens by screwing it into place.

Figure 4: Microscope with Lens L, optimized for soldering and repair.

Figure 5: Microscope with Lens A, ideal for coin inspection.
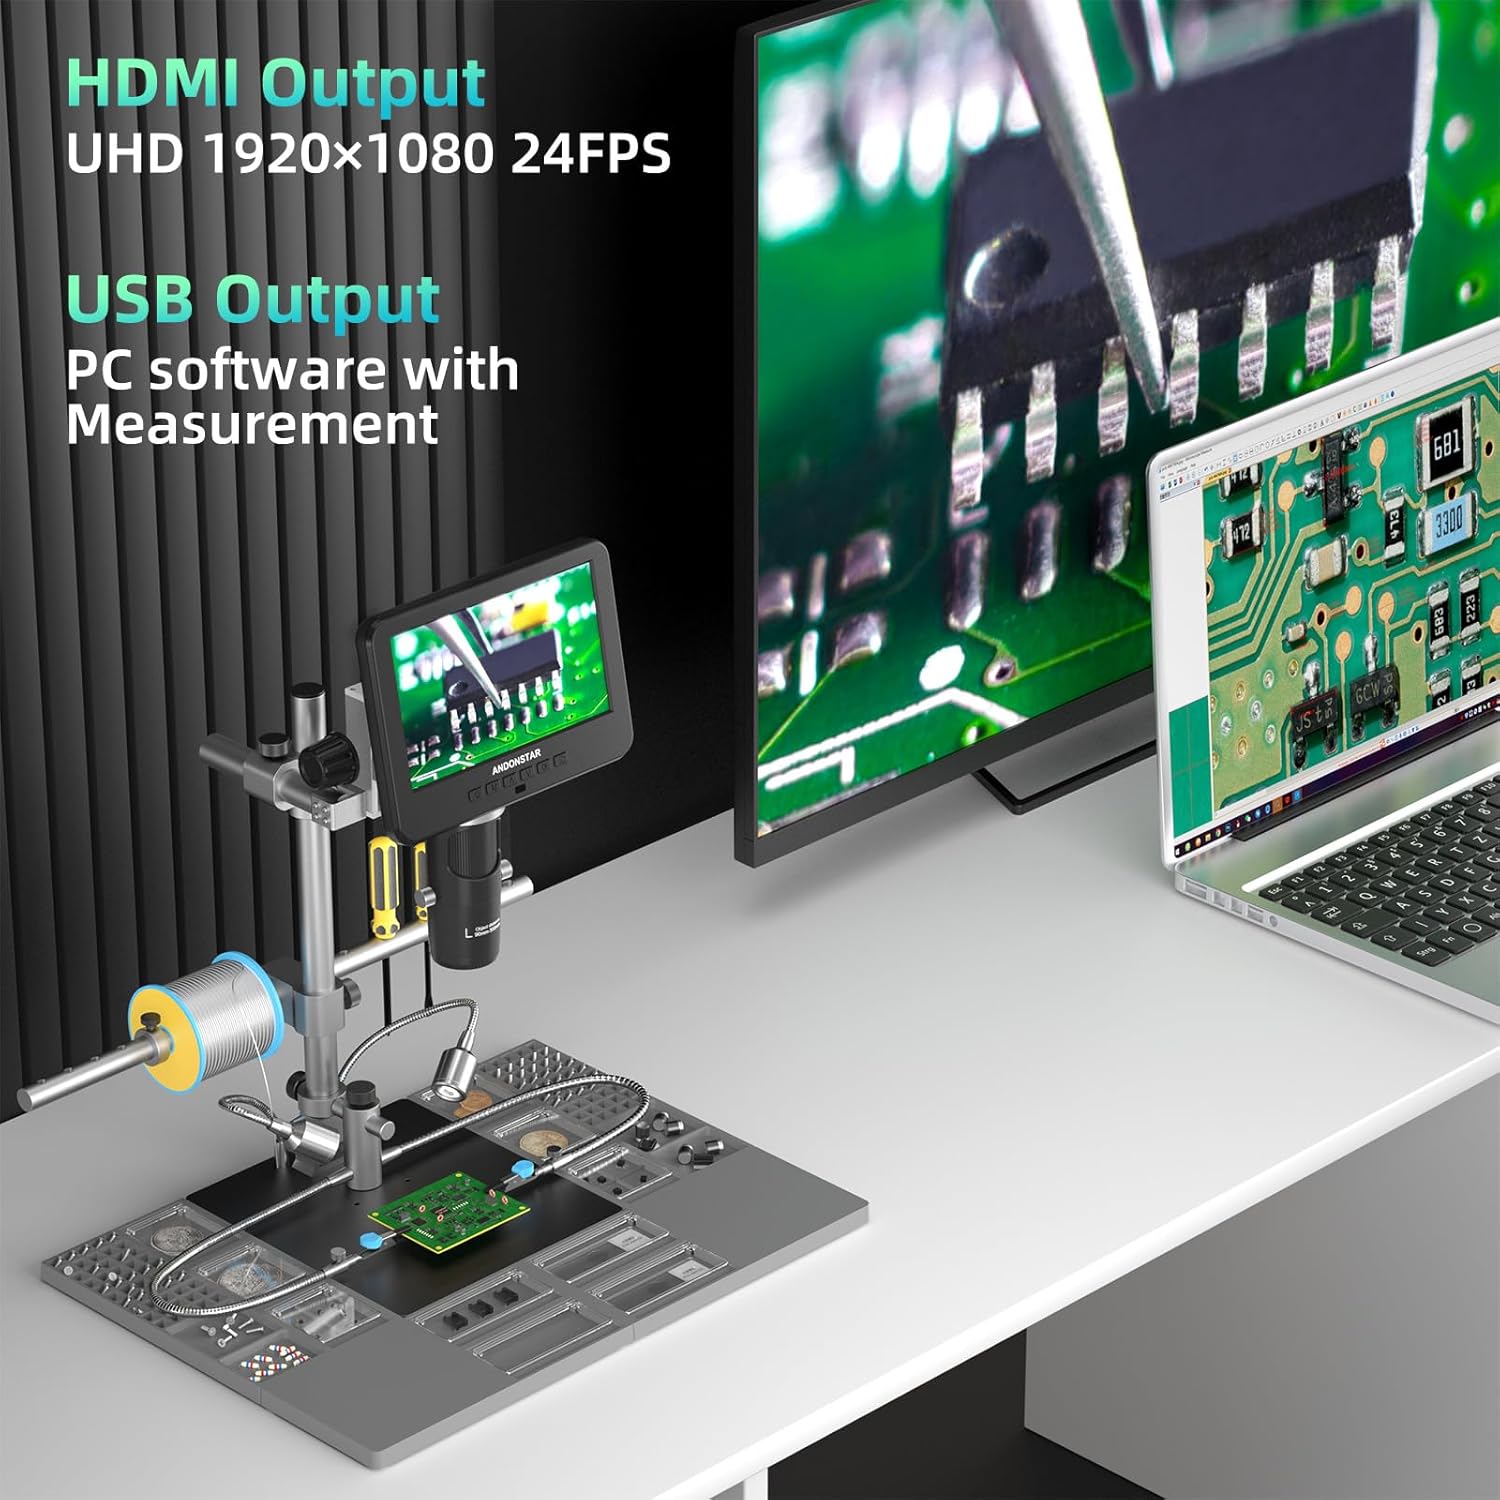
Figure 6: Microscope with Lens D, for detailed biological slide examination.
Video 2: Demonstration of how to use the three different lenses for various applications.
4.2 Regolazione della messa a fuoco e dell'ingrandimento
- Ruotare la rotella di messa a fuoco sul corpo del microscopio per ottenere un'immagine nitida.
- Adjust the object distance by rotating the bracket knob to move the microscope head up or down.
- Use the digital zoom function via the remote control or monitor buttons for further magnification adjustments.
4.3 Funzioni del telecomando
The remote control allows for convenient operation from a distance, offering functions such as:
- Accensione/spegnimento
- Mode/Menu navigation
- Zoom avanti/indietro digitale
- Cattura foto/video
- Image discoloration (e.g., black & white, sepia, negative)
- Adjusting exposure, sharpness, contrast, and color settings.

Figura 7: Telecomando per un comodo utilizzo.
4.4 External Display and PC Connection
- Uscita HDMI: Connect to a larger screen for seamless viewing of ultra-high-definition 2160P videos.
- Uscita USB: Connect to a Windows PC to use the professional measurement software, allowing for measurement, photo, and video capture directly on your computer.
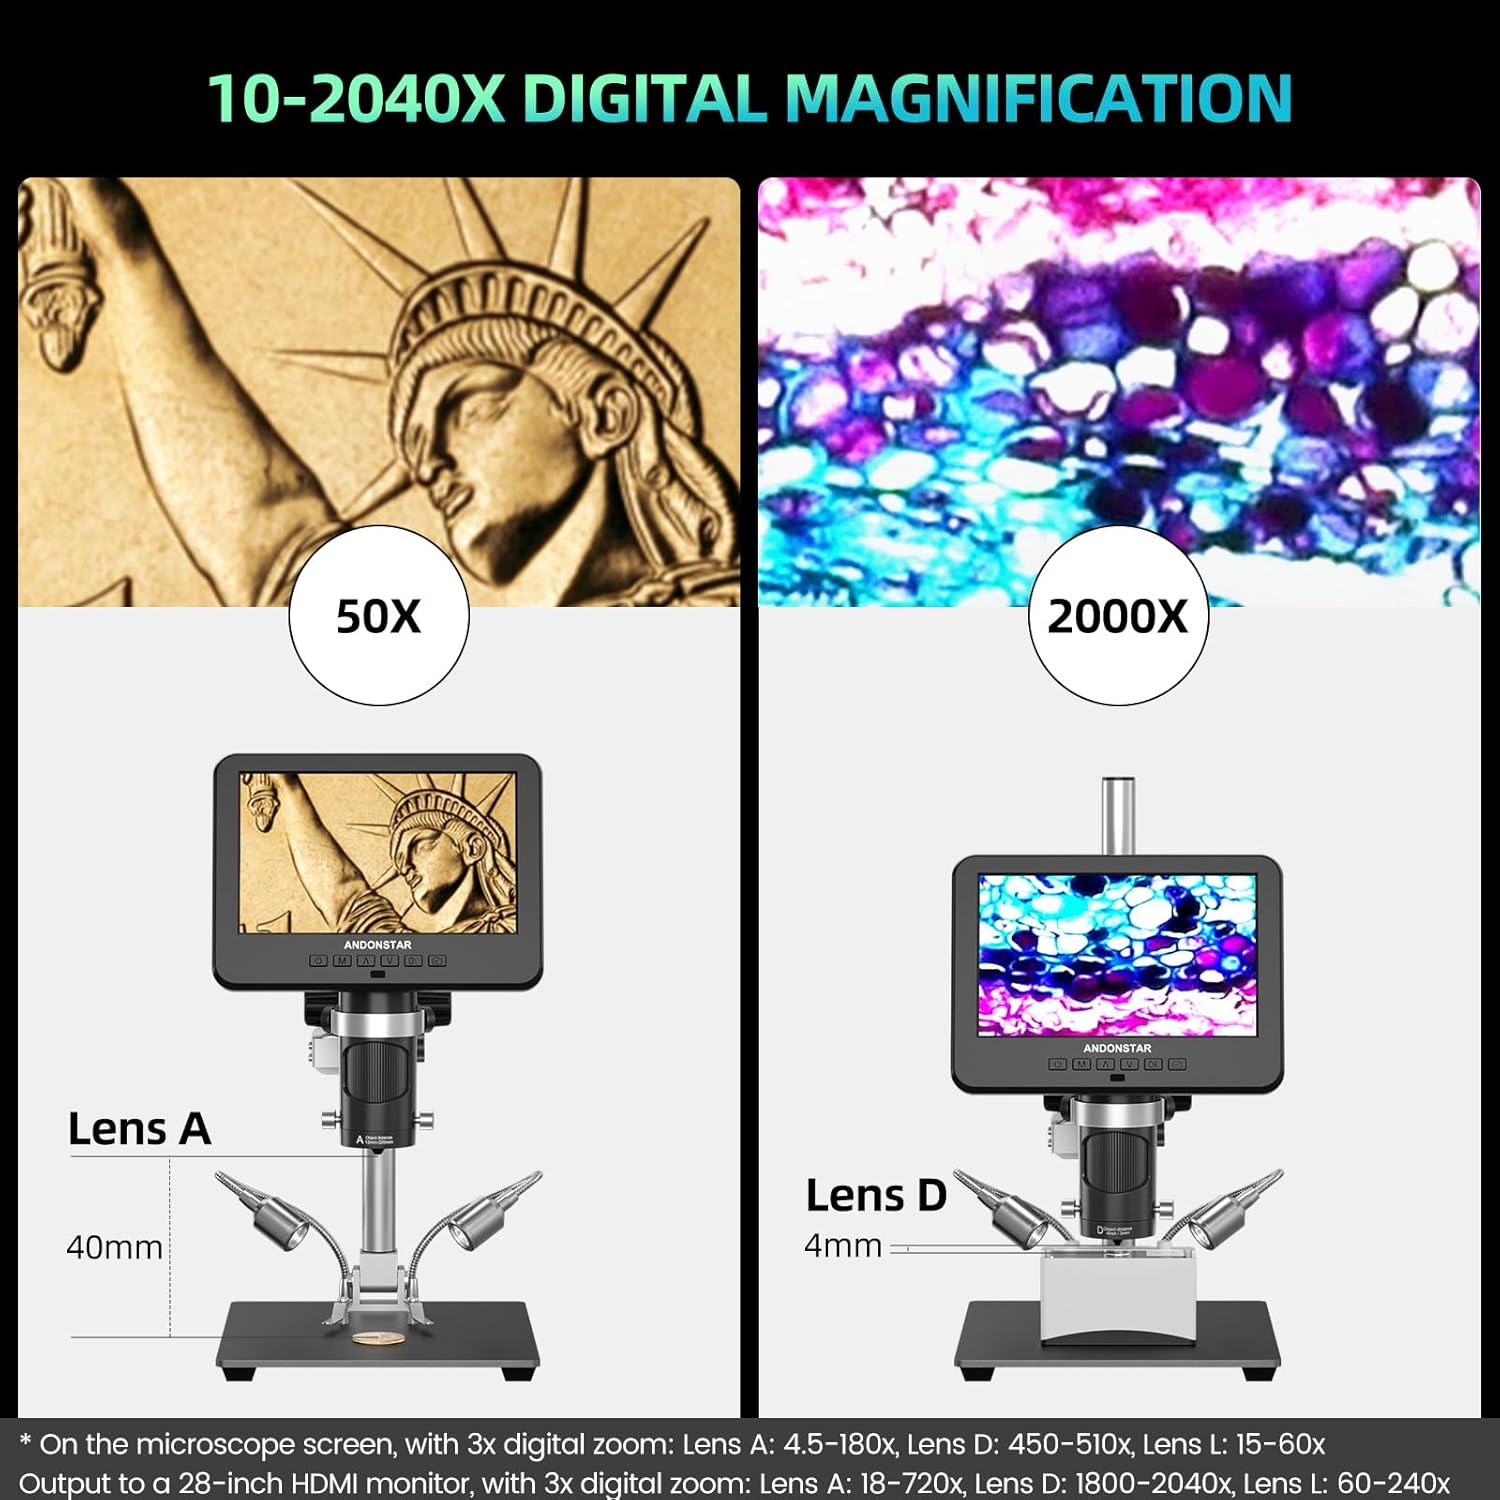
Figure 8: Microscope connected to an external monitor and PC.
Video 3: Oltreview of the Andonstar AD246S-M digital microscope, demonstrating its features and capabilities.
5. Manutenzione
- Keep the microscope and lenses clean. Use a soft, lint-free cloth for cleaning the screen and lens surfaces. Avoid abrasive materials.
- Quando non viene utilizzato, conservare il microscopio in un ambiente asciutto e privo di polvere.
- Ensure all cables are properly connected and not strained.
- Evitare di esporre il dispositivo a temperature o umidità estreme.
6. Risoluzione Dei Problemi
- Nessun potere: Check power adapter connection and ensure the power switch is on.
- Nessuna immagine sullo schermo: Verify lens is correctly installed and focused. Check display mode settings.
- No Image on External Monitor/PC: Ensure HDMI/USB cables are securely connected and the correct input source is selected on the external display. For PC, confirm software installation and device selection.
- Immagine poco chiara: Adjust the focusing wheel and bracket knob. Ensure lenses are clean.
- Errore scheda SD: Ensure the SD card is properly inserted. Try formatting the SD card (this will erase all data).
For further assistance, refer to the detailed user manual included in the package or contact customer support.
7. Specifiche
| Caratteristica | Specificazione |
|---|---|
| Dimensioni del prodotto | 15.75 x 11.81 x 12.99 pollici |
| Peso dell'articolo | 1.13 once |
| Numero modello articolo | AD246S-M Plus |
| Tipo di sorgente luminosa | GUIDATO |
| Materiale | Metallo |
| Angolo reale di View | 178 gradi |
| Ingrandimento massimo | 2040 volte |
| Voltage | 240 Volt |
| Dispositivi compatibili | Computer portatile, computer personale (Windows), televisione |
8. Garanzia e supporto
This Andonstar product comes with a worry-free Garanzia di 24 mesi. For any technical issues, questions, or support needs, please utilize the 24-hour professional after-sales service provided by Andonstar Technology Co., Ltd. Contact information can be found in the included user manual or on the official Andonstar websito.