
1. Introduzione
The Cryfokt IR Radio Frequency Tester is a versatile handheld digital meter designed for accurate frequency testing and infrared signal detection of various remote control devices. This device helps identify issues or faults in remote controls for applications such as car keys, truck doors, electric door controllers, car burglar alarms, electric locks, and garage doors. It features a clear digital display, LED indicators, and a built-in light for convenience.
2. Prodotto finitoview
The Cryfokt IR Radio Frequency Tester is designed for ease of use and portability. Below are the key components and features of the device.

Figura 2.1: Fronte view of the Cryfokt IR Radio Frequency Tester.
Componenti chiave:
- Display digitale: Shows the measured frequency in MHz.
- LED INGRESSO: Indicates infrared signal detection.
- Sensore IR: Detects infrared signals from remote controls.
- Pulsante di illuminazione: Attiva la luce LED integrata.
- Pulsante ON/OFF: Accende o spegne il dispositivo.
- TX Zone: Designated area for placing remote controls during testing.
- Vano batteria: Situato sul retro per l'installazione della batteria da 9 V.
- Fall Proof Rope Attachment: Per proteggere il dispositivo.

Figura 2.2: Indietro view of the Cryfokt IR Radio Frequency Tester.
Caratteristiche:
- Accurate and reliable frequency testing (100MHz to 1GHz).
- Infrared signal detection with INPUT indicator.
- Easy-to-read 4-bit digital display.
- Built-in LED light for use in low-light conditions.
- Compact and handheld design.
Video 2.1: Product demonstration of the Cryfokt IR Radio Frequency Tester, showing its features and operation.
3. Impostazione
- Installazione della batteria:
- Individuare il vano batteria sul retro del dispositivo.
- Aprire il coperchio del vano.
- Inserire una batteria da 9 V, assicurandosi della corretta polarità.
- Chiudere saldamente il coperchio del vano batterie.
- Accensione: Premere il tasto ACCESO/SPENTO button to power on the device. The digital display should illuminate.
4. Istruzioni per l'uso
4.1 Frequency Testing
- Assicurarsi che il tester sia acceso.
- Place the remote control device within the TX Zone on the tester. The effective testing range is within 5cm; closer proximity yields more accurate measurements.
- Premere un pulsante qualsiasi sul telecomando.
- The digital display on the tester will show the frequency value in MHz. Common car key frequencies include 320MHz, 434MHz, and 868MHz.

Figure 4.1: Digital display showing a frequency reading.
4.2 Infrared (IR) Signal Detection
- Assicurarsi che il tester sia acceso.
- Point the infrared emitter of the remote control towards the Sensore IR sul tester.
- Premere un pulsante qualsiasi sul telecomando.
- If the infrared output is functioning correctly, the LED DI INGRESSO will flash red. If the LED does not illuminate, it indicates a potential malfunction or damage to the infrared transmitter of the remote control.
4.3 Utilizzo della luce LED
- Premere il tasto Illuminazione button to activate the built-in LED light.
- This feature is useful for working in low-light conditions, ensuring visibility and accuracy during testing.
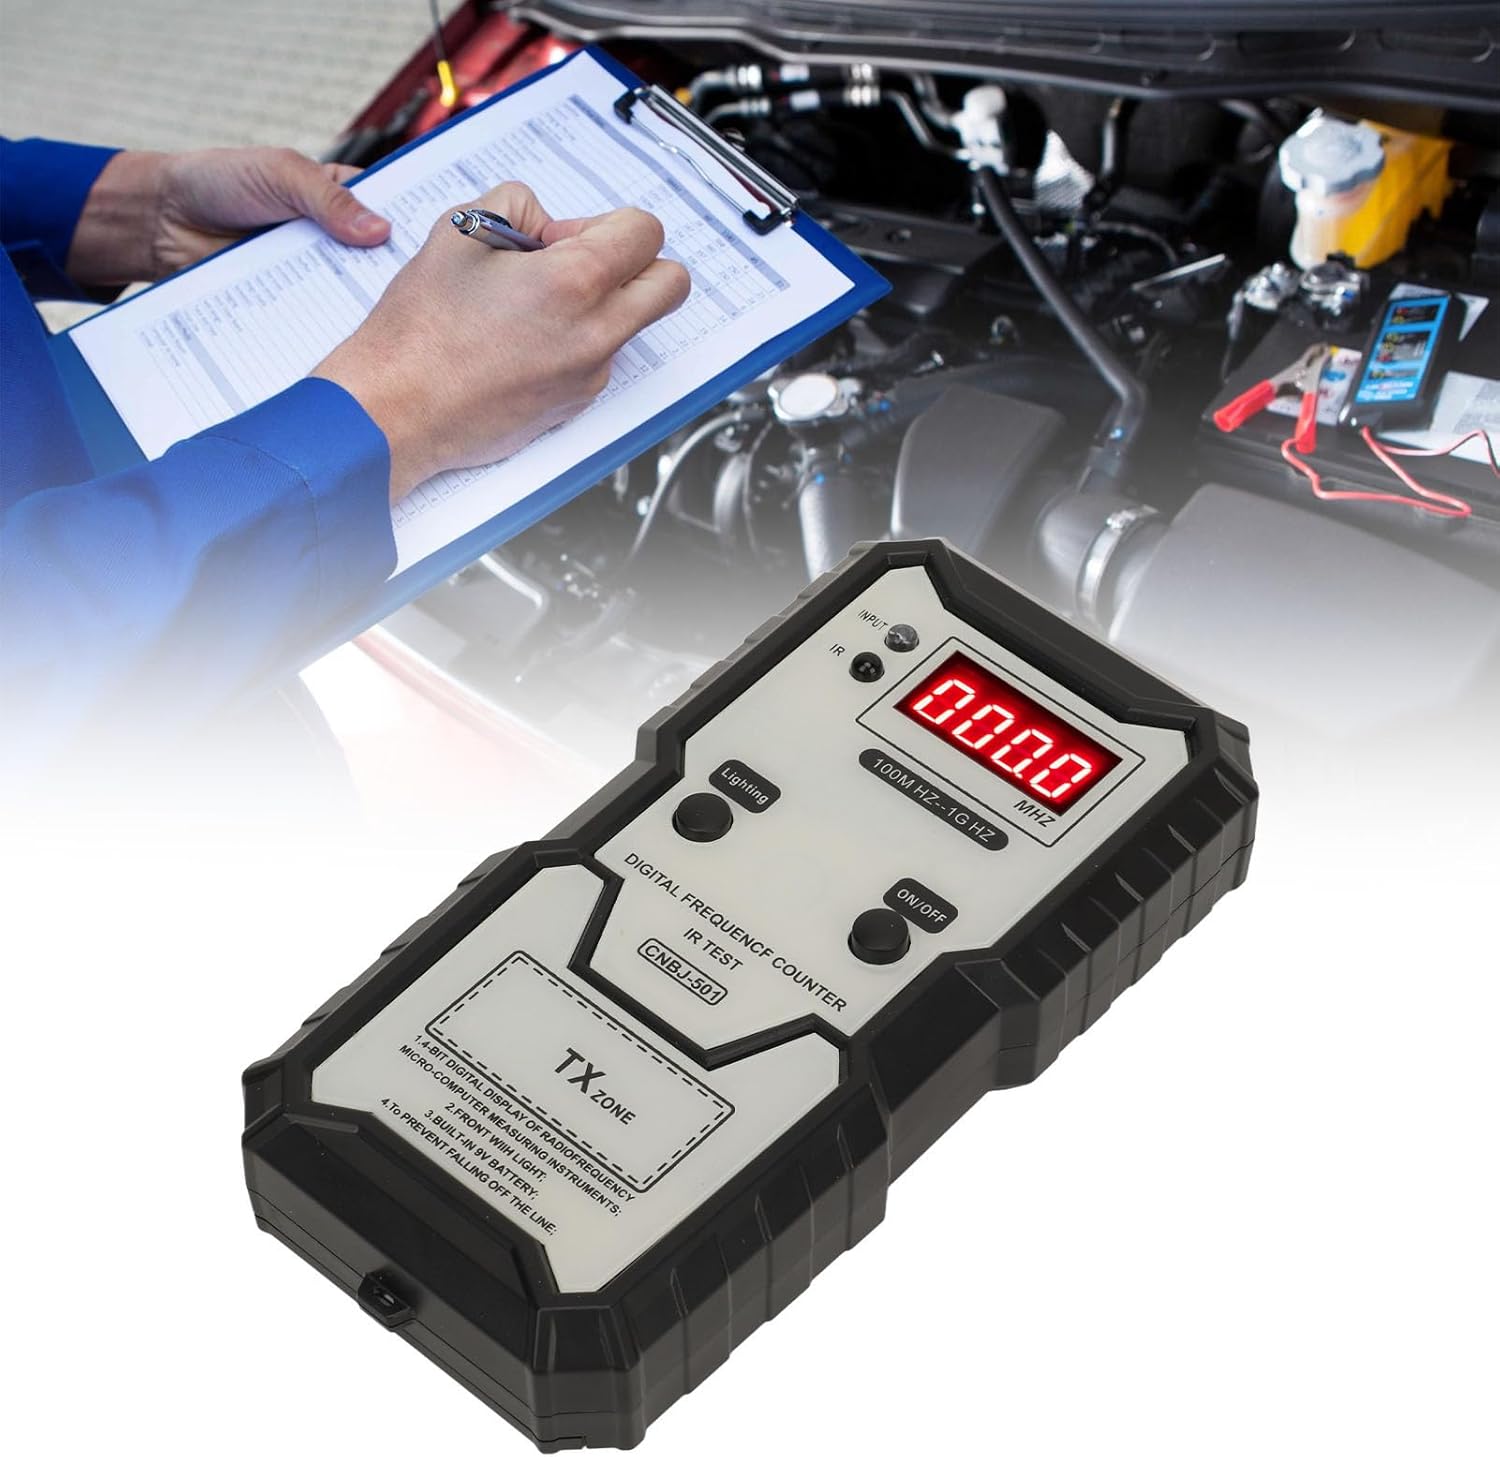
Figure 4.2: Tester in use, demonstrating its application in automotive diagnostics.
5. Manutenzione
- Pulizia: Pulire il dispositivo con un panno morbido e asciutto. Evitare l'uso di detergenti abrasivi o solventi.
- Sostituzione della batteria: Replace the 9V battery when the display dims or the device fails to power on. Refer to Section 3.1 for battery installation instructions.
- Magazzinaggio: Conservare il dispositivo in un luogo asciutto, lontano dalla luce solare diretta e da temperature estreme.
6. Risoluzione Dei Problemi
| Problema | Possibile causa | Soluzione |
|---|---|---|
| Device does not power on or display is dim. | Batteria scarica o scarica. | Sostituire la batteria da 9V. |
| No frequency reading on display. | Remote control not within TX Zone or not transmitting. | Ensure remote is close to the TX Zone (within 5cm) and a button is pressed. Check remote control battery. |
| INPUT LED does not flash during IR test. | Remote control IR emitter faulty or not pointed correctly. | Ensure remote IR emitter is pointed directly at the IR sensor. Check remote control battery. Remote control IR emitter may be damaged. |
7. Specifiche
- Numero modello: Cryfoktowbt9gghu3
- Materiale: addominali
- Intervallo di frequenza di prova: 100 MHz - 1 GHz
- Effective Testing Range: Entro 5 cm
- Fonte di energia: Batteria da 9 V (non inclusa)
- Volume di esercizio minimotage: 6 Volt
- Working Conditions Temperature: -10 ℃ - 40 ℃
- Umidità relativa di lavoro: ≤ 80%
- Storage Conditions Temperature: -20 ℃ - 50 ℃
- Umidità relativa di conservazione: ≤ 85%
- Dimensioni del pacco: Dimensioni: 30.8 x 23.9 x 3.5 cm
- Peso dell'articolo: 230 grammi
- Paese di origine: Cina
8. Garanzia e supporto
For warranty information or technical support, please refer to the documentation provided with your purchase or contact the Cryfokt customer service department. Keep your purchase receipt as proof of purchase for any warranty claims.