1. Introduzione
This manual provides detailed instructions for the installation, operation, and maintenance of your Vtopek W19S 4K Dual Car Dashcam. Please read this manual thoroughly before using the product to ensure proper functionality and safety. This dashcam is designed to record high-quality video footage of your journeys, offering features such as 4K resolution, front and rear camera recording, WiFi connectivity, GPS tracking, night vision, and parking monitoring.

2. Caratteristiche del prodotto
- Ultra-HD 4K Recording: Records in 4K (front) and 1080P (rear) resolutions, capturing clear details like license plates and road signs.
- Dual Wide-Angle Lenses: Front camera with 170° wide angle and rear camera with 140° wide angle to minimize blind spots.
- Visione notturna eccellente: Equipped with F1.6 large aperture, 6-layer optical lens, and HDR/WDR technology for enhanced clarity in low-light conditions.
- Wi-Fi incorporato: Connects to a mobile application for viewing, playback, downloading, and sharing videos.
- GPS integrato: Records real-time driving speed, date, time, and location, viewable via the mobile app or PC player.
- Schermo touch IPS da 3.16 pollici: Provides a clear interface for settings and video playback.
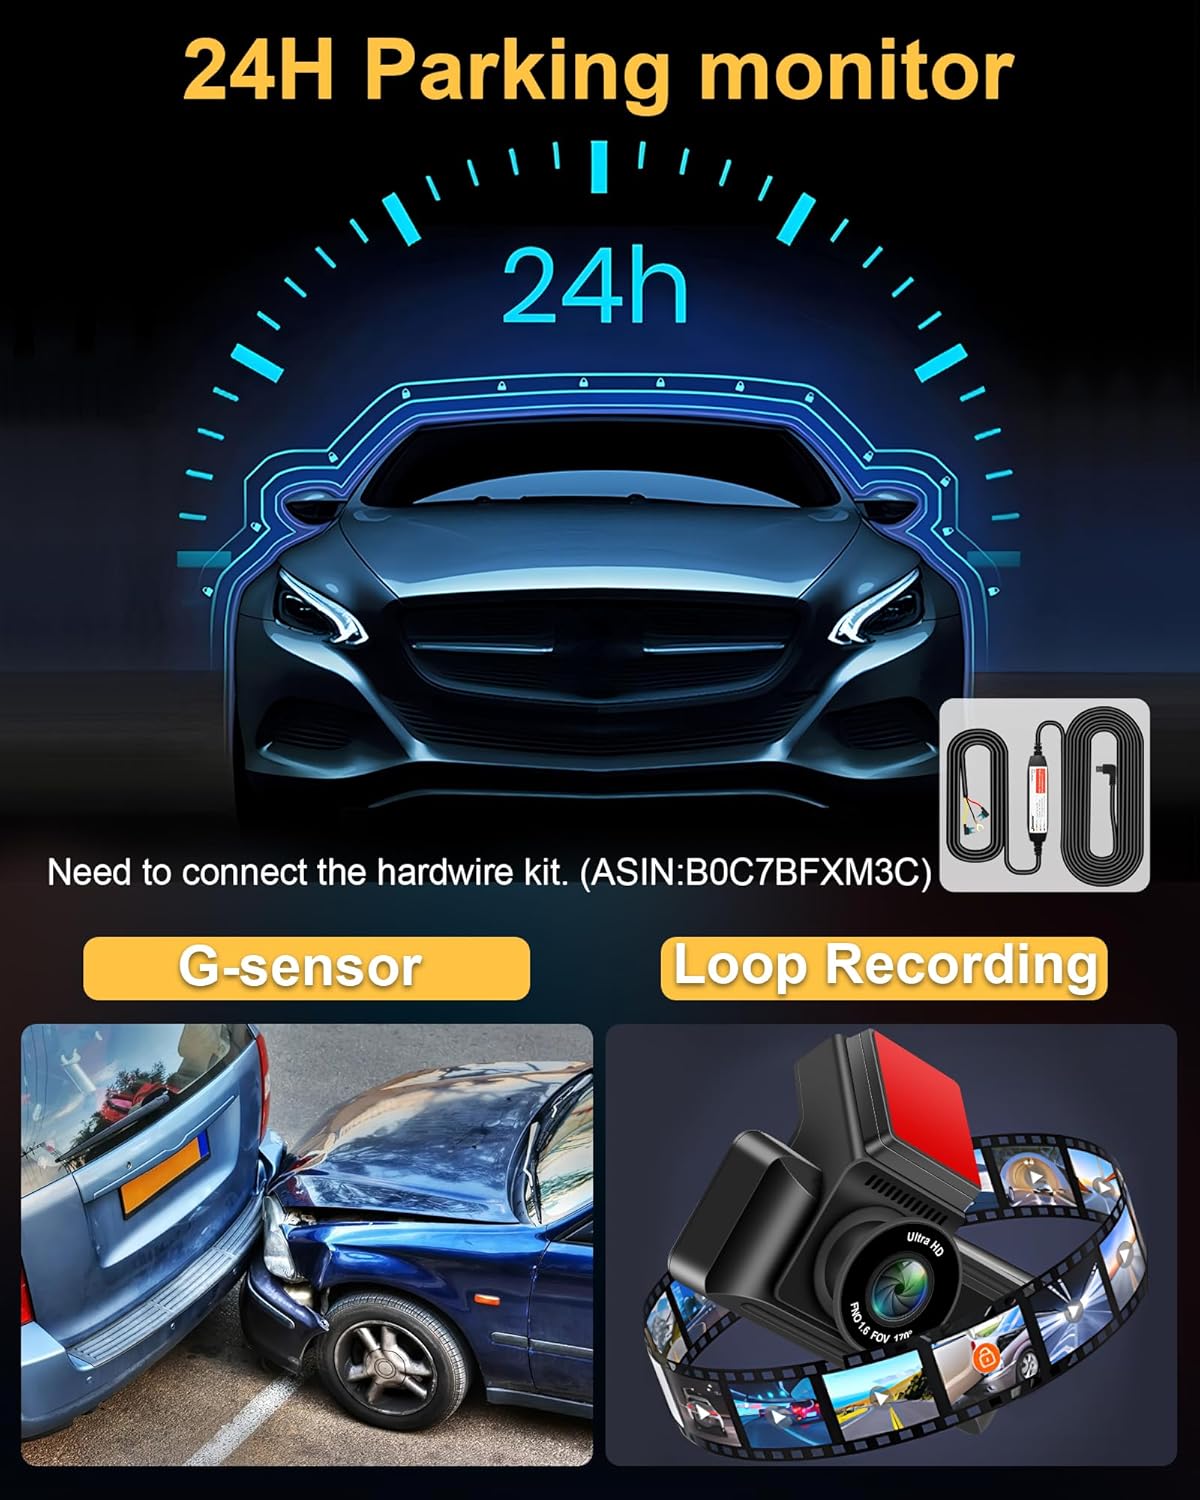
- Monitoraggio del parcheggio 24 ore su 24: Automatically records when motion is detected around the vehicle (requires optional hardwire kit, ASIN: B0C7BFXM3C).
- Sensore G: Blocca e salva automaticamente il video footage in caso di impatto o collisione improvvisa.
- Registrazione in loop: Registra continuamente sovrascrivendo il file sbloccato più vecchio files quando la scheda di memoria è piena.
- Interfaccia di tipo C: Enhanced port for faster data transmission and improved reliability compared to Mini USB.
- Fotocamera posteriore impermeabile IP69: Durable and resistant to water and fog, suitable for external installation.


3. Contenuto della confezione
Si prega di controllare il pacco per assicurarsi che siano presenti tutti gli articoli:
- W19 Dash Camera x1
- Telecamera posteriore x1
- 64GB Micro-SD card x1
- Scatola di imballaggio x1
- Rear Camera Cable (10m/36ft) x1
- Supporto per telecamera x1
- USB Car Charger with GPS x1
- Cacciavite x1
- Strong Double Sided Tape x1
- Vite di fissaggio x9
- Kit di pulizia x1
- Manuale utente x1

4. Configurazione e installazione
4.1. Installazione della fotocamera frontale
- Clean the area on your windshield where you intend to mount the dashcam. Ensure it does not obstruct your view.
- Attach the camera bracket to the dashcam.
- Remove the protective red film from the double-sided tape on the bracket.
- Firmly press the dashcam with the bracket onto the cleaned windshield area. Hold for a few seconds to ensure a secure attachment.
- Adjust the front camera lens angle as needed. The lens can be adjusted up and down.
4.2. Installazione della telecamera posteriore
The IP69 waterproof rear camera can be installed inside or outside the vehicle. The adjustable 180° bracket allows for flexible mounting without drilling.
- Choose a suitable location for the rear camera, typically above the license plate or inside the rear window.
- Secure the rear camera using the provided screws or double-sided tape.
- Route the rear camera cable to the front dashcam unit. Ensure the cable is neatly tucked away and does not interfere with vehicle operations.
- Connect the rear camera cable to the AV port on the main dashcam unit.
4.3. Power Connection and SD Card Insertion
- Insert the provided 64GB Micro-SD card into the dashcam's SD card slot. Ensure it is inserted correctly until it clicks into place.
- Connect the USB Car Charger (with GPS module) to your vehicle's cigarette lighter socket.
- Connect the Type-C end of the power cable to the Type-C port on the dashcam.
- Route the power cable neatly along the edges of your windshield and dashboard to avoid obstruction.

5. Istruzioni per l'uso
5.1. Funzionamento di base
- Accensione/spegnimento: The dashcam will automatically power on and begin recording when your vehicle starts. It will power off automatically when the vehicle is turned off.
- Visualizzazione dello schermo: The 3.16-inch IPS touch screen displays live footage from the front and rear cameras. You can switch views or access settings via the touch interface.
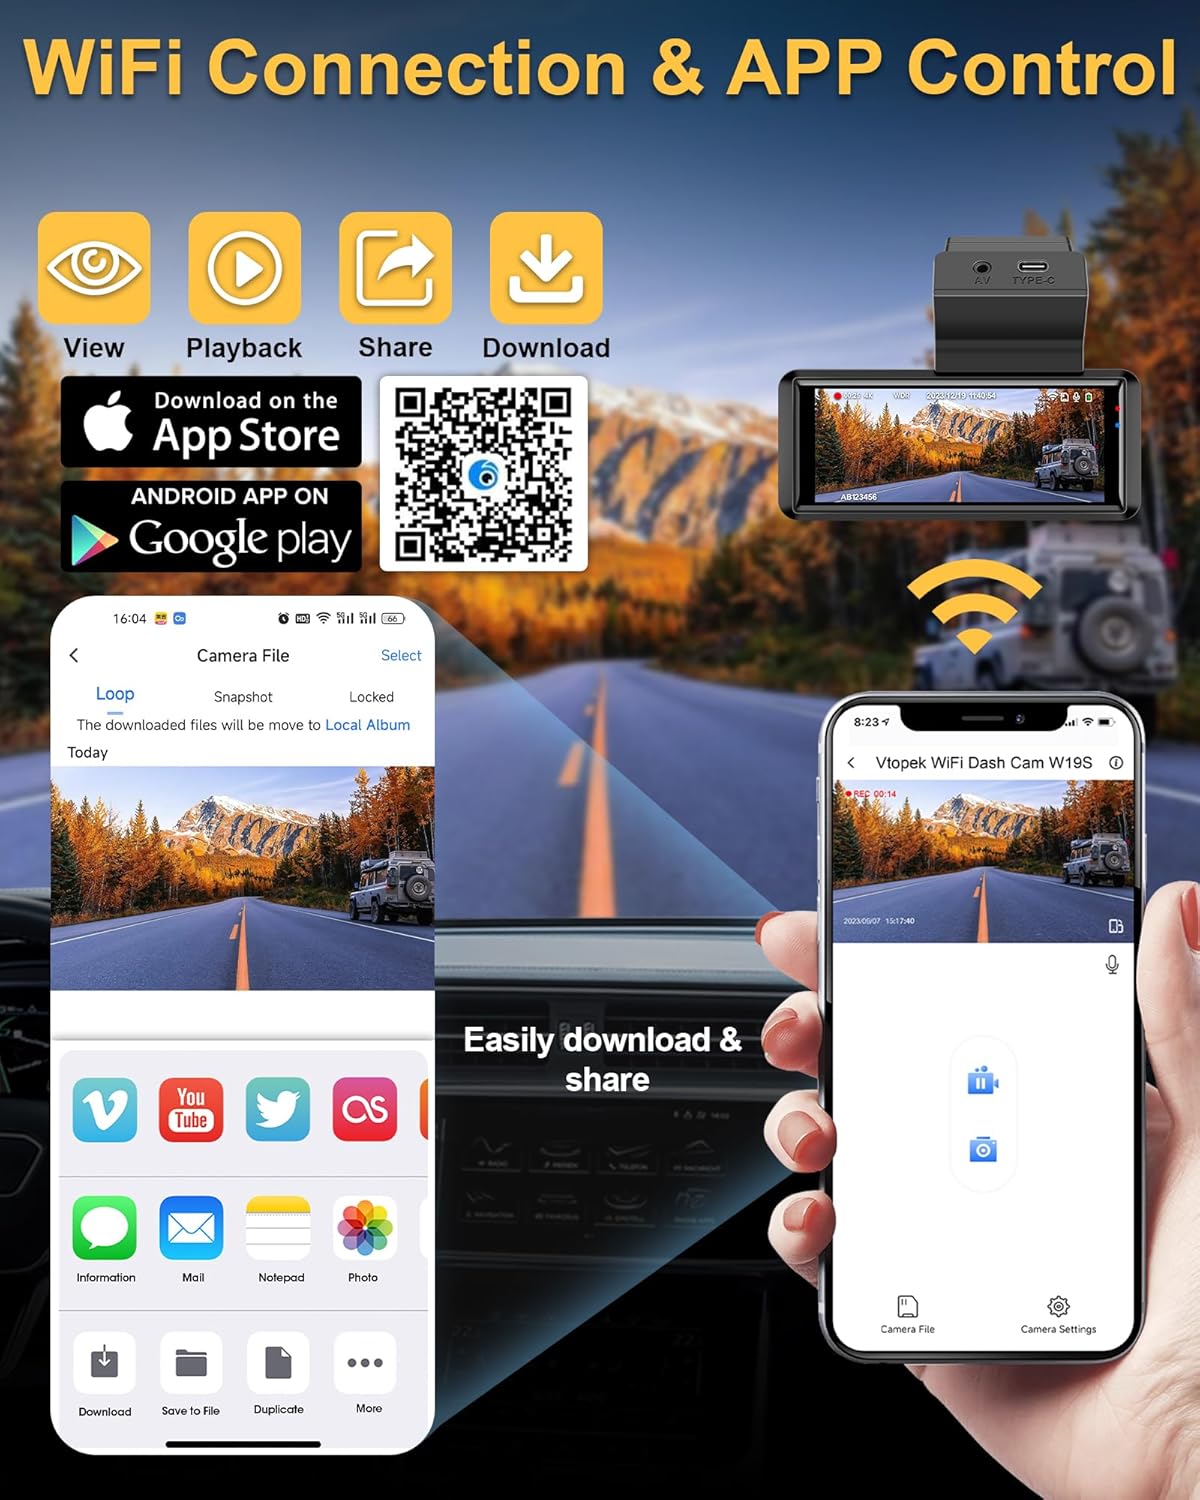
5.2. Controllo Wi-Fi e app
The dashcam features built-in WiFi for seamless connection to your smartphone via a dedicated app.
- Scarica l'App: Scan the QR code provided in the manual or on the dashcam screen, or visit https://www.6zhentan.com/app/d0001/index.html to download the Vtopek dashcam app.
- Connessione Wi-Fi: On your dashcam, enable WiFi. On your smartphone, go to WiFi settings and connect to the dashcam's WiFi network (SSID and password usually displayed on the dashcam screen).
- Funzioni dell'app: Una volta connesso, usa l'app per:
- View feed video in diretta.
- Riproduci i video registrati.
- Scarica il video files al tuo telefono.
- Condividi le registrazioni.
- Adjust dashcam settings.
5.3. Funzionalità GPS
The integrated GPS module records important driving data.
- Registrazione dei dati: The GPS records your vehicle's speed, date, time, and geographical location in real-time.
- Viewdati: Questa informazione può essere viewed when playing back videos through the mobile app or a compatible PC player, which will display your route on a map alongside the video.

5.4. Monitoraggio del parcheggio (24 ore)
For continuous surveillance when your vehicle is parked, the 24-hour parking monitor feature can be activated.
- Attivazione: Questa funzione richiede un kit di cablaggio separato (ASIN: B0C7BFXM3C) to provide continuous power to the dashcam when the vehicle is off.
- Funzionalità: Once activated, the dashcam will automatically start recording if it detects motion or impact while parked.
5.5. Sensore G
The built-in G-sensor detects sudden movements or impacts.
- Bloccaggio automatico: In the event of a collision or sudden braking, the G-sensor will automatically lock the current video segment, preventing it from being overwritten by loop recording.
- Sensibilità: The G-sensor sensitivity can usually be adjusted in the dashcam settings (e.g., Low, Medium, High). A 'Low' setting is often recommended to avoid unnecessary locking of files due to minor bumps.
5.6. Registrazione in loop
The dashcam records continuously in short segments.
- Registrazione continua: When the memory card is full, the dashcam will automatically overwrite the oldest unlocked video files per continuare la registrazione.
- Lunghezza del segmento: Loop recording segments are typically 1, 3, or 5 minutes long, configurable in the settings. A 3-minute segment is often recommended.
6. Specifiche
| Caratteristica | Specificazione |
|---|---|
| Marca | Vtopek |
| Nome del modello | W19S |
| Dimensioni dello schermo | 3.16 pollici (schermo touch IPS) |
| Tecnologia di connettività | Type-C, Wi-Fi |
| Caratteristiche speciali | App Control, Integrated GPS, Parking Monitor, Night Vision, Integrated Wi-Fi |
| Dispositivi compatibili | Smartphone |
| Composizione della batteria | Polimero di litio |
| Risoluzione di registrazione video | Anteriore: 2160p (4K), Posteriore: 1080p |
| Campo di View | Anteriore: 170°, Posteriore: 140° |
| Componenti inclusi | 64GB Memory Card, Smartphone App, GPS Module, Suction Cup Mount |
| Tipo di montaggio | Supporto per parabrezza |
| Metodo di controllo | Applicazione |
| Dimensioni del prodotto | 2P x 5L x 3H centimetri |
7. Manutenzione
- Pulizia: Use a soft, dry cloth to clean the dashcam lens and screen. Avoid using abrasive cleaners.
- Formattazione scheda SD: It is recommended to format the Micro-SD card regularly (e.g., once a month) to ensure optimal performance and prevent data corruption. This can usually be done through the dashcam's settings menu.
- Aggiornamenti del firmware: Check the Vtopek webperiodicamente il sito o l'app per verificare la disponibilità di aggiornamenti del firmware per migliorare le prestazioni e aggiungere nuove funzionalità.
- Temperatura: Evitare di esporre la dashcam a temperature estreme per periodi prolungati, poiché ciò potrebbe influire sulla durata della batteria e sulle prestazioni del dispositivo.
8. Risoluzione Dei Problemi
- La dashcam non si accende: Ensure the power cable is securely connected to both the dashcam and the car charger, and that the car charger is properly inserted into the cigarette lighter socket. Check if the vehicle's power outlet is functioning.
- Problemi di registrazione (ad esempio, interruzione della registrazione, danneggiamento files): Format the SD card. Ensure the SD card is a high-speed Class 10 or U3 card. Replace the SD card if issues persist.
- GPS not working/no signal: Ensure the USB car charger with the integrated GPS module is used. Position the dashcam where it has a clear view del cielo.
- Problemi di connessione WiFi: Ensure WiFi is enabled on the dashcam and your smartphone. Double-check the WiFi password. Try restarting both the dashcam and your phone.
- Schermo bloccato/non risponde: Use a thin object (like a paperclip) to press the reset button (if available) or disconnect and reconnect the power.
- La telecamera posteriore non visualizza: Controllare il collegamento del cavo della telecamera posteriore all'unità principale. Assicurarsi che il cavo non sia danneggiato.
9. Garanzia e supporto
Vtopek offers comprehensive support for your dashcam.
- Garanzia: Il prodotto è coperto da una garanzia del produttore di 1 anni.
- Supporto tecnico: Viene fornito supporto tecnico a vita.
- Contatto: For any questions or assistance, please contact professional customer service via email at jenny@jansite.cn.
