1. Introduzione
The TIMBOOTECH Wireless HDMI Transmitter and Receiver system (Model R34) provides a stable and reliable solution for wireless video and audio transmission. Engineered for continuous operation, this system features a durable aluminum alloy shell for superior heat dissipation, preventing signal drops or lagging. It supports 4K signal input and delivers crystal-clear 1080P@60Hz video and audio wirelessly up to 820 feet (250 meters) in line-of-sight environments. Utilizing 5.8GHz frequency and high-gain dual 3dBi antennas, it ensures a stable connection for various applications, including large conference rooms, home theaters, and digital signage.
2. Cosa c'è nella scatola
Si prega di verificare che tutti gli articoli siano presenti nel pacco:
- 1x Transmitter (TX) Unit
- 1x Receiver (RX) Unit
- 1x Aux Cable
- 2 cavi HDMI
- 2x DC Power Cables
- 2x IR Cables (1 for TX, 1 for RX)
- 1x cavo USB
- 1x Manuale utente

Image: Package contents of the TIMBOOTECH Wireless HDMI Transmitter and Receiver.
3. Istruzioni per l'installazione
The TIMBOOTECH Wireless HDMI system is designed for universal plug-and-play compatibility, requiring no WiFi setup or software installation. It automatically pairs upon powering up.
3.1 Basic Connection (1 Transmitter to 1 Receiver)
- Connect your HDMI source device (e.g., laptop, PC, gaming console, set-top box) to the Ingresso HDMI porta dell'unità trasmettitore (TX) tramite un cavo HDMI.
- Connect your display device (e.g., TV, projector, monitor) to the Uscita HDMI porta dell'unità ricevente (RX) tramite un cavo HDMI.
- Connect the provided DC power cables to both the TX and RX units and plug them into power outlets.
- Ensure both units are powered on. The system will automatically establish a wireless connection.

Image: Basic connection diagram for the wireless HDMI system.
3.2 Loop-Out Functionality
The Transmitter (TX) unit features an HDMI Local Loop-out port, allowing for dual-screen monitoring. This means you can connect a local display directly to the TX unit while simultaneously transmitting the signal wirelessly to the Receiver (RX) unit.
- Follow steps 1-3 from the Basic Connection section.
- Connect an additional HDMI cable from the Uscita HDMI port on the TX unit to a local monitor. This allows you to view the source content on both the local monitor and the wirelessly connected display.

Image: HDMI Local Loop-out function setup.
Video: Guide to HDMI Loop Out and KVM Remote Control. This video demonstrates how to set up and use the HDMI loop-out feature on the transmitter unit.
3.3 KVM Remote Control
The system includes KVM (Keyboard, Video, Mouse) functionality, allowing you to remotely control your source PC or MacBook from the receiver side.
- Follow steps 1-3 from the Basic Connection section.
- Connect a USB cable from the TX unit's USB port to your source laptop/PC.
- Connect your keyboard and mouse to the USB ports on the RX unit.
- You can now control your source device from the remote display using the connected keyboard and mouse. This is ideal for managing digital signage or classroom CCTV systems remotely.

Image: KVM function setup with keyboard and mouse connected to the receiver.
Video: Guide to HDMI Loop Out and KVM Remote Control. This video demonstrates how to set up and use the KVM functionality.
3.4 Multi-Receiver and Multi-Transmitter Streaming
This advanced system supports flexible casting for up to 8 receivers or 8 transmitters, allowing for seamless one-to-many or many-to-one streaming.
- One-to-Many (1 TX to up to 8 RXs): Connect your source device to one TX unit. Connect up to eight RX units to different displays. The TX unit will broadcast the signal to all paired RX units.
- Many-to-One (up to 8 TXs to 1 RX): Connect up to eight source devices to separate TX units. Connect one RX unit to a single display. You can switch between the different TX signals on the RX unit to view content from various sources.
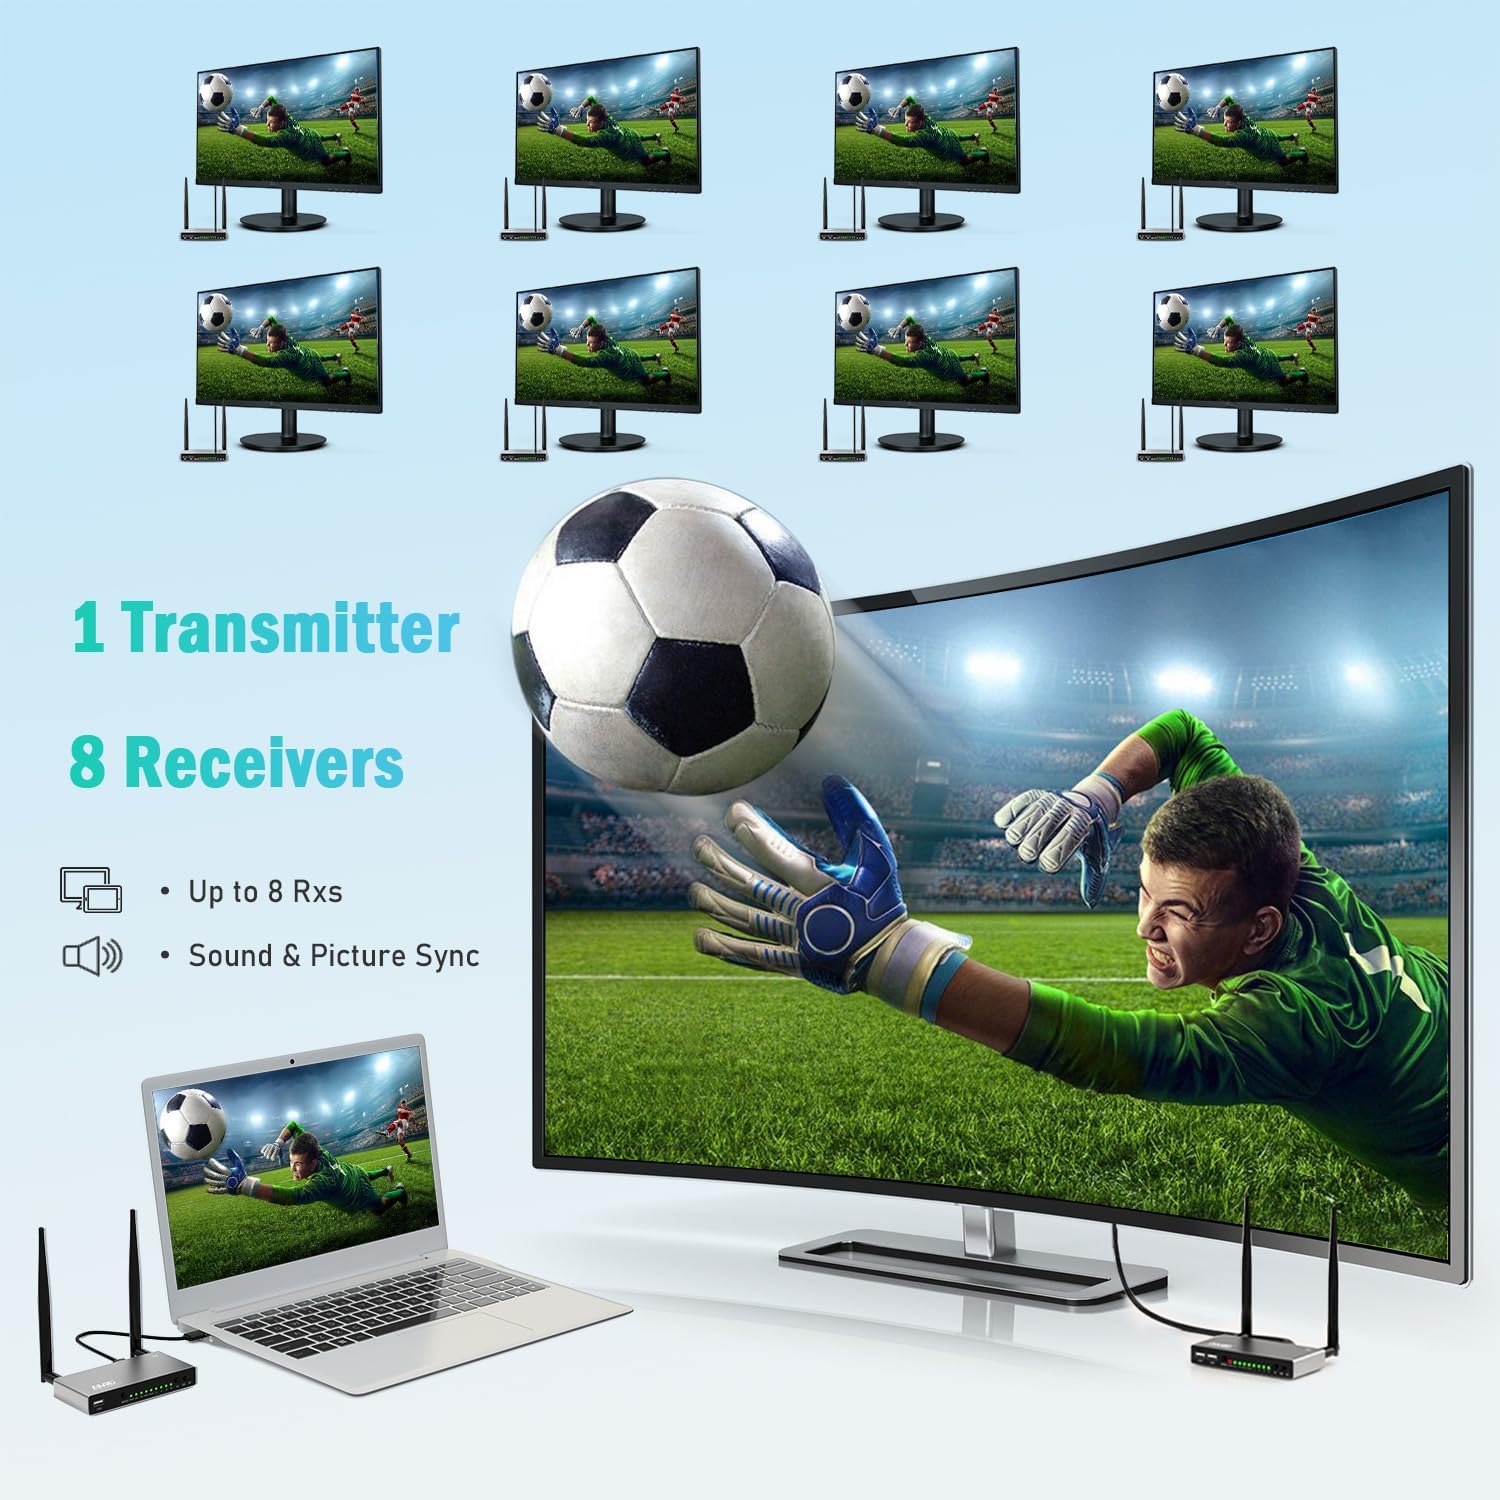
Image: One Transmitter to Eight Receivers setup.
Video: Multi-Receiver Support for TIMBOOTECH Wireless HDMI Extender. This video demonstrates connecting multiple receivers to a single transmitter.
Video: Real Demo 1 TX to 2 RX Dual Screen Setup with No Lag. This video shows a practical setup with one transmitter and two receivers.
4. Specifiche
| Marca | TIMBOOTECH |
| Numero di modello | R34 |
| Tecnologia di connettività | HDMI, USB, Wi-Fi (5.8GHz) |
| Tipo di connettore | Jack da 3.5 mm, HDMI |
| Risoluzione | 4K Input & 1080P@60Hz Output |
| Gamma di trasmissione | Up to 820ft (250m) in line-of-sight |
| Antenne | Doppie antenne da 3dBi |
| Caratteristiche speciali | IR Remote, Local Loop-Out, KVM, Audio Output Port, Supports up to 8 receivers or 8 transmitters |
| Dispositivi compatibili | Cable box, DVD, Blu-ray players, Roku, TV box, computers, laptop, camera, CCTV, Mac, DSLR, Surveillance system, camcorder, or other HDMI enabled devices. |
| Colore | Argento |
5. Troubleshooting and Repair
If you encounter issues with pairing or signal transmission, follow these steps to repair the connection between your Transmitter (TX) and Receiver (RX) units:
- Switch both the TX and RX units to SP mode, then power them on.
- To pair them, connect an HDMI cable from the HDMI output port of the TX unit to the HDMI input port of the RX unit.
- When both the LINK and STA lights on both units are solidly illuminated, the pairing is complete. You can then disconnect the HDMI cable and reconnect the units to your devices as per the setup instructions.
Video: Repairing Your TIMBOOTECH Wireless HDMI Extender. This video provides instructions on how to re-pair the transmitter and receiver units.
6. Garanzia e supporto
TIMBOOTECH provides a 24-month quality replacement guarantee for this product. In addition, a dedicated technical support team is available to assist you with any questions or issues. For further assistance, please refer to the contact information provided in your product packaging or visit the official TIMBOOTECH websito.
The product also comes with a 30-day refund/replacement return policy.