
Pretul 29959
Manuale utente saldatrice inverter Pretul SOIN-110/130P
Modello: 29959
1. Introduzione
Thank you for choosing the Pretul SOIN-110/130P Inverter Welder. This compact and efficient welding machine is designed for both coated electrode (SMAW) and tungsten (TIG) welding processes. It features an automatic BI-VOLTAGE 127-220V adaptation system, ensuring seamless operation across different power inputs without manual adjustments. This manual provides essential information for safe operation, setup, maintenance, and troubleshooting to ensure optimal performance and longevity of your welder.
2. Istruzioni di sicurezza
Dare sempre priorità alla sicurezza quando si utilizzano attrezzature per la saldatura. Il mancato rispetto di queste istruzioni può causare lesioni gravi o mortali.
- La scossa elettrica può uccidere: Non toccare parti elettriche sotto tensione. Indossare guanti da saldatura asciutti e indumenti protettivi. Isolarsi dal lavoro e dalla terra.
- Fumi e gas possono essere pericolosi: Tenere la testa lontana dai fumi. Utilizzare un sistema di ventilazione o di aspirazione per rimuovere i fumi dalla zona in cui si respira.
- I raggi dell'arco possono bruciare gli occhi e la pelle: Indossare un casco da saldatura con filtro di protezione adeguato. Indossare occhiali di sicurezza con protezioni laterali. Utilizzare indumenti protettivi per coprire tutta la pelle esposta.
- Rischio di incendio ed esplosione: Remove all flammables from the welding area. Have a fire extinguisher readily available. Do not weld on containers that have held combustibles.
- Le parti calde possono causare gravi ustioni: Allow the welder and workpieces to cool before handling. Use insulated gloves and tongs.
- Leggi l'intero manuale: Understand all safety warnings and operating procedures before use.
- Utilizzare in un'area ben ventilata: Assicurare un flusso d'aria adeguato per evitare surriscaldamento e accumulo di fumi.
- Messa a terra corretta: Always ensure the welder is properly grounded according to local electrical codes.
3. Contenuto della confezione
Disimballare con cura la scatola e assicurarsi che tutti gli articoli siano presenti e integri. Se qualche articolo risulta mancante o danneggiato, contattare immediatamente il fornitore.
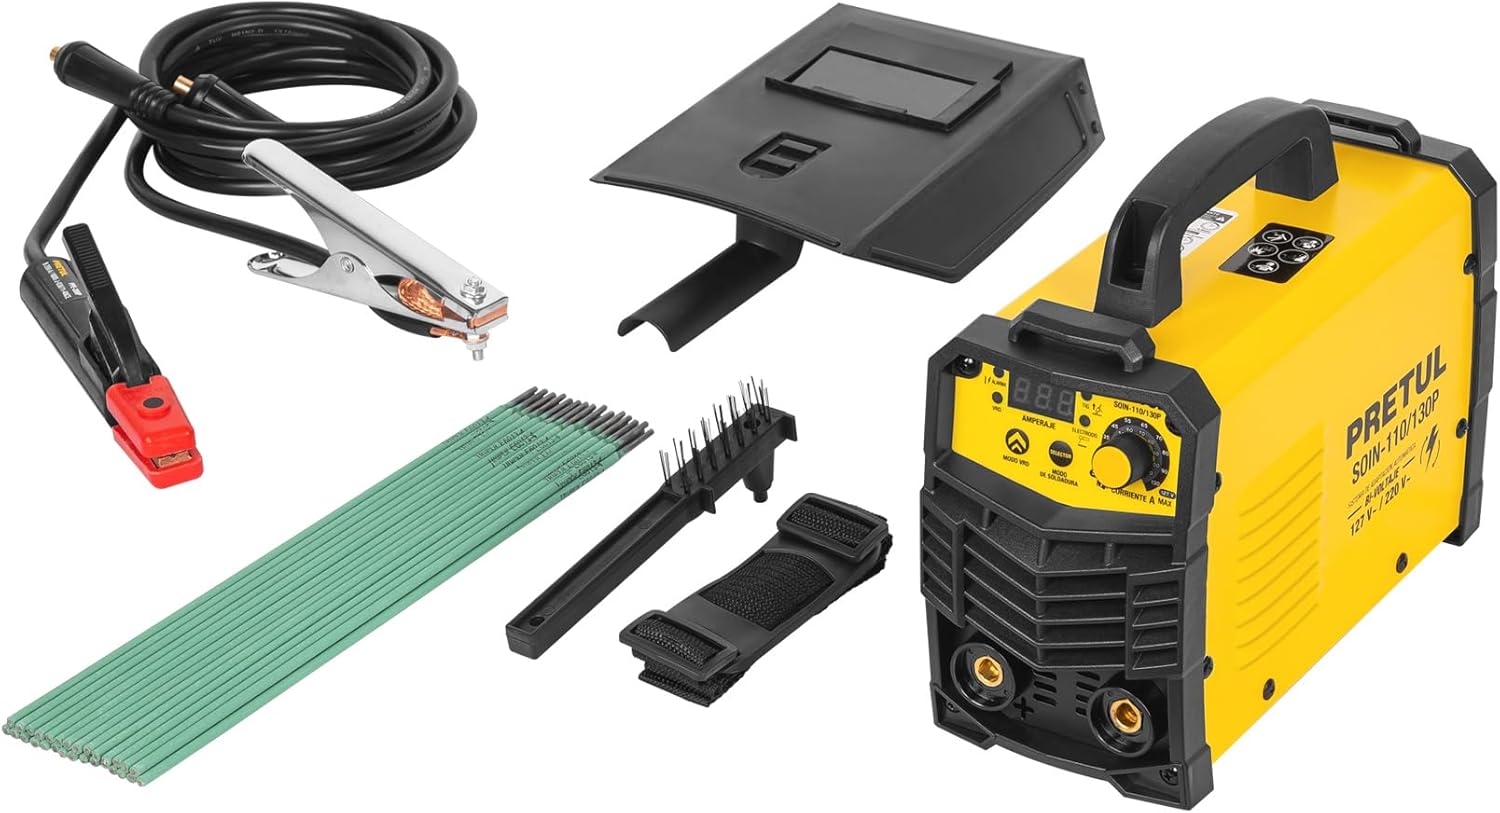
Figure 3.1: Pretul SOIN-110/130P Inverter Welder with all included accessories.
- Pretul SOIN-110/130P Inverter Welder Unit
- Cavo di alimentazione con spina
- 1 kg of 1/8" E6013-4 Electrodes
- Terra Clamp Cable (2 m, #5 AWG / 16 mm²)
- Electrode Holder Cable (2 m, #5 AWG / 16 mm²)
- Protective Welding Mask
- spazzola metallica
4. Prodotto finitoview
Familiarize yourself with the components and controls of your Pretul Inverter Welder.

Figura 4.1: Fronte view of the welder with key components labeled.
- Cavo di alimentazione: Connects the welder to the electrical supply.
- Interruttore On/Off: Accende o spegne l'unità.
- Thermal Protection Light: Illuminates to indicate overheating, activating the thermal protection system.
- Display digitale: Shows current settings and other operational information.
- Manopola di regolazione della corrente: Used to precisely set the welding current (Ampera).
- Quick-Change Terminals (Bornes): 3/8" terminals for quick and secure connection of welding cables.
- Maniglia: Per una facile trasportabilità dell'unità.
Tecnologie chiave
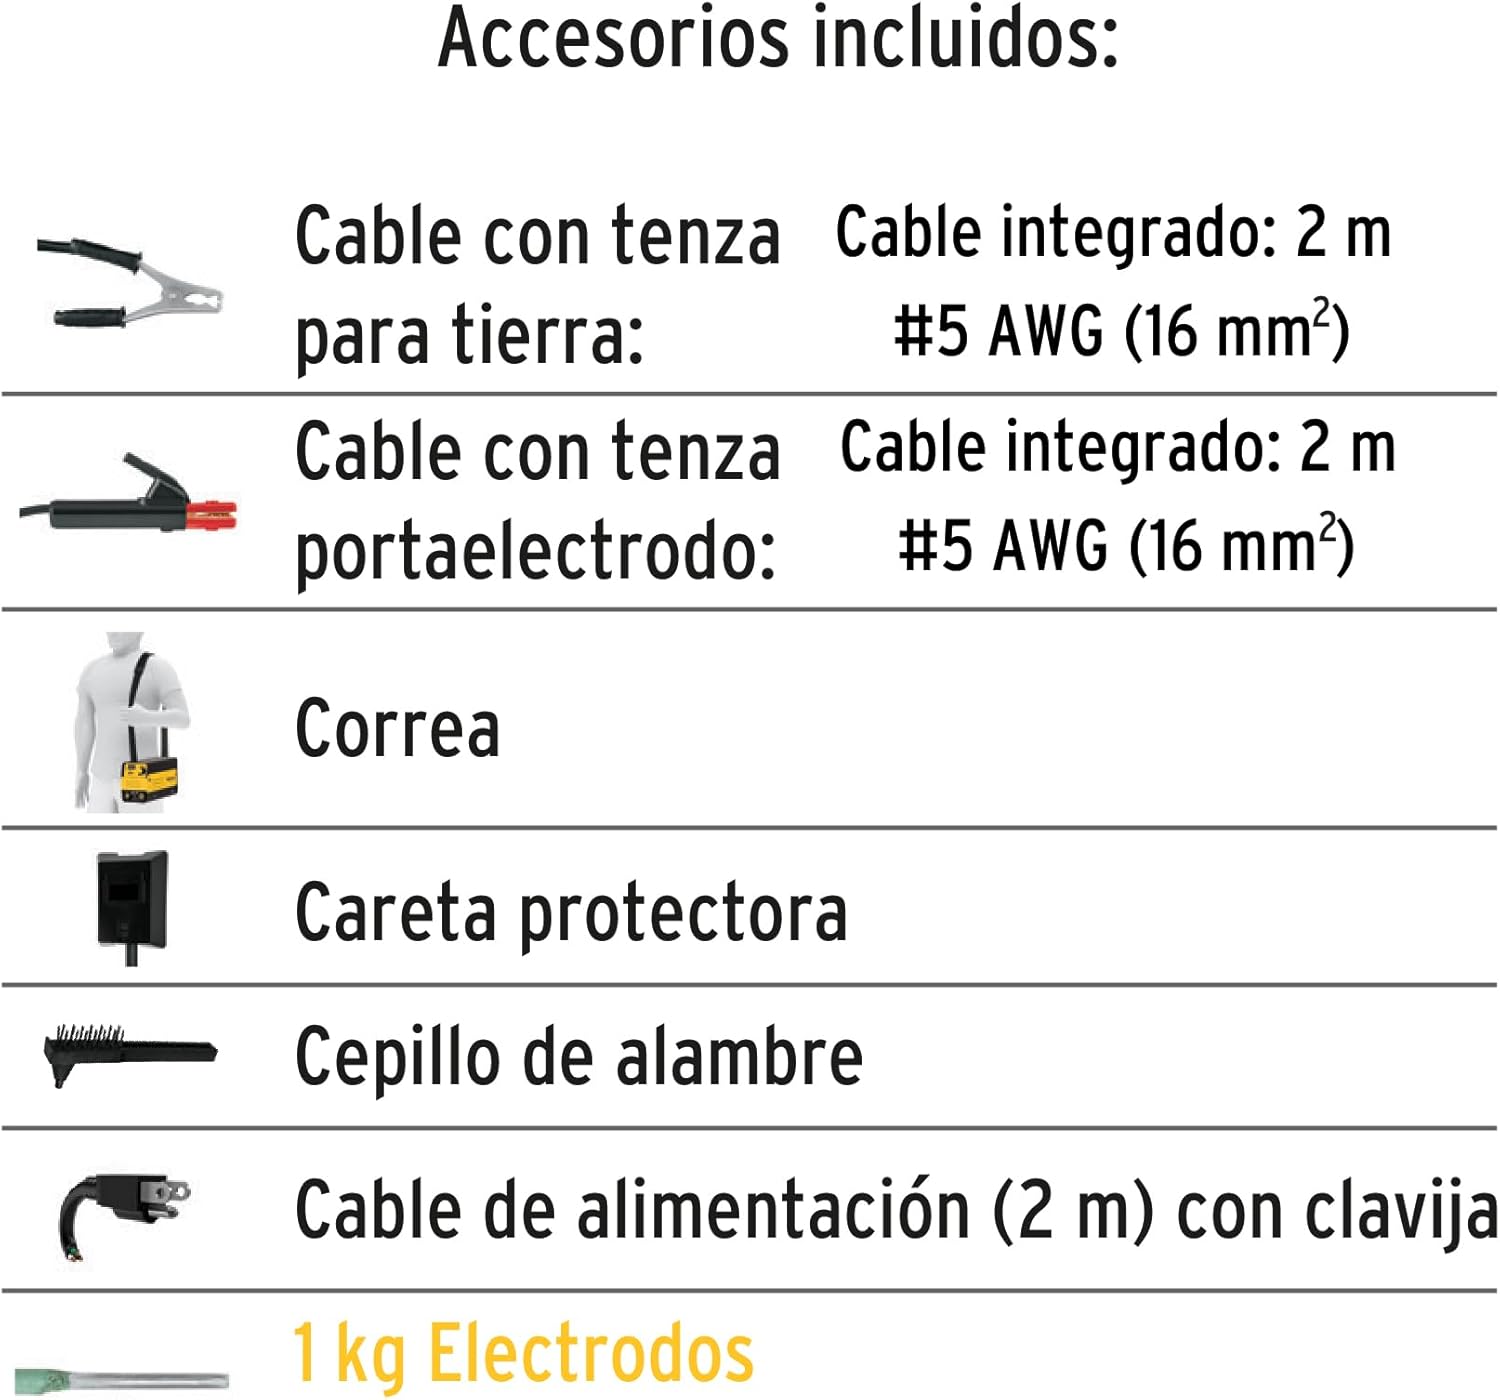
Figura 4.2: Oltreview of integrated welding technologies.
- Tecnologia inverter IGBT: Allows the welder to operate efficiently at any current level, providing a stable arc and reducing power consumption compared to conventional welders.
- Thermal Protect: An integrated protection system that safeguards the machine from overheating due to prolonged use or excessive load. The thermal protection light will illuminate when active.
- Arcoforza: Automatically adjusts the optimal arc value, enabling stable welding and allowing for welding in various positions.
- Antiaderente: Prevents the electrode from sticking to the workpiece, reducing overheating and making it easier to restart the arc.
- Avvio a caldo: Facilitates easy arc ignition by providing a temporary increase in current at the start of welding.
5. Specifiche tecniche
Below are the detailed technical specifications for the Pretul SOIN-110/130P Inverter Welder.
| Caratteristica | Specificazione |
|---|---|
| Numero di modello | 29959 |
| Ingresso volumetage | BI-VOLTAGE 127V / 220V (Automatic Adaptation) |
| Current Range (1 Phase) | 20 A DC - 110 A DC |
| Current Range (2 Phases) | 20 A DC - 130 A DC |
| Processi di saldatura | SMAW (Coated Electrode), TIG (Tungsten) |
| Electrode Compatibility (SMAW) | 6013, 6011 (Up to 5/32"), 7018 (Up to 1/8") |
| Tungsten Electrode Compatibility (TIG) | 1 mm (0.039") |
| Quick-Change Terminals | 3/8" |
| Dimensioni (confezione) | Dimensioni: 36 x 27 x 22 cm |
| Peso (confezione) | 6.24 kg |
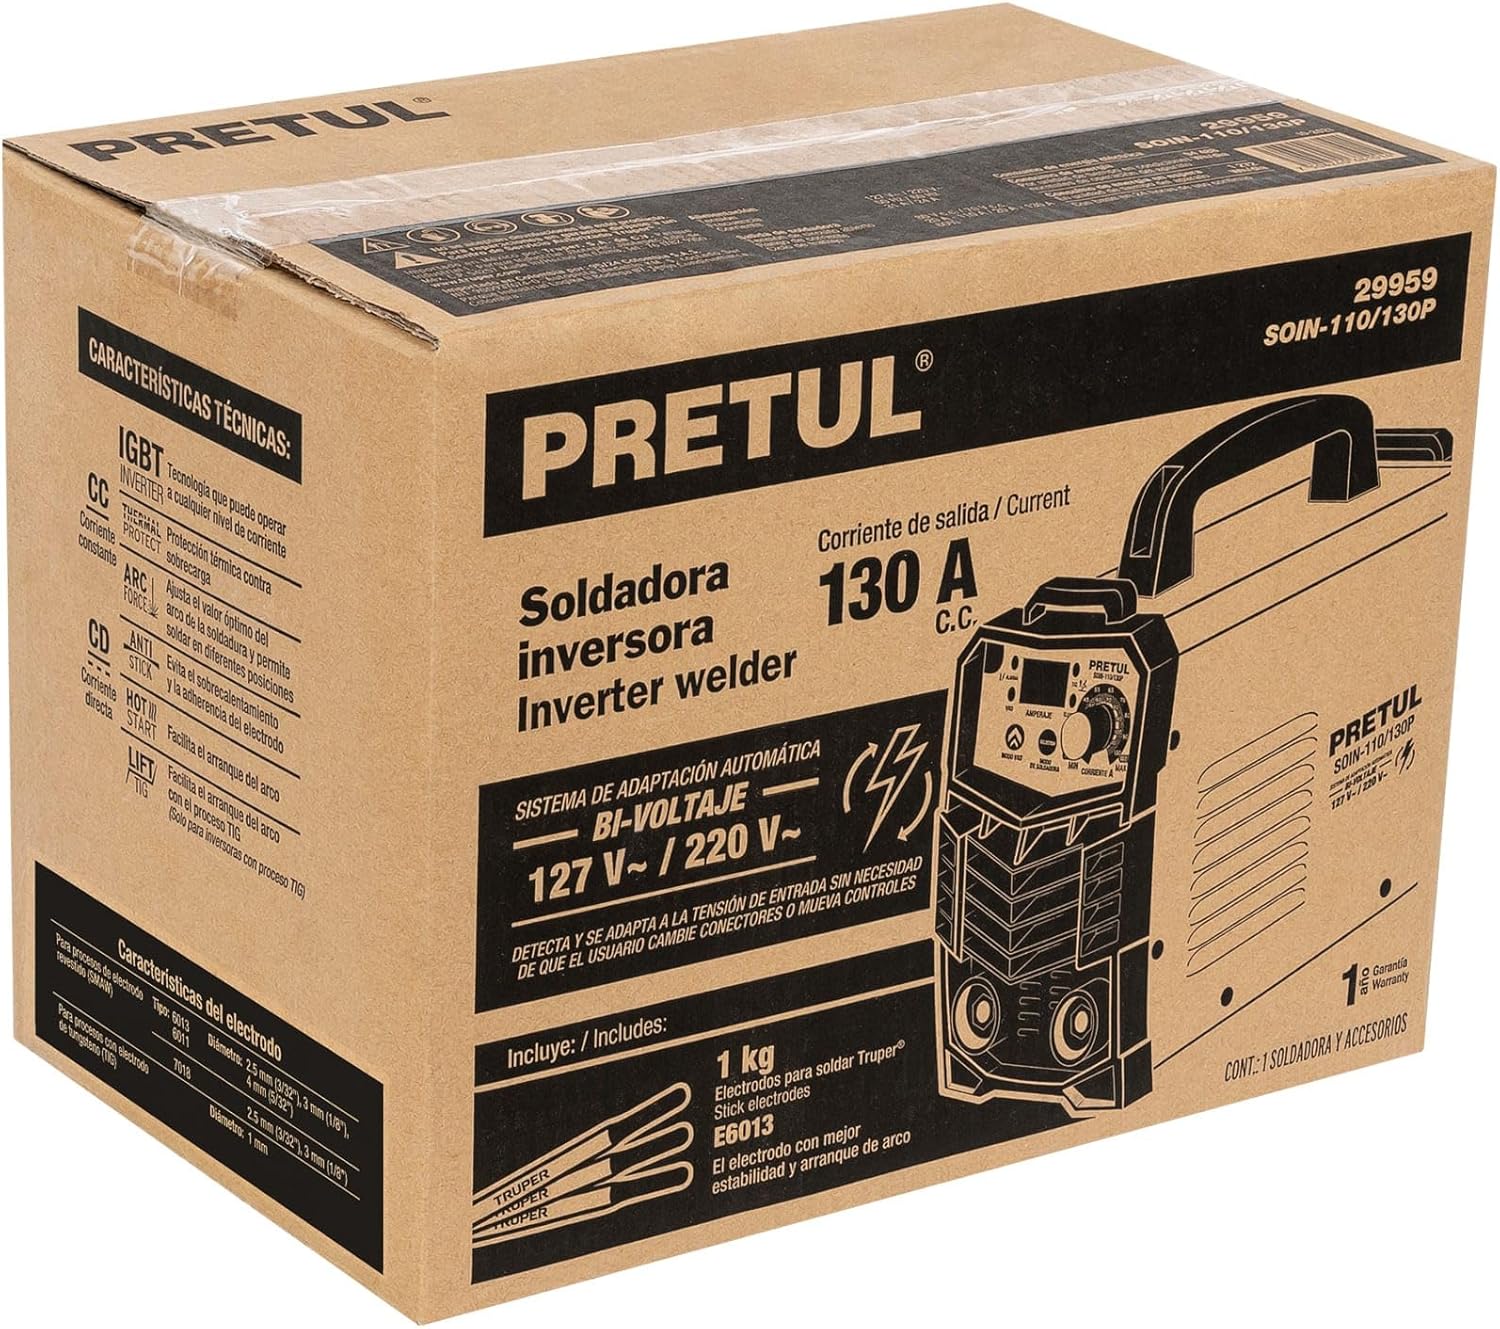
Figure 5.1: Electrode compatibility chart.
6. Impostazione
Follow these steps to set up your Pretul Inverter Welder for operation.
- Scegli una posizione adatta: Select a dry, well-ventilated area free from flammable materials. Ensure stable footing for the welder.
- Collegare il cavo di terraamp: Attacca il terreno clamp cable to the negative (-) quick-change terminal on the welder. Securely attach the ground clamp al pezzo da lavorare o a una parte metallica pulita e nuda del tavolo di saldatura, garantendo un buon contatto elettrico.
- Collegare il portaelettrodo: For SMAW (stick welding), attach the electrode holder cable to the positive (+) quick-change terminal. Insert the appropriate electrode into the holder. For TIG welding, connect the TIG torch (not included) to the appropriate terminal and gas supply.
- Collegamento elettrico: Ensure the welder's ON/OFF switch is in the OFF position. Plug the power cable into a suitable 127V or 220V electrical outlet. The welder will automatically detect and adapt to the input voltage.
- Preparazione alla saldatura: Indossare tutti i dispositivi di protezione individuale (DPI) necessari, tra cui casco da saldatura, guanti e indumenti protettivi.
7. Istruzioni per l'uso
Once the welder is set up, follow these steps for safe and effective operation.
- Accensione: Turn the ON/OFF switch to the ON position. The digital display will illuminate.
- Imposta corrente: Use the current adjustment knob to set the desired amperage for your welding task. Refer to electrode manufacturer recommendations or a welding chart for appropriate settings.
- Inizia a saldare: Bring the electrode into contact with the workpiece to initiate the arc. The Hot Start feature will assist in easy arc ignition. Maintain a consistent arc length and travel speed.
- Monitor Thermal Protection: If the thermal protection light illuminates, stop welding immediately. Allow the machine to cool down before resuming operation. Do not bypass this safety feature.
- Saldatura di finitura: When finished, turn the welder off. Allow the workpiece and electrode holder to cool before handling.
- Ripulire: Use the wire brush to clean slag from the weld.
Suggerimenti per la saldatura:
- Practice on scrap metal to get a feel for the machine and settings.
- Maintain a consistent arc length for a stable weld.
- Regolare amperage based on material thickness and electrode type.
- Ensure good ventilation to disperse welding fumes.
8. Manutenzione
Una manutenzione regolare garantisce la longevità e il funzionamento sicuro della saldatrice.
- Pulizia: Regularly clean the exterior of the welder with a dry cloth. Use compressed air to blow out dust and debris from the ventilation openings. Ensure the welder is unplugged before cleaning.
- Ispezione dei cavi: Periodically inspect all cables (power, ground, electrode) for cuts, fraying, or damaged insulation. Replace damaged cables immediately.
- Controllo del terminale: Ensure quick-change terminals are clean and free of corrosion. Tighten connections as needed.
- Magazzinaggio: Conservare la saldatrice in un ambiente asciutto e pulito, lontano dalla luce solare diretta e da temperature estreme.
- Servizio professionale: For internal cleaning or repairs, always consult a qualified service technician. Do not attempt to open the welder casing te stesso.
9. Risoluzione Dei Problemi
Questa sezione affronta i problemi più comuni che potresti riscontrare con la tua saldatrice.
| Problema | Possibile causa | Soluzione |
|---|---|---|
| La saldatrice non si accende. | Nessuna alimentazione; cavo di alimentazione difettoso; fusibile interno bruciato. | Check power outlet and connections. Inspect power cable for damage. If problem persists, seek professional service. |
| Thermal protection light is on. | Surriscaldamento dovuto a uso prolungato o ventilazione insufficiente. | Stop welding and allow the machine to cool down. Ensure proper ventilation around the unit. |
| L'arco è difficile da colpire o instabile. | Non corretto amperage setting; poor ground connection; damp or incorrect electrode; worn electrode holder. | Regolare amperage. Ensure ground clamp has good contact. Use dry, appropriate electrodes. Check electrode holder for wear. |
| L'elettrodo si attacca al pezzo in lavorazione. | Basso amperage setting; improper arc length; Anti Stick feature not functioning. | Aumento amperage. Practice maintaining proper arc length. If Anti Stick is not working, professional service may be required. |
| Scarsa qualità della saldatura (porosità, schizzi). | Incorrect settings; dirty workpiece; improper technique; damp elettrodi. | Regolare amperage and travel speed. Clean workpiece thoroughly. Use proper welding technique. Ensure electrodes are dry. |
10. Garanzia e supporto
Pretul products are manufactured to high-quality standards and are backed by a manufacturer's warranty against defects in materials and workmanship. Please refer to the warranty card included with your product for specific terms and conditions, or visit the official Pretul websito per informazioni dettagliate sulla garanzia.
For technical support, service, or to inquire about replacement parts, please contact Pretul customer service through their official channels. Keep your purchase receipt as proof of purchase for warranty claims.
Supporto online: www.pretul.com.mx (Nota: questo è un segnaposto URL, please refer to the actual brand websito per supporto.)
Ask a question about this manual
Ask about setup, troubleshooting, compatibility, parts, safety, or missing instructions. Manuals+ will review the question and use this page’s manual context to help answer it.