Jpbaisqic Q6 Pro
Jpbaisqic Replacement Accessories Kit User Manual
For HONITURE Q6 Pro, Laresar L6 Pro, AIRROBO T10+, Neabot N2 Robot Vacuums
Introduzione
This manual provides instructions for the installation and maintenance of the Jpbaisqic Replacement Accessories Kit, compatible with HONITURE Q6 Pro, Laresar L6 Pro, AIRROBO T10+, and Neabot N2 robot vacuum cleaners. This kit includes essential components for maintaining your robot vacuum's performance.
Please read this manual thoroughly before installing or replacing any parts to ensure proper function and longevity of your vacuum cleaner.
Contenuto della confezione
The Jpbaisqic Replacement Accessories Kit includes the following components:
- 1 Main Brush Roller
- 4 spazzole laterali
- 2 filtri HEPA
- 3 tamponi per mop
- 3 sacchetti per la polvere

Immagine: Oltreview of the Jpbaisqic Replacement Accessories Kit, showing one main brush roller, four side brushes, two HEPA filters, three mop pads, and three dust bags.
Compatibilità
This accessory kit is 100% compatible with the following robot vacuum cleaner models:
- HONITURE Q6 Pro
- Laresar L6 Pro
- AIRROBO T10+
- Neabot N2
Nota importante:
Some user feedback indicates potential fitment issues with side brushes for the HONITURE Q6 Pro and overall compatibility with Laresar L6 Pro. Please verify the shape and attachment mechanism of your existing parts against the images provided before installation.
Guida all'installazione
Before beginning any installation, ensure your robot vacuum cleaner is powered off and unplugged from its charging base.
1. Main Brush Roller Installation
- Capovolgere il robot aspirapolvere.
- Individuare il coperchio della spazzola principale, solitamente fissato tramite due linguette o viti.
- Open or unscrew the cover to access the main brush.
- Remove the old main brush by lifting it out.
- Insert the new main brush roller, ensuring the ends align with the slots in the vacuum.
- Chiudere il coperchio della spazzola principale e fissarlo.

Image: Diagram illustrating the removal and installation of the main brush roller in a robot vacuum cleaner. The image shows the brush being inserted into its compartment.
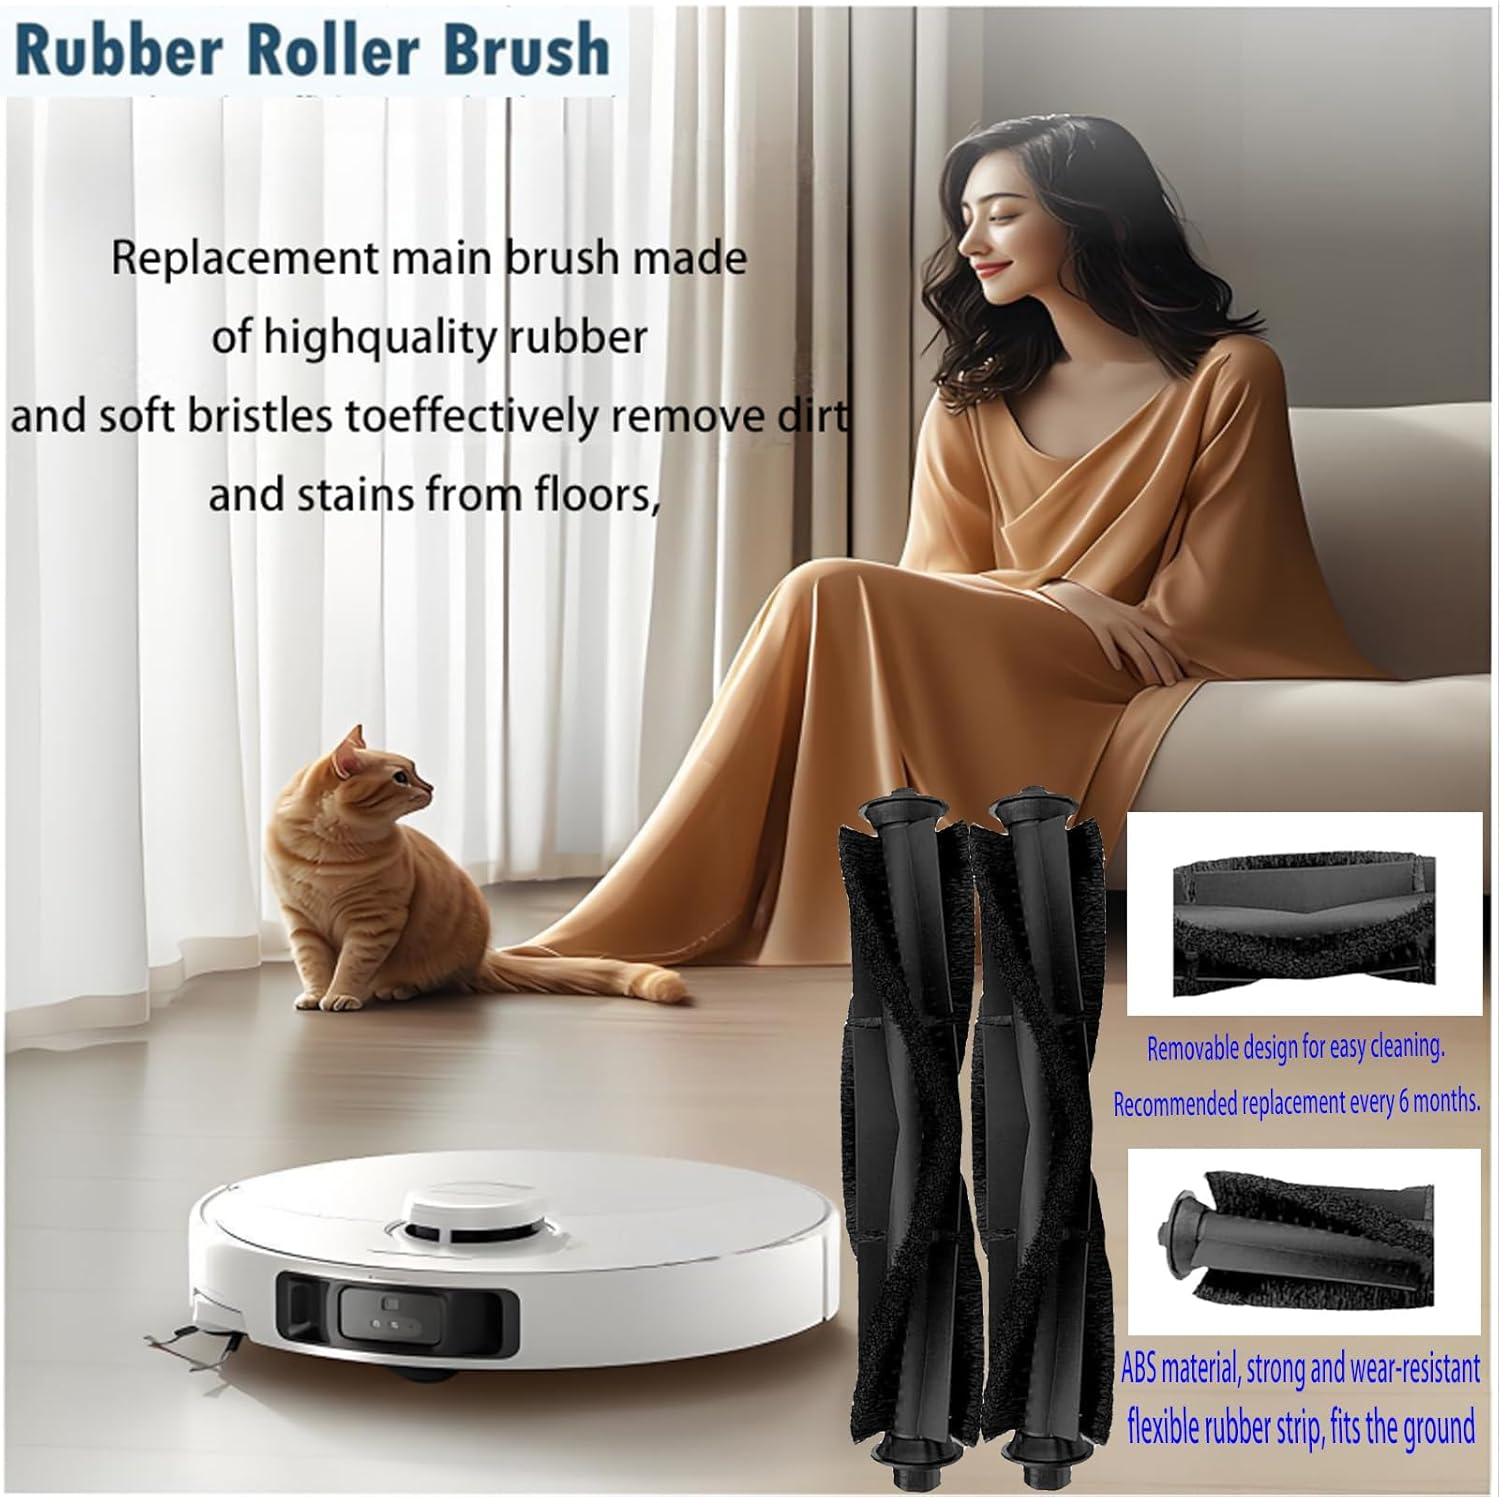
Immagine: Primo piano view of the main brush roller, highlighting its rubber and bristle construction for effective dirt removal. The image also shows the removable design for easy cleaning.
2. Installazione della spazzola laterale
- Capovolgere il robot aspirapolvere.
- Locate the side brushes, usually held by a single screw.
- Svitare e rimuovere la vecchia spazzola laterale.
- Align the new side brush with the post and press it down firmly.
- Fissare la nuova spazzola laterale con la vite.

Image: Diagram showing the installation of side brushes. The image illustrates how to attach the new side brush to the vacuum's base.
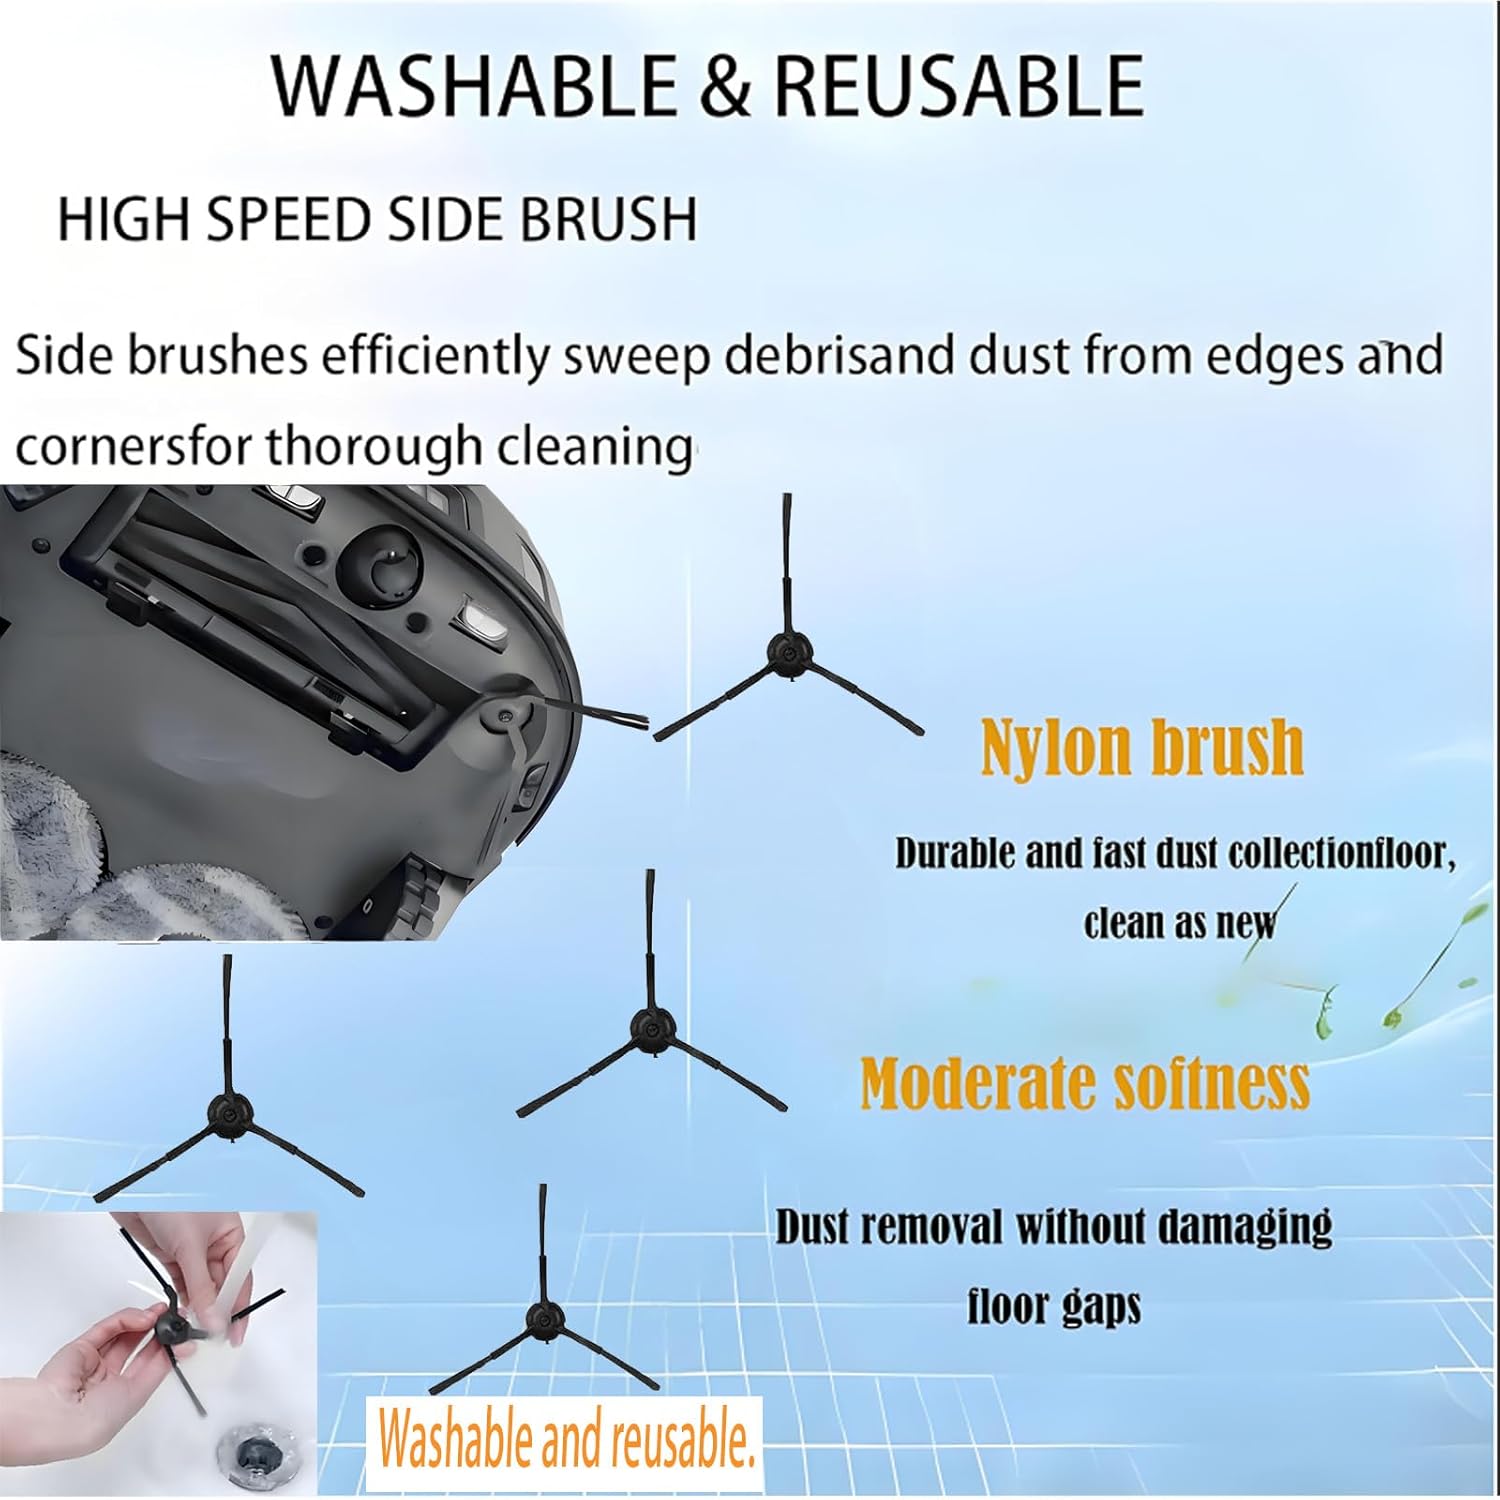
Image: Close-up of the side brushes, emphasizing their nylon construction and three-arm design for sweeping debris from edges and corners.
3. HEPA Filter Replacement
- Aprire il vano del contenitore della polvere del robot aspirapolvere.
- Rimuovere la pattumiera.
- Individuare il gruppo filtro all'interno del contenitore della polvere.
- Rimuovere il vecchio filtro HEPA.
- Insert the new HEPA filter, ensuring it is seated correctly.
- Reinstall the dustbin into the vacuum.

Image: Diagram illustrating the HEPA filter's function and replacement. It shows the filter's pleated design and its role in capturing dust and particles.

Immagine: Primo piano view of the HEPA filter, highlighting its high-efficiency filtration capabilities for dust, particles, and pet hair.
4. Mop Pad Attachment
- Locate the mop pad attachment area on your robot vacuum (if applicable).
- Attach the new mop pad to the designated area, typically using a hook-and-loop fastener or sliding mechanism.
- Ensure the mop pad is securely attached before operating the vacuum in mopping mode.

Image: Diagram showing the mop pad attached to the robot vacuum. The image emphasizes the washable and reusable nature of the mop pads and their effectiveness on various floor types.

Immagine: Primo piano view of the mop pads, highlighting their fine edging, durability, and washability. The image also shows the texture of the microfiber material.
5. Sostituzione del sacchetto antipolvere
- Open the dust collection compartment on your robot vacuum's auto-empty station (if applicable).
- Carefully remove the full dust bag, ensuring the self-sealing mechanism activates to prevent dust leakage.
- Inserire un nuovo sacchetto raccoglipolvere nel vano, assicurandosi che sia completamente inserito.
- Close the dust collection compartment.

Image: Diagram illustrating the features of the dust bags, including their two-layer filtration, non-woven fabric material, and self-sealing design. It shows the bag being inserted into a vacuum's auto-empty station.

Immagine: Primo piano view of the dust bags, emphasizing their well-sealed edge, premium cardboard inlet, and sturdy superfine fabric for containing dust without leakage.
Programma di manutenzione
Regular replacement of these accessories is crucial for maintaining the optimal performance and suction power of your robot vacuum cleaner. The recommended replacement intervals are:
- Rullo spazzola principale: Every 6-12 months, or as needed based on usage and wear.
- Spazzole laterali: Every 3-6 months, or if visibly worn or damaged.
- Filtri HEPA: Every 2-3 months, or more frequently if you have pets or allergies.
- Panni per mocio: Wash after each use. Replace every 3-6 months, or if they lose absorbency or become damaged.
- Sacchetti antipolvere: Replace when full. Service life is typically 6-8 months depending on usage.
Note: These are general guidelines. Actual replacement frequency may vary based on usage, environment, and specific vacuum model.
Risoluzione dei problemi
Se riscontri problemi dopo aver sostituito delle parti, tieni presente quanto segue:
- Prestazioni di pulizia ridotte:
- Ensure all brushes are free of tangled hair or debris.
- Check if the HEPA filter is correctly installed and not clogged.
- Verify the dust bag is not full.
- Side Brushes Not Spinning or Malfunctioning:
- Confirm the side brushes are securely screwed in.
- Check for any hair or debris wrapped around the brush motor or base.
- Refer to the "Important Note" in the Compatibility section regarding potential fitment issues for some models.
- Rumori insoliti:
- Inspect the main brush roller for any foreign objects or damage.
- Ensure all parts are correctly installed and seated.
For further assistance, please refer to your robot vacuum cleaner's original user manual or contact the manufacturer of your specific vacuum model.
Specifiche
| Componente | Quantità | Materiale | Caratteristiche principali |
|---|---|---|---|
| Rullo spazzola principale | 1 | Rubber, Bristles | High-quality, effective dirt removal, removable design |
| Spazzole laterali | 4 | Nylon, ABS | Efficiently sweeps edges and corners, durable |
| Filtri HEPA | 2 | Materiale filtrante di alta qualità | Filters 99.97% of 0.3 micron particles, effective against dust, pet hair |
| Panni per mocio | 3 | Microfibra | Washable, reusable, strong cleanability, fine edging |
| Sacchetti antipolvere | 3 | Tessuto non tessuto | 2-layer filtration, self-sealing design, large capacity |
Overall Kit Dimensions: 5 x 1.99 x 7.99 pollici
Overall Kit Weight: 8.8 once (0.25 chilogrammi)
Supporto
For questions regarding the Jpbaisqic Replacement Accessories Kit, please contact your retailer or the seller directly through the platform where the purchase was made.
For issues related to your specific robot vacuum cleaner model, please refer to the original manufacturer's support channels.