
KIMO QM-3601
Manuale di istruzioni per la chiave a impulsi a batteria KIMO 20V
Marca: KIMO | Modello: QM-3601
Prodotto finitoview
This KIMO 20V Cordless Impact Wrench is designed for efficient and versatile fastening and loosening tasks. Featuring a powerful brushless motor, stepless speed control, and an automatic stop mode, it is ideal for automotive repairs, tire changes, and various home maintenance projects. Its compact and lightweight design ensures comfortable operation for all users.

Figure 1: KIMO 20V Cordless Impact Wrench and included accessories.
Caratteristiche principali
- High Efficiency Stepless Speed Control: Offers 300N·m torque and 0-2300rpm speed. The stepless speed control allows precise adjustment of rotation speed, making it suitable for both heavy-duty and delicate tasks.
- Quick Attachment & LED Light: Features a 1/2-inch drive square compatible with most standard sockets. The built-in LED light illuminates the work area for safe operation in dark environments.
- Forward/Reverse Rotation & Anti-Drop Mechanism: This electric impact wrench supports both forward and reverse rotation. In forward rotation, you can select between automatic stop mode and high-efficiency mode. The automatic stop mode is a key feature, preventing nuts from being lost due to excessive force when loosening them, which is beneficial for work efficiency. In reverse rotation, when tightening nuts, you can choose between power-saving mode (0-1900rpm min-1) and high-efficiency mode (0-2300rpm min-1), which helps prevent unnecessary power consumption.
- Motore brushless durevole: The brushless motor eliminates carbon brushes, allowing the powerful BL motor to operate at lower temperatures and more efficiently. This also results in high durability and maintenance-free operation. KIMO's vibration control system maintains low levels of vibration and noise, providing a more comfortable and quieter working experience than many competitors.
- Cordless and Lightweight Design: This compact, cordless rechargeable impact wrench can be used anywhere after a full charge, offering convenient portability for various tasks. The soft-grip design ensures a secure, non-slip hold for comfortable use. It is easy for women and the elderly to use. It is also highly effective and safer for construction and maintenance work in high places or remote sites.
Contenuto della confezione
- KIMO Impact Wrench Body
- Caricatore rapido
- Borsa portaoggetti (x1)
- 1/2-inch Socket (x1)
- Batteria agli ioni di litio da 2.0 Ah (x1)
- Spilla (x1)
- Manuale di istruzioni (giapponese)

Figura 2: Tutti i componenti inclusi nella confezione.
Impostare
1. Carica della batteria
Before first use, fully charge the provided 2.0Ah Lithium-Ion battery. Connect the rapid charger to a power outlet and insert the battery. The charger's indicator lights will show the charging status. Ensure the battery is fully charged before operation to maximize performance and battery life.
2. Attaching the Socket
- Ensure the impact wrench is turned off and the forward/reverse switch is in the neutral (locked) position.
- Align the 1/2-inch socket with the drive square on the wrench.
- Push the socket firmly onto the drive square until it clicks into place.
- To remove the socket: Hold the socket with the upper half clamped in a vise (if available), support the wrench by hand, and gently tap the neck area of the wrench with a plastic hammer to dislodge the socket. If removal is difficult, apply a small amount of lubricant to the convex part where the socket fits.

Figure 3: Correct method for attaching and removing sockets.
Istruzioni per l'uso
1. Accensione/spegnimento e controllo della velocità
The tool is activated by pressing the trigger switch. The rotation speed is steplessly variable, meaning the more you press the trigger, the faster the tool operates (0-2300rpm). Release the trigger to turn off the tool.
2. Rotazione avanti/indietro
Use the forward/reverse switch located above the trigger to select the desired rotation direction. Push the switch to the left for forward rotation (tightening) and to the right for reverse rotation (loosening). Ensure the switch is in the center position for safety when not in use or when changing sockets.
Figure 4: Forward (F) for tightening and Reverse (R) for loosening.
3. Mode Selection (Forward Rotation)
In forward rotation, you can select between two modes:
- Modalità ad alta efficienza (0-1330 giri/min): For general tightening tasks requiring consistent power.
- Modalità di arresto automatico: Designed to prevent over-tightening and loss of nuts. The tool automatically stops once the nut is sufficiently tightened.

Figura 5: Due-stage speed adjustment for precise control.
4. Mode Selection (Reverse Rotation)
In reverse rotation (loosening), you can select between two speed ranges to optimize power consumption:
- Modalità di risparmio energetico (0-1900 giri/min): For lighter loosening tasks, conserving battery life.
- Modalità ad alta efficienza (0-2300 giri/min): For stubborn nuts requiring maximum loosening power.
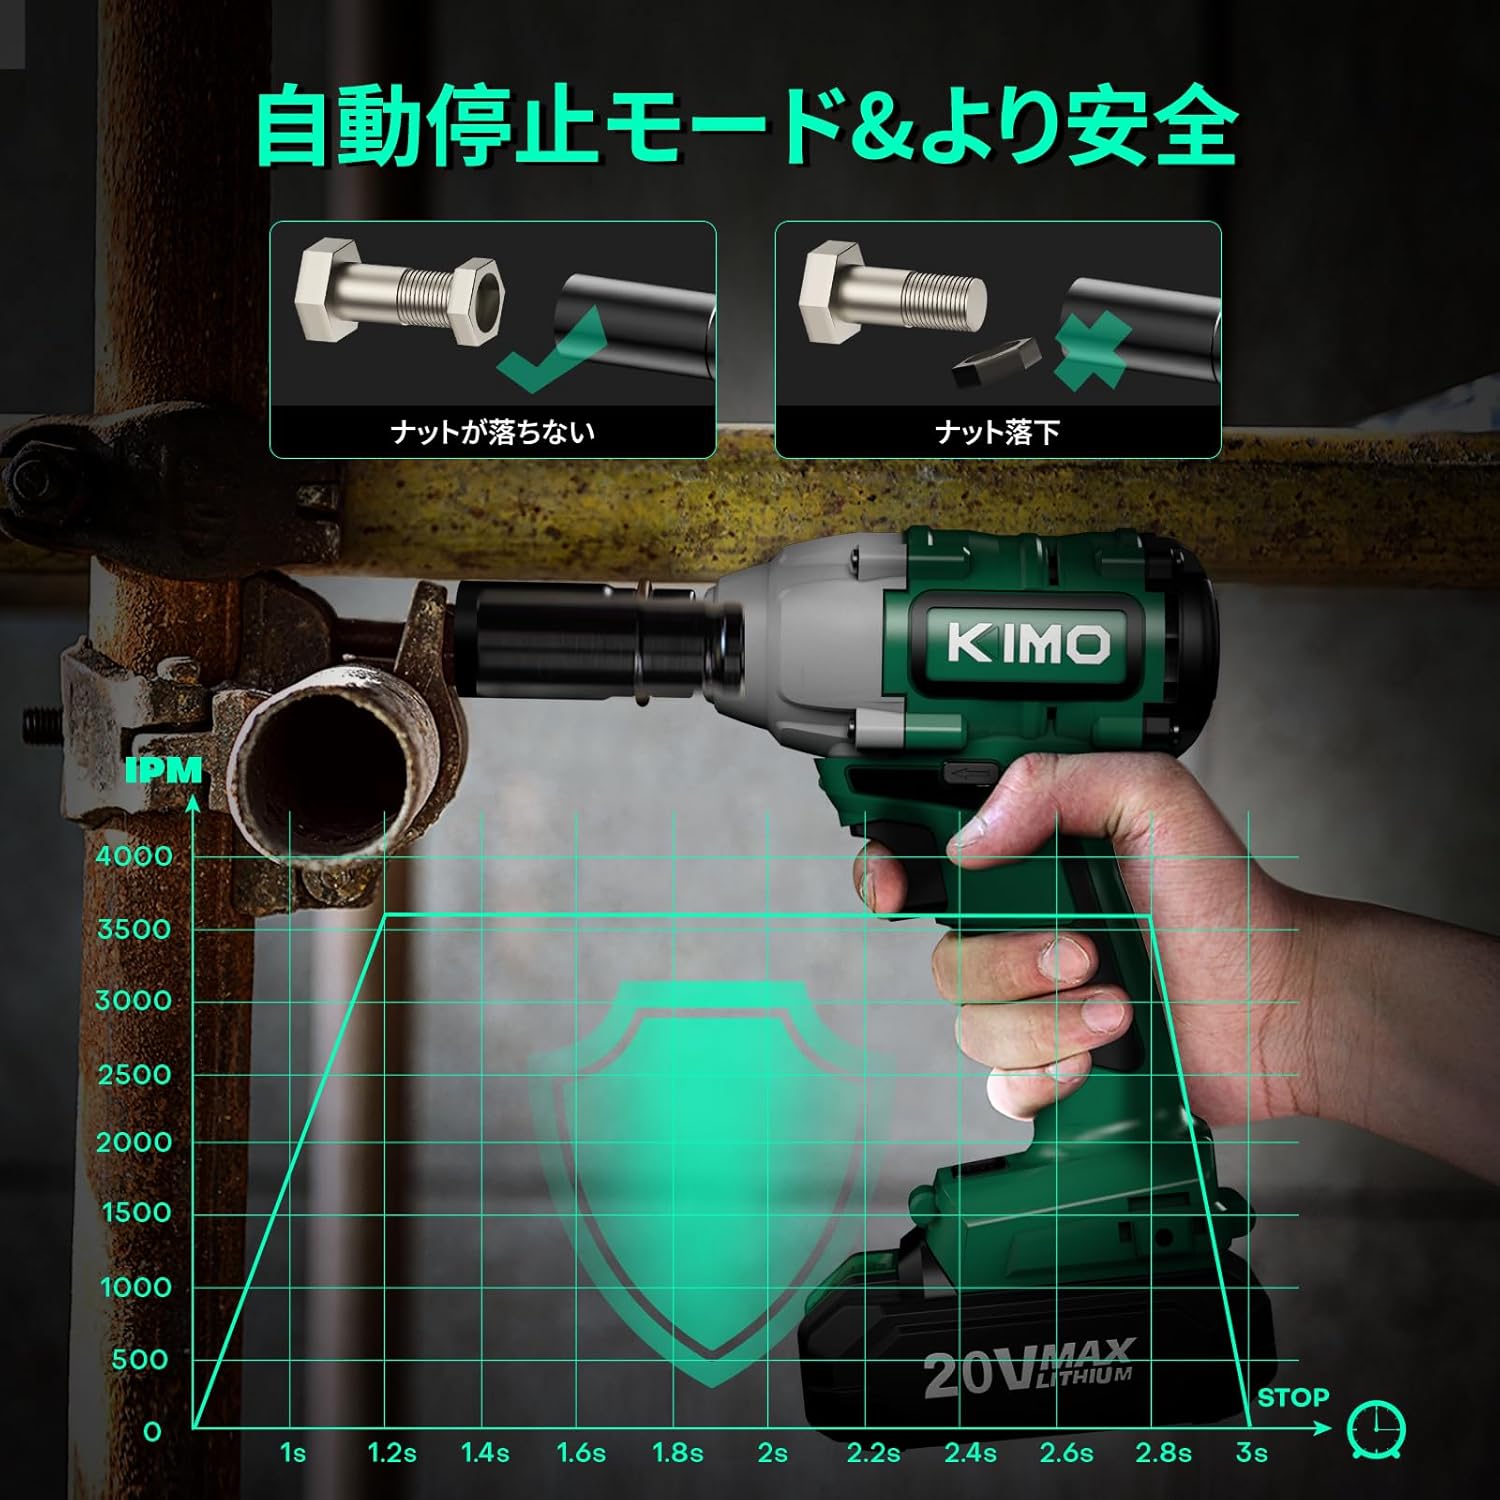
Figure 6: Automatic stop mode for safe and efficient loosening.
5. Luce da lavoro a LED
The integrated LED light automatically illuminates the work area when the trigger is pressed, providing visibility in dimly lit spaces.

Figure 7: The LED light provides illumination for working in dark areas.
Manutenzione
Pulizia generale
Pulire regolarmente l'esterno dell'utensile con un panno morbido eamp panno. Non utilizzare prodotti chimici aggressivi o detergenti abrasivi. Mantenere le aperture di ventilazione libere da polvere e detriti per garantire un corretto raffreddamento.
Cura della presa
- Store sockets in a clean, dry place.
- After each use, remove the socket from the wrench and store it in the provided storage bag.
- If rust occurs on the socket or the drive square, apply a small amount of lubricant to the affected area and gently tap with a wrench or other tool to facilitate removal/attachment.
Cura e conservazione della batteria
- To prolong battery life, always fully charge the battery after use before storing it.
- When storing the battery, keep it away from metal objects such as coins, keys, or nails, as these can cause short circuits and potential malfunctions.
- Conservare le batterie in un luogo fresco e asciutto, lontano dalla luce solare diretta e da temperature estreme.
Risoluzione dei problemi
| Problema | Possibile causa | Soluzione |
|---|---|---|
| Lo strumento non si avvia. | Batteria non carica o non inserita correttamente. | Assicurarsi che la batteria sia completamente carica e inserita saldamente. |
| Potenza ridotta o funzionamento intermittente. | Low battery charge; Overload protection activated; Obstruction in motor/ventilation. | Recharge battery. Allow tool to cool down if overheated. Clear any obstructions from ventilation. |
| Socket difficult to attach/remove. | Rust or debris on drive square/socket; Incorrect attachment method. | Apply lubricant to the drive square. Ensure correct attachment/removal procedure is followed (refer to Setup section). |
| Rumori o vibrazioni insoliti. | Loose components; Internal damage. | Stop operation immediately. Check for loose parts. If problem persists, contact customer support. |
Specifiche
| Caratteristica | Dettaglio |
|---|---|
| Marca | Cimice |
| Numero di modello | QM-3601 |
| Voltage | 20 Volt |
| Cosatage | 60 L |
| Coppia massima | 300 Nm |
| Velocità a vuoto | 0-2300 giri/min |
| Drive Square | 1/2 di pollice (12.7 mm) |
| Tipo di batteria | Ioni di litio |
| Capacità della batteria | 2.0 Ah |
| Tipo di motore | Senza spazzole |
| Peso dell'articolo | 1.4 kg |
| Materiale | Plastica, Metallo |
| Colore | Verde |
Garanzia e supporto
For warranty information and technical support, please refer to the detailed Japanese instruction manual included in your package. You may also visit the official KIMO brand store on Amazon for further assistance and product registration.
KIMO Brand Store: Visit KIMO Store
Note: No official product videos with verified 'Seller' creator type were available for embedding based on the provided data.
Ask a question about this manual
Ask about setup, troubleshooting, compatibility, parts, safety, or missing instructions. Manuals+ will review the question and use this page’s manual context to help answer it.