
1. Introduzione
This manual provides detailed instructions for the installation, operation, and maintenance of your EVTSCAN Digital Thermoregulator. This device is designed to precisely control heating equipment, such as wall-mounted boilers and gas boilers, ensuring a stable and energy-efficient temperature environment. Please read this manual thoroughly before installation and use to ensure proper function and safety.
2. Informazioni sulla sicurezza
Always observe the following safety precautions to prevent damage to the device or personal injury:
- Assicurarsi che l'alimentazione sia scollegata prima dell'installazione o della manutenzione.
- In caso di dubbi sul cablaggio elettrico, l'installazione deve essere eseguita da un professionista qualificato.
- Non esporre il dispositivo all'acqua o a umidità eccessiva.
- Use only the specified battery type (2 AA batteries) and ensure correct polarity.
- Tenere il dispositivo lontano da materiali infiammabili.
3. Prodotto finitoview
The EVTSCAN Digital Thermoregulator features a clear LCD display for easy monitoring and a simple interface for temperature control. Its compact design allows for discreet integration into your living space.

Figura 3.1: Fronte view of the Digital Thermoregulator. The LCD screen displays current settings and room temperature, with a rotary knob below for adjustments.
Componenti chiave:
- Schermo LCD: Shows set temperature, room temperature, time, and operational icons.
- Manopola/pulsante di controllo: Utilizzato per navigare nei menu e regolare le impostazioni.
- Vano batteria: Located on the rear or side for 2 AA batteries.
- Terminali di cablaggio: For connection to the heating system.
4. Specifiche
| Caratteristica | Specificazione |
|---|---|
| Modello | EVTSCANok0g9ct2zq |
| Modalità di alimentazione | 2 batterie AA (non incluse) |
| Screen Accuracy | 0.5 ℃ |
| Sensore di sonda | CNT (10k) 1% |
| Capacità di contatto | Greater than 30-230 V DC working voltage, lower current. Reference: 5 A 30 V (HF relay) or 2 A 30 V (NEC relay) |
| Intervallo di visualizzazione della temperatura | da 1 a 40 ℃ |
| Intervallo di regolazione della temperatura predefinito | da 5 a 35 ℃ |
| Intervallo di temperatura di esercizio | da 0 a 50 ℃ |
| Programma in esecuzione | Set once a week |
| Produzione | Relè di commutazione |
| Materiale | Policarbonato ignifugo |
| Peso | 170 grammi |
5. Configurazione e installazione
The EVTSCAN Digital Thermoregulator is designed for simple installation. Follow these steps carefully:
5.1. Disimballaggio e ispezione
Rimuovere con attenzione tutti i componenti dall'imballaggio. Verificare che tutti gli articoli elencati nel contenuto della confezione siano presenti e integri.
- 1 Digital Temperature Controller
- 2 Viti
5.2. Installazione della batteria
The device requires 2 AA batteries for operation. These are not included in the package.
- Locate the battery compartment on the back of the thermoregulator.
- Aprire il coperchio del vano batterie.
- Inserire 2 batterie AA, assicurandosi della corretta polarità (+/-).
- Chiudere saldamente il coperchio del vano batterie.

Figura 5.1: Angolato view of the thermoregulator, illustrating its compact size and potential location for battery access or mounting points.
5.3. Montaggio e cablaggio
The thermoregulator is designed for wall mounting. Ensure the power to your heating system is turned off before proceeding with wiring.
- Scegliere una posizione adatta su una parete interna, lontano dalla luce solare diretta, da correnti d'aria o da fonti di calore che potrebbero influenzare le letture della temperatura.
- Mount the backplate (if detachable) to the wall using the provided screws.
- Connect the thermoregulator to your boiler or heating system according to the wiring diagram provided with your boiler and the thermoregulator's terminal markings. This typically involves connecting the switching relay output to the boiler's control input.
- Secure the thermoregulator onto the mounted backplate.
Nota: For wiring, consult a qualified electrician if you are unfamiliar with electrical installations.
6. Istruzioni per l'uso
The EVTSCAN Digital Thermoregulator uses a microcomputer control technology to maintain your desired temperature efficiently.
6.1. Powering On and Initial Display
Once batteries are installed, the LCD display will illuminate, showing the current room temperature, set temperature, and time.
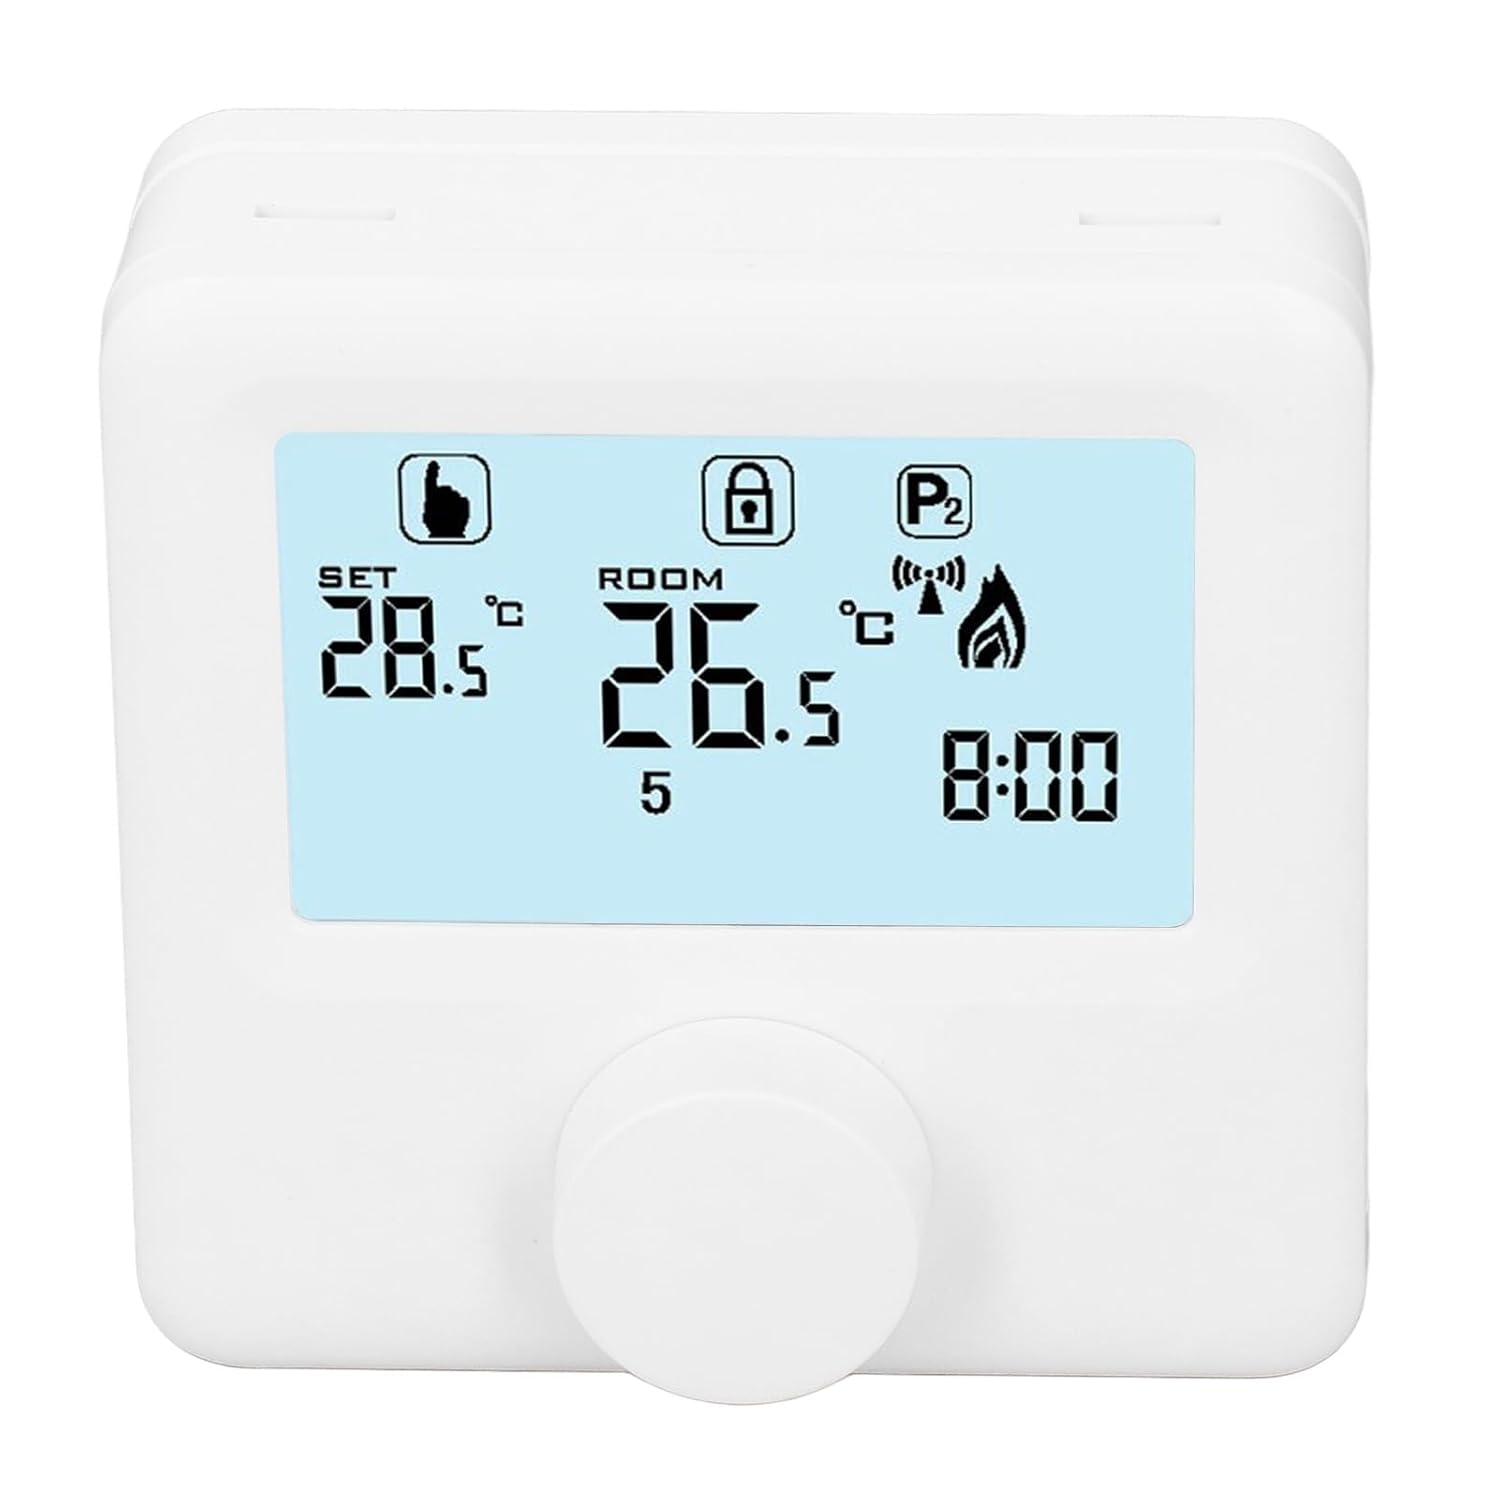
Figura 6.1: dettagliata view of the LCD display. It shows the set temperature (SET), room temperature (ROOM), a lock icon, a program icon (P2), a signal icon, a flame icon indicating heating, and the current time.
6.2. Impostazione della temperatura
Per regolare la temperatura desiderata:
- Rotate the control knob to increase or decrease the set temperature. The "SET" value on the display will change accordingly.
- The device will automatically activate or deactivate the heating system to maintain the set temperature within the range of 1 to 40 ℃. The default adjustment range is 5 to 35 ℃.
6.3. Programmazione settimanale
The thermoregulator supports a weekly programming schedule. This allows you to set different temperatures for various times of the day across the week.
- Press and hold the control knob (or a designated button, if available) to enter programming mode.
- Use the control knob to navigate through days of the week and time slots.
- Adjust the desired temperature for each programmed period.
- Confirm your settings to save the weekly program. The device will then operate according to this schedule.
6.4. Understanding Display Icons
- IMPOSTATO: Indicates the target temperature you have set.
- CAMERA: Visualizza la temperatura ambiente attuale.
- Icona della fiamma: Si illumina quando il sistema di riscaldamento è attivo.
- Icona di blocco: May indicate a keypad lock feature to prevent accidental changes.
- P1/P2 Icon: Indicates the current program mode (e.g., P1 for comfort, P2 for economy, or specific weekly program segments).
- Icona del segnale: May indicate wireless communication status if applicable.
7. Manutenzione
Regular maintenance ensures the longevity and optimal performance of your thermoregulator.
- Pulizia: Pulire il dispositivo con un panno morbido e asciutto. Non utilizzare detergenti abrasivi o solventi.
- Sostituzione della batteria: Replace batteries when the low battery indicator appears on the display. Always replace both batteries simultaneously with new AA batteries.
- Area del sensore: Ensure the temperature sensor area (usually a small vent on the device) is free from dust and obstructions for accurate readings.
8. Risoluzione Dei Problemi
If you encounter issues with your EVTSCAN Digital Thermoregulator, refer to the following common problems and solutions:
- Il display è vuoto:
- Controllare che le batterie siano installate correttamente.
- Sostituire le vecchie batterie con quelle nuove.
- L'impianto di riscaldamento non risponde:
- Ensure the thermoregulator is powered on and the flame icon is displayed when heating is expected.
- Verify wiring connections to the boiler are secure and correct.
- Check the boiler's power supply and status.
- Assicurarsi che la temperatura impostata sia superiore alla temperatura ambiente attuale.
- Letture della temperatura imprecise:
- Ensure the device is not exposed to direct sunlight, drafts, or heat sources.
- Clean any dust or debris from the sensor area.
- Impossibile modificare le impostazioni:
- Check if the lock icon is displayed. If so, refer to the operating instructions to unlock the keypad.
Se il problema persiste, contatta l'assistenza clienti.
9. Garanzia e supporto
Specific warranty information for this product is not provided in the available data. Please refer to the product packaging or the retailer's websito per i dettagli sulla garanzia.
For technical support or further assistance, please contact EVTSCAN customer service through their official channels or the retailer from whom you purchased the product.
You can visit the EVTSCAN store on Amazon for more information: Negozio EVTSCAN