Introduzione
Grazie per l'acquistoasing the MUSE M-19 GL Alarm Clock Radio. This manual provides essential information for the safe and efficient operation of your device. Please read it thoroughly before use and retain it for future reference.
Istruzioni di sicurezza
- Non esporre l'unità alla pioggia o all'umidità per evitare incendi o scosse elettriche.
- Assicurare una ventilazione adeguata; non ostruire le aperture di ventilazione.
- Posizionare l'unità su una superficie stabile e piana.
- Evitare di posizionare l'unità vicino a fonti di calore come radiatori, bocchette di riscaldamento, stufe o altri apparecchi (inclusi amplificatori) che producono calore.
- Utilizzare solo accessori/componenti specificati dal produttore.
- Scollegare l'apparecchio durante i temporali o quando non viene utilizzato per lunghi periodi.
- Affidare tutti gli interventi di assistenza a personale qualificato.
- Smaltire le batterie in modo responsabile. Non esporre le batterie a calore eccessivo.
Contenuto della confezione
- MUSE M-19 GL Alarm Clock Radio
- Adattatore di alimentazione CA.
- Manuale d'uso
Prodotto finitoview
The MUSE M-19 GL is a compact alarm clock radio featuring a clear 1.8-inch LCD display. It includes an FM tuner and multiple alarm functions, designed for bedside use.
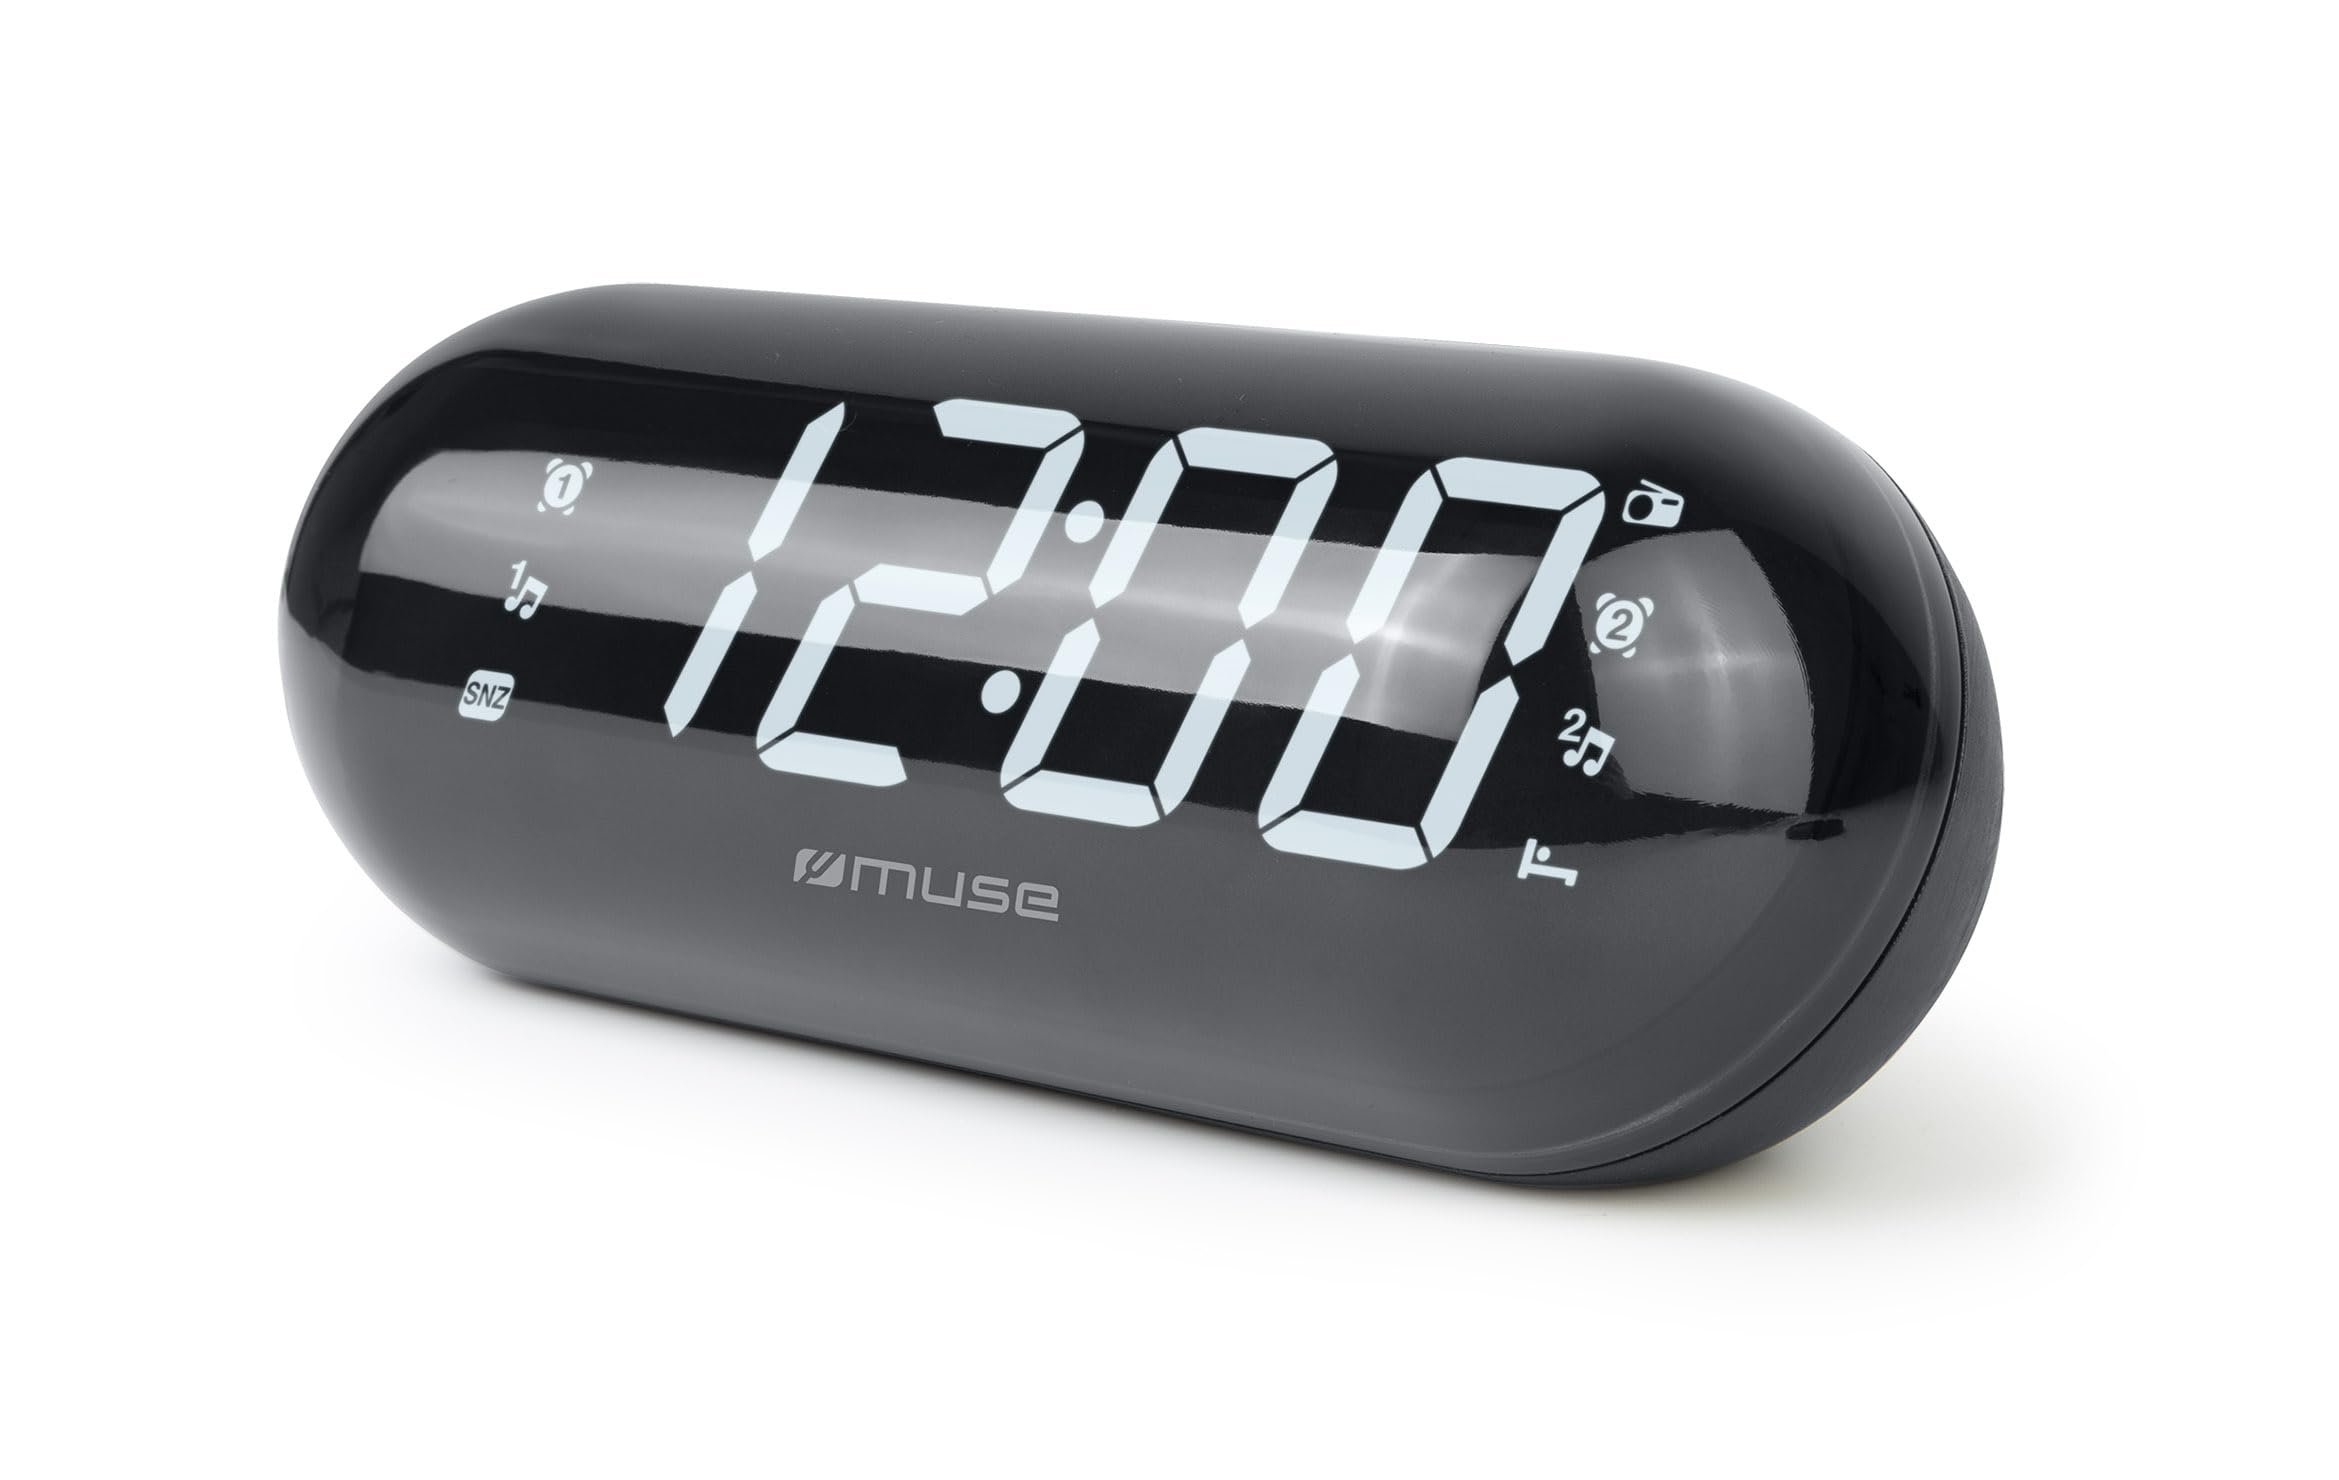
Image: The MUSE M-19 GL Alarm Clock Radio with its digital display showing '12:00', positioned on a wooden bedside table next to a bed.
Familiarize yourself with the buttons and display indicators for optimal use. Specific button functions will be detailed in the 'Operating' section.
Impostare
1. Alimentazione del dispositivo
- Alimentazione CA: Connect the provided AC power adapter to the DC IN jack on the back of the unit, then plug the adapter into a standard wall outlet. The display will light up.
- Batteria di backup: Per la conservazione delle impostazioni di ora e sveglia durante un'interruzione di correntetage, insert 2 x AAA batteries (not included) into the battery compartment on the bottom of the unit. Ensure correct polarity (+/-).
2. Impostazione dell'ora
- Premere e tenere premuto il tasto IMPOSTAZIONE DELL'ORA button (location may vary, refer to device diagram if available) until the hour digits flash.
- Utilizzare il ORA E MINUTO pulsanti per regolare l'ora.
- Premere IMPOSTAZIONE DELL'ORA nuovamente per confermare e uscire dalla modalità di impostazione dell'ora.
Operativo
1. Funzionamento radio (sintonizzatore FM)
- Attiva/disattiva: Premere il tasto RADIO ACCESA/SPENTA pulsante per accendere o spegnere la radio.
- Frequenza di sintonizzazione: Utilizzare il TUNA + or MELODIA - buttons to manually adjust the FM frequency. Press and hold for automatic scanning to the next available station.
- Preimpostazioni: Per salvare una stazione, sintonizzarsi sulla frequenza desiderata, quindi tenere premuto il tasto PRESET finché il numero preimpostato non lampeggia. Utilizzare TUNA + or MELODIA - per selezionare un numero preimpostato (1-20), quindi premere PRESET di nuovo per confermare.
- Richiama i preset: Premere brevemente il tasto PRESET pulsante per scorrere le stazioni salvate.
2. Funzioni di allarme
The M-19 GL features dual alarms (Alarm 1 and Alarm 2).
- Impostazione di un allarme:
- Premere e tenere premuto il tasto ALLARME 1 or ALLARME 2 finché le cifre dell'ora non lampeggiano.
- Utilizzare il ORA E MINUTO pulsanti per impostare l'orario desiderato per la sveglia.
- Premere il tasto ALLARME 1 or ALLARME 2 button again to select the alarm source (Buzzer or Radio). An indicator will appear on the display.
- Premere il tasto ALLARME 1 or ALLARME 2 ancora una volta per confermare e attivare l'allarme.
- Funzione snooze: Quando suona la sveglia, premere il tasto POSTICIPARE pulsante per silenziarlo temporaneamente per circa 9 minuti.
- Interrompi allarme: Per disattivare la sveglia per il giorno, premere il tasto ALLARME ON / OFF button. The alarm icon will disappear from the display.
- Disable Alarm Permanently: Premere il tasto ALLARME ON / OFF button repeatedly until the alarm icon for the respective alarm (1 or 2) is no longer displayed.
Manutenzione
Pulizia
Wipe the unit with a soft, dry cloth. Do not use abrasive cleaners or solvents, as they may damage the finish.
Sostituzione della batteria
If the time display is blank or incorrect after a power outage, the backup batteries may need replacement. Open the battery compartment on the bottom of the unit, remove the old AAA batteries, and insert new ones, observing correct polarity.
Risoluzione dei problemi
| Problema | Possibile causa | Soluzione |
|---|---|---|
| Nessuna alimentazione/Display spento | AC adapter not connected or power outage. | Ensure AC adapter is securely plugged in. Check power outlet. Replace backup batteries if needed. |
| La ricezione radio è scarsa | Segnale debole o antenna non estesa. | Estendere completamente l'antenna FM a filo. Riposizionare l'unità per una ricezione migliore. |
| L'allarme non suona | Sveglia non impostata o volume troppo basso. | Verify alarm time and activation (alarm icon on display). Increase radio volume if alarm source is radio. |
| L'ora non è corretta | Time not set or backup batteries are depleted. | Reset the time. Replace backup batteries. |
Specifiche
- Modello: M19GL
- Display: 1.8-inch LCD, Digital
- Sintonizzatore radio: FM with 20 Presets
- Fonte di energia: AC (main), 2 x AAA batteries (backup, not included)
- Dimensioni (L x P x A): 15 x 3.81 x 10 cm (5.9 x 1.5 x 3.9 pollici)
- Peso: 300 grammi (0.66 libbre)
- Materiale: Plastic (structure), LCD (display)
- Colore: Nero
- Caratteristiche speciali: Alarm, Snooze, Integrated Speaker
Garanzia e supporto
This MUSE M-19 GL Alarm Clock Radio comes with a garanzia di due anni against manufacturing defects from the date of purchase. Please retain your proof of purchase for warranty claims.
For technical support or warranty inquiries, please refer to the contact information provided with your purchase documentation or visit the official Muse websito.