
1. Prodotto finitoview
The Cuifati ITX Computer Motherboard H6 ME is designed for compact computing systems, offering essential features for a reliable and efficient build. This motherboard supports LGA 1155 CPUs and DDR3 memory, providing a stable foundation for various applications.
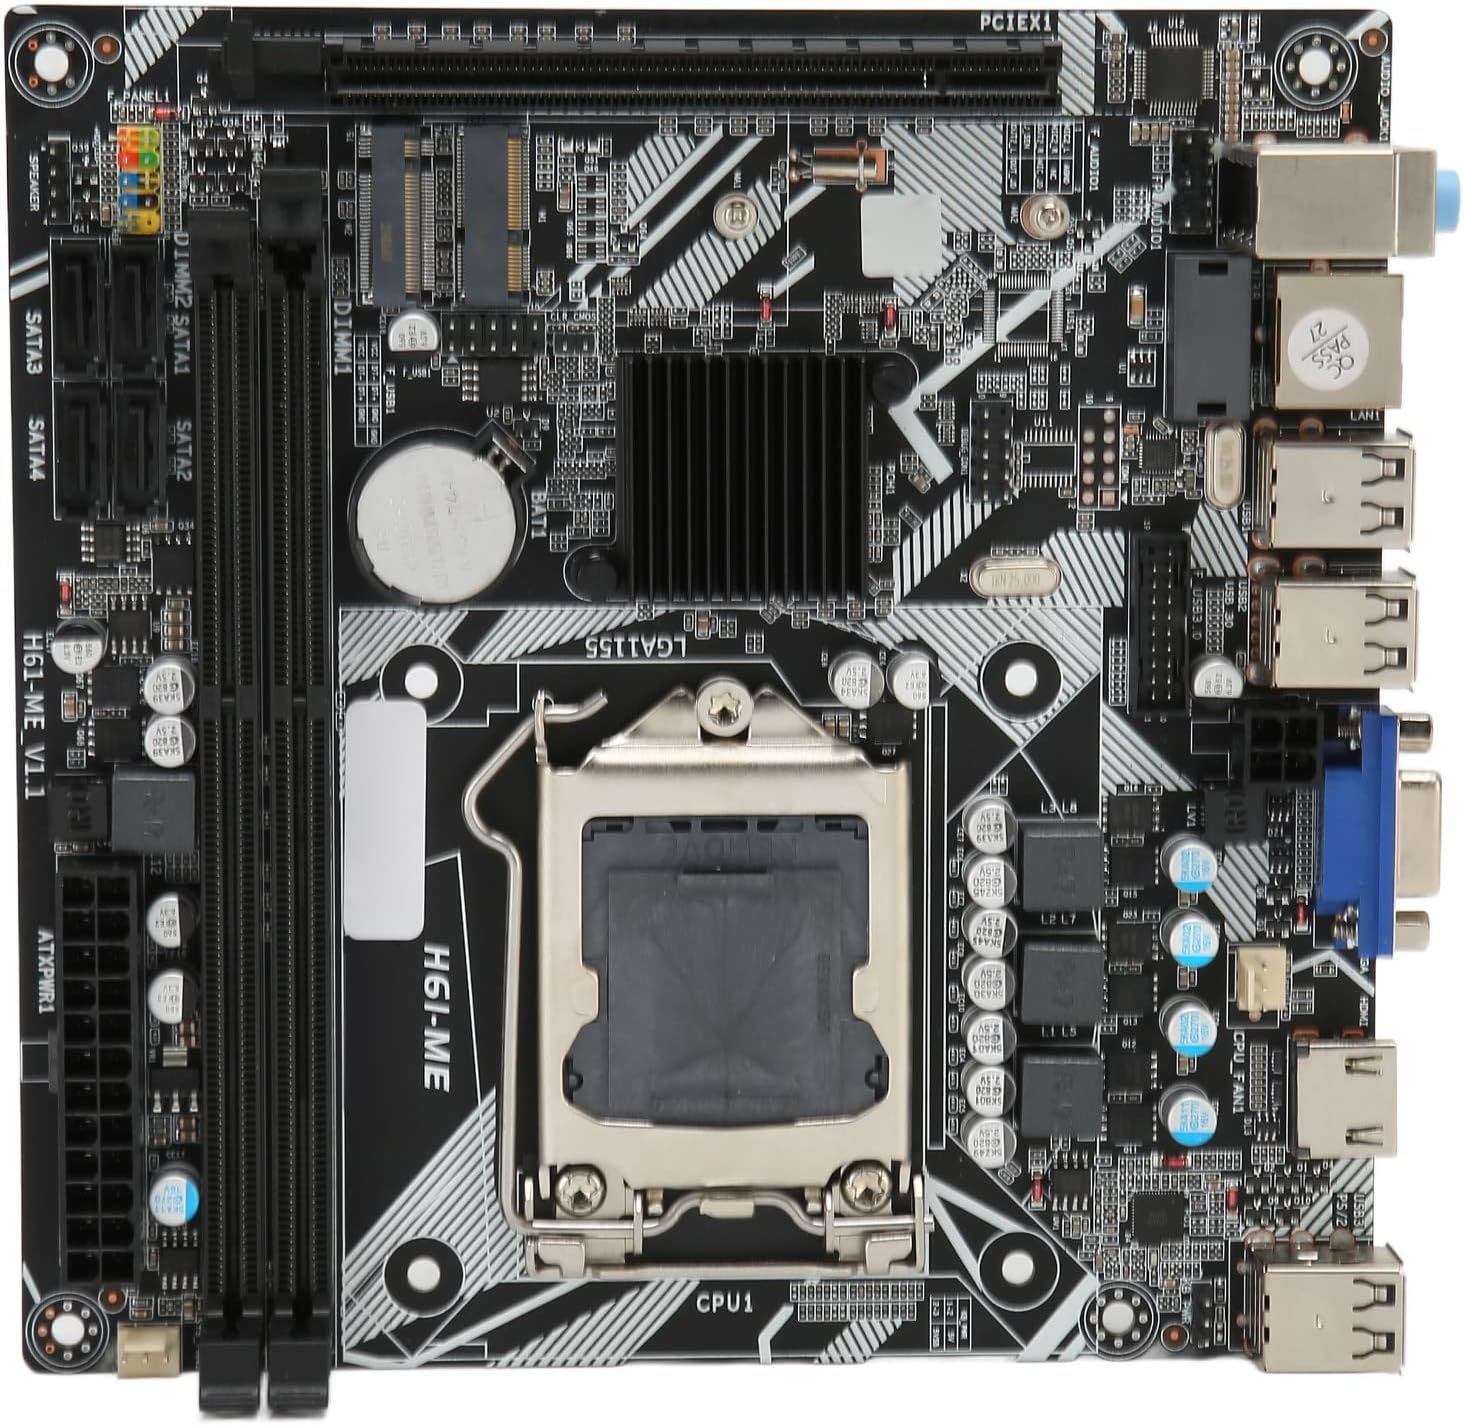
Figure 1: Cuifati ITX Computer Motherboard H6 ME (Top View)
2. Caratteristiche principali
- Slot CPU LGA 1155: Supports LGA 1155 processors for stable performance.
- Multiphase Power Design: Features stable and accurate multiphase power delivery for improved CPU performance.
- HD Video Output: Equipped with VGA and HD Multimedia Interface (HDMI) for digital high-definition video output.
- Memoria DDR3 a doppio canale: Incorporates two DDR3 memory slots, supporting up to 16GB, enhancing overall system performance.
- Multiple USB2.0 Interfaces: Provides 10 USB2.0 interfaces (4 front, 6 rear) for extensive peripheral connectivity.
- Opzioni di archiviazione: Includes 4 SATA2.0 ports and M.2 NVME support for various storage solutions.
- Slot PCIe 16X: Features a PCIe 16X slot for dedicated graphics cards or other expansion cards.
3. Contenuto della confezione
Prima di procedere con l'installazione, verificare che tutti gli elementi siano presenti nella confezione.
- 1 x Cuifati LGA 1155 Motherboard (H6 ME)
- 1 x Metal I/O Plate
- 1 x SATA Connecting Cable

Figura 2: Scheda madre e accessori inclusi
4. Configurazione e installazione
This section provides instructions for installing the Cuifati H6 ME motherboard into your computer system. Ensure your system is powered off and unplugged before beginning any installation.
4.1. Identificazione dei componenti
Familiarize yourself with the layout of the motherboard and its various connectors.

Figura 3: Diagramma dei componenti della scheda madre
- CPU Slot (LGA 1155): For installing your Intel LGA 1155 processor.
- Slot DDR3: Due slot per moduli di memoria DDR3.
- Slot PCIe 16X: Per schede grafiche o altre schede di espansione.
- Porte SATA2.0: Four ports for connecting SATA storage devices (HDDs/SSDs).
- NVME M.2 Slot: For high-speed NVME M.2 SSDs.
- Connettori del pannello frontale: Pins for power switch, reset switch, HDD LED, and power LED.
- USB2.0 Headers: For front panel USB ports.
- 24-Pin ATX Power Connector: Ingresso di alimentazione principale dall'alimentatore.
- 4-Pin CPU Power Connector: Potenza aggiuntiva per la CPU.
- Porte I/O posteriori: USB, VGA, HDMI, LAN, Audio ports.
4.2. Fasi di installazione
- Preparare il caso: Ensure your computer case is ready for motherboard installation. Install standoffs if necessary.
- Installare lo scudo I/O: Snap the metal I/O plate into the corresponding opening in your computer case.
- Installare la CPU:
- Aprire la leva del socket della CPU e rimuovere il coperchio protettivo.
- Carefully align your LGA 1155 CPU with the socket, ensuring the notches on the CPU match the keys on the socket.
- Inserire delicatamente la CPU nel socket. Non forzarla.
- Chiudere la leva del socket per fissare la CPU.
- Installare il dissipatore della CPU: Apply thermal paste (if not pre-applied) and install your CPU cooler according to its manufacturer's instructions. Connect the CPU fan cable to the "CPU FAN" header on the motherboard.
- Memoria di installazione (RAM):
- Aprire le clip su entrambe le estremità degli slot di memoria DDR3.
- Allineare la tacca sul modulo di memoria DDR3 con la chiave nello slot.
- Premere con decisione su entrambe le estremità del modulo di memoria finché le clip non scattano in posizione.
- Montare la scheda madre: Posizionare con attenzione la scheda madre nel case, allineando i fori delle viti con i distanziali. Fissare la scheda madre con le viti.
- Collegare i cavi di alimentazione:
- Collegare il cavo di alimentazione ATX a 24 pin dall'alimentatore al connettore di alimentazione principale sulla scheda madre.
- Connect the 4-pin CPU power cable to the CPU power connector.
- Installa dispositivi di archiviazione: Connect your SATA HDDs/SSDs to the SATA2.0 ports using the provided SATA cable. If using an NVME M.2 SSD, install it into the M.2 slot and secure it with the screw.
- Installa la scheda grafica (facoltativo): If using a dedicated graphics card, insert it into the PCIe 16X slot and secure it. Connect any necessary PCIe power cables from your power supply.
- Collegare i cavi del pannello frontale: Connect the power switch, reset switch, HDD LED, and power LED cables from your case to the corresponding pins on the motherboard's front panel header. Refer to the motherboard diagram (Figure 3) for pin assignments.
- Connect USB and Audio Cables: Connect front panel USB and audio cables to their respective headers on the motherboard.

Figure 4: PCIe 16X Slot for Expansion Cards
5. Istruzioni per l'uso
Una volta installati e collegati tutti i componenti, è possibile accendere il sistema.
5.1. Accensione iniziale
- Collegare il monitor, la tastiera e il mouse alle porte appropriate sul pannello I/O posteriore.
- Plug in the power cable to your power supply and turn on the power supply switch.
- Premere il pulsante di accensione sul case del computer.
- The system should boot up, and you should see output on your monitor.
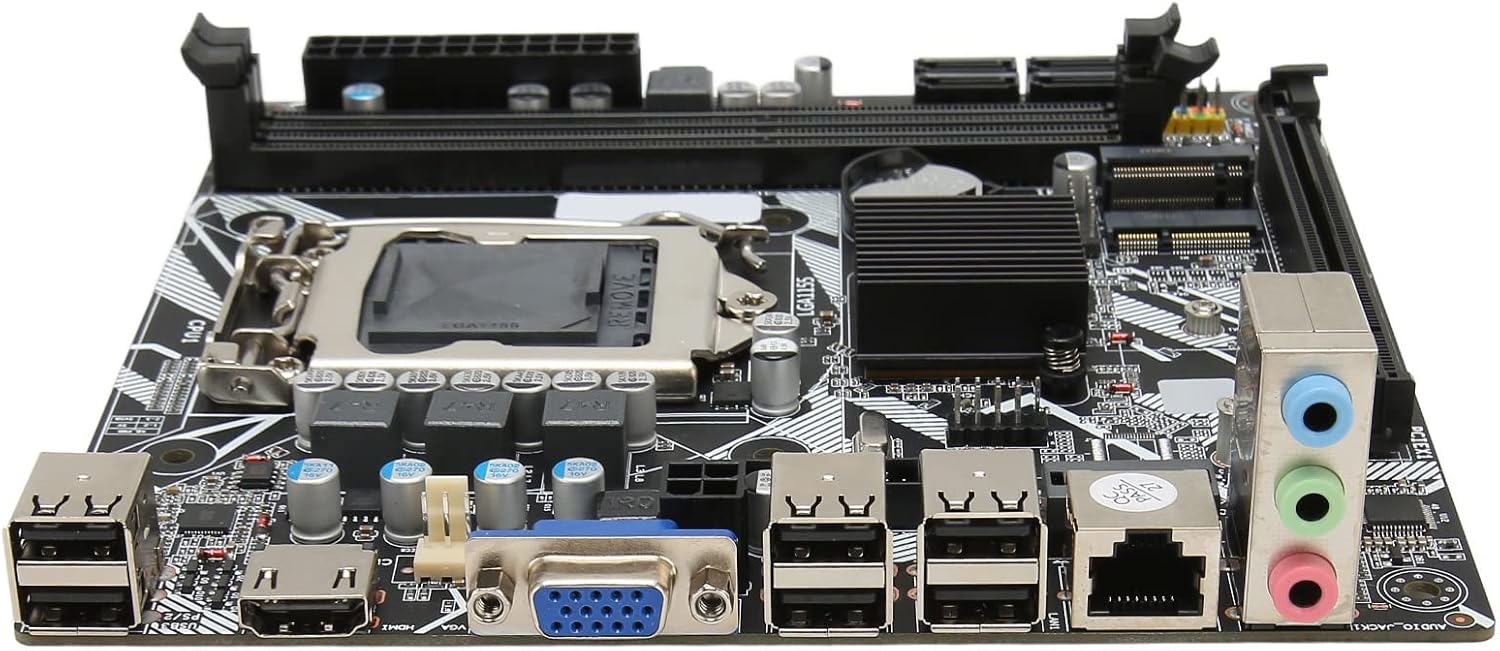
Figura 5: Porte I/O posteriori
5.2. Configurazione BIOS/UEFI
Per accedere all'utilità di configurazione BIOS/UEFI, premere il tasto designato (solitamente DEL or F2) repeatedly during the initial boot sequence. From the BIOS, you can configure system settings, boot order, and monitor hardware status.
5.3. Installazione del sistema operativo
Once the system is stable, you can proceed with installing your preferred operating system (e.g., Windows, Linux) from a bootable USB drive or DVD.
6. Manutenzione
Proper maintenance can extend the lifespan of your motherboard and ensure optimal performance.
- Rimozione della polvere: Pulisci regolarmente l'interno del case del computer dalla polvere, in particolare da ventole e dissipatori, utilizzando aria compressa. Assicurati che il sistema sia spento e scollegato prima di pulire.
- Gestione dei cavi: Assicurarsi che i cavi siano disposti in modo ordinato per migliorare il flusso d'aria ed evitare interferenze.
- Aggiornamenti del BIOS: Controllare periodicamente le istruzioni del produttore websito per gli aggiornamenti del BIOS. Aggiornare il BIOS solo se necessario e seguire attentamente le istruzioni per evitare l'instabilità del sistema.
- Condizioni ambientali: Operate the motherboard in a well-ventilated area, away from direct sunlight, excessive heat, and moisture.
7. Risoluzione Dei Problemi
Questa sezione affronta i problemi più comuni che potresti incontrare.
- Nessun potere:
- Check if the power supply is plugged in and switched on.
- Verify that the 24-pin and 4-pin power cables are securely connected to the motherboard.
- Assicurarsi che il cavo dell'interruttore di alimentazione del pannello frontale sia collegato correttamente al connettore della scheda madre.
- Nessuna visualizzazione:
- Confirm that the monitor is connected to the correct video output (VGA or HDMI) on the motherboard or graphics card.
- Reinstallare i moduli RAM. Provare ad avviare il computer con un solo modulo RAM installato.
- Reinstallare la scheda grafica (se applicabile).
- Ensure the CPU is properly seated and the CPU cooler is installed correctly.
- Instabilità/arresti anomali del sistema:
- Check for overheating. Ensure CPU cooler and case fans are functioning.
- Verificare la presenza di errori nei moduli di memoria utilizzando strumenti diagnostici.
- Assicurarsi che tutti i driver (chipset, scheda grafica, ecc.) siano aggiornati.
- Periferica non rilevata:
- Prova a collegare la periferica a una porta USB diversa.
- Ensure necessary drivers are installed for the peripheral.
- Check BIOS settings to ensure USB ports are enabled.
8. Specifiche
| Caratteristica | Descrizione |
|---|---|
| Modello di scheda madre | H6 ME |
| Tipo di scheda madre | ITX |
| Tipo di slot CPU | LGA1155 |
| Slot di memoria | DDR3 x 2 |
| Capacità massima di memoria | Fino a 16 GB |
| Porte SATA | SATA2.0 x 4 |
| Slot per scheda grafica | PCIe 16X |
| Interfacce USB | USB2.0 x 10 (4 Front, 6 Rear) |
| Interfacce di espansione | VGA x 1, HD Multimedia Interface (HDMI) x 1, M.2, NVME M.2, DEBUG Pin x 1 |
| Sound Audio Card | Realtek ALC662 Sound Chip |
| Scheda di rete | 100M Network Card |
| Batteria incorporata | 240mAh CR2032 x 1 |
| Peso dell'articolo | 1.13 libbre |
| Dimensioni del pacco | 8.27 x 7.87 x 1.97 pollici |
| Numero di modello | CUIFATI6wgctin4bz |
9. Garanzia e supporto
For warranty information or technical support, please refer to the retailer where the product was purchased or visit the official Cuifati websito. Conservare la prova d'acquisto per eventuali reclami in garanzia.
Produttore: CUIFATI
Data prima disponibilità: 19 dicembre 2023
For additional assistance, you may contact Cuifati customer service through their official channels.