
1. Introduzione
Thank you for choosing the AXI Lucas Container Enclosure. This manual provides essential information for the safe assembly, operation, and maintenance of your new outdoor storage solution. This enclosure is designed to discreetly store up to three standard waste containers, each with a maximum capacity of 240 liters, offering a tidy and aesthetically pleasing solution for your outdoor space.
Please read these instructions carefully before beginning assembly and retain them for future reference.

Image 1: The AXI Lucas Container Enclosure for three waste bins, shown in an outdoor garden environment.
2. Informazioni sulla sicurezza
- Always follow all assembly instructions carefully. Incorrect assembly can lead to instability and potential injury.
- Assicurarsi che tutti i dispositivi di fissaggio siano ben serrati durante il montaggio. Controllare periodicamente e serrare nuovamente se necessario.
- Per evitare incidenti, tenere bambini e animali domestici lontani dall'area di montaggio.
- Use appropriate personal protective equipment (e.g., gloves) during assembly to avoid cuts or pinches.
- Do not overload the enclosure or place excessively heavy items on the lids.
- Be aware of pinch points when opening and closing the lids and doors, especially with the gas springs.
- Posizionare il contenitore su una superficie piana e stabile per evitare che si ribalti.
3. Contenuto della confezione
Before starting assembly, verify that all parts are present and undamaged. If any parts are missing or damaged, do not proceed with assembly and contact customer support.
I componenti previsti includono:
- Frame components (metal profiles)
- Side panels, back panel, and front door panels (anthracite/wood-look)
- Top lids with integrated handles
- Gas springs and shock absorbers
- Door locks with keys
- Chiusure magnetiche
- Connecting chains for waste bin lids
- Assembly hardware (screws, bolts, nuts, washers, pins)
4. Installazione e assemblaggio
Assembly typically requires two people. Ensure you have adequate space and the necessary tools (e.g., screwdriver, wrench) before beginning.
4.1 Disimballaggio e identificazione delle parti
- Disimballare con cura tutti i componenti dall'imballaggio.
- Lay out all parts and compare them against the package contents list to ensure everything is present.
- Identify the different frame sections, panels, and hardware.
4.2 Assemblaggio del telaio
- Begin by assembling the base frame using the provided bolts and nuts. Do not fully tighten all fasteners until the entire frame is assembled.
- Attach the vertical frame posts to the base.
- Connect the top frame sections to the vertical posts. Ensure the frame is square and stable before tightening all connections.
4.3 Installazione del pannello
- Slide or attach the side and back panels into the designated grooves or mounting points on the frame.
- Install the front door panels. Ensure they swing freely and align correctly.
- Attach the door locks and magnetic latches as per the detailed diagrams in the manufacturer's specific assembly guide (not provided here).

Image 2: Detail of an assembly pin or stopper, used to secure components during construction.
4.4 Lid and Gas Spring Attachment
- Attach the top lids to the frame using the provided hinges.
- Install the gas springs according to the instructions. These assist in smooth opening and closing of the lids.
- Connect the small chains from the enclosure lid to the lid of your waste bins. This allows the bin lid to open automatically when the enclosure lid is lifted.
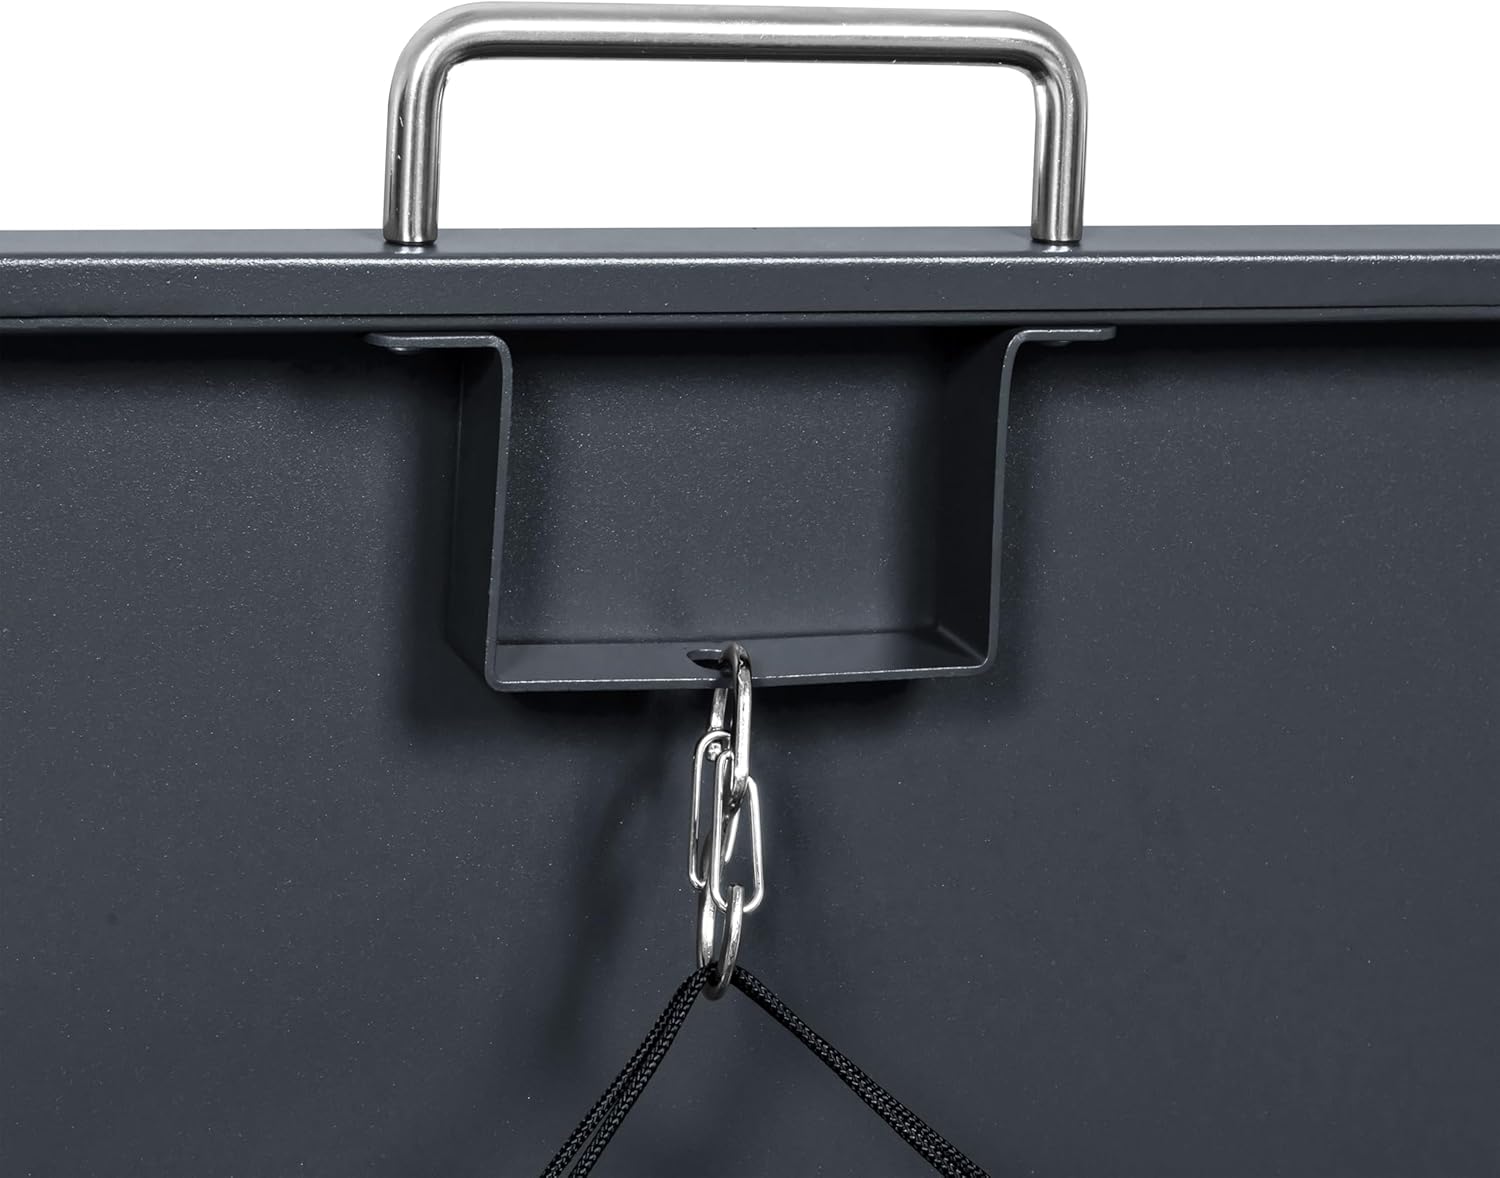
Image 3: The chain mechanism, designed to link the enclosure lid with the waste bin lid for synchronized opening.
4.5 Verifiche finali
- Ensure all screws, bolts, and fasteners are fully tightened.
- Check that all doors and lids open and close smoothly without obstruction.
- Verify the enclosure is stable and level on its intended surface.
5. Istruzioni per l'uso
5.1 Placing Waste Containers
- Unlock the front door(s) using the provided key.
- Open the door(s) fully.
- Roll your waste container(s) into the enclosure. Ensure they are positioned centrally.
- Close and lock the door(s). The magnetic latch will help keep the door closed even before locking.

Image 4: Detail of the door lock, showing the key insertion point for securing the enclosure.

Image 5: The magnetic latch mechanism, providing additional security and keeping the door closed when unlocked.
5.2 Disposing of Waste
- Lift the top lid of the enclosure. The gas springs will assist in opening and holding it open.
- If the chain is connected, the waste bin lid inside will also open.
- Dispose of your waste into the container.
- Gently lower the enclosure lid until it closes securely.
5.3 Removing Waste Containers
- Unlock and open the front door(s).
- Roll the waste container(s) out for collection.
- After collection, roll the container(s) back into the enclosure.
- Close and lock the door(s).
6. Manutenzione
- Pulizia: Clean the enclosure regularly with a soft cloth and mild soap and water. Avoid abrasive cleaners or harsh chemicals that could damage the powder coating or wood-look finish. Rinse thoroughly and dry.
- Controllo hardware: Periodically inspect all screws, bolts, and hinges for tightness. Re-tighten any loose fasteners to ensure structural integrity.
- Molle a gas: Check the gas springs for smooth operation. If they become stiff or fail to hold the lid open, they may need replacement.
- Locks and Latches: Ensure the locks and magnetic latches function correctly. Lubricate locks with a suitable graphite lubricant if they become stiff.
- Drenaggio: Ensure the area around the enclosure allows for proper water drainage to prevent standing water.
7. Risoluzione Dei Problemi
- Lids do not open smoothly or stay open: Check the gas springs for proper installation and function. Ensure no obstructions are preventing full movement.
- Le porte non si chiudono correttamente: Verify that the enclosure is on a level surface. Check hinges for damage or misalignment. Ensure the magnetic latch and lock mechanism are aligned and free of debris.
- Il contenitore sembra instabile: Re-check all frame connections and ensure all fasteners are securely tightened. Confirm the enclosure is placed on a firm, level surface.
- Waste bin lid not opening with enclosure lid: Ensure the connecting chain is properly attached to both the enclosure lid and the waste bin lid. Check for tangles or obstructions.
8. Specifiche
| Caratteristica | Dettaglio |
|---|---|
| Numero di modello | A093.003.00 |
| Marca | ASSE |
| Dimensioni del prodotto (L x P x A) | 200 cm x 80 cm x 116 cm (78.7 x 31.5 x 45.7 pollici) |
| Peso dell'articolo | 79 kg (174.17 libbre) |
| Capacità | 3 waste containers, up to 240 liters each |
| Materiale | Galvanized Steel (frame and top), Metal (top material), Wood-look (front panels) |
| Colore | Anthracite / Wood-look (Grey) |
| Livello di resistenza all'acqua | Resistente all'acqua |
| Protezione dai raggi UV | VERO |
| Assemblaggio richiesto | SÌ |
| Stile della porta | Single hinged door (per compartment) |
| Caratteristiche | Gas springs, shock absorbers, lock with 2 keys, magnetic latch, ventilation, back panel |

Image 6: Technical drawing illustrating the overall dimensions of the 3-container enclosure.
9. Garanzia e supporto
For warranty information, please refer to the terms and conditions provided at the point of purchase or visit the official AXI websito. Conservare la prova d'acquisto per eventuali reclami in garanzia.
If you require further assistance, have questions about assembly, or need to report a missing/damaged part, please contact AXI customer support. You can often find support contact details on the manufacturer's websito o tramite il rivenditore presso cui hai acquistato il prodotto.
You can also visit the AXI Store for more product information: Negozio AXI su Amazon