
1. Introduzione
This manual provides essential information for the safe and efficient use of your Philips 32E1N3100LA monitor. Please read these instructions carefully before operating the device and retain them for future reference.
The Philips 32E1N3100LA is a 32-inch Full HD (1920x1080) monitor featuring a VA panel, 75Hz refresh rate, and 1ms MPRT response time, designed for a clear and smooth visual experience. It includes built-in speakers and supports Adaptive Sync technology.

Davanti view of the Philips 32E1N3100LA monitor.
2. Informazioni sulla sicurezza
Always follow these basic safety precautions when using your monitor:
- Non esporre il monitor alla pioggia o all'umidità.
- Non aprire il monitor casing. All'interno non ci sono parti riparabili dall'utente.
- Garantire una ventilazione adeguata attorno al monitor.
- Utilizzare solo l'adattatore di alimentazione fornito con il monitor.
- Tenere il monitor lontano dalla luce solare diretta e da fonti di calore.
- Refer to the official "Safety Information (PDF)" document for comprehensive safety guidelines.
For detailed safety instructions, please consult the official safety document: Informazioni sulla sicurezza (PDF)
3. Impostazione
3.1 Disimballaggio
Rimuovere con attenzione tutti i componenti dall'imballaggio. Assicurarsi che tutti gli articoli elencati nella lista di imballaggio siano presenti e integri.
3.2 Montaggio del supporto
- Posizionare il monitor a faccia in giù su una superficie morbida e pulita per evitare graffi.
- Fissare il collo del supporto al monitor utilizzando le viti fornite.
- Secure the base to the stand neck.

Posteriore view del monitor con il supporto.
3.3 Cavi di collegamento
Collegare i cavi necessari alle porte posteriori del monitor:
- Cavo di alimentazione: Collegare il cavo di alimentazione all'ingresso di alimentazione del monitor e quindi a una presa elettrica dotata di messa a terra.
- Cavo video: Connect an HDMI cable from your computer's video output to the monitor's HDMI input. Alternatively, use a D-Sub (VGA) cable if your system supports it.

Rear ports of the monitor for power and video connections.
3.4 Gestione dei cavi
Utilize the integrated cable management feature on the stand to keep your workspace tidy.
Cable management feature on the monitor stand.
4. Funzionamento del monitor
4.1 Accensione/spegnimento
Press the power button, usually located on the back or bottom edge of the monitor, to turn it on or off. The power LED will indicate the monitor's status.
4.2 Menu di visualizzazione su schermo (OSD)
The monitor features a micro joystick control, typically located on the rear right side, for navigating the OSD menu. This allows you to adjust various settings.
4.2.1 Impostazioni immagine
- Luminosità/Contrasto: Adjust these settings to optimize image visibility.
- Temperatura del colore: Select predefined color modes or customize RGB levels.
- Modalità LowBlue: Reduces harmful blue light emissions for eye comfort during prolonged use.
- Tecnologia senza sfarfallio: Minimizes screen flickering to reduce eye strain.

LowBlue Mode and Flicker-free technology for eye comfort.
4.2.2 Impostazioni audio
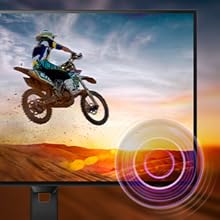
Adjust the volume of the built-in speakers through the OSD menu. An audio output jack is also available for connecting external headphones or speakers.

Monitor with built-in speakers.
4.3 Adaptive Sync (FreeSync)
This monitor supports Adaptive Sync technology, which synchronizes the display's refresh rate with your graphics card's frame rate. This helps eliminate screen tearing and stuttering for smoother gameplay and video playback. Ensure your graphics card supports FreeSync and that the feature is enabled in your graphics card settings and the monitor's OSD.

Adaptive Sync technology for smooth visuals.
5. Manutenzione
5.1 Pulizia dello schermo
Pulire delicatamente lo schermo con un panno morbido e privo di lanugine. Per i segni ostinati, strofinare leggermenteampen the cloth with a screen cleaner specifically designed for monitors. Do not spray cleaner directly onto the screen.
5.2 Pulizia del Casing
Utilizzare un panno morbido e asciutto per pulire il monitor casing. Evitare l'uso di detergenti abrasivi o solventi.
5.3 Cura generale
- Evitare di posizionare oggetti pesanti sul monitor o sui suoi cavi.
- Non ostruire le aperture di ventilazione.
- Scollegare il monitor dalla presa di corrente durante i temporali o quando non viene utilizzato per lunghi periodi.
6. Risoluzione Dei Problemi
Se riscontri problemi con il monitor, fai riferimento ai seguenti problemi comuni e alle relative soluzioni:
| Problema | Possibile soluzione |
|---|---|
| Nessun potere | Ensure the power cable is securely connected to the monitor and a working electrical outlet. Check the power adapter. |
| Nessuna immagine sullo schermo | Verify the video cable (HDMI/D-Sub) is correctly connected to both the monitor and your computer. Ensure the correct input source is selected in the OSD menu. |
| L'immagine è sfocata o distorta | Adjust the resolution settings on your computer to match the monitor's native resolution (1920x1080). Check video cable quality and connection. |
| Nessun suono dagli altoparlanti | Check the volume settings in the OSD menu and on your computer. Ensure the audio source is correctly configured. |
| Sincronizzazione adattiva non funzionante | Confirm your graphics card supports FreeSync and that it is enabled in both your graphics card control panel and the monitor's OSD settings. |
7. Specifiche
| Caratteristica | Dettaglio |
|---|---|
| Numero di modello | 32E1N3100LA/00 |
| Dimensioni dello schermo | 32 pollici |
| Tipo di pannello | Pannello VA |
| Risoluzione | Risoluzione Full HD 1080p (1920 x 1080) |
| Proporzioni | 16:9 |
| Frequenza di aggiornamento | Frequenza 75 Hz |
| Tempo di risposta | 1 millisecondo (MPRT) |
| Rapporto di contrasto | 3000:1 |
| Luminosità | 300 cd/m² |
| Connettività | 1x HDMI 1.4, 1x D-Sub (VGA) |
| Audio | Built-in Speakers, Audio Out |
| Sincronizzazione adattiva | Sincronizzazione gratuita |
| Consumo energetico | 30.5 Watt |
| Dimensioni (PxWxH) | 25P x 72l x 52H cm |
| Peso | 7 chilogrammi |
| Supporto VESA | Yes (Wall Mount Type) |
8. Garanzia e supporto
8.1 Informazioni sulla garanzia
This Philips monitor comes with a limited warranty. For specific terms, conditions, and duration of your warranty, please refer to the documentation included with your product or visit the official Philips support websito.
8.2 Assistenza clienti
For technical assistance, troubleshooting beyond this manual, or warranty claims, please contact Philips customer support. You can find contact information and additional resources on the official Philips websito.
Additional detailed instructions are available in the official user manual: Istruzioni per l'uso (PDF)