
1. Prodotto finitoview
The LIORQUE Digital Kitchen Timer Model YGH5249 is a multi-functional device designed to assist with various timing needs. It features a large LCD display, adjustable alarm volume, and multiple placement options. This timer can function as a countdown timer, a count-up stopwatch, and a digital clock.

Immagine 1.1: anteriore view of the LIORQUE Digital Kitchen Timer, highlighting its large LCD screen and control buttons.
Caratteristiche principali:
- Funzionalità 3 in 1: Timer, Stopwatch, and Clock modes.
- Ampio display LCD: Ensures clear readability of time.
- Volume di allarme regolabile: Three levels (Mute, Low, High) to suit different environments.
- Modalità personalizzata: Save frequently used countdown times for quick access.
- Posizionamento versatile: Magnetic back, foldable stand, and lanyard hole for flexible use.
- Delay Reminder: Automatically starts counting up after countdown finishes.
- Auto-Restore: Remembers the last set countdown time.

Image 1.2: Visual representation of the timer's main features and functions.
2. Configurazione e installazione della batteria
The timer requires 2 AAA batteries (included) for operation. Follow these steps to install them:
- Individuare il coperchio del vano batterie sul retro del timer.
- Far scorrere il coperchio per aprirlo.
- Inserire due batterie AAA, assicurandosi che la polarità sia corretta (+ e -) come indicato all'interno del vano.
- Chiudere saldamente il coperchio del vano batterie.
The timer will power on automatically once batteries are installed.
3. Istruzioni per l'uso
3.1 Switching Modes (Timer/Stopwatch/Clock)
The LIORQUE timer offers three modes: Timer (countdown), Stopwatch (count-up), and Clock. To switch between Timer mode and Clock mode, press and hold the ST/SP button for 2 seconds. The timer will display the current time in Clock mode or the timer interface in Timer mode.

Image 3.1: Switching between Counting Mode and Clock Mode.
3.2 Impostazione del timer per il conto alla rovescia
- Ensure the timer is in Timer mode (displaying H:M:S).
- Utilizzare il 1H, 5M, 1M, E 5S buttons to set the desired countdown time. Each press adds the corresponding time increment.
- Premere il tasto ST/SP pulsante per avviare il conto alla rovescia.
- Per mettere in pausa il conto alla rovescia, premere ST/SP di nuovo. Premerlo ancora una volta per riprendere.
- Per azzerare il timer, premere il tasto RESET pulsante.
- When the countdown reaches zero, the alarm will sound for 1 minute.
3.3 Using Stopwatch (Count-Up)
- Ensure the timer is in Timer mode and reset to 00:00:00.
- Premere il tasto ST/SP pulsante per iniziare il conteggio.
- Per mettere in pausa il cronometro, premere ST/SP di nuovo. Premerlo ancora una volta per riprendere.
- Per azzerare il cronometro, premere il tasto RESET pulsante.

Image 3.2: Illustration of Count-up and Countdown modes.
3.4 Shortcut Setting
The timer allows for quick setting of common intervals:
- Premere 1H per 1 ore.
- Premere 5M per 5 minuti.
- Premere 1M per 1 minuto.
- Premere 5S per 5 secondi.

Immagine 3.3: Es.amples of using shortcut buttons for quick time setting.
3.5 Modalità personalizzata
The Custom Mode allows you to save a frequently used countdown time for instant recall.
- In Timer mode, set your desired countdown time using the 1H, 5M, 1M, E 5S pulsanti.
- Premere e tenere premuto il tasto COSTUME button for 2 seconds. The timer will remember this setting.
- Each subsequent short press of the COSTUME button will automatically load the saved time.

Image 3.4: Setting and recalling a custom timer value.
3.6 Regolazione del volume della sveglia
The timer features a 3-level alarm volume adjustment (Mute, Low, High). A switch on the side of the timer allows you to select the desired volume level.

Image 3.5: Volume adjustment switch and its three settings.
3.7 Opzioni di posizionamento
Il timer LIORQUE offre opzioni di posizionamento flessibili:
- Magnetico: Attach the timer to metal surfaces like refrigerators using its strong magnetic back.
- In piedi: Use the integrated foldable stand to place the timer on any flat surface, such as a countertop or desk.
- Foro per cordino: Hang the timer using a rope through the designated lanyard hole.
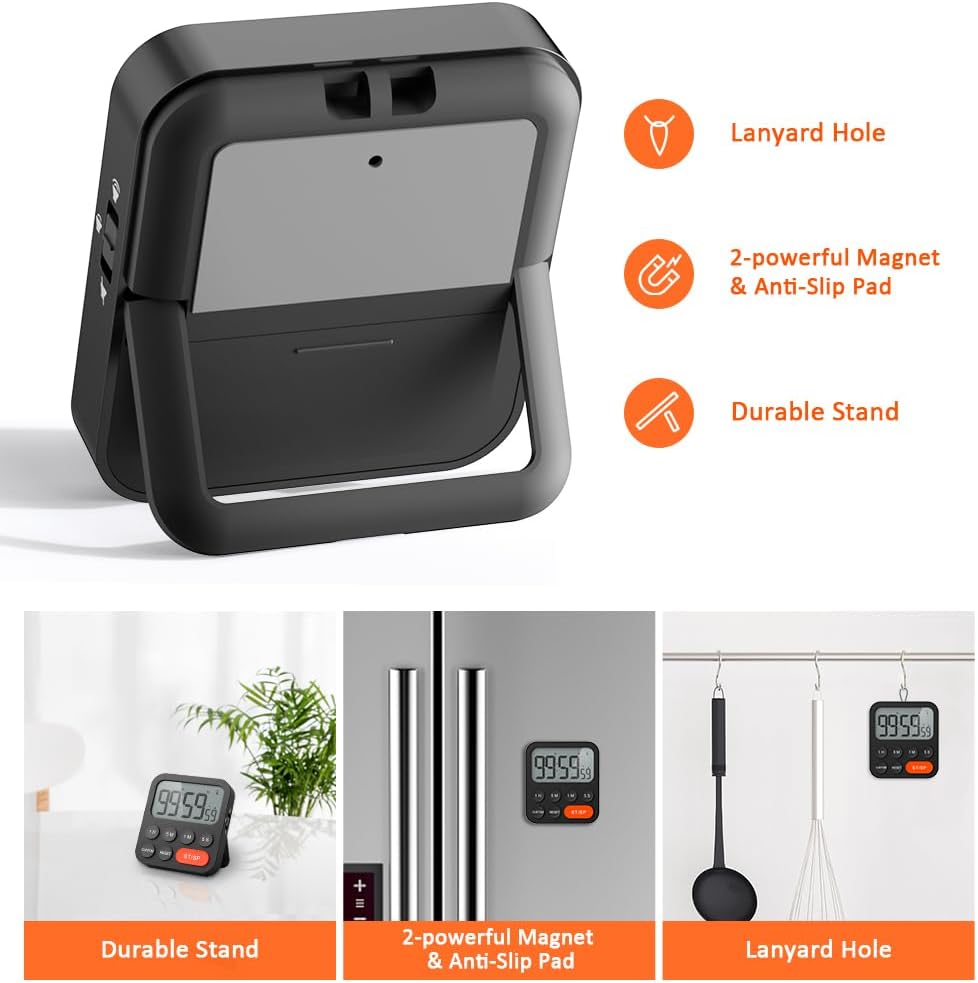
Image 3.6: Various ways to place and use the timer.
3.8 funzioni aggiuntive
- Delay Reminder: After a countdown finishes, the timer will automatically start counting up, indicating the elapsed time since the alarm.
- Auto-Restore: Once a countdown is complete and the alarm has sounded, pressing the ST/SP button will restore the timer to the last set countdown time, making it convenient for repetitive tasks.

Image 3.7: Explanation of Delay Reminder and Auto-restore features.
4. Manutenzione
- Pulire il timer con un panno morbido e asciutto. Non utilizzare detergenti abrasivi né immergerlo in acqua.
- Sostituire le batterie quando il display diventa scuro o il timer funziona in modo irregolare.
- Quando non si utilizza il timer per lunghi periodi, conservarlo in un luogo fresco e asciutto.
5. Risoluzione Dei Problemi
- Il timer non risponde: Controllare che le batterie siano installate correttamente e abbiano una carica sufficiente. Sostituirle se necessario.
- Allarme troppo basso/alto: Adjust the volume switch on the side of the timer to your preferred level.
- Il display è vuoto: Ensure batteries are installed and functional. If the issue persists, contact customer support.
6. Specifiche
| Caratteristica | Dettaglio |
|---|---|
| Marca | LIORCO |
| Numero di modello | YGH5249 |
| Colore | Nero |
| Dimensioni del prodotto | 0.94"P x 0.94"A |
| Peso dell'articolo | 4.2 once |
| Fonte di alimentazione | 2 batterie AAA (incluse) |
| Numero di impostazioni | 3 (Volume) |
| Dimensioni dello schermo | 1E+1 centimetri |
7. Garanzia e supporto
For warranty information or technical support, please refer to the product packaging or contact LIORQUE customer service through their official webo al rivenditore presso cui è stato acquistato il prodotto. Conservare la ricevuta d'acquisto per eventuali reclami in garanzia.