
1. Informazioni importanti sulla sicurezza
Si prega di leggere attentamente tutte le istruzioni prima di installare o utilizzare questo apparecchio. La mancata osservanza di queste istruzioni può causare scosse elettriche, incendi o altri pericoli che potrebbero causare lesioni personali o danni alla proprietà.
- AVVERTIMENTO: Rischio di scossa elettrica. Scollegare l'alimentazione dal fusibile o dall'interruttore automatico prima dell'installazione o della manutenzione.
- AVVERTIMENTO: Risk of fire. Keep combustible materials away from the lamp.
- This fixture is intended for indoor use only. Do not use in wet locations or where directly exposed to water.
- Garantire la fornitura voltage is compatible with the fixture's requirements (120V-277V).
- All wiring connections must be made in accordance with local and national electrical codes. If you are unsure about wiring, consult a qualified electrician.
- Non tentare di modificare o smontare l'apparecchio. All'interno non sono presenti parti riparabili dall'utente.
2. Cosa c'è nella scatola
Verificare che tutti i componenti siano presenti prima di iniziare l'installazione:
- LED Shop Light Fixture(s)
- Hardware di montaggio (viti, tasselli)
- Linking Cables (1.5" and 8" for daisy-chaining)
- Dadi a filo
3. Specifiche
| Caratteristica | Specificazione |
|---|---|
| Marca | Illuminazione Sunco |
| Nome del modello | LED Shop Light, 4ft Wraparound, Prismatic Lens, 8.5 Inch |
| Dimensioni (L x P x A) | 48 cm L x 8.58 cm P x 2.56 cm A |
| Cosatage | 60 Watt |
| Luminosità | 7200 lumen |
| Efficienza | 120 LM / W |
| Temperatura del colore (CCT) | Selezionabile: 4000K, 5000K, 6000K |
| Voltage | 120V-277V |
| Dimmerabile | No (non dimmerabile) |
| Materiale | Alloy Steel, Polycarbonate |
| Tipo di montaggio | Ceiling Mount (Flush Mount) |
| Caratteristiche speciali | Linkable, Wide Beam Angle (110°) |
| Certificazioni | ETL, FCC, RoHS |
| Vita media | 50,000 ore |
The fixture features a durable build with an impact-resistant prismatic lens for wide and consistent light dispersion.

This image illustrates key features including impact resistance, the prismatic lens design, non-dimmable functionality, and the wide voltage compatibility of 120-277V.
4. Configurazione e installazione
Follow these steps for proper installation. Ensure power is disconnected before starting.
4.1. Prepararsi per l'installazione
- Spegnere l'alimentazione: Individuare l'interruttore automatico che controlla l'area di installazione e disattivare l'alimentazione.
- Rimuovere il diffusore: Gently remove the prismatic diffuser from the lamp base to access the internal components.
- Seleziona la temperatura del colore (CCT): Before mounting, locate the CCT switch inside the fixture. Select your desired color temperature (4000K, 5000K, or 6000K). This setting cannot be changed easily after installation.

This image shows the internal CCT switch, allowing selection between 4000K, 5000K, and 6000K before installation.
4.2. Montaggio dell'apparecchio
The fixture is designed for flush mounting to a ceiling or surface. It includes keyhole slots for easy installation.
- Segna punti di montaggio: Hold the fixture in the desired mounting location and mark the positions for the mounting screws. Ensure these align with a junction box or suitable support structure.
- Installare l'hardware di montaggio: Drill pilot holes if necessary and install the provided mounting screws, leaving a small gap for the fixture to slide onto.
- Preparare il cablaggio: If connecting to a junction box, knock out the appropriate punch hole on the fixture's housing.

This diagram illustrates the three main steps for installation: securing the housing, connecting electrical wires, and attaching the light fixture.
4.3. Connessione elettrica
- Collegare i fili: Using the provided wire nuts, connect the fixture's wires to the supply wires: Live (black) to Live, Neutral (white) to Neutral, and Ground (yellow/green) to Ground. Ensure all connections are secure.
- Fili di rinforzo: Carefully tuck all wires and wire nuts into the junction box or fixture housing.
4.4. Linking Multiple Fixtures (Daisy Chain)
This fixture supports daisy-chaining to extend lighting coverage. Use the provided linking cables.
- Connect Linking Cable: Insert one end of a linking cable into the designated port on the first fixture and the other end into the port on the next fixture.
- Connessioni sicure: Ensure linking cables are securely connected and properly routed.
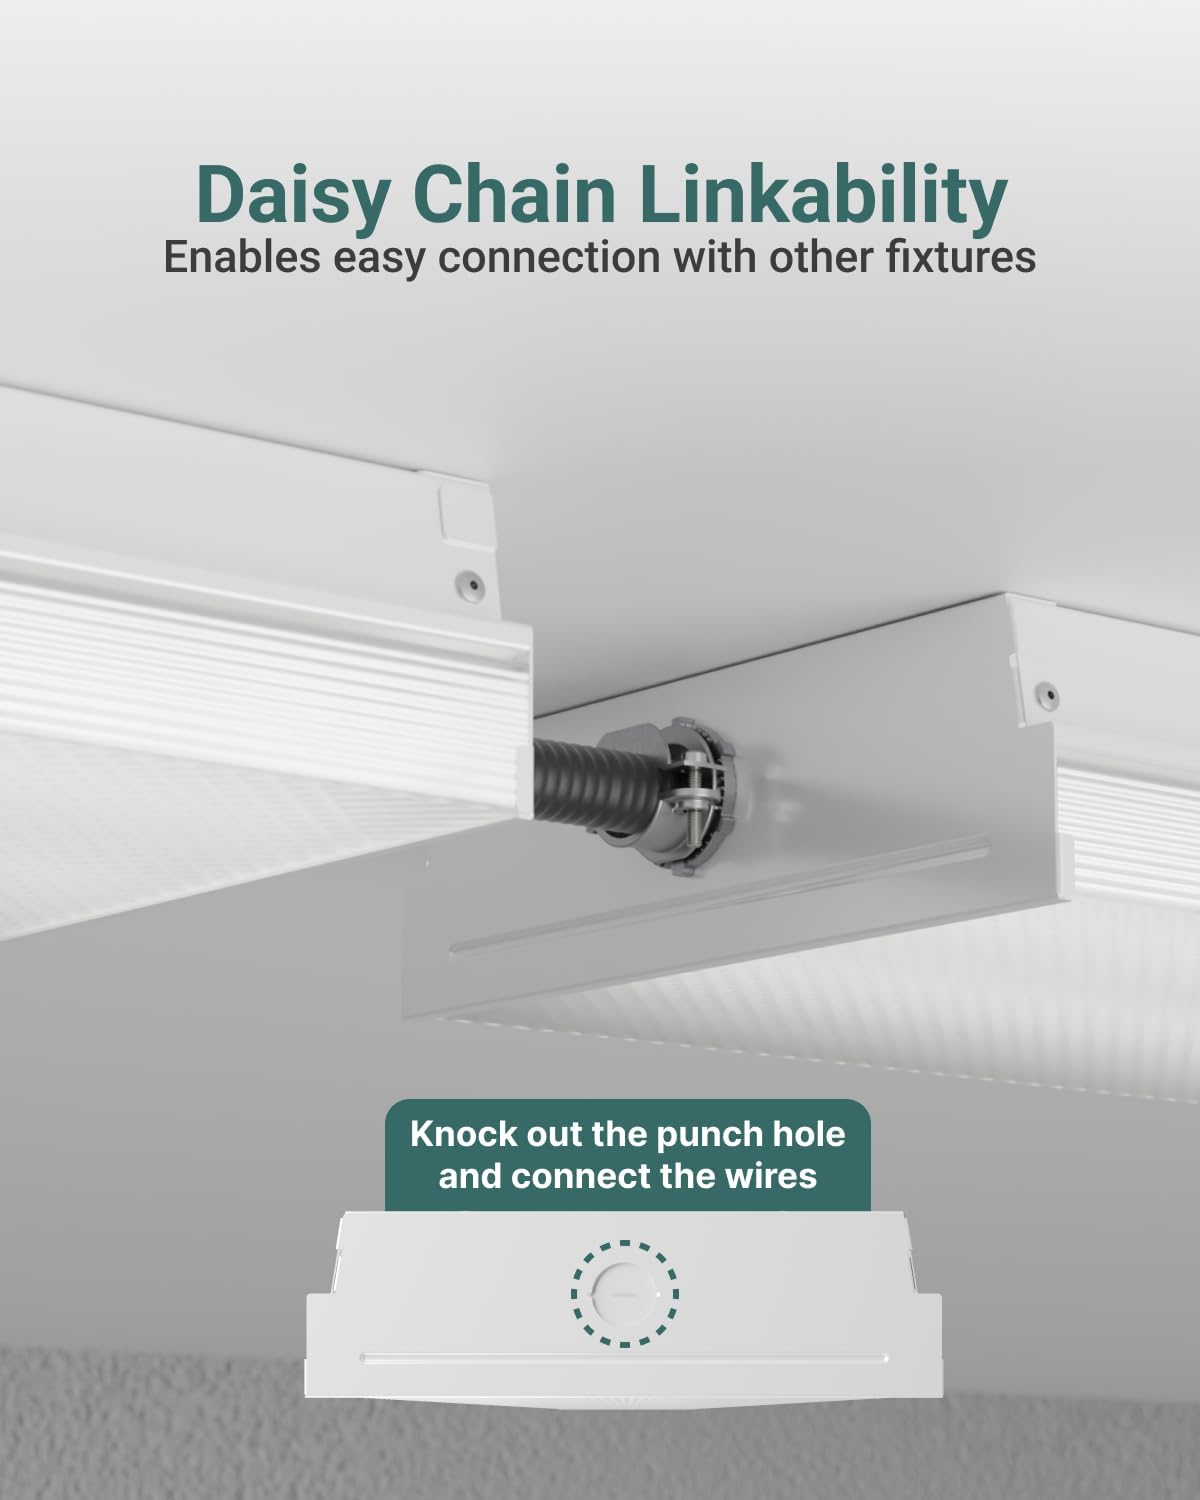
This image demonstrates how to daisy-chain multiple fixtures using the linking cables and highlights the knockout punch hole for electrical connections.
4.5. Passaggi finali
- Ricollegare il diffusore: Align one end of the diffuser with the aluminum base and push it into place until it snaps securely.
- Ripristina alimentazione: Turn the circuit breaker back on to restore power to the fixture.
5. Istruzioni per l'uso
The Sunco Lighting LED Shop Light is designed for straightforward operation once installed.
5.1. Color Temperature Selection (CCT)
This fixture features a selectable color temperature (CCT) switch, allowing you to choose between 4000K (Cool White), 5000K (Daylight), and 6000K (Bright White) to suit your preference or application. The CCT switch is located inside the fixture and must be set during installation before the diffuser is reattached.
- 4000K: Provides a neutral white light, suitable for offices or general workspaces.
- 5000K: Offers a bright, crisp daylight-like illumination, ideal for tasks requiring high visibility.
- 6000K: Delivers a very bright, cool white light, often preferred for industrial settings or areas needing maximum brightness.

This image displays the internal components and wiring, emphasizing the high efficiency of the LED fixture operating within a 120-277V range.
5.2. Accensione/spegnimento
The fixture is non-dimmable and operates via a standard wall switch connected to its power supply. Simply toggle the wall switch to turn the light on or off.
6. Manutenzione
The Sunco Lighting LED Shop Light requires minimal maintenance. Always ensure power is disconnected before performing any maintenance.
- Pulizia: Wipe the exterior of the fixture with a soft, dry, or slightly damp cloth. Do not use harsh chemicals or abrasive cleaners, as these can damage the finish or lens.
- Ispezione: Periodically inspect the fixture for any signs of damage, loose wiring, or wear. If any issues are found, disconnect power and consult a qualified electrician.
- Nessuna sostituzione della lampadina: This fixture uses integrated LEDs, meaning there are no bulbs to replace. The LEDs are designed for a long lifespan of 50,000 hours.
7. Risoluzione Dei Problemi
If you experience issues with your LED Shop Light, refer to the following common troubleshooting steps:
- La luce non si accende:
- Controllare l'interruttore per assicurarsi che l'alimentazione sia attiva.
- Verify all wire connections are secure and correct.
- Assicurarsi che l'interruttore a parete sia in posizione ON.
- La luce tremola:
- Confirm the fixture is not connected to a dimmer switch, as it is non-dimmable.
- Controllare che i collegamenti dei cavi non siano allentati.
- Garantire la fornitura voltage è stabile e rientra nell'intervallo specificato.
- Temperatura colore errata:
- The CCT switch must be set before installation. If the diffuser is already installed, carefully remove it to access and adjust the switch.
If these steps do not resolve the issue, contact Sunco Lighting customer support for assistance.
8. Garanzia e supporto
Sunco Lighting garantisce la qualità dei suoi prodotti.
- Garanzia: This product is backed by a 3-Year Warranty. Please refer to the official Sunco Lighting website or your purchase documentation for full warranty details and terms.
- Assistenza clienti: For technical assistance, troubleshooting, or warranty claims, please contact Sunco Lighting customer support.