1. Introduzione
The Y&H 140A MPPT Solar Charge Controller is an advanced device designed for efficient energy harvesting from solar panels. It utilizes Maximum Power Point Tracking (MPPT) technology to optimize power output and charging efficiency for 48V battery systems. This controller supports high PV input voltages up to 500V, making it suitable for large-scale solar power generation systems in various applications, including residential, commercial, and off-grid setups.
This manual provides essential information for the safe installation, operation, and maintenance of your solar charge controller. Please read it thoroughly before installation and use.
2. Informazioni sulla sicurezza
WARNING: Failure to follow these safety instructions may result in serious injury or death, and may damage the controller or other equipment.
- Prima di applicare l'alimentazione, assicurarsi che tutti i collegamenti siano sicuri e corretti.
- Always disconnect the solar array and battery power before installing or servicing the controller.
- Durante l'installazione, utilizzare strumenti e dispositivi di protezione individuale (DPI) adeguati.
- The controller generates high voltage. L'installazione e la manutenzione devono essere eseguite solo da personale qualificato.
- Do not disassemble or attempt to repair the controller yourself. Contact qualified service personnel.
- Assicurare una ventilazione adeguata attorno al controller per evitare il surriscaldamento.
- This controller is designed for 48V battery systems. Do not connect to other voltage sistemi.

Figure 2.1: Multiple Protection Features. The controller includes heatsink over-temperature protection, reverse connection protection, fan sensitivity, overvoltage protection, short-circuit protection, and overload protection to ensure system stability and safety.
3. Prodotto finitoview
3.1 Caratteristiche principali
- Maximum Power Point Tracking (MPPT) technology for up to 98% tracking efficiency and 99% conversion efficiency.
- Ampio volume di ingresso PVtage range: 60-500 VDC.
- Intelligente 4-stage battery charging design (Bulk, Constant, Float, Equalize) to optimize battery lifespan.
- Comprehensive protection: overcharge, over-discharge, short-circuit, PV overvoltage, sovracorrente e surriscaldamento.
- LCD display and user-friendly interface for system monitoring and configuration.
- Dual fans for efficient heat dissipation.
- Compatible with various 48V battery types: AMG, USE, FLD, LiFePO4, and user-defined batteries.
- Supporta un volume elevatotage DC (HVDC) transmission to reduce line loss and improve efficiency.
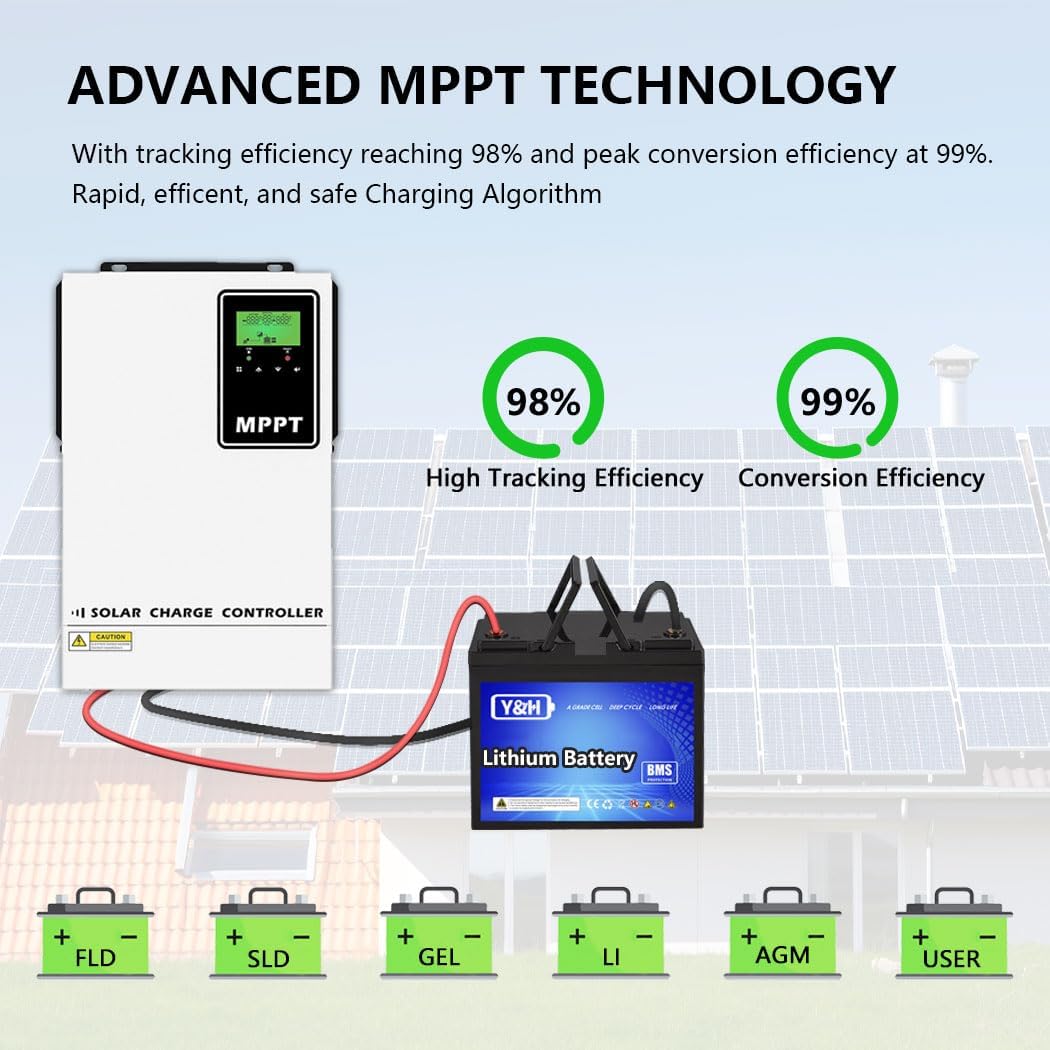
Figure 3.1: Advanced MPPT Technology. This image highlights the high tracking efficiency (98%) and conversion efficiency (99%) of the controller, along with its compatibility with various battery types like FLD, SLD, GEL, LI, AGM, and user-defined.
3.2 Identificazione dei componenti

Figure 3.2: Port Introduction. This diagram identifies the key components and ports of the controller:
- Schermo LCD
- Indicatore di guasto
- Indicatore di carica
- Pulsanti funzione
- Terminali di ingresso FV
- Collegamento a terra
- Terminali di ingresso della batteria
- Anti-dust kit (if included)
4. Configurazione e installazione
4.1 Montaggio del controller
Mount the controller vertically on a non-flammable surface in a well-ventilated area. Ensure there is sufficient clearance around the unit for proper airflow and heat dissipation. Avoid direct sunlight, high temperatures, and moisture.
4.2 Collegamenti di cablaggio
IMPORTANT: Always connect the battery first, then the solar array. Disconnect in reverse order (solar array first, then battery).
- Collegamento della batteria: Connect the battery cables to the battery input terminals (7) on the controller. Ensure correct polarity (+ to + and - to -). The recommended battery cable size for 48V/140A is 1 x 2 AWG (25mm²), with a maximum torque value of 2 Nm.
- Connessione al pannello solare: Connect the solar panel array cables to the PV input terminals (5). Ensure correct polarity. The recommended PV cable size for 48V/140A is 1 x 12 AWG (4mm²), with a maximum torque value of 1.2 Nm. The maximum open circuit voltage of the PV array should not exceed 500V. The optimal recommended operating voltage è 280V.
- Collegamento a terra: Connect the ground wire to the ground connection terminal (6).
WARNING: Using improper cable connections or sizes is critical to the safe and efficient operation of the system. Refer to the specifications for recommended cable sizes.

Figure 4.1: Easy Connections Diagram. This illustration shows the typical wiring setup for the solar charge controller, connecting solar panels, a 48V battery bank, and an inverter to power AC loads.
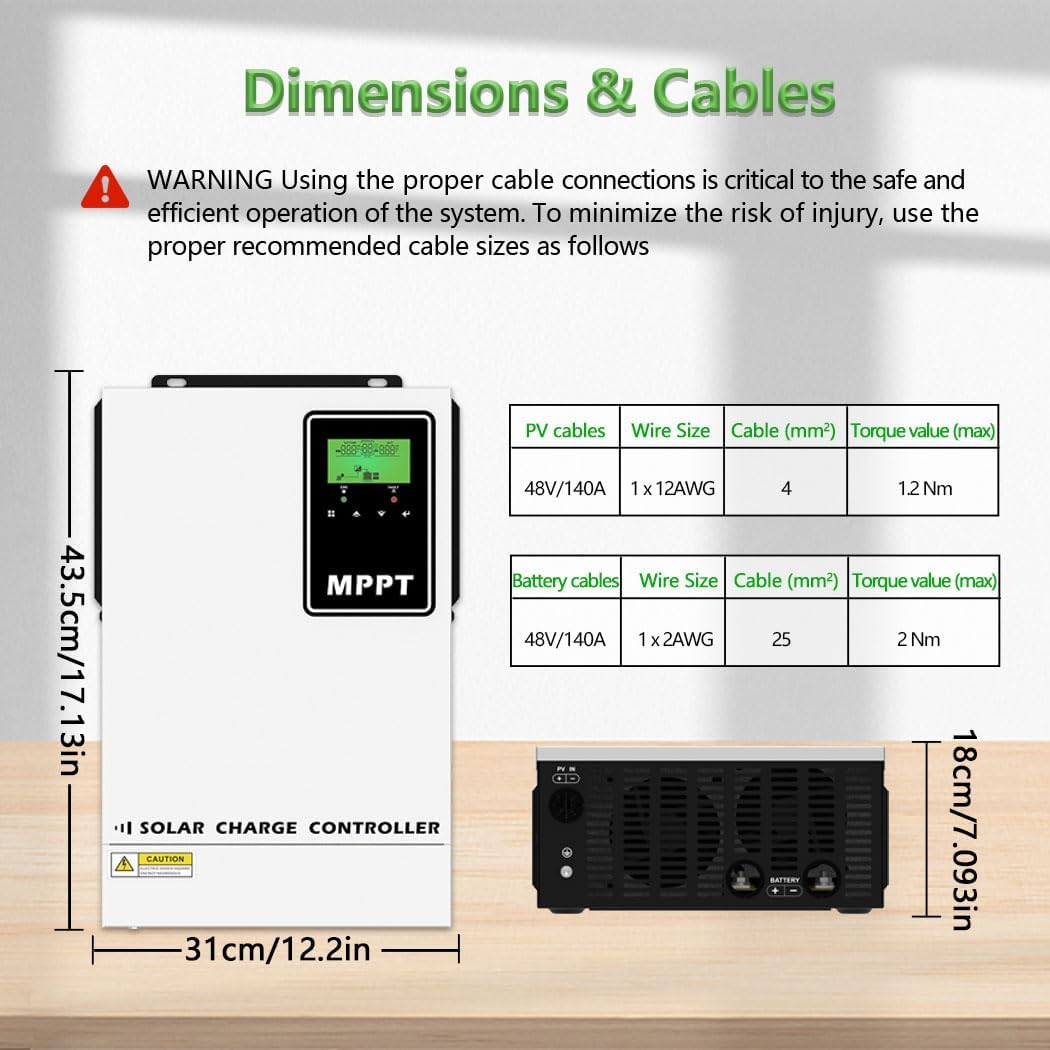
Figure 4.2: Dimensions and Cable Specifications. This image provides the physical dimensions of the controller and a table detailing recommended wire sizes and torque values for PV and battery connections.
5. Istruzioni per l'uso
5.1 LCD Display and Interface
The LCD display (1) provides real-time information about the system's performance. Use the function buttons (4) to navigate through the display menus and configure settings. The display typically shows:
- PV volumetage e corrente
- PV power output
- Volume della batteriatage e corrente di carica
- Data e ora del sistema
- Energy generation capacity
- Error codes (if any)
- Numero di versione del software
The fault indicator (2) illuminates to signal system errors, while the charging indicator (3) shows the current charging status.
5.2 Configurazione del tipo di batteria
The controller is compatible with various 48V battery types. It is crucial to select the correct battery type in the controller settings to ensure optimal charging and prolong battery life. Supported types include:
- AMG (Absorbed Glass Mat)
- USE (User-defined, likely for custom lead-acid settings)
- FLD (Piombo-acido allagato)
- LiFePO4 (fosfato di ferro e litio)
- User-defined (allows for custom charging parameters for specific battery chemistries)
Refer to your battery manufacturer's specifications for recommended charging parameters and configure the controller accordingly, especially for user-defined battery types.
5.3 MPPT Charging Mode
Il controller utilizza un 4-stage charging algorithm to efficiently and safely charge your batteries, extending their lifespan:

Figura 5.1: 4-Stage Charging Process. This graph shows the battery voltage and charging stages over time, including Bulk Charge, Constant Charging, and Float Charge, with an Equalize Boost phase to reverse sulfation and improve battery capacity.
- Bulk Charge (A): Questa è l'iniziale stage where the battery is charged at its maximum current until the voltage raggiunge un livello impostato.
- Constant Charging (B): il volumetage is held constant while the current gradually decreases.
- Float Charge (C): Una volta che la batteria è completamente carica, il voltage is reduced to a lower "float" level to maintain a full charge without overcharging.
- Equalize Boost: Periodically, or as needed, the controller may apply an equalization charge to flooded lead-acid batteries. This involves charging at a higher voltage per bilanciare il volume della cellatages and prevent sulfation, which can reduce battery capacity.
6. Manutenzione
Una manutenzione regolare garantisce la longevità e le prestazioni ottimali del tuo regolatore di carica solare:
- Ispezione visiva: Periodically check for any loose connections, damaged wiring, or signs of corrosion.
- Pulizia: Keep the controller clean and free from dust and debris. Ensure the ventilation openings are not blocked. Use a dry cloth for cleaning.
- Controllo della ventola: Ensure the cooling fans are operating correctly and are not obstructed.
- Aggiornamenti del firmware: Controllare il produttore websito per eventuali aggiornamenti firmware disponibili.
- Ispezione della batteria: Regularly inspect your batteries for signs of damage, leakage, or swelling. Ensure battery terminals are clean and tight.
7. Risoluzione Dei Problemi
If you encounter issues with your Y&H 140A MPPT Solar Charge Controller, refer to the following common troubleshooting steps:
| Problema | Possibile causa | Soluzione |
|---|---|---|
| Nessun display/Nessuna alimentazione | Collegamento della batteria allentato, volume della batteriatage too low, fuse blown. | Controllare i collegamenti della batteria e il voltage. Assicurarsi che la batteria sia caricatage is above the minimum operating threshold. Check and replace fuses if necessary. |
| Nessuna ricarica da fotovoltaico | PV array disconnected, PV voltage too low/high, shading on panels, fault indicator active. | Check PV connections and ensure correct polarity. Verify PV voltage is within the 60-500VDC operating range. Clear any shading. Check LCD for error codes. |
| Batteria non completamente carica | Incorrect battery type setting, insufficient PV power, battery degradation. | Verify battery type setting matches your battery. Ensure PV array size is adequate for your load and battery capacity. Test battery health. |
| Surriscaldamento | Poor ventilation, blocked fans, excessive ambient temperature. | Ensure adequate clearance around the controller. Clean fan vents. Relocate controller to a cooler environment if possible. |
| Codice di errore visualizzato | Guasto specifico del sistema. | Refer to the controller's internal manual or manufacturer's support for specific error code definitions and solutions. |
Per problemi persistenti o codici di errore non elencati, contattare l'assistenza clienti Y&H.
8. Specifiche
| Caratteristica | Specificazione |
|---|---|
| Numero di modello | XMC-140A-48V-UK |
| Volume di sistematage | 48 VCC |
| Vol. massimo circuito aperto FVtage (voce) | 500 Volt |
| Vol. avvio fotovoltaicotage | 90 Volt |
| Recommended Optimal PV Operating Voltage | 280 Volt |
| Potenza massima del generatore FV | 6500 L |
| Corrente di carica | 140 A |
| PV Cable Size (Recommended) | 1 x 12 AWG (4mm²) |
| Battery Cable Size (Recommended) | 1 x 2 AWG (25mm²) |
| Dimensioni (L x P x A) | 43 x 31 x 18 cm (17.13 x 12.2 x 7.093 pollici) |
| Peso | 6.4 kg |
| Tipo di visualizzazione | LCD |
| Tipi di batterie compatibili | AMG, USE, FLD, LiFePO4, User-defined |
9. Garanzia e supporto
For warranty information, please refer to the documentation included with your purchase or visit the official Y&H website. If you require technical assistance, troubleshooting support, or have questions regarding your Y&H 140A MPPT Solar Charge Controller, please contact Y&H customer service through their official channels.
Please have your model number (XMC-140A-48V-UK) and purchase details ready when contacting support.