
1. Informazioni importanti sulla sicurezza
Please read this manual carefully before installing and using your Amica KMI 776 660 C induction hob. Keep these instructions for future reference. Incorrect installation or use can cause injury or damage.
- Sicurezza elettrica: Ensure the hob is connected to a properly grounded electrical supply by a qualified electrician. The voltage and frequency must match the specifications.
- Superfici calde: La superficie del piano cottura diventerà calda durante e dopo l'uso. Non toccare le superfici calde. Utilizzare guanti da forno o presine.
- Sicurezza dei bambini: This appliance is not intended for use by persons (including children) with reduced physical, sensory or mental capabilities, or lack of experience and knowledge, unless they have been given supervision or instruction concerning use of the appliance by a person responsible for their safety. Supervise children to ensure they do not play with the appliance. Activate the Child Lock feature when not in use.
- Ventilazione: Ensure adequate ventilation around the appliance as described in the installation section.
- Uso corretto: Use the hob only for cooking food. Do not place metallic objects such as knives, forks, spoons, and lids on the hob surface as they can get hot.
2. Prodotto finitoview
The Amica KMI 776 660 C is an autonomous 60 cm induction hob designed for efficient and flexible cooking. Key features include:
- PowerBooster: Increases heating power for rapid boiling or searing.
- AutoBridge: Combines two cooking zones into one large zone for oversized cookware.
- DirectTouch Slider Control: Intuitive touch controls for precise power level adjustments.
- Stop'n'Go Function: Mette in pausa la cottura e riprende con le impostazioni precedenti.
- Blocco bambini: Impedisce l'azionamento accidentale.
- Timer & Short-Term Timer: Per una durata di cottura precisa.
- Rilevamento del vaso: Automatically detects suitable cookware.
- Indicatore di calore residuo: Shows which zones are still hot.
- Design senza cornice: For a sleek, flush-mounted installation.
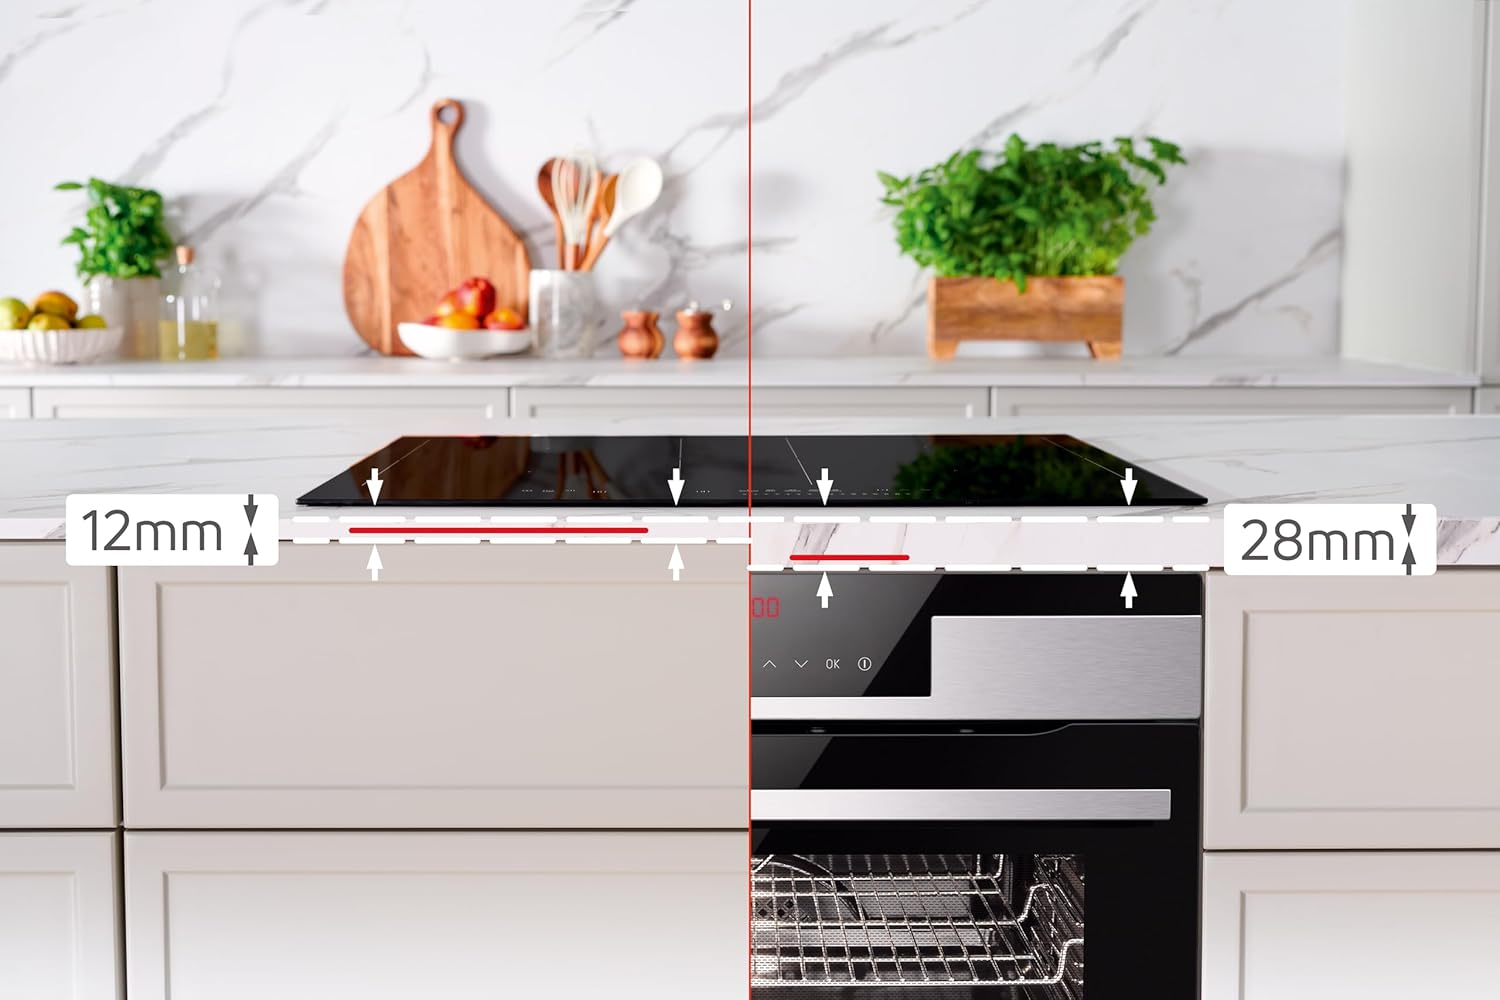
Immagine: Frontale view of the Amica KMI 776 660 C induction hob, showcasing its sleek, frameless black glass surface and touch controls.
3. Configurazione e installazione
Installation must be performed by a qualified technician in accordance with local regulations and safety standards.
3.1. Disimballaggio
Carefully remove the hob from its packaging. Inspect for any damage. Retain packaging for transport if needed.
3.2. Dimensioni di installazione
Ensure the countertop cutout dimensions are correct and that there is sufficient clearance for ventilation. The hob requires specific clearances from the front (12mm) and rear (28mm) for proper airflow.

Image: Installation diagram illustrating the required 12mm front clearance and 28mm rear clearance for the hob to ensure proper ventilation.
3.3. Connessione elettrica
The hob operates on a 3N ~ 230/400 V / 50 Hz power supply with a total load of 7.35 kW. The electrical connection must be made by a licensed electrician, ensuring compliance with all local electrical codes.
4. Istruzioni per l'uso
The Amica KMI 776 660 C induction hob features intuitive DirectTouch slider controls for easy operation.
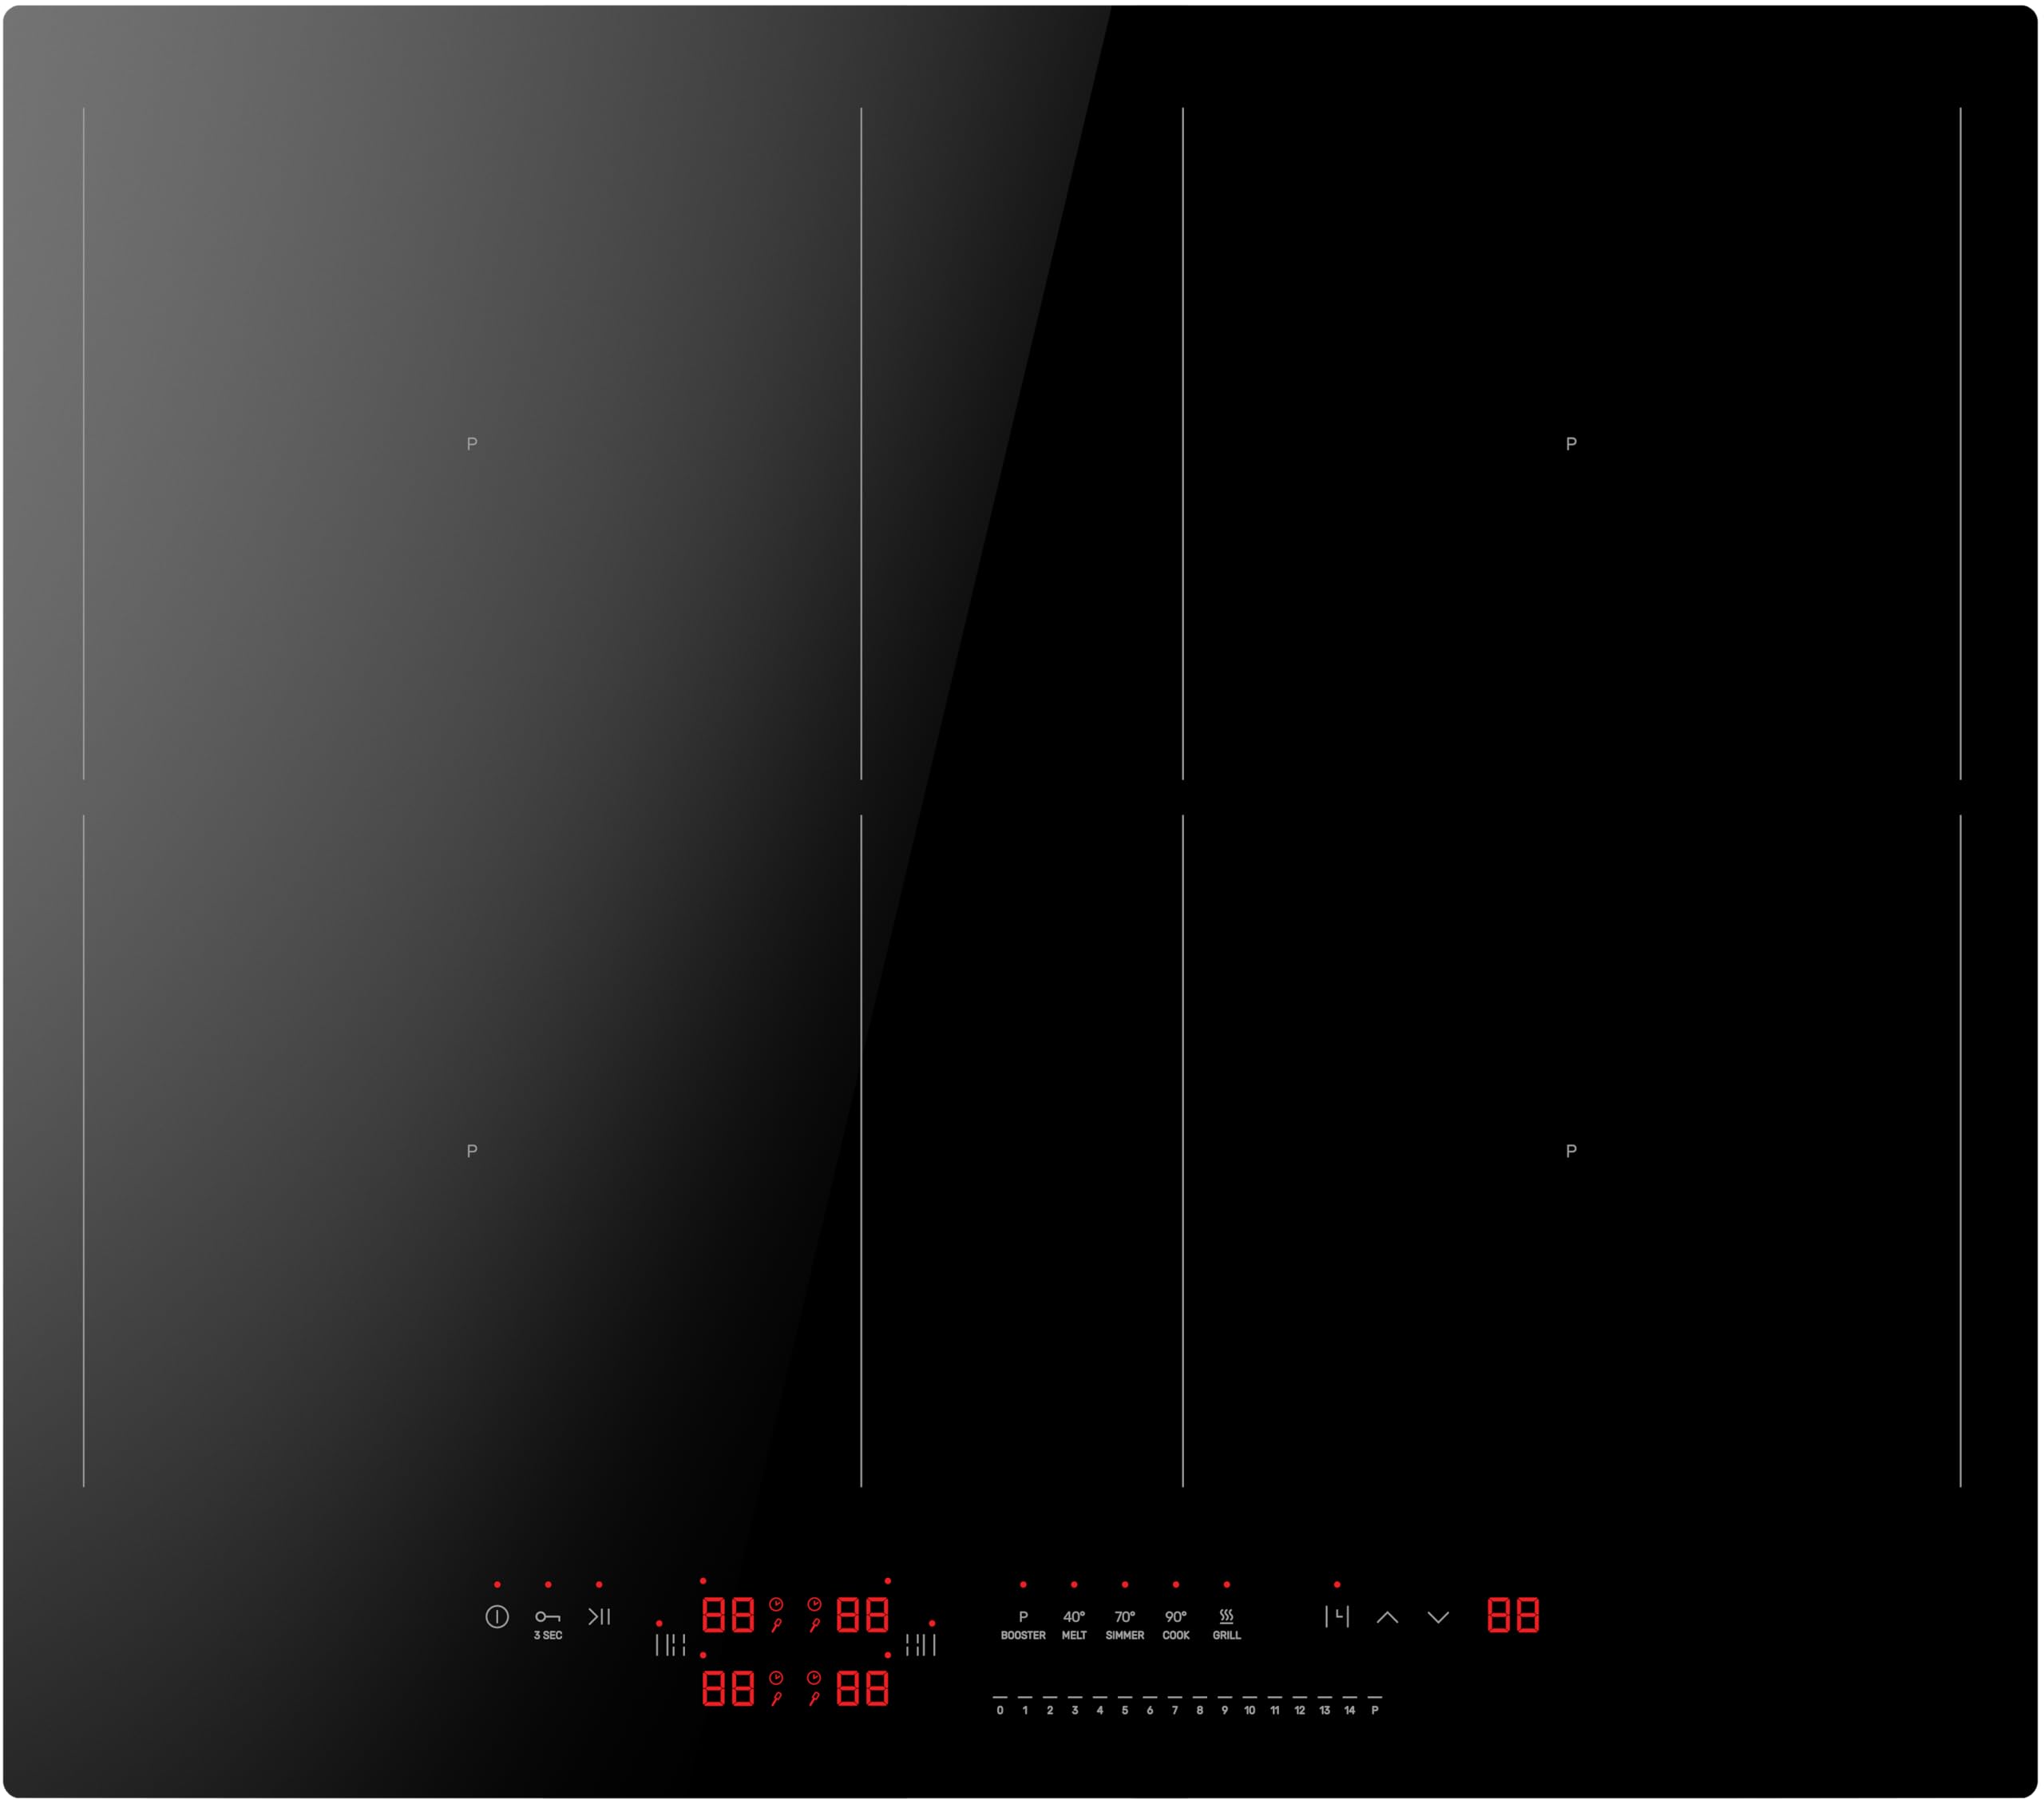
Image: A user's hand adjusting the power level on the hob's DirectTouch slider control panel, with pots cooking on the surface.
4.1. Accensione/spegnimento
- Per attivare: Toccare il simbolo di accensione (ⓘ) sul pannello di controllo. Il display si illuminerà.
- Per spegnere: Touch and hold the power symbol until the display turns off.
4.2. Selezione di una zona di cottura e regolazione della potenza
- Posizionare la pentola adatta sulla zona di cottura desiderata.
- Toccare il pulsante di selezione della zona corrispondente.
- Use the DirectTouch slider to select a power level from 1 to 14.

Image: The induction hob demonstrating its ability to maintain different precise temperatures across four cooking zones, suitable for various dishes simultaneously.
4.3. PowerBooster Function
The PowerBooster function provides maximum power to a selected zone for a short period, ideal for rapidly boiling water or searing food.
- Selezionare la zona di cottura desiderata.
- Touch the Booster symbol (often indicated by a 'P' or a specific icon) on the control panel. The display will show 'P'.
- The Booster will automatically deactivate after a set time or when the temperature is reached, returning to a lower power setting.
4.4. AutoBridge Function
The AutoBridge function allows you to combine two adjacent cooking zones into one large zone, perfect for griddle pans or large roasting dishes.
- Place a large pot or pan over the two bridgeable zones.
- Touch the AutoBridge symbol (often two linked circles or a bridge icon). The hob will automatically detect the large cookware and activate both zones as one.
- Regolare il livello di potenza per la zona combinata utilizzando il cursore.
4.5. Stop'n'Go (Pause) Function
The Stop'n'Go function allows you to pause all active cooking zones and then resume cooking with the same settings.
- Touch the Stop'n'Go symbol (often a pause icon). All active zones will switch to a low keep-warm setting or pause.
- Touch the Stop'n'Go symbol again to resume cooking at the previous power settings.
4.6. Funzioni del timer
The hob includes a cooking timer and a short-term timer.
- Timer di cottura: Set a duration for a specific cooking zone. The zone will turn off automatically when the time expires.
- Short-Term Timer (Minute Minder): Set a general timer that does not affect cooking zones. An acoustic signal will sound when the time expires.
- Refer to the full manual for detailed instructions on setting and adjusting timers.
4.7. Blocco bambini
The Child Lock prevents accidental operation of the hob, enhancing safety, especially in households with children.

Image: A child safely interacting near the hob, highlighting the importance and benefit of the child lock feature for family safety.
- Attivare: With the hob off, touch and hold the Child Lock symbol (often a key or lock icon) for a few seconds until an indicator light or symbol appears.
- Per disattivare: Touch and hold the Child Lock symbol again until the indicator disappears.
5. Manutenzione e pulizia
Una pulizia e una manutenzione regolari garantiranno la longevità e le prestazioni ottimali del vostro piano cottura a induzione.
- Pulizia giornaliera: Dopo ogni utilizzo, pulire la superficie del piano cottura con un panno morbido e acqua tiepida e sapone. Risciacquare e asciugare accuratamente.
- Macchie ostinate: For burnt-on food or stubborn stains, use a ceramic hob scraper and a specialized ceramic hob cleaner. Follow the product instructions carefully.
- Evitare abrasivi: Non utilizzare spugne abrasive, pagliette o detergenti chimici aggressivi, poiché potrebbero graffiare o danneggiare la superficie del vetro.
- Pannello di controllo: Pulisci il pannello di controllo con l'annuncioamp panno. Assicurarsi che sia asciutto prima di utilizzare il piano cottura.
- Aperture di ventilazione: Ensure that the ventilation openings underneath the hob are not blocked.
6. Risoluzione Dei Problemi
Se riscontri problemi con il tuo piano cottura, fai riferimento ai seguenti problemi comuni e alle relative soluzioni prima di contattare l'assistenza.
| Problema | Possibile causa | Soluzione |
|---|---|---|
| Il piano cottura non si accende. | No power supply; Child Lock active. | Controllare l'interruttore automatico. Disattivare il blocco bambini. |
| La zona di cottura non si riscalda. | Incorrect cookware; Pot not detected; Power level too low. | Use induction-compatible cookware. Ensure pot is centered. Increase power level. |
| Il display mostra un codice di errore. | Guasto interno; surriscaldamento. | Spegnere il piano cottura, attendere qualche minuto, quindi riavviarlo. Se l'errore persiste, contattare l'assistenza. |
| Rumori insoliti durante il funzionamento. | Normal induction hum; Cookware quality. | A slight humming or buzzing is normal for induction hobs. This can vary with cookware type. |
For issues not listed here or if problems persist, please contact Amica customer support or a qualified service technician.
7. Specifiche tecniche
| Caratteristica | Specificazione |
|---|---|
| Marca | Amica |
| Numero di modello | KMI 776 660 C |
| Tipo | Autonomous Induction Hob |
| Dimensioni (L x P x A) | Dimensioni: 59.2 x 52.2 x 4.9 cm |
| Cutout Dimensions (approx.) | Dimensioni: 56.0 x 49.0 cm |
| Peso netto | 7.8 kg |
| Potenza totale | 7350 Watt (7.35 kW) |
| Voltage / Frequenza | 3N ~ 230/400 V / 50 Hz |
| Zone di cottura | 4 zone a induzione |
| Zone del ponte | 2 (AutoBridge function) |
| Zona anteriore sinistra | 220 x 190 mm, 2.2 kW (Booster: 3.0 kW) |
| Zona posteriore sinistra | 220 x 190 mm, 2.2 kW (Booster: 3.0 kW) |
| Zona anteriore destra | 220 x 190 mm, 2.2 kW (Booster: 3.0 kW) |
| Zona posteriore destra | 220 x 190 mm, 2.2 kW (Booster: 3.0 kW) |
| Bridge Zone Power | 3.0 kW (Booster: 3.7 kW) |
| Tipo di controllo | DirectTouch Slider Sensor |
| Livelli di potenza | 14 |
| Livelli di temperatura | 4 (Gar-Temperaturstufen) |
| Caratteristiche di sicurezza | Child Lock, Residual Heat Indicator, Pot Detection |
8. Garanzia e assistenza clienti
For warranty information, please refer to the warranty card included with your product or the terms and conditions of your purchase. Keep your proof of purchase for any warranty claims.
For technical assistance, spare parts, or service requests, please contact your local Amica service center or the retailer where you purchased the product. Ensure you have your model number (KMI 776 660 C) and serial number ready.

Image: Amica 'Made in Europe' logo, signifying the product's origin and commitment to design, functionality, and innovation.


