1. Introduzione
This manual provides essential information for the safe and efficient operation, maintenance, and troubleshooting of your DayPlus 18V Cordless Impact Wrench. Please read these instructions carefully before using the tool and retain them for future reference.
The DayPlus Cordless Impact Wrench is designed for tightening and loosening nuts, bolts, and screws, offering high torque and versatility for various applications, including automotive work and construction projects.
2. Istruzioni di sicurezza
AVVERTENZA: leggere tutte le avvertenze di sicurezza, le istruzioni, le illustrazioni e le specifiche fornite con questo utensile elettrico. La mancata osservanza di tutte le istruzioni elencate di seguito può causare scosse elettriche, incendi e/o lesioni gravi.
- Sicurezza dell'area di lavoro: Mantenete l'area di lavoro pulita e ben illuminata. Aree disordinate o buie possono favorire incidenti. Non utilizzate utensili elettrici in atmosfere esplosive, ad esempio in presenza di liquidi, gas o polveri infiammabili.
- Sicurezza elettrica: Evitare il contatto del corpo con superfici messe a terra o collegate a massa come tubi, radiatori, fornelli e frigoriferi. C'è un rischio maggiore di scosse elettriche se il corpo è collegato a massa o collegato a massa.
- Sicurezza personale: Indossare sempre protezioni per gli occhi. Utilizzare dispositivi di sicurezza adeguati, come maschere antipolvere, scarpe antinfortunistiche antiscivolo, caschi o protezioni acustiche, se necessario. Vestirsi in modo appropriato. Non indossare abiti larghi o gioielli. Tenere capelli e vestiti lontani dalle parti in movimento.
- Uso e cura dello strumento: Non forzare l'utensile elettrico. Utilizzare l'utensile elettrico corretto per l'applicazione desiderata. Svolgerà il lavoro in modo migliore e più sicuro alla velocità per cui è stato progettato. Scollegare la batteria dall'utensile elettrico prima di effettuare qualsiasi regolazione, sostituire accessori o riporre l'utensile elettrico.
- Uso e cura della batteria: Ricaricare solo con il caricabatteria specificato dal produttore. Un caricabatteria adatto a un tipo di pacco batteria può creare un rischio di incendio se utilizzato con un altro pacco batteria. Utilizzare gli utensili elettrici solo con pacchi batteria appositamente designati.
3. Componenti del prodotto
Familiarize yourself with the parts of your DayPlus Cordless Impact Wrench for proper operation and maintenance.

Immagine 3.1: Sopraview of the DayPlus Cordless Impact Wrench components. Key parts include the sleeve, brushless motor, heat dissipation vent, forward and reverse switch, stepless speed regulation button, soft rubber coated handle, mode adjustment and power quantity display, battery removal button, and large capacity battery.
- Manica: The attachment point for sockets and other accessories.
- Motore Brushless: Fornisce potenza efficiente e maggiore durata dell'utensile.
- Sfiato di dissipazione del calore: Garantisce il corretto raffreddamento durante il funzionamento.
- Interruttore avanti e indietro: Controlla la direzione di rotazione.
- Stepless Speed Regulation Button: Consente il controllo della velocità variabile in base alla pressione del grilletto.
- Soft Rubber Coated Handle: Offre una presa comoda e sicura.
- Mode Adjustment and Power Quantity Display: Shows current power level and allows selection of operating modes.
- Pulsante di rimozione della batteria: Rilascia il pacco batteria dallo strumento.
- Batteria di grande capacità: Fornisce energia allo strumento.
4. Specifiche
| Caratteristica | Specificazione |
|---|---|
| Albero di uscita | Attacco quadrato da 1/2" |
| Coppia nominale | 420 Nm |
| Velocità a vuoto | 0-3200 giri/min |
| Tipo di batteria | Li-ion 6000 mAh (18V) |
| Tempo di ricarica | 1.5 - 2 hours for full charge |
| Frequenza di impatto | Da 0 a 4400 pollici al minuto |
| Prese incluse | 14 millimetri, 17 millimetri, 19 millimetri, 22 millimetri |
| Materiale | Acrilonitrile Butadiene Stirene (ABS) |
| Colore | Blu |
5. Impostazione
5.1. Batteria in carica
- Assicurarsi che la batteria sia inserita saldamente nel caricabatterie.
- Collegare il caricabatterie a una presa di corrente standard.
- Allow 1.5 to 2 hours for a full charge. The charger's indicator light will typically change color or turn off when charging is complete.
- Una volta caricata, scollegare il caricabatterie dalla presa di corrente e rimuovere la batteria.
Note: Always use the original DayPlus charger provided with the tool. Do not attempt to charge damaged batteries.
5.2. Attaching/Removing Battery Pack
- Allegare: Allineare il pacco batteria alla base della chiave a impulsi e farlo scorrere finché non scatta saldamente in posizione.
- Per rimuovere: Press the battery removal button (refer to Image 3.1) and slide the battery pack out.
5.3. Attaching Sockets and Accessories
- Prima di collegare o rimuovere gli accessori, assicurarsi che l'utensile sia spento e che la batteria sia stata rimossa.
- Align the square drive of the socket with the 1/2" square drive shaft of the impact wrench.
- Push the socket firmly onto the shaft until it locks into place.
- To remove, pull the socket off the shaft. Some sockets may require a slight twist or a release pin mechanism if present.
6. Istruzioni per l'uso
6.1. Accensione/spegnimento e controllo della velocità
The tool is powered on by pressing the trigger switch. The speed of the impact wrench is controlled by the pressure applied to the trigger. Pressing gently results in lower speed, while pressing harder increases the speed up to the maximum 3200 rpm.
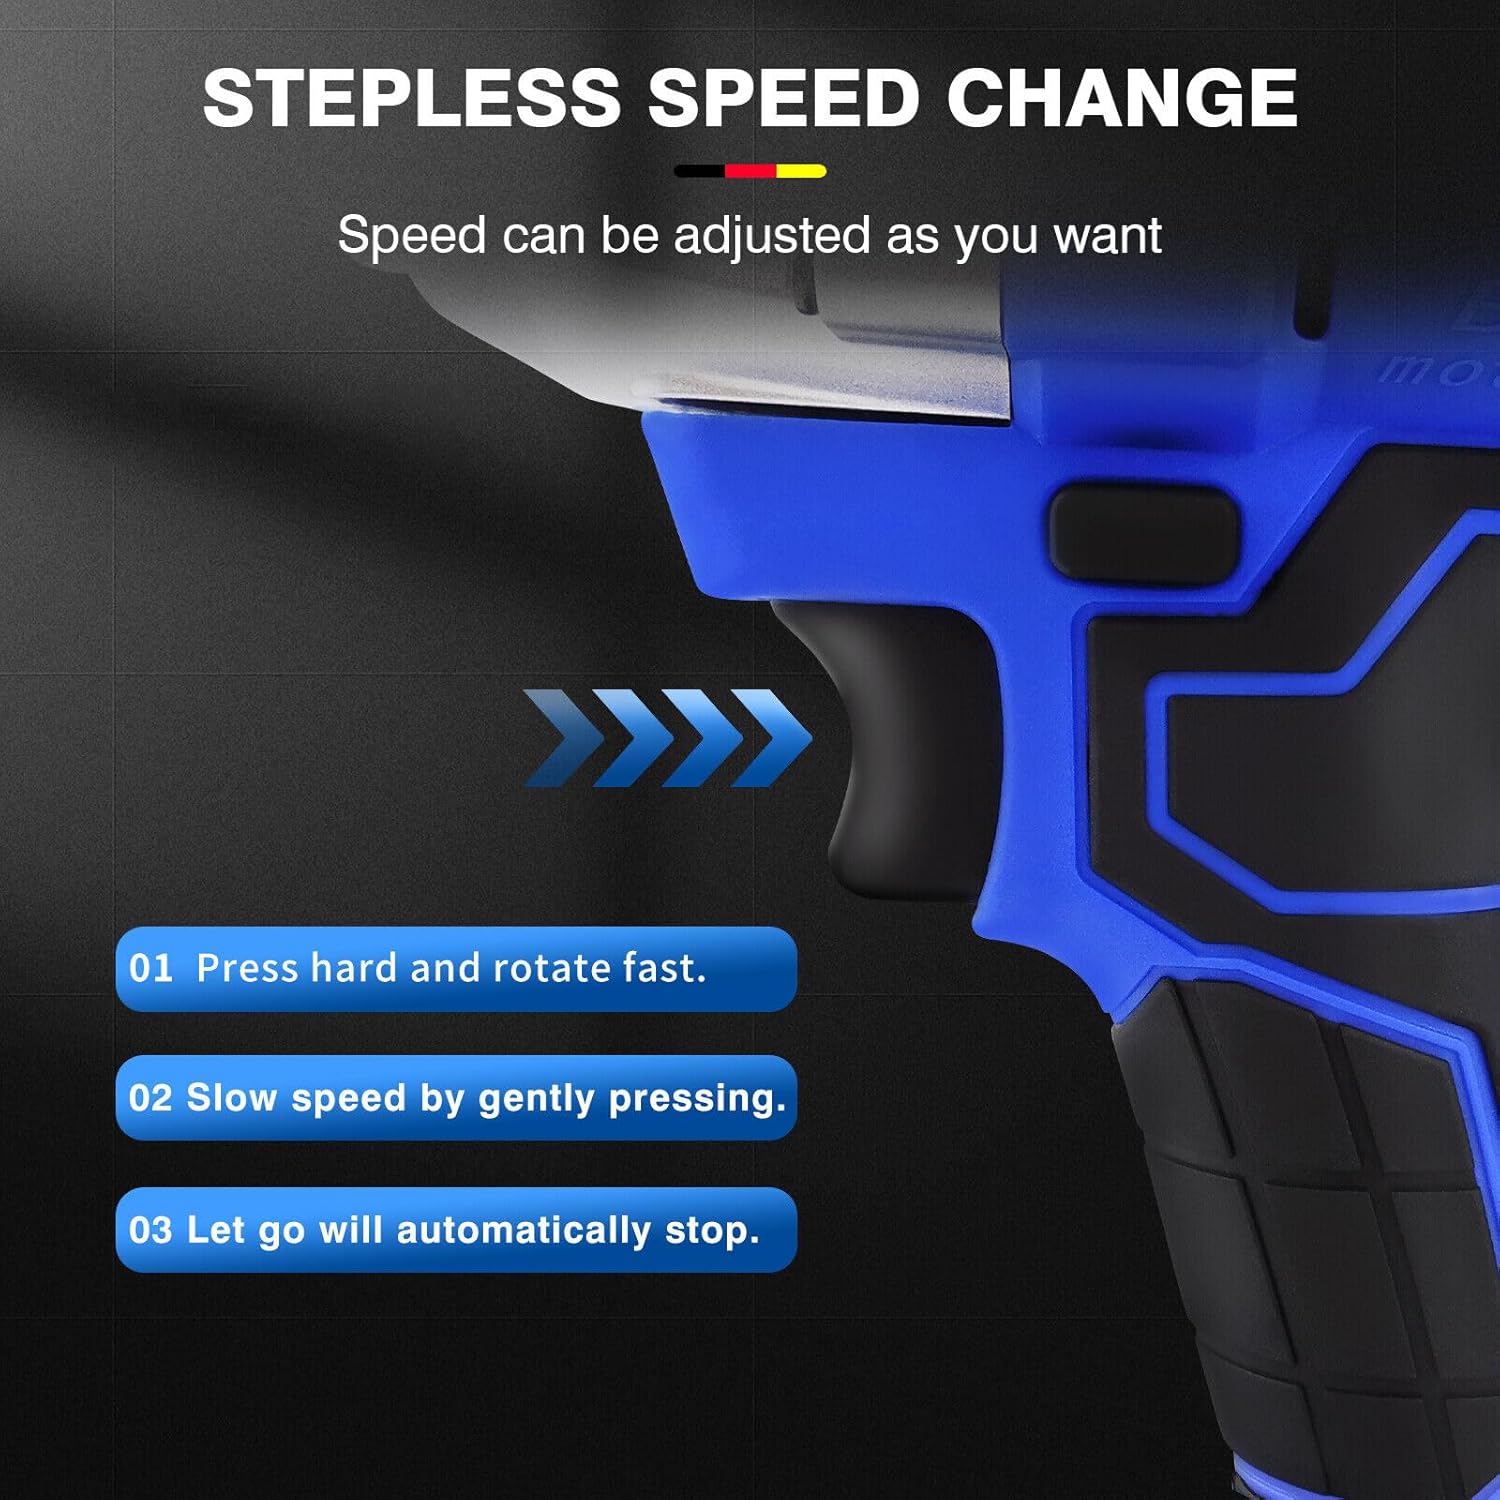
Immagine 6.1: Illustration of the stepless speed change. Pressing hard rotates fast, pressing gently slows speed, and releasing the trigger stops the tool.
- Press hard: For fast rotation and maximum torque.
- Press gently: For slower speed and controlled operation.
- Let go: The tool will automatically stop.
6.2. Interruttore avanti e indietro
The forward/reverse switch controls the direction of rotation, allowing for both tightening and loosening applications.

Immagine 6.2: The forward button is used for screwing (tightening), and the reverse button is used for removing screws (loosening).
- Pulsante Avanti: Push the switch to the left for clockwise rotation (tightening).
- Pulsante inverso: Push the switch to the right for counter-clockwise rotation (loosening).
- Ensure the switch is in the central (locked) position when not in use to prevent accidental starting.
6.3. Mode Adjustment and Power Display
The tool features a display for real-time power indication and mode adjustment.

Immagine 6.3: Close-up of the mode adjustment and power quantity display. This allows users to monitor battery life and select appropriate torque settings.
- The display shows the remaining battery charge, allowing you to plan your work effectively.
- Use the mode adjustment button (if present, typically integrated with the display) to select between different torque settings or operating modes for various tasks.
6.4. Integrated Work Light
The impact wrench is equipped with a scattering light feature to illuminate the work area, especially useful in low-light conditions.

Immagine 6.4: The integrated work light provides illumination for dark corners, enabling one-hand operation without an additional flashlight.
- The light typically activates when the trigger is pressed and remains on for a short period after release.
- This feature enhances visibility and safety during operation in dimly lit environments.
6.5. Versatile Applications (Drill/Wrench)
The DayPlus impact wrench can be adapted for various tasks, functioning as both an electric drill and an electric wrench with appropriate accessories.
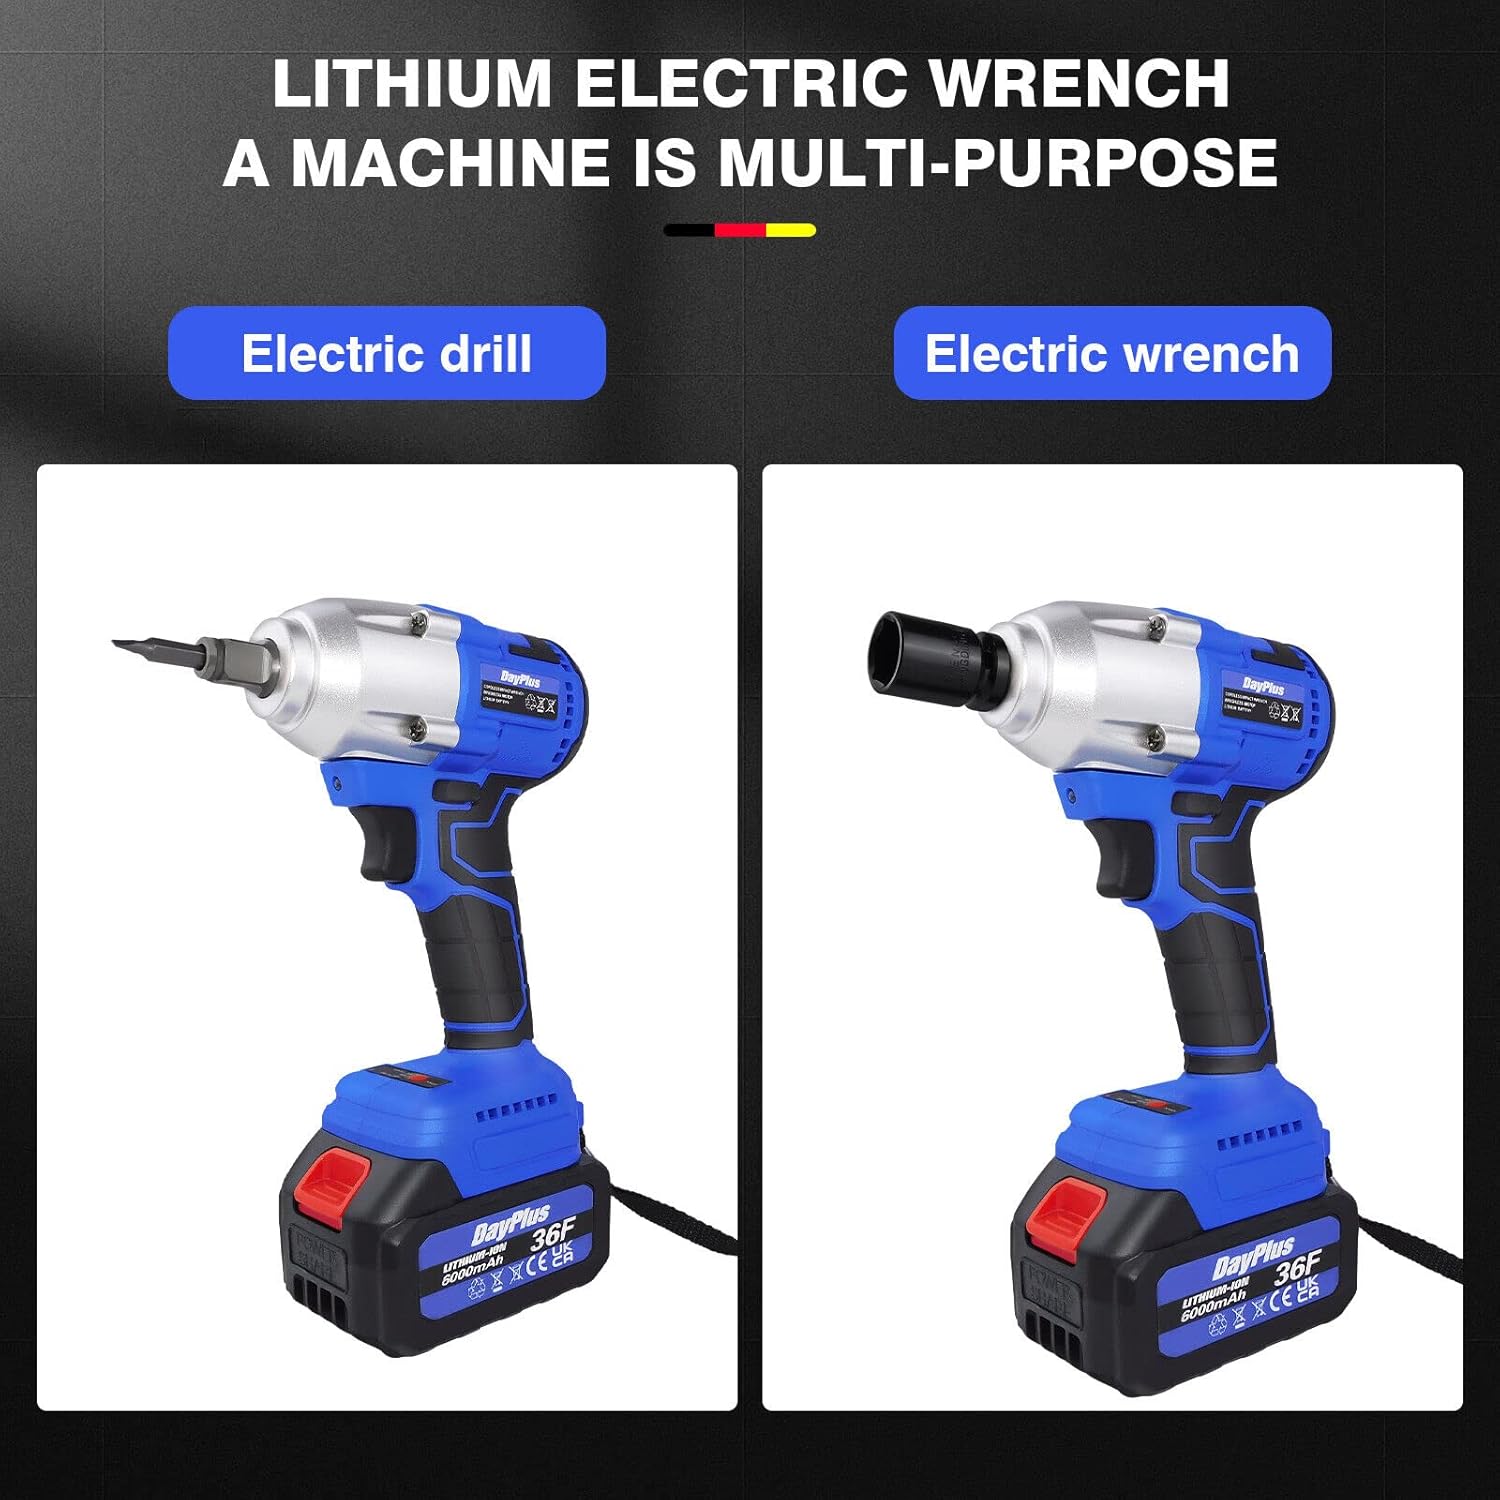
Immagine 6.5: The tool's versatility allows it to be used as an electric drill with a drill bit adapter or as an electric wrench with sockets.
- Electric Wrench: Use with square drive sockets for tightening and loosening nuts and bolts.
- Trapano elettrico: Attach a drill chuck adapter (sold separately) and drill bits for drilling applications.
7. Manutenzione
Una manutenzione regolare garantisce la longevità e le prestazioni ottimali della vostra chiave a percussione.
- Pulizia: Mantenere pulite le aperture di ventilazione dell'utensile per evitare il surriscaldamento. Utilizzare un panno morbido eamp cloth to clean the housing. Do not use solvents or abrasive cleaners.
- Prese d'aria per la dissipazione del calore: Regularly check and clear the heat dissipation vents to ensure effective cooling during continuous operation.
- Cura della batteria: Conservare le batterie in un luogo fresco e asciutto, lontano dalla luce solare diretta. Non conservare batterie completamente scariche per periodi prolungati.
- Magazzinaggio: When not in use, store the impact wrench and its accessories in a dry, secure location out of reach of children.
- Ispezione: Ispezionare periodicamente l'utensile per verificare la presenza di eventuali danni, viti allentate o parti usurate. Non utilizzare un utensile danneggiato.

Immagine 7.1: The air outlet design facilitates effective heat dissipation, crucial for continuous work without overheating the machine.
8. Risoluzione Dei Problemi
| Problema | Possibile causa | Soluzione |
|---|---|---|
| Lo strumento non si avvia | Battery not charged or improperly inserted. Forward/reverse switch in central (locked) position. | Charge battery fully and ensure it is securely inserted. Move the forward/reverse switch to either forward or reverse position. |
| Potenza o velocità ridotte | Batteria scarica. Protezione da sovraccarico attivata. | Recharge the battery. Reduce the load on the tool; allow it to cool down if it has been used continuously. |
| Calore eccessivo durante il funzionamento | Blocked ventilation vents. Continuous heavy use. | Clean ventilation vents. Allow the tool to cool down periodically during heavy use. |
| La presa non si collega saldamente | Incorrect socket size. Debris on the square drive. | Ensure the socket is 1/2" square drive. Clean the square drive and the socket. |
9. Garanzia e supporto
DayPlus products are manufactured to high-quality standards. For information regarding warranty coverage, please refer to the warranty card included with your purchase or contact DayPlus customer support.
For technical assistance, spare parts, or service, please contact your retailer or the DayPlus customer service department. Keep your purchase receipt as proof of purchase.