
1. Introduzione e oltreview
The LIORQUE G0181R-P is a versatile projection alarm clock radio designed to enhance your daily routine. It features a large digital display, dual alarms, FM radio, a convenient snooze function, and a projection feature to display the time on your ceiling or wall. Additionally, it includes two USB ports for charging your devices.

Immagine 1.1: Passoview of the LIORQUE G0181R-P Projection Alarm Clock Radio, highlighting its main features including time projection, FM radio, dual alarms, snooze, infinite brightness adjustment, and dual USB charging ports.
2. Impostazione
2.1 Collegamento di alimentazione
Connect the provided power adapter to the DC IN port on the back of the alarm clock and plug it into a standard wall outlet. The display will light up, indicating the device is receiving power.

Image 2.1: The alarm clock connected to its power adapter, which is plugged into a wall socket. This illustrates the initial power setup.
2.2 Batteria di backup
The unit includes a built-in CR2032 button cell battery. This battery serves as a backup to retain time and alarm settings during a power outage. It does not power the main display or functions.
3. Istruzioni per l'uso
3.1 Impostazione dell'ora
- Premere e tenere premuto il tasto IMPOSTAZIONE DELL'ORA pulsante. Le cifre dell'ora lampeggeranno.
- Utilizzare il Volume+ or vol- pulsanti per regolare l'ora.
- Premere IMPOSTAZIONE DELL'ORA di nuovo. Le cifre dei minuti lampeggeranno.
- Utilizzare il Volume+ or vol- pulsanti per regolare i minuti.
- Premere IMPOSTAZIONE DELL'ORA una terza volta per confermare e uscire dalla modalità di impostazione dell'ora.
- Per passare dal formato 12 ore a quello 24 ore, premere il tasto 12/24H button during normal time display.
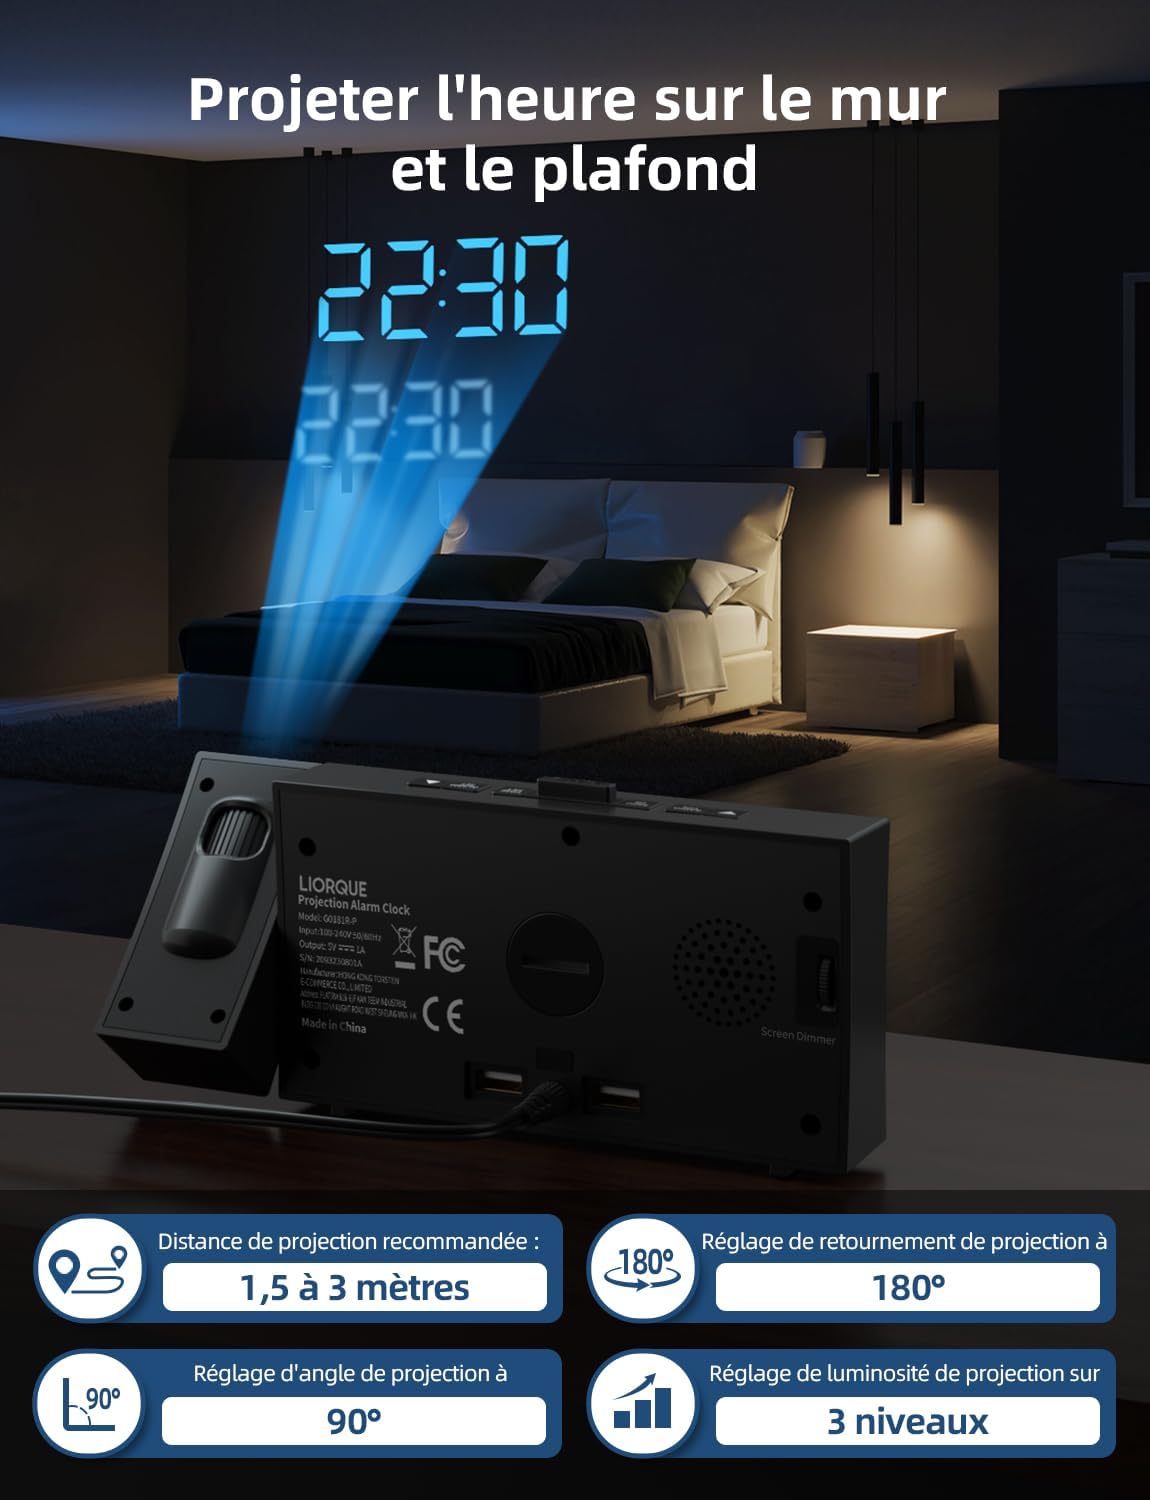
Image 3.1: The front display of the alarm clock, showing the digital time. This is the primary interface for time and alarm settings.
3.2 Alarm Setting (Dual Alarms)
This clock features two independent alarms (Alarm 1 and Alarm 2).
- Premere e tenere premuto il tasto ALLARME 1 INSERITO or ALLARME 2 INSERITO pulsante. Le cifre dell'ora per la sveglia selezionata lampeggeranno.
- Utilizzare il Volume+ or vol- pulsanti per regolare l'ora della sveglia.
- Premere il rispettivo SET ALLARME nuovamente il pulsante. Le cifre dei minuti lampeggeranno.
- Utilizzare il Volume+ or vol- pulsanti per regolare i minuti della sveglia.
- Premere il rispettivo SET ALLARME button a third time to confirm.
- Per attivare/disattivare un allarme, premere il tasto ALLARME 1 ON/OFF or ALLARME 2 ON/OFF button. An indicator icon will appear on the display when an alarm is active.

Image 3.2: The display showing two distinct alarm settings, illustrating the dual alarm capability of the clock.
3.3 Funzione posticipa
Quando suona un allarme, premere il tasto grande POSTICIPARE button on top of the clock to temporarily silence the alarm. The alarm will sound again after the set snooze duration. The default snooze time is 5 minutes and can be adjusted from 5 to 60 minutes in the settings.

Image 3.3: A person pressing the snooze button on the alarm clock, with an overlay indicating the adjustable snooze duration.
3.4 Funzionamento della radio FM
- Premere il tasto RADIO ACCESA/SPENTA pulsante per accendere la radio FM.
- Premere il tasto SCANSIONE pulsante per eseguire la scansione automatica e salvare le stazioni FM disponibili (fino a 10 stazioni).
- Utilizzare il MEMORIA pulsante per scorrere le stazioni salvate.
- Regolare il volume utilizzando il Volume+ or vol- pulsanti.
- Per spegnere la radio, premere il RADIO ACCESA/SPENTA di nuovo il pulsante.

Image 3.4: The alarm clock displaying FM radio frequencies, with visual cues indicating radio waves, demonstrating its FM radio functionality.
3.5 Proiezione temporale
The projector allows you to display the time on a wall or ceiling.
- Premere il tasto PROIEZIONE ON/OFF button to activate or deactivate the projection.
- Rotate the projector lens to adjust the projection angle.
- Premere e tenere premuto il tasto PROIEZIONE RUOTARE button to rotate the projected image 180 degrees for optimal viewing.
- Adjust the projection brightness using the dedicated projection brightness control (often a small wheel or button near the projector lens).

Image 3.5: The alarm clock projecting the time onto a bedroom ceiling, demonstrating its projection feature.
3.6 Regolazione della luminosità del display
The main display brightness can be adjusted to your preference.
- Premere il tasto DIMENSIONATORE ripetutamente il pulsante per scorrere i diversi livelli di luminosità (ad esempio, Alto, Medio, Basso, Spento).
- Some models may feature an infinite dimmer wheel or button for precise adjustment.

Image 3.6: The alarm clock with a visual representation of its infinite brightness adjustment feature, allowing users to set the display intensity from 0% to 100%.
3.7 porte di ricarica USB
Two USB charging ports are located on the back of the unit. These ports provide power to charge compatible electronic devices such as smartphones or tablets. Simply connect your device's USB charging cable to one of the ports.

Image 3.7: The alarm clock charging two smartphones simultaneously via its integrated USB ports, demonstrating its charging capability.
4. Manutenzione
4.1 Pulizia
To clean the alarm clock, gently wipe the surfaces with a soft, dry cloth. Do not use abrasive cleaners, waxes, or solvents as they may damage the finish. Ensure the device is unplugged before cleaning.
4.2 Sostituzione della batteria
The CR2032 backup battery typically lasts for several years. If you notice that time and alarm settings are not retained after a power outage, the battery may need replacement. To replace, locate the battery compartment on the bottom of the unit, open it, and replace the old CR2032 battery with a new one, ensuring correct polarity. Dispose of old batteries responsibly.
5. Risoluzione Dei Problemi
- Nessun display/Unità non accesa: Ensure the power adapter is securely plugged into both the clock and a working wall outlet. Check if the outlet is functional.
- L'allarme non suona: Verify that the alarm is activated (check for the alarm icon on the display). Ensure the alarm volume is not set to zero.
- Radio Static / Poor Reception: Extend the FM antenna fully. Try repositioning the clock to improve reception. Perform an auto-scan to find stronger stations.
- Proiezione non chiara: Adjust the focus of the projector lens (if available) and ensure the projection distance is within the recommended range (typically 1.5 to 3 meters). Clean the projector lens if it appears dusty.
- Time/Settings Lost After Power Outage: The CR2032 backup battery may be depleted and needs replacement.
6. Specifiche
| Marca | LIORCO |
| Numero di modello | G0181R-P |
| Dimensioni (L x P x A) | Dimensioni: 5.8 x 3.81 x 10 cm |
| Peso | 360 grammi |
| Tipo di visualizzazione | Digitale |
| Caratteristiche speciali | Alarm, Radio, Snooze, Time Projection, USB Charging |
| Fonte di alimentazione | Elettrico con cavo |
| Materiale | Plastica |
| Batteria di backup | CR2032 (incluso) |
7. Garanzia e supporto
This product comes with a standard manufacturer's warranty. For specific warranty details, please refer to the documentation included with your purchase or contact LIORQUE customer support. If you encounter any issues not covered in this manual, please reach out to the manufacturer's support team for assistance.
For further support, please visit the official LIORQUE websito o contattare il loro servizio clienti.