
1. Introduzione
The SKYSHL SS103PVC12 Optical Fiber Power Meter (OPM) is a compact and user-friendly instrument designed for comprehensive testing of fiber optic networks. It facilitates both absolute optical power measurement and relative optical loss measurement. This device is characterized by its robust design, wide power measurement range, high precision, and user self-calibration capabilities, making it a cost-effective solution for fiber optic professionals.
This manual provides detailed instructions for the safe and effective use of your SKYSHL SS103PVC12. Please read it thoroughly before operation and retain it for future reference.
2. Informazioni sulla sicurezza
Per evitare lesioni e danni al dispositivo, osservare le seguenti precauzioni di sicurezza:
- Sicurezza laser: The Visual Fault Locator (VFL) emits a visible red laser. Non fissare direttamente il raggio laser o view con strumenti ottici. Direct exposure can cause severe eye injury.
- Sicurezza della batteria: Use only the specified battery type (3.7V 700mAh lithium battery). Do not disassemble, puncture, or expose the battery to extreme temperatures or fire. Dispose of batteries according to local regulations.
- Condizioni ambientali: Operate the device within specified temperature and humidity ranges. Avoid exposure to water, dust, and corrosive substances.
- Pulizia: Use a soft, dry cloth for cleaning the device. For optical connectors, use specialized fiber optic cleaning tools.
- Manutenzione: Non tentare di aprire o riparare il dispositivo da soli. Per qualsiasi intervento di assistenza, rivolgersi a personale qualificato.
3. Contenuto della confezione
Verificare che tutti gli articoli siano presenti nel pacco:
- 1 x SKYSHL SS103PVC12 Optical Fiber Power Meter
- 1 cavo di ricarica da USB-A a Micro USB
- 1 x FC-LC Adapter
- 1 x Manuale utente (questo documento)

4. Prodotto finitoview
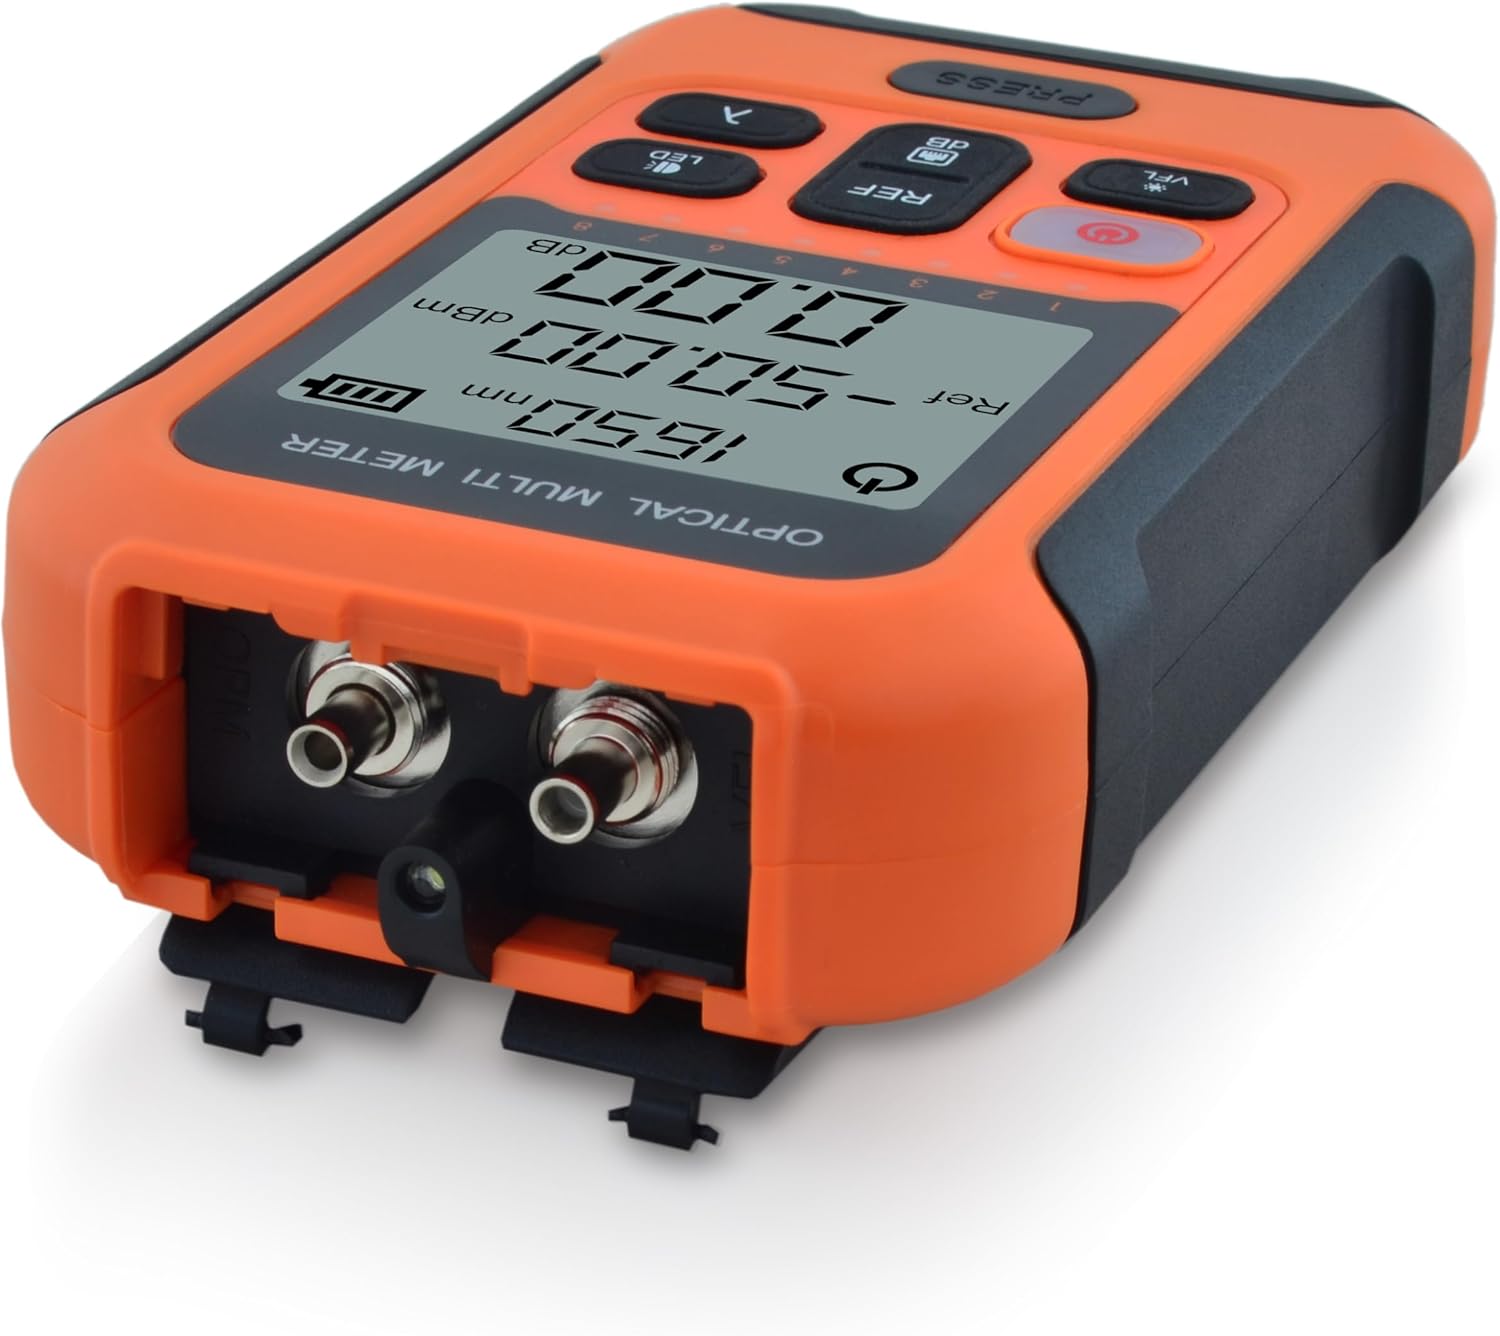
The SKYSHL SS103PVC12 is an all-in-one tool for fiber optic network testing. It combines an Optical Power Meter (OPM), a Visual Fault Locator (VFL), an RJ45 cable tester, and an LED flashlight.
4.1 Caratteristiche principali
- Multi-Wavelength Calibration: Supports 10 calibrated wavelengths: 850nm, 980nm, 1270nm, 1300nm, 1310nm, 1490nm, 1550nm, 1577nm, 1625nm, and 1650nm, suitable for both single-mode and multi-mode fiber testing.
- Ampia gamma di misurazioni: Measures optical power from -50dBm to +26dBm.
- VFL integrato: 650nm red laser with a 30km range for identifying fiber breaks and continuity.
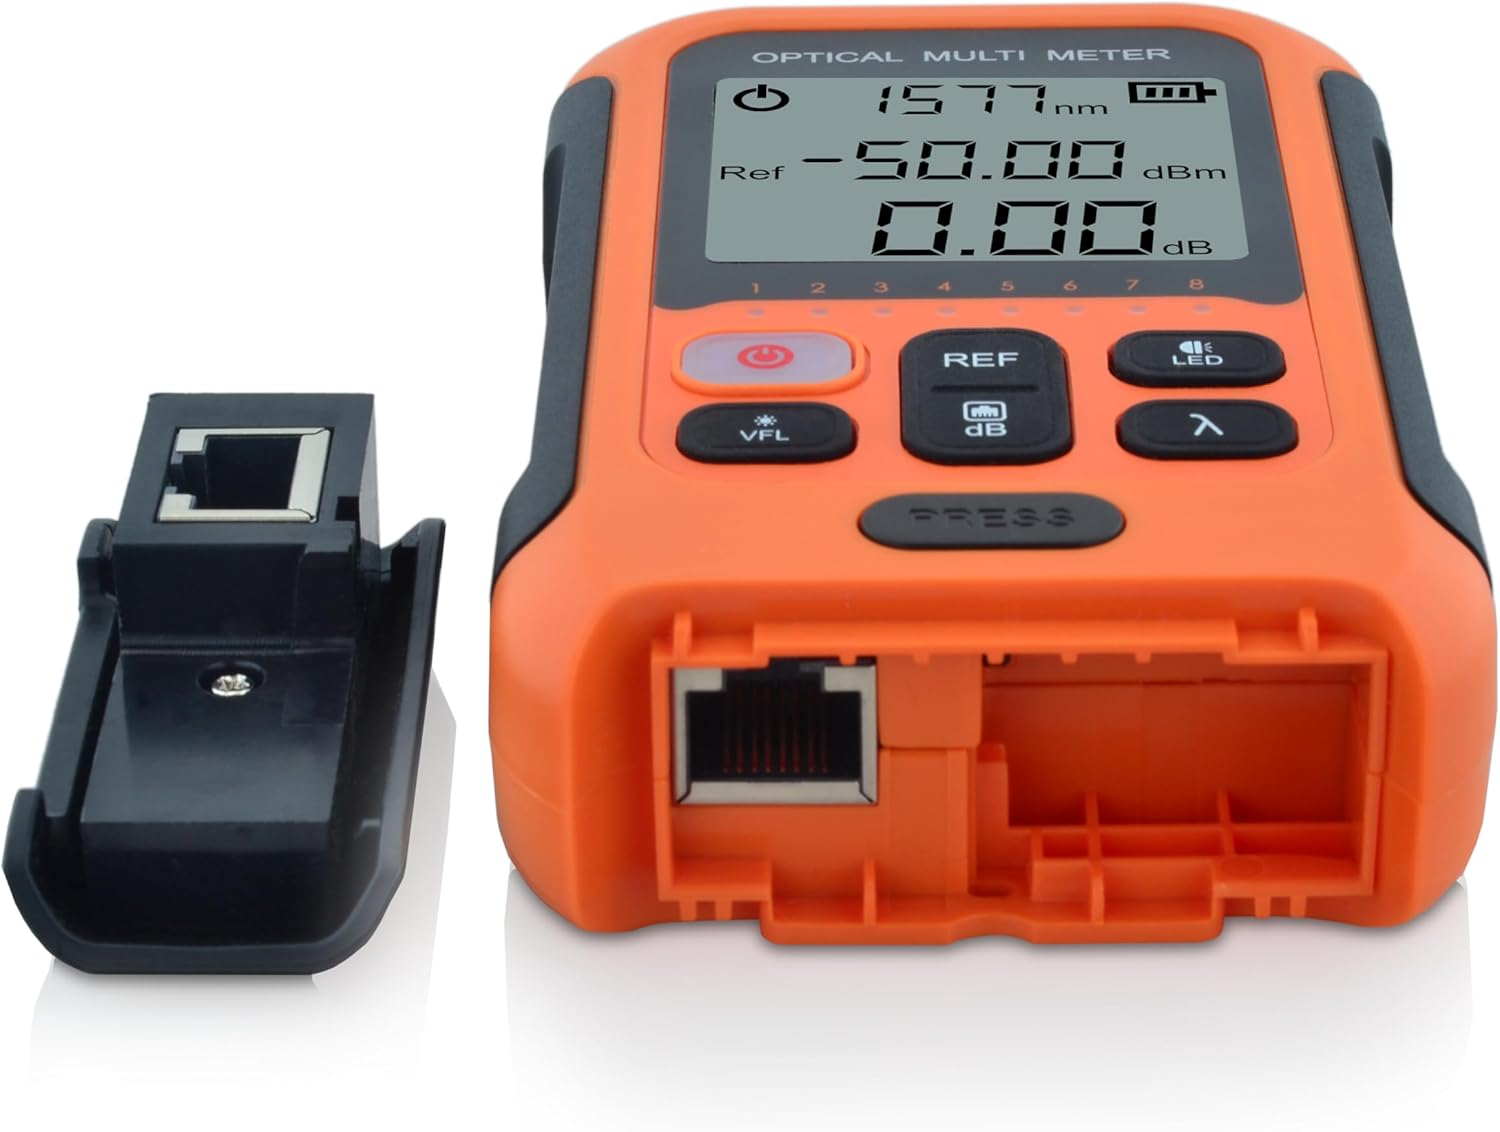
- RJ45 Cable Tester: For quick localization and testing of 8P/6P/4P network cables.
- Universal Connector Compatibility: Features a 2.5mm universal connector (compatible with FC/SC/ST) and includes an FC-LC adapter for LC connectors.
- Batteria a lunga durata: Powered by a 3.7V 700mAh lithium battery, providing over 120 hours of typical operation.
- Design compatto e durevole: Ergonomic, portable, and built with high-strength plastic casing for resilience.
- Display LCD da 2 pollici: Clear and easy-to-read interface.
4.2 Disposizione del dispositivo


5. Impostazione
5.1 Caricamento della batteria
The device is powered by a built-in 3.7V 700mAh lithium battery. Before first use, or when the battery indicator on the display shows low charge, connect the device to a USB power source using the provided Micro USB cable. The power button will illuminate red during charging.
5.2 Collegamento dei cavi in fibra ottica
- Ensure the fiber optic connector is clean. Use a fiber optic cleaning tool if necessary.
- For FC, SC, or ST connectors, directly insert them into the 2.5mm universal port on the top of the device.
- For LC connectors, attach the provided FC-LC adapter to the universal port, then insert the LC connector into the adapter.
- Ensure a secure connection to prevent inaccurate readings.
5.3 Connecting RJ45 Cables
- Detach the small RJ45 module from the side of the main unit.
- Connect one end of the RJ45 cable to the port on the main unit.
- Connect the other end of the RJ45 cable to the detached module.
- Proceed to the operating instructions for RJ45 cable testing.
6. Istruzioni per l'uso
6.1 Accensione/spegnimento
- Per accendere, tieni premuto il tasto Pulsante di accensione (red button with power symbol) for approximately 2 seconds.
- Per spegnere, tenere premuto il pulsante Pulsante di accensione again for approximately 2 seconds.
- Il dispositivo è dotato di una funzione di spegnimento automatico dopo 10 minuti di inattività per preservare la batteria.
6.2 Misurazione della potenza ottica (OPM)
- Seleziona la lunghezza d'onda: Premere il tasto λ (Wavelength) Button to cycle through the available calibrated wavelengths (850nm, 980nm, 1270nm, 1300nm, 1310nm, 1490nm, 1550nm, 1577nm, 1625nm, 1650nm). Select the wavelength corresponding to your fiber optic system.
- Connetti Fibra: Connect the fiber optic cable to the appropriate port as described in Section 5.2.
- Read Absolute Power: The display will show the measured optical power in dBm.
- Set Reference (Relative Measurement):
- With a known good signal connected, press the REF/dB Button to set the current power reading as the reference value (0.00dB).
- When measuring other points in the fiber link, the display will show the relative loss or gain in dB compared to the set reference.
- Premere il tasto REF/dB Button again to toggle between absolute (dBm) and relative (dB) measurements.
6.3 Localizzatore visivo di guasti (VFL)
- Attiva VFL: Premere il tasto VFL Button. The 650nm red laser will emit from the VFL port (located near the fiber optic input ports).
- Identify Faults: Connect the fiber to be tested to the VFL port. Observe the fiber for any visible red light leakage, which indicates breaks, sharp bends, or faulty connectors.
- Deactivate VFL: Premere il tasto VFL Button again to turn off the laser.
- Attenzione: Always follow laser safety guidelines (Section 2).
6.4 RJ45 Cable Tester
- Ensure the RJ45 cable is connected to both the main unit and the detached module as described in Section 5.3.
- The device will automatically begin testing the cable continuity. The display will show the status of each wire pair (1-8 for 8P, 1-6 for 6P, 1-4 for 4P).
- A successful test will show all corresponding numbers lighting up sequentially or indicating continuity. Any missing or incorrect sequence indicates a fault (e.g., open, short, cross).
Torcia elettrica 6.5 LED
- Premere il tasto Pulsante LED to turn the integrated LED flashlight on or off. This is useful for working in dimly lit environments.
7. Manutenzione
- Cleaning Optical Connectors: Regularly clean the fiber optic input ports and any adapters using specialized fiber optic cleaning swabs or pens. Dust and debris are the primary causes of inaccurate measurements.
- Pulizia del dispositivo: Wipe the exterior of the device with a soft, dry, lint-free cloth. Do not use abrasive cleaners or solvents.
- Cura della batteria: For optimal battery life, avoid fully discharging the battery frequently. If storing the device for an extended period, charge it to approximately 50% and recharge every few months.
- Magazzinaggio: Store the device in a cool, dry place, away from direct sunlight and extreme temperatures. Use the protective caps for all ports when not in use.
8. Risoluzione Dei Problemi
| Problema | Possibile causa | Soluzione |
|---|---|---|
| Il dispositivo non si accende. | Batteria scarica o scarica. | Carica il dispositivo utilizzando il cavo USB in dotazione. |
| Inaccurate or unstable OPM readings. | Dirty fiber optic connectors or incorrect wavelength setting. | Clean all fiber optic connectors. Ensure the correct wavelength is selected on the device. |
| La luce rossa VFL è debole o non visibile. | Dirty VFL port or fiber connection. | Clean the VFL port and the fiber end-face. |
| RJ45 cable test fails or shows incorrect pinout. | Faulty RJ45 cable, poor connection, or damaged port. | Ensure the cable is properly seated. Test with a known good cable. Inspect cable for damage. |
| Il dispositivo si blocca o non risponde più. | Problema temporaneo del software. | Press and hold the Power Button for 10 seconds to force a restart. |
If the problem persists after attempting these solutions, please contact SKYSHL customer support for assistance.
9. Specifiche
| Parametro | Valore |
|---|---|
| Tipo di rilevatore | InGaAs |
| Lunghezze d'onda calibrate | 850nm, 980nm, 1270nm, 1300nm, 1310nm, 1490nm, 1550nm, 1577nm, 1625nm, 1650nm |
| Campo di misura | -50~+26dBm (CW/1Hz/2Hz) |
| VFL Wavelength/Range | 650nm / 30km |
| Power Measurement Uncertainty | ±0.3 dB |
| Connettori | Universal 2.5mm (FC/SC/ST compatible), FC-LC adapter, RJ45 |
| Spegnimento automatico | 10 minuti |
| Alimentazione elettrica | Batteria al litio da 3.7 V 700 mAh |
| Display | LCD da 2 pollici |
| Tempo di funzionamento | >120 hours (typical) |
| Dimensioni (L x P x A) | 120 x 70 x 27 mm (4.72 x 2.76 x 1.06 pollici) |
| Peso | 0.13 KG (0.29 libbre) |
| Produttore | SKYSHL |
| Numero di modello | SS103PVC12 |
| Colore | Arancia |
| Paese di origine | Cina |
10. Garanzia e supporto
SKYSHL provides the following warranty for the SS103PVC12 Optical Fiber Power Meter:
- Sostituzione gratuita per 3 anni
- 5 Years Free Maintenance
- Garanzia a vita
For technical support, warranty claims, or any inquiries regarding your device, please contact SKYSHL customer service through the retailer where you purchased the product or visit the official SKYSHL websito per le informazioni di contatto.